Home
Explore Our HVAC Insights

Explore Our HVAC Insights

Blog

Explore Our HVAC Insights

Stay informed with expert HVAC tips and advice.

View All
Identifying the Source of a Burning Smell When Turning on the Heater in Miami placeholder-image  | Air On Demand
5 min read

Identifying the Source of a Burning Smell When Turning on the Heater in Miami

After months of disuse, firing up your heating system can produce an alarming odor. We break down the difference between harmless burning dust and a dangerous electrical issue.

The Panic of a Burning Smell During Miami's First Cold Snap

Late October or November arrives, and with it comes the first real chill of the season, prompting you to finally switch your thermostat over to "heat." But within minutes, a strong, alarming odor fills the house. Identifying the source of a burning smell when turning on the heater in Miami is a critical step for any homeowner experiencing that sudden moment of panic. You are immediately faced with a crucial decision: is this just a harmless seasonal burn-off, or are you dealing with a dangerous electrical fire? When the temperature drops and the heater kicks on for the first time in nearly a year, that pungent scent is enough to make anyone rush to the thermostat in fear.

Before you assume the worst, it helps to understand exactly what happens inside your system during that October/November first heater startup. The sudden transition from cooling to heating awakens components that have been sitting completely dormant. However, safety must always come first. If you determine the situation is unsafe, you can always rely on professional HVAC repair and emergency AC and heating repair in Miami to resolve the issue safely and swiftly.

Why the First Startup Always Causes Alarm

The panic you feel is entirely justified. We are conditioned to associate burning smells with immediate danger, especially inside our homes. When you smell something burning near an appliance, your instincts tell you that something is actively catching fire. In South Florida, this anxiety is compounded by the fact that heating systems are rarely used, making the sudden odor feel highly abnormal. However, knowing the mechanics behind this seasonal phenomenon is the key to differentiating between a normal maintenance quirk and a genuine hazard that requires immediate professional intervention.

Why Heat Strips Smell Like Burning Dust After Months of Inactivity

Most homes in South Florida do not rely on traditional gas furnaces, which are far more common in northern, colder climates. Instead, Miami homeowners typically use heat pumps equipped with electric heat strips, or straight cool air conditioners paired with electric heating elements. These heat strips function very much like the glowing coils inside a toaster. When activated, electricity flows through the metal elements, generating intense heat that the blower motor then pushes through your ductwork and into your living spaces.

Because our winters are so mild, these heating elements sit entirely dormant for the vast majority of the year. During those 10+ months of idle dust accumulation on heat strips, a thick layer of airborne particulates settles directly onto the metal components. Every time your air conditioner runs during the long summer, tiny particles of dust, pet dander, dead skin cells, and microscopic debris bypass the filter and find a resting place on the inactive heating coils.

The South Florida Humidity Factor

Miami's unique climate makes this dust accumulation significantly worse than in other parts of the country. With our high average humidity—often hovering at 70% or higher for months on end—the airborne dust does not just settle lightly. The moisture in the air causes the particulates to clump together and stick stubbornly to the idle heat strips. It forms a dense, caked-on layer rather than a light dusting.

When you finally turn the heat on, those metal strips rapidly heat up to hundreds of degrees. The caked-on layer of clumped dust is instantly incinerated. This rapid incineration is exactly what creates that harsh, burning smell. Because the dust layer is so thick from the humidity, the resulting odor is much stronger and more pungent than what homeowners in dry climates experience. This is why testing your heat strips before a cold snap is such a valuable practice; it allows you to manage this inevitable burn-off safely and on your own terms, rather than being caught off guard on the first truly cold night.

The 10-to-20 Minute Rule for Harmless Odors

When you are trying to determine if your system is safe, time is your best diagnostic tool. The HVAC industry has a standard baseline for how long this normal dust burn-off should last. When you initiate that October/November first heater startup, the harmless burning dust odor typically dissipates within a very specific window.

The Burn-Off Timeline

1. The initial blast (0 to 5 minutes): This is when the smell will be at its absolute strongest. The heat strips have just reached their maximum temperature, and the thickest layers of accumulated dust are burning away all at once. The odor will quickly spread through the vents into every room.

2. The fading phase (5 to 15 minutes): As the primary layer of dust is incinerated, the smell should noticeably begin to weaken. You will still smell it in the air, but the intensity coming directly from the vents should drop significantly.

3. The clear-out (15 to 20 minutes): By the twenty-minute mark, the heat strips should be completely clean. The odor coming from the vents should be gone, though a faint, lingering scent may remain in the ambient air of your home for a short while longer.

The quick fix: If the smell is strong but clearly resembles dusty, stale air or singed lint, simply open a few windows slightly to ventilate the home. Monitor the system closely during this initial 20-minute startup period. Do not leave the house or go to sleep while the heater is running for the first time. As long as the smell steadily decreases in intensity and vanishes within that 20-minute window, your system is functioning exactly as it should after a long summer.

Recognizing the Scent of an Electrical HVAC Emergency

While burning dust is harmless, an electrical short is a severe hazard that requires immediate action. To keep your home safe, you must learn to contrast the normal dust smell with dangerous electrical odors. Unlike the temporary odor of 10+ months of idle dust accumulation on heat strips burning away, an electrical malfunction has a very distinct, chemical scent that will not fade over time.

An electrical short, melting wire insulation, or a failing blower motor produces an acrid, sharp odor. It often smells like melting plastic, burning rubber, pungent sulfur, or a distinct "fishy" ozone scent. Furthermore, this smell will not dissipate after 20 minutes; in fact, as the electrical component continues to overheat or melt, the smell will grow progressively stronger and more toxic.

Warning Signs Beyond the Smell

An electrical emergency rarely happens in silence. In addition to the chemical odor, you should listen and watch for secondary warning signs. Unusual sounds, such as loud buzzing, aggressive humming, or sudden popping noises coming from the air handler, strongly indicate electrical arcing or a seized motor. You may also notice your interior lights flickering when the system attempts to run, or you might find that the HVAC system is repeatedly tripping your circuit breaker. High-humidity corrosion over the summer can easily degrade wiring connections, leading to these exact types of electrical failures when the system is suddenly forced to draw heavy power for heating.

Dust vs. Electrical Odors: A Quick Comparison

• Smell Profile — Harmless Dust Burn-Off: Singed lint, stale air, dusty — Dangerous Electrical Emergency: Melting plastic, ozone, sulfur, acrid

• Duration — Harmless Dust Burn-Off: Fades steadily within 10 to 20 minutes — Dangerous Electrical Emergency: Persists indefinitely and grows stronger

• Associated Sounds — Harmless Dust Burn-Off: Normal, smooth blower fan operation — Dangerous Electrical Emergency: Unusual buzzing, humming, or popping

• Electrical Impact — Harmless Dust Burn-Off: System runs normally without interruption — Dangerous Electrical Emergency: May cause tripping breakers or flickering lights

Dust Burn-Off vs. Electrical Emergency in HVAC Systems

Immediate Safety Steps if the Odor Persists

If the odor during your October/November first heater startup crosses that 20-minute threshold, or if it immediately smells like melting plastic and ozone rather than dusty lint, you must treat the situation as an active electrical hazard. Taking swift, decisive action can prevent a minor wiring short from escalating into a devastating house fire.

Your Emergency Action Plan

1. Turn off the thermostat immediately: Do not wait to see if the smell goes away. Walk straight to your thermostat and switch the system from "Heat" to the "Off" position. This stops the thermostat from calling for more heating power.

2. Shut off the breaker to the HVAC system: To completely cut power and eliminate the fire risk, locate your home's main electrical panel. Find the breaker clearly labeled for the HVAC system, air handler, or heat pump, and flip it to the "Off" position. This ensures no residual electricity is flowing to a potentially melting wire.

3. Do not attempt DIY electrical diagnostics: Never open the air handler cabinet to investigate the wiring yourself. High-voltage electrical components can retain a lethal charge even after the breaker is flipped. There are no safe DIY repairs for an active electrical short in an HVAC system.

4. Call a professional for immediate inspection: Reach out to local experts right away. Working with Air On Demand means you benefit from fast emergency response and a deep knowledge of South Florida HVAC systems. Local technicians understand exactly how our coastal humidity degrades wiring and can safely resolve electrical hazards, restoring your peace of mind.

By following these steps, you remove the fuel—electricity—from the potential fire, keeping your home and family completely safe while you wait for a qualified technician to arrive and assess the damage.

Preventing Odors with Pre-Season Maintenance

The best way to handle the panic of a burning smell is to prevent it from happening in the first place. You do not have to accept the harsh odor of 10+ months of idle dust accumulation on heat strips as an inevitable part of winter. By shifting your focus from emergency response to proactive prevention, you can ensure your heater starts up cleanly and safely every single year.

Routine maintenance removes the fuel for the burning smell before the heat strips are ever turned on. During a thorough tune-up, a technician will open the air handler and physically clean the heating elements, the blower motor, and the surrounding cabinet. By carefully wiping away the thick, clumped layers of humidity-caked dust, they eliminate the material that causes the harsh burn-off odor. When you finally turn the heat on, the clean metal elements heat up without incinerating any debris, resulting in warm, odorless air.

The Role of Air Filters and Inspections

• Change your air filters early: Before the first cold snap arrives, replace your HVAC filter. A fresh, clean filter improves airflow and drastically reduces the amount of dust circulating through the home and settling on the heating components.

• Schedule proactive service: By scheduling routine HVAC maintenance before the late fall temperature drop, you ensure your system is prepped and ready for the sudden change in weather.

• Catch electrical vulnerabilities: Professional inspections do more than just clean away dust. Technicians will test electrical connections, measure voltage, and look for signs of summer corrosion. This allows them to catch frayed wires and failing capacitors before they become active fire hazards during a cold night.

Frequently Asked Questions About Miami Heater Odors

How long should a heater smell like burning?

A heater should only smell like burning for 10 to 20 minutes during its initial use. This brief window allows the accumulated dust on the heat strips to safely incinerate and clear out of the system. If the smell persists beyond 20 minutes, it is no longer a normal burn-off and requires immediate attention. Always monitor the system closely during this initial timeframe.

What does an electrical fire in an HVAC system smell like?

An electrical fire typically smells like melting plastic, pungent sulfur, burning rubber, or a sharp, chemical ozone scent. Unlike the smell of burning dust, which resembles stale air or singed lint, an electrical odor is harsh and highly toxic. Furthermore, an electrical smell will grow stronger the longer the system runs, rather than fading away.

Is it normal for a heater to smell like burning?

Yes, it is perfectly normal for a brief period during your October/November first heater startup. Because the heat strips sit idle for most of the year, they collect a thick layer of dust that must burn off when activated. As long as the odor dissipates within 20 minutes and does not smell like melting plastic, it is a standard part of seasonal HVAC operation.

Why does my heat pump smell like burning plastic?

A burning plastic odor usually indicates a serious electrical malfunction, such as melting wire insulation, a failing capacitor, or an overheating blower motor. This is never a normal smell and should be treated as an immediate fire hazard. Shut off your thermostat and the circuit breaker to the HVAC system right away, and contact a professional technician.

Can high humidity make burning dust smell worse?

Yes, high humidity causes airborne dust to clump together and stick much more stubbornly to idle heating components. In coastal climates like Miami, this creates a thicker, denser layer of debris on the heat strips compared to dry regions. When this thick layer finally burns off, the resulting odor is noticeably stronger and more pungent.

Should I open windows during the first heater startup in Miami?

Opening windows is a great way to ventilate the harmless dust odor during the initial startup. Cracking a few windows allows the singed, dusty air to escape the house quickly, minimizing discomfort. Once the 20-minute burn-off window has passed and the smell is gone, you can close the windows and enjoy the clean, warm air.

Stay Safe and Warm During South Florida's Winter

Navigating the sudden drop in temperature shouldn't come with a side of panic. By understanding the clear guidelines for your system's operation, you can stay comfortable without fear. Remember the golden rule: the harmless smell of 10+ months of idle dust accumulation on heat strips will steadily fade within 10 to 20 minutes. Conversely, any scent of melting plastic, sulfur, or an odor that persists indefinitely is a clear signal to shut the system down immediately at the breaker.

Knowing the difference between these two scenarios keeps your family safe and prevents unnecessary panic during a chilly evening. You do not have to guess whether your system is functioning properly. Identifying the source of a burning smell when turning on the heater in Miami is much easier when you know exactly what to look and listen for. If you ever remain unsure about your system's safety, or if you want to skip the dusty burn-off entirely with a pre-season cleaning, reach out to local experts to explore your service options and ensure a worry-free winter.

Upgrading to a Daikin Inverter System vs. Replacing Your Single-Stage Condenser placeholder-image  | Air On Demand
5 min read

Upgrading to a Daikin Inverter System vs. Replacing Your Single-Stage Condenser

A standard condenser might cool your home, but it often leaves behind heavy fall humidity. See exactly how continuous inverter technology eliminates that cold, clammy feeling.

The Myth of the Quick Fix: Why a New Condenser Isn't Always the Answer

If you are debating the choice of upgrading to a Daikin Inverter System vs. replacing your single-stage condenser, you might believe the common myth that simply swapping out that noisy metal box in your yard will automatically cure a sticky, uncomfortable home. Many homeowners assume that a new outside unit equals better cooling. While a fresh condenser will certainly blow cold air, raw temperature control is only half the battle when you live in a coastal climate. The real challenge is managing the heavy moisture lingering in your indoor air.

For comprehensive guidance on navigating these choices, exploring professional AC installation and replacement is the best first step.

The frustration usually peaks during Miami's muggy fall / October timeframe. The intense heat of summer begins to back off slightly, but the oppressive moisture in the air does not. You might notice that your thermostat reads a perfectly reasonable 74 degrees, yet your skin feels clammy, the floors feel slightly slick, and the air feels heavy. This specific discomfort happens because your cooling system is failing to extract moisture. When making your replacement decision, understanding how different technologies handle this exact problem is critical. Choosing between a standard single-stage unit and an advanced inverter-driven system comes down to how well they manage water, not just how well they manage heat.

Understanding the 'Cold But Clammy' Phenomenon

To understand why your house feels like a refrigerator but still feels stuffy, you have to look at the two distinct jobs your air conditioner performs: sensible cooling and latent cooling. Sensible cooling is the process of lowering the actual temperature of the air—the number you see dropping on your thermostat. Latent cooling, on the other hand, is the process of extracting humidity from that air. A truly comfortable home requires a precise balance of both.

Human beings perceive comfort through a combination of temperature and humidity. Our bodies cool themselves by sweating; when the indoor humidity is too high, that sweat cannot evaporate. As a result, a room sitting at 74 degrees with 70% humidity will feel significantly warmer and vastly more uncomfortable than a room sitting at 76 degrees with 45% humidity.

This balance becomes extremely difficult to maintain during seasonal shifts. In Miami FL, average relative humidity often stays above 70% deep into the fall. Because the outdoor temperature has dropped slightly from the summer peak, your air conditioner does not need to run very long to satisfy the thermostat's temperature setting. It blasts cold air, hits 74 degrees quickly, and shuts off. However, the latent heat load—the humidity—remains aggressively high.

When your system fails to provide adequate latent cooling, the consequences go beyond just physical discomfort. Poor moisture removal severely diminishes your indoor air quality. High indoor humidity creates an ideal breeding ground for dust mites, encourages mold and mildew growth inside your ductwork, and can cause wood floors and cabinetry to swell. Mastering latent cooling is essential for protecting both your comfort and your property.

The Limits of Single-Stage Condensers in High Latent Heat Conditions

The root cause of poor humidity control usually traces back to the mechanical limitations of traditional cooling equipment. Standard single-stage compressors operate at exactly 100% capacity whenever they are turned on. There is no middle ground, no low gear, and no cruising speed. They are either running at full blast or completely completely shut off.

This all-or-nothing operation leads directly to a phenomenon known as "short-cycling" during milder weather. Because the system pushes out its maximum cooling capacity, it rapidly drops the indoor temperature to match the thermostat setting. The unit then abruptly powers down. In the middle of summer, this isn't always a problem because the intense heat forces the system to run for long stretches anyway. But in milder, highly humid conditions, the system runs in short bursts.

Many homeowners ask if they can solve their comfort issues by just swapping out the broken outdoor unit while keeping the indoor equipment. If you are exploring AC replacement services, it is vital to know that a basic single-stage condenser swap won't change this fundamental operational flaw. A new single-stage unit will still operate at 100% capacity, and it will still short-cycle when the weather is mild but muggy. Furthermore, this constant starting and stopping puts immense mechanical wear and tear on electrical components like contactors and capacitors, shortening the lifespan of the equipment.

Why Short-Cycling Ruins Indoor Comfort

The physics of dehumidification require time. Inside your home, warm air blows over the cold evaporator coil. For moisture to be removed from the air, the coil must get extremely cold, and the air must pass over it long enough for condensation to form—much like water droplets forming on the outside of a cold glass of iced tea on a summer afternoon. Those droplets then fall into a drain pan and are channeled out of your house.

The time factor: It typically takes a standard air conditioner about 10 to 15 minutes of continuous running just for the indoor coil to get cold enough to start wringing meaningful amounts of water out of the air.

The short-cycle failure: If your single-stage system blasts the house with cold air and satisfies the thermostat in just 8 minutes, it shuts down before the dehumidification process ever really gets going. The result is cold, stagnant, humid air circulating endlessly through your living spaces.

How Inverter Technology Masters Humidity Control

The solution to the short-cycling trap lies in variable-speed modulation. Unlike a single-stage system that operates like a light switch (only on or off), an inverter-driven compressor operates more like the gas pedal in your car. It constantly adjusts its speed and cooling output to exactly match the real-time demands of your home.

When the system first turns on, it may ramp up to full capacity to quickly bring the temperature down. But once it nears the target temperature, the inverter technology allows the compressor to seamlessly ramp down to 30% capacity or even lower. Instead of shutting off entirely, it continues to run at a very low, ultra-efficient speed.

This "continuous run" capability is the ultimate weapon against indoor humidity. Because the system is running constantly at a low speed, indoor air is continuously circulating over the cold evaporator coil. This maximizes moisture extraction without overcooling the room. The system wrings out the humidity hour after hour, creating a perfectly balanced, dry, and comfortable environment.

As specialized local experts, Air On Demand leverages the Daikin Inverter System to solve the specific climate challenges of South Florida. We understand that aggressive latent cooling is non-negotiable here. By utilizing inverter technology, we help homeowners eliminate the temperature swings and sticky air that traditional systems leave behind. If you want to dive deeper into the mechanics of these advanced units, learning about inverter-driven compressors vs. two-stage systems can clarify exactly how this modulation works to protect your indoor air quality.

Beyond Comfort: Noise Reduction and Space-Saving Design

While mastering humidity is the primary reason to upgrade, premium inverter systems offer several secondary benefits that dramatically improve your day-to-day experience at home. When you move away from the aggressive on/off cycles of standard equipment, you gain advantages in acoustics, footprint, and longevity.

• Whisper-quiet operation: Standard condensers are notorious for the loud "clunk" they make when the compressor kicks on at 100% capacity. Because inverter systems gradually ramp up their speed and spend most of their time operating at a low hum, they generate significantly lower decibel levels. You can easily hold a conversation on your patio right next to the running unit.

• Space-saving side-discharge designs: Many inverter models feature a slim, side-discharge cabinet rather than the traditional bulky cube that blows air upward. This narrow footprint is ideal for zero-lot-line homes, tight side yards, or placement under low overhangs where standard units simply won't fit or breathe properly.

• Reduced mechanical stress: The hardest part of an air conditioner's job is starting up. Pulling the massive amount of electricity required to jump-start a single-stage compressor from zero to 100% generates heat and wear. Continuous, low-speed operation eliminates these harsh electrical surges, reducing stress on the internal components over the lifespan of the unit.

Side-by-Side Comparison: Single-Stage Replacement vs. Inverter Upgrade

To help clarify the core differences, here is a direct comparison of how these two approaches handle the realities of high latent heat conditions.

• Humidity Control — Standard Single-Stage Condenser: Poor during mild weather; frequent short cycles fail to extract moisture. — Advanced Inverter Upgrade: Excellent; continuous modulation wrings out moisture without overcooling.

• Run Times — Standard Single-Stage Condenser: Frequent, abrupt on/off cycles (100% or 0%). — Advanced Inverter Upgrade: Long, steady, continuous operation at low speeds (down to 30%).

• Noise Levels — Standard Single-Stage Condenser: Noticeable start-up "clunk" and loud operation. — Advanced Inverter Upgrade: Whisper-quiet, gradual ramping up and down.

• Efficiency — Standard Single-Stage Condenser: Standard SEER ratings; high energy spikes at every start-up. — Advanced Inverter Upgrade: High-efficiency operation; sips electricity by avoiding constant restarts.

Single-Stage vs. Inverter AC Performance in High Humidity

Weighing the Investment: Is the Upgrade Worth It?

Making the right choice for your home involves looking past the initial installation day. It is true that upgrading to a fully modulating inverter system requires a higher initial investment than simply swapping a standard condenser for another basic model. However, evaluating the return on that investment requires looking at the total impact on your home environment and your monthly utility usage.

The value of an inverter system is realized every single day through the complete elimination of humidity issues and superior daily comfort. Furthermore, because inverter compressors sip electricity at lower speeds rather than demanding massive power surges to start up repeatedly, they offer significantly lower month-to-month energy consumption. When you are repairing vs replacing your AC, factoring in these long-term operational savings is crucial.

Additionally, high-efficiency inverter systems frequently qualify for general energy efficiency rebates or federal tax credits designed to incentivize energy conservation. While you should always verify current local utility programs and consult a tax professional for the latest guidelines, these incentives can help offset the initial upgrade costs. Ultimately, for homes struggling with latent heat and sticky air, the premium technology pays immense dividends in quality of life, superior indoor air quality, and extended system longevity.

Frequently Asked Questions About AC Upgrades and Humidity

Can I just replace my outside AC unit?

While it is physically possible to just swap the outside box, it is rarely recommended and won't solve underlying humidity problems. An air conditioning system is designed as a matched set; pairing a new outdoor condenser with an old indoor air handler severely impacts efficiency, compromises moisture removal, and can significantly shorten the lifespan of the new equipment.

Does an inverter AC dehumidify better?

Yes, an inverter AC provides vastly superior dehumidification. Because it can modulate its capacity and run continuously at lower speeds, it gives the indoor evaporator coil much more time to pull moisture from the air, preventing the cold and clammy feeling associated with traditional units.

Why does my house feel cold and clammy?

This happens when your AC cools the air too quickly (sensible cooling) but shuts off before extracting the humidity (latent cooling). The system satisfies the thermostat's temperature setting but leaves high levels of moisture trapped in your indoor air.

What is the difference between single-stage and inverter AC?

A single-stage AC runs at 100% capacity or 0%, meaning it is either fully on or fully off. An inverter AC modulates its compressor speed—much like a car's gas pedal—allowing it to run continuously at lower capacities to maintain exact temperatures and remove humidity.

Is upgrading to an inverter system worth the investment?

For regions with high humidity and long cooling seasons, the dramatic improvement in daily comfort, indoor air quality, and energy efficiency makes it a highly valuable upgrade. It eliminates the sticky, clammy feeling that basic systems leave behind during milder weather.

Stop Settling for Sticky Air: Take Control of Your Comfort

True indoor comfort requires mastering both the temperature and the humidity inside your living spaces. Settling for a basic condenser replacement often means settling for the exact same sticky, clammy environment you are trying to escape. By choosing an advanced solution like the Daikin Inverter System, you ensure that your home remains perfectly dry, quiet, and consistently cool, regardless of how muggy it gets outside.

You don't have to live with a home that feels like a damp cave. Take the time to explore advanced solutions tailored to the specific profile of your house. To review your options and see how upgrading to a Daikin Inverter System vs. replacing your single-stage condenser can transform your daily comfort, schedule a consultation with our team to learn more about Daikin Fit systems in Miami today.

Can I Use a Third-Party Technician Without Voiding My Daikin Warranty? placeholder-image  | Air On Demand
5 min read

Can I Use a Third-Party Technician Without Voiding My Daikin Warranty?

If your original installer is unresponsive, you don't have to wait in discomfort. Find out how the Magnuson-Moss Warranty Act protects your right to hire a new technician.

Are You Trapped With Your Original Installer for Daikin Repairs?

Are you asking yourself, "Can I use a third-party technician without voiding my Daikin warranty?" because your original installer is suddenly unresponsive? It is a stressful position for any homeowner. You have invested in high-quality Daikin equipment, but now that you need crucial October post-summer maintenance or an urgent repair, the company that put the system in is nowhere to be found. They might be fully booked, providing poor customer service, or simply not returning your calls.

Many homeowners hesitate to call a new, responsive technician because they are terrified of losing their manufacturer coverage. The decision point is clear: do you wait in discomfort and risk further damage to your system, or do you hire a different company and hope your warranty survives the switch?

The good news is that you have the absolute right to choose your repair company. At Air On Demand, a pattern we see often across Miami is homeowners believing they are tied to a single contractor for the lifespan of their air conditioning system—but that is a myth. To make the best decision for your home and your comfort, you simply need to understand the fundamental difference between manufacturer equipment warranties and local service guarantees.

The Short Answer: The Magnuson-Moss Warranty Act Protects You

The direct answer is no, you do not have to use your original installer to keep your Daikin warranty valid. Federal law is firmly on your side when it comes to selecting a service provider for your major home appliances and HVAC systems.

In 1975, the federal government passed the Magnuson-Moss Warranty Act. This critical piece of consumer protection legislation makes it illegal for manufacturers to "tie" their warranty coverage to a specific service provider or brand of parts, barring very specific safety exceptions. In plain terms, a manufacturer cannot legally force you to use the company that originally installed your unit to maintain your factory warranty.

However, this freedom comes with a primary condition: the technician performing the work must be a qualified, Licensed HVAC Professional. While Daikin cannot mandate that you use "Company A" over "Company B" for your AC repair in Miami, they can and do require that whoever touches the system meets professional, state-licensed standards. You cannot hire an unlicensed handyman or attempt DIY electrical repairs and expect the manufacturer to cover the resulting damage. As long as you hire a certified professional who follows the manufacturer's technical specifications, your coverage remains fully intact.

Manufacturer Parts Warranty vs. Contractor Labor Warranty

The biggest source of confusion for homeowners stems from misunderstanding what exactly is covered and by whom. When you purchase a new AC system or heat pump, you are typically receiving two entirely separate warranties from two different entities.

The psychological trap is real: homeowners often confuse losing a short-term labor warranty with losing their long-term Daikin parts warranty. Switching to a new third-party technician might mean you forfeit the original installer's free labor guarantee, but it absolutely does not void the Daikin parts warranty.

What Daikin Covers (Parts)

The Daikin manufacturer warranty is a parts-only guarantee that comes directly from the factory. This coverage protects you against factory defects and internal component failures, such as a faulty compressor, a leaking evaporator coil, or a defective blower motor. This warranty is attached to the equipment itself, usually lasting up to 10 or 12 years if properly registered. It remains completely valid regardless of which Licensed HVAC Professional services the unit, provided they follow proper procedures.

What Your Installer Covers (Labor)

The contractor labor warranty is a separate, private guarantee provided by the local company that installed the unit. This covers the cost of the technician's time and protects you against installation errors (like improper brazing or incorrect duct sizing). This labor warranty is specific to that particular company and usually only lasts for a brief initial period. If you hire a different company to fix the system, the new company will charge you for their labor, effectively voiding the original installer's private labor guarantee—but the expensive Daikin parts remain fully covered by the factory.

• Provider — Daikin Parts Warranty: Daikin (The Manufacturer) — Contractor Labor Warranty: The Original Installing Company

• What it Covers — Daikin Parts Warranty: Defective factory components (coils, compressors, boards) — Contractor Labor Warranty: Technician's time, workmanship, and installation errors

• Typical Duration — Daikin Parts Warranty: 10 to 12 years (with registration) — Contractor Labor Warranty: 1 to 2 years (varies by contractor)

• Valid With — Daikin Parts Warranty: Any qualified, Licensed HVAC Professional — Contractor Labor Warranty: Only the original installing company

• Risk of Voiding — Daikin Parts Warranty: Voided by neglect, unlicensed work, or non-OEM parts — Contractor Labor Warranty: Voided if another company works on the system

Parts Warranty vs. Labor Warranty Comparison

What Daikin Actually Requires to Keep Your Warranty Valid

While you are free to choose your service provider, Daikin does outline strict manufacturer specifications that your chosen third-party technician must follow. Protecting your warranty is about ensuring the equipment is treated correctly.

• Use of OEM Parts: The technician must use OEM (Original Equipment Manufacturer) parts for any covered repairs. If a generic, aftermarket part is installed and it causes a subsequent failure in the system, Daikin will not cover the damage.

• Documented Routine Maintenance: The system must receive regular, documented routine AC maintenance by a qualified professional. Manufacturers expect you to care for the equipment. If a component fails because the system was choked by a filthy filter or neglected for years, the warranty claim can be denied.

• Proper Equipment Registration: To receive the maximum warranty term (often extending from 5 years to 10 or 12 years), the equipment must have been registered properly within 60 days of installation.

• Adherence to Technical Specifications: Repairs and maintenance must follow Daikin's exact technical guidelines, including proper refrigerant charging, correct voltage requirements, and appropriate airflow calculations.

This is where choosing the right third-party contractor matters. As a highly qualified local contractor, our team at Air On Demand strictly adheres to Daikin's manufacturer specifications. In our years of servicing Miami homes, we have found that meticulous attention to these details is what keeps systems running efficiently. We always use OEM parts and follow precise diagnostic protocols to ensure that when a Licensed HVAC Professional from our team works on your system, your manufacturer coverage is completely protected.

Navigating a Daikin Mini Split Warranty and Extended Terms

Many homeowners in our area utilize ductless technology for targeted cooling. If you are wondering how a daikin mini split warranty operates, you will be relieved to know it functions under the exact same federal protections as standard central air systems. You are not forced to use the original installer for your ductless mini split systems to keep the factory parts coverage intact.

However, the situation requires a bit more attention if you purchased a daikin extended warranty, such as the Asure Extended Service Plan. Extended warranties often cover both parts and labor for up to 12 years. Unlike a local contractor's private labor guarantee, an extended labor warranty purchased directly through Daikin is often transferable or usable by other authorized service providers.

Before authorizing major third-party repairs, it is crucial to verify your specific extended terms. If you have an active Asure plan, you will want to ensure the third-party technician you hire is authorized to process claims through that specific extended network, otherwise you may end up paying out of pocket for labor that could have been covered. Always provide your new technician with your warranty documentation so they can verify exactly what tier of coverage you possess.

Why Waiting for Your Original Installer Can Be a Costly Mistake

One of the most dangerous things you can do for your HVAC system is to delay necessary service while waiting for an unresponsive original installer. Ironically, skipping or delaying maintenance to "protect" your labor warranty is a much faster way to void your Daikin parts warranty than simply hiring a new company.

Consider the extreme year-round usage systems endure here. Miami's relentless heat, high humidity, and coastal environment create a grueling operating environment for any air conditioner or heat pump. By the time fall arrives, your system has likely been running non-stop for six or more months. This makes October post-summer maintenance and a thorough pre-winter inspection absolutely critical. The coastal salt air accelerates corrosion on condenser coils, and the constant humidity taxes the condensate drainage system.

If you notice a strange noise, a drop in cooling performance, or a clogged drain line, waiting weeks for your original contractor to finally call you back allows minor wear and tear to cascade into catastrophic failures. If a minor electrical contactor fails and you ignore it, it can burn out a highly expensive compressor. When the manufacturer evaluates the failed compressor and sees it was caused by profound neglect and delayed service, they can legally deny the warranty claim.

Hiring a responsive, qualified third-party technician immediately protects both the physical equipment and the legal standing of your manufacturer warranty. If you are wondering does skipping maintenance void your Daikin warranty, the answer is a resounding yes if the lack of maintenance leads directly to the component failure.

Frequently Asked Questions About Daikin Warranties and Repairs

Understanding the fine print of HVAC warranties can be overwhelming. Here are clear, concise answers to the most common questions homeowners have about their Daikin coverage.

Do I have to use the company that installed my AC for repairs?

No, you are not legally required to use the original installing company for repairs. Under the Magnuson-Moss Warranty Act, your manufacturer parts warranty remains valid as long as the repairs are performed by a Licensed HVAC Professional. While using a different company means you will have to pay for their labor, the factory will still cover the cost of defective parts.

What voids a Daikin warranty?

A Daikin warranty is typically voided by neglect, improper installation, or unqualified repairs. Specific actions that can void coverage include failing to perform annual maintenance, allowing an unlicensed individual to work on the system, using non-OEM replacement parts, or moving the equipment from its original installation location. Physical damage from acts of nature or vandalism is also not covered.

Does Daikin warranty cover labor?

The standard Daikin manufacturer warranty covers only the cost of replacement parts, not the labor required to install them. Labor is usually covered by the local contractor who installed the system, typically for the first year or two. The only exception is if you explicitly purchased a Daikin extended labor warranty (like the Asure plan) at the time of installation.

Can any HVAC technician work on a Daikin?

Yes, any state-certified, Licensed HVAC Professional can work on a Daikin system without voiding the parts warranty. However, our team recommends choosing a technician who is experienced with Daikin's specific technology, especially for complex inverter-driven systems or ductless mini splits, to ensure the diagnostics and repairs meet factory specifications.

How do I check my Daikin warranty registration status?

You can check your warranty status directly on the Daikin website using the serial number and model number of your equipment, which are printed on the manufacturer's data plate on the side of your unit. Checking this status will confirm whether the equipment was properly registered within the 60-day window and exactly how many years of parts coverage remain.

Will using non-OEM parts void my Daikin warranty?

Yes, using generic or aftermarket parts can void the warranty for the specific component replaced, as well as any other components that are subsequently damaged by the non-OEM part. To protect your coverage, always insist that your service technician uses genuine Daikin replacement parts for all internal repairs.

Protect Your System and Your Coverage with Expert Service

The bottom line is that you, the homeowner, are entirely in control of who services your Daikin equipment. You do not have to settle for poor communication, endless delays, or subpar service just because a company performed your initial installation.

A qualified, licensed technician using genuine OEM parts will keep your manufacturer warranty fully intact while providing the prompt, professional service you deserve. Do not let warranty fears cause you to delay vital October post-summer maintenance or ignore early warning signs of a breakdown. Reach out to a local Miami expert who understands Daikin specifications inside and out, and get the peace of mind that comes with knowing your system—and your coverage—are in capable hands.

Permitting Delays for AC Installations in Miami-Dade County This Fall placeholder-image  | Air On Demand
5 min read

Permitting Delays for AC Installations in Miami-Dade County This Fall

The October post-summer rush often creates a backlog at the local building department. Understand these bottlenecks to set realistic timelines for your fall AC replacement.

The October AC Permitting Bottleneck in South Florida

At Air On Demand, our team typically sees a wave of frustrated homeowners hit an administrative wall when trying to schedule a system upgrade. Navigating permitting delays for AC installations in Miami-Dade County this fall is a frustrating reality for many whose systems barely survived the summer heat. You finally decide to pull the trigger on a new unit, only to learn that the county building department is backed up, leaving you waiting for official paperwork to clear before the real work can begin. While the calendar says it is mid-fall and you might be thinking about pre-winter inspections, the local municipal inspection pipeline is still heavily congested from processing the peak-season rush.

If you are ready to explore your options for AC installation and replacement, scheduling your Miami AC installation services early is the best way to get ahead of the paperwork queue.

Setting realistic expectations is the first step toward a successful project. When you plan a full system upgrade during the October post-summer period, you have to account for both the physical labor and the administrative timeline. In our years of serving South Florida, we have found that understanding why these bottlenecks happen, and what goes into resolving them, will help you manage your timeline and keep your household comfortable while you wait for the green light from the county.

Why the Local Building Department Experiences Fall Inspection Backlogs

Most homeowners assume that once September ends and they start scheduling fall maintenance, HVAC companies and local building departments immediately slow down. In reality, our team consistently sees Miami-Dade County experience a compounding administrative backlog by early fall. The surge of emergency replacements that occurred during the hottest months creates a massive wave of paperwork that takes weeks, or even months, to fully process and close out.

This backlog affects every licensed contractor operating in the region. The delays are driven by several overlapping factors that strain municipal resources:

1. The sheer volume of applications: The peak cooling season pushes thousands of aging systems to failure, resulting in a flood of permit applications hitting the county offices simultaneously.

2. Late-season weather events: Fall is still active hurricane season. When tropical storms threaten the area, municipal offices often shift their priorities to emergency preparations and post-storm assessments, pausing routine permit processing.

3. Inspector availability: Field inspectors are stretched incredibly thin trying to finalize inspections for jobs that were completed earlier in the year, leaving fewer resources to review new applications.

The Ripple Effect of Summer Breakdowns

The emergency installations from July and August are still making waves in the fall. Even as our customers shift their focus toward indoor air quality (IAQ) improvements and heating-startup checks, county inspectors are busy clearing out the massive summer queue. Because of this, new permit applications submitted in the fall often end up sitting in a longer line than they would during the spring.

Understanding High Velocity Hurricane Zone (HVHZ) Paperwork Requirements

Replacing an air conditioner in South Florida is not as simple as swapping out a box and plugging it in. As a local contractor, we know firsthand that the region is subject to some of the strictest building codes in the country to ensure structures and equipment can withstand extreme weather. Florida Building Code (FBC) Section 105.1 explicitly mandates that a permit must be pulled for all HVAC system replacements. In Miami-Dade County, these regulations are even tighter.

The county operates within a High Velocity Hurricane Zone (HVHZ). This designation means every piece of equipment installed outside your home must meet rigorous wind-load engineering requirements. The paperwork required to prove compliance is extensive, and any missing detail will cause the application to be rejected by the reviewer.

Before any inspections can be scheduled, a Notice of Commencement (NOC) must be filed and recorded with the county clerk. This legal document protects you from certain liabilities, but recording it adds another administrative step to the timeline.

Notice of Acceptance (NOA) and Tie-Downs

One of the most critical documents in the Miami-Dade County permitting process is the Notice of Acceptance (NOA). The NOA is an official product approval document proving that your specific AC unit or heat pump, along with its tie-downs and the stand it rests on, has been tested and certified to withstand hurricane-force winds.

The county strictly enforces NOA requirements for all outdoor units. If the application does not include the correct, up-to-date NOA for the exact model being installed, or if the engineering details for the concrete pad and tie-down straps are incomplete, the permit will face immediate rejection. We always stress to our clients that this level of scrutiny is necessary for public safety, but it requires absolute precision during the application process.

Steps to Prepare for Miami-Dade AC Permitting Timelines

Municipal Wait Times vs. Contractor-Caused Delays: What You Can Control

When facing an October replacement, it helps to understand the difference between unavoidable municipal backlogs and avoidable administrative errors. The speed at which the county processes a flawlessly submitted application is entirely out of your hands. However, the accuracy of that initial submission is completely within the control of the company you hire.

A pattern we see often with inexperienced contractors is critical paperwork mistakes that derail the entire timeline. Common errors include missing energy calculations, attaching the wrong NOA for the equipment combination, or failing to secure notarized signatures on the Notice of Commencement. When a permit application is rejected for these errors, the contractor must correct the paperwork and re-submit it. Unfortunately, a re-submission pushes your application straight to the back of the line, turning a standard wait into a prolonged, multi-week ordeal.

• Unavoidable County Delays — Common Causes: High application volume, inspector shortages, hurricane preparations. — Impact on Timeline: Standard processing wait time; predictable based on current municipal backlog.

• Avoidable Contractor Errors — Common Causes: Missing energy calcs, incorrect NOA documents, unsigned NOC forms. — Impact on Timeline: Application rejected; pushed to the back of the line upon re-submission, doubling the wait.

This is where partnering with an established professional makes a massive difference. Working with our team at Air On Demand means you benefit from our deep local roots and established mastery of the county's permitting processes. We ensure that every piece of paperwork, from energy calculations to tie-down engineering, is filed flawlessly the first time to prevent unnecessary administrative delays.

Managing Indoor Comfort While Awaiting County Approvals

Waiting for a permit to clear is heavily taxing when your indoor environment is uncomfortable. While the calendar might say it is fall, October in this region remains hot and highly humid, making any delay in an AC replacement an urgent comfort issue. If your current system is failing or completely offline, you need strategies to keep your home livable.

Temporary cooling strategies are essential during this waiting period. Utilizing portable air conditioning units in primary living spaces or bedrooms can provide a safe, localized retreat from the heat. Running ceiling fans counterclockwise creates a wind-chill effect that makes the room feel cooler, while standalone dehumidifiers pull excess moisture from the air, making the high temperatures much more tolerable.

Protecting indoor air quality (IAQ) is just as vital when your central system is down. Our technicians highly recommend keeping windows closed during the most humid parts of the day to prevent moisture buildup, which can quickly lead to musty odors and biological growth in a South Florida home.

Most importantly, do not let the discomfort push you into skipping the permit process out of desperation. Allowing unpermitted work carries severe legal and financial penalties, including massive fines, the potential forced removal of the new equipment, and complications if you ever try to sell your home.

Preparing Your Home and Budget for a Seamless Fall Installation

While your permit application works its way through the Miami-Dade County system, you can use the waiting period to prepare your property. Taking a few proactive steps now ensures that once the county gives the green light, our physical installation crews can work rapidly and without unexpected roadblocks.

• Clear the indoor workspace: Ensure there is a clear, wide path from your front door to the indoor air handler. Remove furniture, rugs, and fragile items from the immediate area so technicians have plenty of room to maneuver heavy equipment.

• Prep the outdoor condenser pad: Trim back any overgrown bushes, branches, or tall grass around the outdoor unit. Technicians need at least two to three feet of clearance on all sides to safely remove the old unit and secure the new one to the pad.

• Secure pets and plan for noise: AC replacement is a heavy construction process. Plan a safe, quiet space for your pets away from the work zones, and be prepared for several hours of drilling and heavy lifting.

Finalizing Your Upgrade Logistics

The administrative waiting period is also the perfect time to finalize the financial logistics of the upgrade. You can review your options for financing options for new AC systems without feeling rushed. Take the time to understand how much AC replacement services cost over the long term, factoring in the energy efficiency of the new unit versus the operating costs of your old system. Additionally, generally applicable federal tax credits may apply to qualifying heat pump installations, so use this time to verify current programs with your utility or a tax professional. If you live in a community with a Homeowners Association (HOA), ensure all neighborhood architectural approvals are secured alongside your municipal permits.

Protecting Your Investment with the Right Equipment Warranties

A properly permitted and inspected installation does more than just keep you compliant with local laws; it is often a strict requirement to keep your manufacturer warranties valid. Major HVAC manufacturers design their systems to perform under specific conditions, and they require proof that the equipment was installed according to local building codes by a licensed professional.

If a system is installed without a permit in Miami-Dade County, and a major component fails a year later, the manufacturer can—and likely will—void the warranty, leaving you responsible for the entire repair bill. Going through the proper channels protects your investment.

It is also important to understand the difference between standard parts warranties and comprehensive unit replacement guarantees. A standard warranty might cover a broken compressor, but you will still pay for the labor. A more robust coverage plan, like a Daikin unit replacement guarantee, offers a higher level of protection if a major component fails within a specified timeframe. Knowing your system is fully compliant with county codes gives you the peace of mind that your warranties will stand strong when you need them.

Partnering with Local Experts to Expedite Your AC Replacement

Understanding current municipal timelines helps set realistic expectations for a fall AC installation. While the post-summer backlog at the building department is an unavoidable reality of living in South Florida, the timeline does not have to be dragged down by sloppy paperwork or administrative errors.

Flawless administrative execution is the key to minimizing wait times. By working with a dedicated local team like Air On Demand that understands the nuances of HVHZ requirements and NOA documentation, you ensure your application moves through the system as efficiently as possible.

Do not wait until your system completely fails to start the process. Schedule a consultation today to evaluate your current equipment, secure your place in line, and get the paperwork started before the municipal backlog grows any larger.

Frequently Asked Questions

Do I need a permit to replace my AC in Miami-Dade County?
Yes, a permit is legally required for all AC replacements in the county. The Florida Building Code mandates that any modification or replacement of an HVAC system must be reviewed and inspected by local authorities. This ensures the new equipment meets safety standards and strict wind-load requirements.

How long does it take to get a building permit in Miami-Dade?
The timeline fluctuates based on the season, but wait times often stretch longer in the fall. Following the busy summer season, the county processes a backlog of applications and inspections. Submitting flawless paperwork on the first attempt is the best way to prevent additional weeks of delay.

What happens if I replace my AC without a permit in Florida?
Replacing an AC without a permit carries severe consequences, including heavy fines and potential legal action from the county. Homeowners may be forced to tear out the unpermitted equipment and start over. Furthermore, unpermitted work generally voids manufacturer warranties and can block the future sale of your home.

Why are Miami-Dade permits taking so long this fall?
The fall backlog is primarily driven by the massive volume of emergency replacements that occurred during the summer. Inspectors are busy finalizing those mid-summer jobs, leaving fewer resources to process new applications. Late-season tropical weather preparations also frequently divert municipal resources.

Can a contractor start my AC installation before the permit is approved?
No, physical installation should not begin until the permit is officially approved and issued. Starting work prematurely violates local building codes and can result in immediate stop-work orders. A reputable contractor will always wait for official county clearance before removing your old equipment.

What is a Notice of Acceptance (NOA) for an AC unit?
A Notice of Acceptance is an official document certifying that a specific product meets the county's High Velocity Hurricane Zone standards. For air conditioners and heat pumps, the NOA proves that the outdoor unit, its stand, and its tie-down straps can withstand hurricane-force winds. Missing or incorrect NOAs are a leading cause of permit rejections.

Clearing October Yard Debris from Your Homestead AC Condenser Fins placeholder-image  | Air On Demand
5 min read

Clearing October Yard Debris from Your Homestead AC Condenser Fins

Wet fall leaves and storm debris can quickly suffocate your outdoor AC unit. See how rotting organic matter damages aluminum fins and what perimeter clearing is safe to tackle yourself.

The Hidden Threat of October Yard Debris to Your Homestead AC Unit

October in South Florida isn't exactly crisp autumn weather—it is the tail end of our late storm season, bringing heavy rains, high winds, and a constant barrage of wind-blown organic matter. Clearing October yard debris from your Homestead AC condenser fins is one of the most critical preventative steps you can take before the winter heating season begins. Unlike northern states where dry leaves simply blow away, our team at Air On Demand consistently sees how our subtropical climate creates a unique challenge. Wet leaves, grass clippings, and palm fronds plaster themselves against the damp aluminum fins of your outdoor unit, creating a dense, suffocating mat that refuses to dry out.

This accumulation presents a concrete problem for homeowners: leaving this wet organic matter to rot against the unit restricts vital airflow, forces your system to work harder, and slowly eats away at the delicate metal components. The decision point you face is knowing exactly what perimeter debris is safe for you to clear away yourself, versus recognizing when the internal fins have become so compromised that they require professional attention. Ignoring this seasonal reality inevitably leads to severe efficiency loss and unexpected breakdowns. For comprehensive protection against these subtropical elements, regular AC maintenance is essential to keep your equipment running smoothly year-round.

Because Homestead maintains high relative humidity throughout the October wet fall and late storm season, the natural drying process is severely hindered. A clump of wet grass clippings thrown against your condenser by a lawnmower on a Tuesday will likely still be wet the following Monday. This constant moisture trap is a pattern we see often on our fall maintenance routes, and it is the primary reason why outdoor HVAC units in our region degrade faster if they are not actively monitored. Understanding the difference between a harmless stray leaf and a damaging mat of wet debris is the first step in protecting your investment.

How Wet Grass Clippings and Leaves Chemically Corrode Aluminum Fins

When most people think of yard debris, they picture dry, brittle autumn leaves crunching underfoot. In Homestead, the reality is much heavier and wetter. South Florida vegetation is dense, moisture-laden, and prone to rapid decomposition when exposed to the elements. This distinction is crucial because the damage caused by our local yard waste isn't just physical—it is a highly destructive chemical process.

Standard, generic HVAC advice often suggests simply waiting for leaves to dry and blow off the unit. However, in our years of performing fall AC and heat pump inspections across the Miami area, our technicians at Air On Demand have learned that this advice severely underestimates the corrosive power of South Florida's specific yard vegetation. When a thick layer of wet grass and leaves sticks to your condenser, it initiates a chemical reaction that actively degrades your equipment.

The Role of Tannic Acids in Aluminum Degradation

As organic matter like palm fronds, oak leaves, and grass clippings begin to decompose, they release organic compounds known as tannic acids. Tannins are naturally occurring polyphenols found in most plant life. While harmless in your garden bed, these acids are highly corrosive to the thin aluminum fins that make up your AC condenser coil.

Aluminum is chosen for condenser fins because it transfers heat exceptionally well and is generally resistant to standard water rust. However, it is highly vulnerable to prolonged acidic exposure. When wet, rotting leaves sit against these fins for weeks during the October wet fall and late storm season, the tannic acids slowly etch away the protective surface of the metal. Over time, this causes the fins to become brittle, crumble, and literally turn to powder when touched. During your yard cleanup, you might spot early signs of this corrosion as a white, chalky residue forming on the normally shiny metal surface.

Why High Humidity Accelerates the Damage

The chemical rotting process requires moisture to act as a catalyst. In a dry climate, a leaf might release a small amount of acid before drying out and stopping the reaction. In Homestead's subtropical climate, the constant high humidity ensures the debris stays damp, trapping the acidic moisture directly against the metal 24 hours a day.

• Dry Northern Autumn Leaves — Moisture Level: Low (dries quickly) — Chemical Impact on Aluminum Fins: Minimal acid release; easily blows away — Risk of Corrosion: Low

• Freshly Cut Dry Grass — Moisture Level: Low to Moderate — Chemical Impact on Aluminum Fins: Can block airflow, but minimal chemical reaction — Risk of Corrosion: Moderate

• Wet Homestead Palm/Oak Leaves — Moisture Level: High (retains water) — Chemical Impact on Aluminum Fins: Continuous release of tannic acids onto metal — Risk of Corrosion: High

• Wet Clumped Grass Clippings — Moisture Level: Very High (dense mat) — Chemical Impact on Aluminum Fins: Traps moisture and heat, accelerating rapid oxidation — Risk of Corrosion: Severe

Waiting for the debris to simply "dry out and fall off" is not a viable strategy in this environment. By the time the weather dries out enough to halt the decomposition, the chemical pitting on your aluminum fins has already occurred, permanently reducing the unit's ability to transfer heat.

The Cycle of Condenser Fin Damage from Wet Yard Debris

The Direct Link Between Blocked Condenser Fins and System Shutdowns

Beyond the slow, silent chemical corrosion, wet October yard debris poses an immediate mechanical threat to your air conditioning system. To understand why a layer of leaves can shut down your entire home cooling process, you have to look at how the outdoor condenser is designed to function.

The primary job of the outdoor unit is to exhaust the heat that the indoor evaporator coil absorbed from your living space. The hot refrigerant travels outside, and the condenser fan pulls massive amounts of ambient air through the aluminum fins to cool that refrigerant back down into a liquid. Those fins are spaced millimeters apart to maximize the surface area for heat transfer.

When wet debris plasters over these fins, it acts like a heavy wool blanket. The heat cannot escape. The fan continues to spin, but it is pulling against a blocked surface, creating a vacuum effect that forces the compressor to work exponentially harder to push the refrigerant through the system. This restricted airflow strains the entire mechanical chain, leading to a massive spike in energy consumption and extreme internal temperatures.

Understanding the Thermal Overload Switch

Manufacturers design these systems with built-in safety mechanisms to prevent catastrophic failure when airflow is blocked. One of the most critical components is the thermal overload switch located inside the condenser fan motor. If the motor runs too hot because it is struggling against a wall of wet grass clippings, this switch will automatically break the electrical circuit to save the motor from melting down.

If you notice your system frequently short-cycling, or if the outdoor unit simply stops running during the October wet fall and late storm season, a blocked coil is a prime suspect. On our autumn service calls, we often find that understanding why a fan motor shuts down from thermal overload is crucial; repeatedly resetting the breaker without addressing the suffocating layer of debris will eventually cause the compressor itself to fail, turning a simple airflow issue into a major mechanical replacement.

Establishing a Safe Two-Foot Perimeter Around Your Outdoor Unit

Managing the vegetation around your outdoor equipment is the most effective way to prevent both chemical corrosion and thermal overload. The Department of Energy (DOE) and ASHRAE (American Society of Heating, Refrigerating and Air-Conditioning Engineers) guidelines strictly recommend maintaining a minimum two-foot clearance around all sides of the outdoor unit, with at least five feet of unobstructed clearance above it.

In Homestead, vegetation grows incredibly fast. When our Air On Demand installation and repair crews visit properties for pre-winter heating-startup checks, we frequently notice bushes that were trimmed in July encroaching heavily on units by October. This rapid growth requires more frequent perimeter checks than in other regions.

Safe Landscaping Practices Near HVAC Equipment

Before you begin any yard work near your air conditioner, always locate the outdoor disconnect box and pull the plug or flip the switch to turn off the power. This ensures the fan won't suddenly turn on and pull loose debris—or your tools—into the spinning blades.

• Trim back encroaching shrubs: Keep all bushes, hedges, and low-hanging branches pruned back at least 24 inches from the metal casing.

• Control mower discharge: Always direct the side discharge of your lawnmower away from the AC unit. Grass clippings are heavy, wet, and easily stick to the damp fins if blown directly at the condenser.

• Choose the right base cover: Avoid putting wood mulch directly against the concrete pad of the AC unit. Wood mulch retains moisture and encourages mold and organic rot. Instead, we recommend a border of crushed gravel or river rock, which drains quickly and discourages weed growth.

• Clear the base daily during storms: After heavy winds, do a quick walk-around to remove large palm fronds or branches leaning against the unit.

By maintaining this strict two-foot perimeter, you allow the system to breathe properly, exhaust heat efficiently, and drastically reduce the amount of organic material that can accumulate on the fins.

Why You Should Never Attempt to Clean or Straighten Condenser Fins Yourself

While clearing the two-foot perimeter around your unit is a highly encouraged homeowner task, interacting directly with the condenser fins crosses a critical boundary. The aluminum fins on your outdoor unit are incredibly fragile. They are designed to be as thin as possible to facilitate heat transfer, making them as pliable as heavy-duty aluminum foil.

A common and dangerous mistake homeowners make is attempting to blast wet yard debris off the unit using a high-pressure garden hose or a pressure washer. Because the fins are so easily bent, the force of the water will instantly crush them flat. Furthermore, if you spray directly into the unit, you are often just forcing the wet, rotting organic matter deeper between the coils where it becomes permanently trapped.

The Risks of DIY Hosing and Brushing

Bent fins compound the original problem. Even if you manage to wash away the leaves, crushing the fins closed restricts the airflow just as severely as the debris did. Using household items like stiff bristle brushes, brooms, or putty knives to scrape off dried grass is equally destructive. These abrasive tools will scratch the protective coating on the aluminum, inviting faster corrosion, and will inevitably bend the delicate metal structure.

Professional technicians use specialized fin combs specifically sized to the exact gauge and spacing of your unit's coil to carefully straighten bent sections. When the Air On Demand team performs internal cleaning, we use calibrated, safe chemical foaming cleaners that push debris out from the inside without requiring high-pressure water. If your unit is plastered with wet vegetation, scheduling a professional AC coil cleaning is the only safe way to restore airflow without risking permanent damage to the heat exchanger.

Inspecting Your System During Homestead's Late Hurricane Season

Living in South Florida means remaining vigilant through the very end of hurricane season. The wind-blown debris common during late-season tropical systems in October can drastically alter the condition of your outdoor unit overnight. Establishing a routine post-storm visual inspection helps you catch minor accumulations before they escalate into severe chemical corrosion or mechanical failure.

Here are the seasonal steps you should take to safely inspect your system after a heavy rain or wind event during the October wet fall and late storm season:

1. Perform a visual walk-around: Check all four sides of the condenser unit. Look for heavy accumulations of wet leaves, plastered grass, or small branches that may have wedged themselves into the top grill.

2. Inspect the concrete pad: Ensure the heavy rains haven't washed away the soil beneath the equipment pad, causing the unit to tilt. A severely unlevel unit stresses the compressor and disrupts oil flow.

3. Listen for unusual noises: Stand near the unit while it is running. If you hear a loud buzzing, a harsh grinding sound, or if the fan seems to be struggling to spin up to speed, this often indicates that internal debris is obstructing the motor or the fan blades.

4. Check the airflow temperature: Place your hand safely above the top exhaust fan (do not reach inside). The air blowing out should feel significantly warmer than the ambient outdoor temperature. If the air feels cool, or if the airflow is very weak, the system is struggling to reject heat.

If your visual inspection reveals a thick mat of debris stuck to the fins, or if you hear grinding noises from the fan motor, shut the system off at the thermostat immediately. Running a choked system will only cause further damage. At this stage, a visual inspection warrants calling a licensed professional like our team for an AC repair service in Homestead to safely dismantle the outer casing and extract the debris.

Frequently Asked Questions About Yard Debris and AC Condensers

What happens if debris gets in the AC condenser?

When debris gets inside the AC condenser, it restricts the vital airflow needed to cool the refrigerant. This forces the compressor to work harder, driving up energy consumption and reducing cooling capacity inside the home. Over time, trapped organic debris will rot, releasing acids that corrode the internal aluminum components, and can eventually cause the fan motor to overheat and shut down.

Can wet leaves damage my outside AC unit?

Yes, wet leaves are highly damaging to your outside AC unit. As they decompose against the metal, they release tannic acids that chemically pit and corrode the delicate aluminum fins. In a humid environment like Homestead, these leaves rarely dry out, meaning the acidic moisture sits continuously against the metal, accelerating the degradation process.

How much clearance does an outdoor AC unit need?

An outdoor AC unit requires a minimum of two feet of clearance on all sides to operate efficiently. This 24-inch perimeter ensures the fan can pull in enough ambient air to reject heat. Additionally, you should maintain at least five feet of unobstructed vertical clearance above the unit to allow the hot exhaust air to vent properly without bouncing back down.

How do you clean AC condenser fins safely?

The safest way to clean AC condenser fins is to gently remove large, loose debris from the exterior by hand while wearing heavy gloves, with the power turned off. You should never use a high-pressure hose, a stiff brush, or any sharp tools, as the aluminum fins are extremely fragile and bend easily. For stuck-on dirt or deep internal cleaning, you must hire a professional who uses specialized foaming coil cleaners and calibrated fin combs.

Why does my AC fan motor shut down after heavy rain and yard debris accumulation?

Your AC fan motor shuts down because the heavy accumulation of debris blocks the airflow, trapping intense heat inside the unit. To prevent the motor from catching fire or melting, a built-in safety device called a thermal overload switch trips and cuts the power. The motor will not run consistently again until the debris is removed and proper airflow is restored.

Is it safe to spray my AC unit with a garden hose to remove grass clippings?

No, it is not safe to spray your AC unit with a standard garden hose to remove wet grass clippings. The water pressure can easily crush the fragile aluminum fins flat, which permanently blocks airflow. Furthermore, spraying from the outside often just forces the wet, acidic grass clippings deeper into the center of the coil where they are impossible to remove without dismantling the unit.

Protect Your System Before the Next October Storm Hits

Addressing wet, rotting debris before it causes permanent corrosion or triggers a thermal overload shutdown is vital for the longevity of your cooling system. While you should always be proactive about maintaining a safe, two-foot cleared perimeter around your outdoor equipment, the delicate work of restoring airflow through clogged aluminum fins must be handled with specialized care.

Don't let the remnants of the October wet fall and late storm season quietly eat away at your system's efficiency. Keeping your system in top shape before winter can also ensure it operates efficiently, which is especially important if you are looking into generic utility incentive programs or federal tax credits that may apply to qualifying heat pump installations—always verify current programs with your utility or a tax professional. Let the experts at Air On Demand evaluate your equipment, safely remove corrosive buildup, and ensure your fan motor is operating without strain. Protect your investment by scheduling professional AC maintenance in Homestead to keep your home comfortable and your equipment safe from the elements.

The Hidden Costs of Ignoring a Slightly Wobbly AC Condenser Fan Blade placeholder-image  | Air On Demand
5 min read

The Hidden Costs of Ignoring a Slightly Wobbly AC Condenser Fan Blade

That slight rattling noise from your outdoor AC unit might seem harmless if the air is still cold. However, a tiny fan imbalance can act like a jackhammer, eventually destroying your compressor.

Why a Rattling AC Unit Is Never 'Just a Noise'

As we transition into fall maintenance season, The Hidden Costs of Ignoring a Slightly Wobbly AC Condenser Fan Blade often become glaringly obvious to homeowners whose outdoor units have run constantly through a brutal Miami summer. Because the system is still blowing cold air inside your home, it is incredibly tempting to ignore that slight rattling noise. Most homeowners assume that as long as the house feels comfortable, the equipment is perfectly healthy. However, this oversight can completely destroy your cooling system from the inside out. If you need AC repair to investigate a strange noise, Air On Demand is here to help.

A tiny fan imbalance left unchecked does not stay a tiny problem for long. In our years providing HVAC services across Miami, the Air On Demand team has seen firsthand how this imbalance acts like a jackhammer on delicate internal components. What starts as a millimeter of wobble rapidly escalates into violent shaking, sending destructive shockwaves through the entire outdoor cabinet. This mechanical breakdown happens in distinct stages, eventually turning a simple tune-up issue into a catastrophic equipment failure. Understanding exactly how these micro-vibrations tear your system apart is the first step in protecting your investment.

The Physics of an Unbalanced Condenser Fan

To understand why a minor wobble is so dangerous, you have to look at the sheer speed and force involved in your outdoor cooling equipment. Residential AC condenser fans typically spin between 800 and 1,200 revolutions per minute (RPMs). At these operational speeds, even a millimeter of imbalance translates to thousands of micro-impacts per minute against the unit's metal chassis. Miami's high-usage climate means AC units run significantly more hours annually than the national average, multiplying those micro-impacts exponentially over a single season.

Common causes of these minor imbalances include debris impacts from severe storms, small sticks falling through the top grate, or gradual loosening of the set screw over time. Sometimes, a blade simply warps slightly from years of thermal expansion and contraction. When homeowners notice this, they sometimes attempt a DIY fix by trying to "bend" the blade back into place. This is highly ineffective and dangerous for the equipment. Fan blades are precision-balanced at the factory; bending them by hand almost always makes the imbalance worse, accelerating the damage. If you suspect an issue, scheduling professional AC repair in Miami is the only safe way to resolve it.

The RPM Multiplier Effect

The math behind the damage: When a fan spins at 1,200 RPMs, it completes 20 full revolutions every single second. Over a typical 10-hour cooling cycle on a hot afternoon, that fan spins 720,000 times. If the blade is out of balance, that equals 720,000 tiny hammer strikes against the motor shaft and the surrounding metal cabinet in just one day.

You can compare the force of an unbalanced fan to a washing machine that becomes off-balance during a spin cycle. You know how violently a washing machine shakes and bangs when all the wet clothes shift to one side. Now, apply that same destructive physical force to your outdoor AC unit, but happening continuously, day after day, without stopping.

• 1 Minute — Total Revolutions (at 1,200 RPM): 1,200 — Impact on Unbalanced Equipment: Minor audible rattling; early stress on bearings.

• 1 Hour — Total Revolutions (at 1,200 RPM): 72,000 — Impact on Unbalanced Equipment: Vibration transfers to the chassis and motor mounts.

• 10-Hour Cycle — Total Revolutions (at 1,200 RPM): 720,000 — Impact on Unbalanced Equipment: Screws loosen; metal brackets begin to flex unnaturally.

• 30 Days (Summer) — Total Revolutions (at 1,200 RPM): 21,600,000+ — Impact on Unbalanced Equipment: Severe metal fatigue sets in; structural failure begins.

Stage One: Shattered Motor Mounts After Summer

The first major component to fail in the domino effect of a wobbly fan is the mounting assembly. The condenser fan motor does not float in mid-air; it is bolted to the unit using metal motor mounts or brackets. These brackets are designed to hold the fan assembly perfectly stable while it spins. However, they are not designed to absorb endless, violent lateral shaking.

Continuous vibration specifically attacks these mounts, causing severe metal fatigue. By the time October post-summer wear sets in, these components have endured months of peak summer operation. Our technicians frequently find that the constant flexing back and forth weakens the structural integrity of the steel or aluminum brackets. Eventually, the metal simply gives up and cracks under the strain.

Once a motor mount breaks, a minor wobble instantly escalates into violent shaking. The fan assembly drops slightly, causing the spinning blades to strike the metal shroud or the condenser coil itself. This creates a terrifying grinding noise and often leads to the motor burning out completely as it struggles to turn against the obstruction. If you are currently diagnosing a seized condenser fan motor, shattered mounts from a long-ignored imbalance are often the root cause.

The Threat of Metal Fatigue

How constant stress breaks solid metal: Metal fatigue is the progressive and localized structural damage that occurs when a material is subjected to cyclic loading. In simpler terms, if you bend a paperclip back and forth enough times, it snaps. The exact same principle applies to the heavy-duty brackets holding your fan motor.

• Micro-cracks form: The initial vibrations create microscopic fissures in the mounting brackets that are invisible to the naked eye.

• Cracks propagate: As the fan continues to spin off-balance, these tiny fissures grow wider and deeper into the metal.

• Sudden fracture: Without warning, the weakened bracket snaps completely, dropping the spinning motor assembly.

• Motor seizure: The violent drop often jams the fan blades against the housing, causing the motor to overheat and seize instantly.

Stage Two: The Threat to Your Copper Refrigerant Lines

If the motor mounts manage to hold together, the destructive energy has to go somewhere else. This brings us to the most critical danger of an unbalanced fan: high-frequency micro-vibrations transferring to copper refrigerant lines. The shaking chassis transfers kinetic energy directly to the delicate copper tubing that connects the outdoor coil to the compressor. This tubing is the lifeline of your entire cooling system.

Copper is naturally a soft, malleable metal, which is why it is used in plumbing and HVAC systems. However, it is highly susceptible to a phenomenon known as work-hardening. Continuous vibration makes the metal brittle over time. As the fan shakes the cabinet, the copper lines vibrate rapidly. This constant motion changes the crystalline structure of the copper, stripping away its flexibility and turning it rigid and fragile.

Once the copper becomes brittle, it is only a matter of time before it fractures and severs completely. When a high-pressure refrigerant line snaps, the results are immediate and disastrous. The system violently expels its entire chemical refrigerant charge into the atmosphere in a matter of seconds. Not only is this a massive environmental hazard, but it also strips the system of its ability to cool your home, leaving you stranded in the heat.

Understanding Work-Hardened Copper

Why copper cannot absorb endless vibration: You might wonder why a metal pipe cannot just shake a little bit without breaking. The answer lies in metallurgy. Work-hardening (also known as strain hardening) occurs when a metal is deformed repeatedly at normal temperatures. The repeated vibrations from the wobbly fan force the copper molecules to pack closer together, making the material harder but significantly less ductile.

• Healthy / Factory New — Physical Characteristics: Soft, malleable, easily bent without snapping. — Vibration Tolerance: Can absorb normal, low-level operational hum.

• Early Work-Hardening — Physical Characteristics: Stiffening, losing flexibility, surface stress marks. — Vibration Tolerance: Struggles to flex; transfers vibration to joints.

• Fully Brittle (Fatigued) — Physical Characteristics: Rigid, fragile, crystalline structure altered. — Vibration Tolerance: Zero tolerance; snaps under continued shaking.

The Domino Effect of a Wobbly AC Fan

Stage Three: The Path to Catastrophic Compressor Failure

The ultimate hidden cost of ignoring a wobbly fan is the destruction of the compressor itself. The compressor is the heart of your AC system; it is a heavy-duty pump responsible for circulating refrigerant through the lines. When a work-hardened copper line severs due to violent shaking, it directly impacts this vital component.

A sudden loss of refrigerant under high pressure causes the compressor to react violently. Refrigerant does more than just cool your home; it also cools the electrical windings inside the compressor motor. When the line snaps and the refrigerant blows out, the compressor continues to run, but it is now pumping empty air. Without the cooling effect of the chemical refrigerant, the internal motor overheats almost instantly, causing the electrical windings to melt and short out. This is known as a compressor burnout.

Contrast the relatively simple fix of balancing a fan blade with the massive undertaking of replacing a burned-out compressor. Fixing a wobble requires a technician to recalibrate the blade, tighten the assembly, or replace a small part. Recovering from a compressor burnout requires removing the entire heart of the system, flushing acid out of the lines, and installing a major new component. Compressor damage from physical vibration is entirely preventable, provided you do not ignore the warning signs.

When Replacement Becomes the Only Option

Why severe damage forces your hand: Severe compressor damage often necessitates full system discussions. When a compressor burns out due to severed lines, the repair is so extensive that replacing the entire outdoor unit often makes more practical sense. If you find yourself in this unfortunate position, professional AC replacement services become the only viable path forward.

• Acid contamination: A burned-out compressor releases highly corrosive acid into the remaining copper lines, which must be painstakingly flushed out.

• System mismatch: Replacing just the outdoor unit on an older system can lead to efficiency mismatches with your indoor air handler.

• The core message: Ignoring a small rattling noise directly leads to the largest possible repair in the HVAC industry.

Professional Diagnostics: Stopping the Domino Effect Early

Because the journey from a minor wobble to a shattered compressor happens gradually, you have a window of opportunity to stop the domino effect early. This requires professional intervention and thorough inspections. A highly trained technician knows exactly what to look for when diagnosing a rattling outdoor unit, moving far beyond just listening to the noise.

When investigating a vibration, a professional checks the calibration and balance of the fan blade itself. They inspect the motor shaft for excessive play, verify the torque on all mounting bolts, and critically, they examine the copper refrigerant lines for early signs of stress and work-hardening. This is where Air On Demand's thorough diagnostic approach makes a massive difference. By catching subtle issues like wobbly fan blades early, this comprehensive approach saves homeowners from preventable compressor replacements.

Comprehensive fall maintenance catches these micro-vibrations before they cascade into catastrophic failures. After a long Miami summer, having our professional team evaluate the structural integrity of your outdoor unit ensures that minor wear and tear is corrected immediately before we head into the cooler months. This proactive strategy is vastly superior to the generic "wait until it breaks" advice that leaves you vulnerable to sudden, massive equipment failure. Scheduling routine AC maintenance is your best defense against vibration damage.

Frequently Asked Questions About AC Condenser Vibrations

What happens if an AC fan blade is unbalanced?

An unbalanced AC fan blade causes the entire outdoor unit to vibrate rapidly, placing immense mechanical stress on internal components. Over time, this shaking causes motor mounts to suffer from metal fatigue and break. If left unresolved, the continuous micro-vibrations will eventually transfer to the copper refrigerant lines, making them brittle and prone to snapping.

Why is my AC condenser vibrating so much?

Excessive vibration usually stems from a fan blade that is bent, damaged by debris, or coated in heavy dirt buildup that throws off its center of gravity. It can also be caused by loose mounting bolts or worn-out bearings inside the fan motor itself. A professional diagnostic is required to pinpoint the exact source of the imbalance before it damages the compressor.

Can a wobbly fan damage the AC compressor?

Yes, a wobbly fan is a direct threat to the AC compressor. The vibrations from the unbalanced fan travel through the unit's chassis and shake the copper lines connected to the compressor. This shaking hardens the copper until it fractures, causing a sudden loss of refrigerant that leads to immediate compressor burnout.

Can I run my AC if the fan is wobbling?

You should immediately turn off your AC if you notice the outdoor fan wobbling or vibrating excessively. Continuing to run the system forces the equipment to endure thousands of damaging micro-impacts per minute. Shutting it down prevents shattered motor mounts and severed refrigerant lines while you wait for a technician.

Is a rattling noise from the outside AC unit dangerous?

A rattling noise is a clear warning sign of mechanical failure and should be treated as a serious threat to your equipment. While it might start as a loose screw or a minor blade imbalance, it quickly escalates into violent shaking that destroys vital components. Ignoring the noise guarantees a much larger and more complex repair down the road.

How do professionals fix an unbalanced AC fan blade?

Professionals fix an unbalanced blade by first inspecting the assembly for physical damage, warping, or loose set screws. If the blade is bent or severely out of balance, the technician will typically replace the blade entirely, as bending it back manually is dangerous and ineffective. They will also re-torque the motor mounts and inspect the copper lines for existing stress damage.

Protect Your Compressor from Preventable Damage

The journey from a minor fan wobble to a shattered compressor is a mechanical domino effect that no homeowner wants to experience. What begins as a slight imbalance during a heavy cooling season quickly escalates into metal fatigue, broken motor mounts, and work-hardened copper lines. Ultimately, the high-frequency vibrations sever the tubing, causing a sudden loss of refrigerant and a catastrophic compressor burnout.

If your AC is still cooling but the outdoor unit is rattling or vibrating, it is the perfect time to act. Do not wait for the system to fail completely. A clear, mechanical explanation of this domino effect shows exactly why early intervention is critical. Schedule a professional diagnostic check today to resolve any fan imbalances safely, ensuring your system runs smoothly and your compressor remains protected from entirely preventable damage.

Daikin Mini Split vs. Ducted Heat Pump for Heating a Miami Sunroom placeholder-image  | Air On Demand
5 min read

Daikin Mini Split vs. Ducted Heat Pump for Heating a Miami Sunroom

Tying a sunroom into your home's central air seems logical, but it often compromises your entire HVAC system. Discover why a dedicated wall cassette is functionally superior.

The Myth of the Easy Extension: Heating Your Florida Room

Tying a sunroom into your home's existing central air seems like the most logical, straightforward way to get comfortable. But the truth is, extending ductwork into an uninsulated space is one of the fastest ways to compromise your entire home's heating and cooling system. When weighing a Daikin Mini Split vs. Ducted Heat Pump for Heating a Miami Sunroom, you are fundamentally evaluating the aesthetic and functional viability of conditioning a poorly insulated space without ruining the efficiency of your main house.

As the intense summer heat begins to break and we start looking toward cooler October fall evenings, many homeowners realize their Florida room is entirely unequipped for temperature drops. The space becomes too chilly at night and remains too sticky during the day. This creates a critical decision point: do you attempt to force your existing central system to cover this extra square footage, or do you install a dedicated solution?

To make the right choice for your home, it helps to understand the underlying mechanics of Ductless Mini Split Systems and why treating a sunroom like a standard bedroom almost always leads to systemic HVAC failure.

The Unique Architectural Challenge of Miami Sunrooms

Florida rooms require highly specialized mechanical solutions because they were rarely designed with modern climate control in mind. While the rest of your home operates within a sealed, insulated envelope, your sunroom plays by an entirely different set of physical rules.

Here is why your sunroom creates a unique microclimate inside your home:

1. Post-construction additions: Most Florida rooms were enclosed long after the original construction of the primary residence. They often began as screened-in porches or covered patios before being upgraded with glass windows or acrylic panels.

2. A severe lack of R-value insulation: Standard interior walls and ceilings feature thick insulation to trap conditioned air. Sunrooms, by contrast, are essentially glass boxes. They suffer from rapid heat gain during sunny afternoons and rapid heat loss during cooler October fall evenings.

3. Exclusion from original ductwork design: Because these spaces were originally built as outdoor or transitional areas, they were never factored into the home's original central HVAC ductwork blueprint. The main system was simply not sized to push air into that zone.

4. Intense regional climate factors: Miami's intense heat and high humidity make poorly insulated sunrooms notoriously difficult to manage. The space acts like a greenhouse, trapping moisture and heat that standard central air systems struggle to dehumidify without freezing out the rest of the house.

This architectural reality sets the stage for severe mechanical failures if you attempt to apply standard central air conditioning and heating principles to a space that defies them.

Why Extending a Ducted Heat Pump Often Fails Mechanically

When you hire a contractor to simply punch a hole in your existing duct trunk and run a flex duct out to your sunroom, you are altering the fundamental physics of your home's airflow. Our deep local expertise in Miami's unique residential architecture has shown us time and again that these well-intentioned extensions almost always result in costly central air mistakes.

While a traditional AC and ductwork installation is perfect for the main body of a house, forcing it to service a high-heat-loss sunroom creates a cascade of mechanical problems.

The Static Pressure Problem

Your central ductwork operates much like your home's plumbing system; it relies on carefully balanced static pressure to deliver air evenly to every room. The blower motor is calibrated to push a specific volume of air against a specific amount of resistance.

When you tap into the existing supply trunk to feed a sunroom, you suddenly reduce the air pressure available to the rest of the house. It is exactly like turning on every faucet in your home at once—the water pressure drops everywhere. By forcing air into a new, uninsulated space, you inadvertently starve your master bedroom, living room, and kitchen of the airflow they need to stay comfortable.

Load Calculation Disruptions

HVAC systems are sized based on an ACCA Manual J load calculation, which factors in square footage, window placement, and insulation quality. Adding an uninsulated room throws off the entire home's math.

Because Florida rooms require a disproportionate amount of energy compared to their actual square footage, your central thermostat will read the temperature in the main hallway and shut the system off long before the sunroom reaches a comfortable temperature. Alternatively, if you place the thermostat in the sunroom, your primary system will run endlessly, overworking the compressor, reducing overall HVAC efficiency, and drastically shortening the equipment's lifespan. This is why transitioning to an independent Daikin wall cassette is often the only mechanically sound choice.

The Hidden Costs of Extending Ductwork vs. Installing a Mini Split

The Daikin Solution: Independent Comfort and Inverter Technology

The most effective way to solve the load calculation problem is to decouple the sunroom from the main house entirely. By utilizing independent temperature control, you allow the primary central system to do exactly what it was originally designed to do, while a dedicated unit handles the heavy lifting in the Florida room.

This is where ductless air conditioners excel. A standalone Daikin system provides superior humidity control in Miami, treating the specific moisture load of the sunroom without overcooling the rest of the house. Because there are no uninsulated duct runs losing conditioned air into attics or crawlspaces, 100% of the energy consumed goes directly into cooling or heating your living space.

Understanding Inverter Technology

The secret to a Daikin wall cassette's efficiency lies in its inverter technology. Traditional single-stage central heat pumps operate on a basic "on or off" principle. When they turn on, they blast air at 100% capacity until the thermostat is satisfied, then shut down completely.

How an inverter compressor changes the game:

• Variable speed operation: Instead of turning on and off, an inverter compressor modulates its speed seamlessly. It operates much like the accelerator pedal in a car, gently adjusting power to maintain a constant speed rather than slamming on the gas and then the brakes.

• Precise temperature maintenance: This technology allows the unit to match the exact thermal load of a sunroom at any given moment, preventing the rapid temperature swings common in high-glass rooms.

• Seamless seasonal transitions: As October weather fluctuates between hot afternoons and chilly nights, an inverter system smoothly transitions between cooling and heating without missing a beat.

Overcoming Aesthetic Hesitations with Modern Wall Cassettes

Even when homeowners understand the mechanical superiority of a ductless system, there is often one major hurdle left: the visual impact. It is completely natural to worry that a wall unit will disrupt your sunroom's carefully curated decor and sightlines.

Historically, ductless units were bulky, utilitarian boxes that dominated the room. However, modern engineering has transformed these systems. Today's Daikin wall cassette features a sleek, low-profile design that blends quietly into the background. When you weigh the slight visual change against the massive architectural and comfort benefits—no more sweating in the summer, no more freezing in the winter, and no more astronomical energy bills—the trade-off becomes highly favorable.

Strategic Placement Options

Functionality does not have to ruin aesthetics. Working with the existing architectural features of your Florida room allows for discreet installation.

Common strategic placements include:

• High on the wall: Mounting the unit just below the ceiling line keeps it out of direct eye-level sightlines while maximizing the natural downward flow of conditioned air.

• Above entryways: Placing the cassette over the door leading back into the main house often hides it from view when you are sitting and enjoying the room.

• Corner installations: Utilizing dead corner space can make the unit feel like a natural structural element rather than an add-on.

Proper clearance requirements for optimal airflow must always be maintained, but a skilled technician can almost always find a location that balances mechanical efficiency with interior design.

Comparing Long-Term Value and Warranty Protection

When evaluating how to condition your sunroom, the initial installation price is only a fraction of the total cost of ownership. Extending existing ducts often seems cheaper upfront, but the operational costs, energy waste, and potential repairs to your overtaxed central system make it a notoriously poor long-term investment.

Furthermore, general energy rebates or federal tax credits may apply to qualifying high-efficiency heat pump installations, helping to offset the initial investment (always verify current programs and eligibility with a qualified tax professional). Beyond energy savings, you also gain the peace of mind that comes with robust manufacturer protections.

• Impact on Main HVAC — Extending Central Ducted Heat Pump: High risk of static pressure drops and premature compressor failure. — Dedicated Daikin Wall Cassette: Zero impact. Operates completely independently.

• Energy Efficiency — Extending Central Ducted Heat Pump: Poor. Loses energy through ductwork; struggles with sunroom load. — Dedicated Daikin Wall Cassette: Excellent. Inverter technology eliminates duct loss and minimizes power draw.

• Temperature Control — Extending Central Ducted Heat Pump: Tied to the main house thermostat; often results in hot/cold spots. — Dedicated Daikin Wall Cassette: Precise, room-specific zoning for exact comfort control.

• Warranty Value — Extending Central Ducted Heat Pump: May void existing central system warranties if improperly modified. — Dedicated Daikin Wall Cassette: Backed by comprehensive coverage, like the Daikin Unit Replacement Guarantee vs. Standard Compressor Warranties.

Frequently Asked Questions About Sunroom Heating and Cooling

Why shouldn't I extend my ductwork to my sunroom?

Extending ductwork to a sunroom disrupts the static air pressure of your entire central HVAC system. Because the blower motor was only sized for the original footprint of the house, forcing air into a new, uninsulated space starves your other rooms of airflow. Additionally, the lack of insulation in the sunroom will cause your main system to run continuously, driving up energy bills and wearing out the equipment prematurely.

How do Daikin mini splits perform in Florida rooms?

Daikin mini splits perform exceptionally well in Florida rooms because they operate independently from the main house. Their inverter technology allows the compressor to modulate its speed, matching the exact heating or cooling load required by the sunroom's unique microclimate. This provides precise humidity control and consistent temperatures without wasting energy.

Can you extend ductwork to a sunroom?

While it is physically possible to cut into your existing duct trunk and run a line to a sunroom, it is highly discouraged by HVAC professionals. Doing so throws off the Manual J load calculation of your home. The resulting imbalance usually leads to poor airflow, hot and cold spots throughout the main house, and a significantly shortened lifespan for your central AC unit.

What is the best way to heat and cool a Florida room?

The best way to heat and cool a Florida room is by installing a dedicated, ductless mini-split system. This approach decouples the poorly insulated sunroom from your main home's tightly sealed thermal envelope. A dedicated system provides targeted comfort, handles the high moisture load efficiently, and protects your primary central air system from being overworked.

Does a mini split add value to a Florida room?

Yes, adding a mini split transforms a seasonal sunroom into a fully functional, year-round living space, which adds significant usable square footage to your home. By providing reliable temperature control during both sweltering summer afternoons and cooler October fall evenings, the space becomes far more appealing and functional for daily use.

Will a Daikin wall cassette disrupt my sunroom's aesthetics?

Modern Daikin wall cassettes are designed with sleek, low-profile aesthetics specifically to minimize visual disruption. By working with a professional installer, the unit can be strategically placed high on a wall, above an entryway, or tucked into a corner. The slight visual addition is vastly outweighed by the ability to actually enjoy the room in total comfort.

Make Your Sunroom Comfortable Before the Chill Sets In

Trying to force a central ducted heat pump to manage the extreme thermal loads of a sunroom is a battle you will ultimately lose on your energy bills. A dedicated Daikin system efficiently handles the unique architectural challenges of a Florida room without ruining your interior aesthetics or compromising your main home's efficiency.

As we transition into cooler October fall evenings, now is the ideal time to finalize your home's heating preparations before winter weather arrives. You don't have to abandon your sunroom just because the temperature drops. If you are ready to evaluate your space and explore how a dedicated system can transform your comfort, consulting with a local expert for a Miami mini split installation is the safest, most reliable way to protect your home and enjoy your sunroom year-round.

How Long Does a Daikin Warranty Claim Actually Take to Process in South Florida? placeholder-image  | Air On Demand
5 min read

How Long Does a Daikin Warranty Claim Actually Take to Process in South Florida?

Waiting on replacement parts is frustrating when your system breaks down. Here is the realistic timeline for Daikin warranty approvals and shipping so you know exactly what to expect.

Waiting on AC Repairs? Understanding the Daikin Warranty Timeline in South Florida

Are you sitting in a warm house wondering exactly how long does a Daikin warranty claim actually take to process in South Florida? When your air conditioning system goes down unexpectedly, the last thing you want to deal with is a convoluted administrative process. Waiting for replacement parts is always frustrating, especially when you rely heavily on your cooling system to maintain a comfortable indoor environment.

Many homeowners assume that an active warranty means an immediate, same-day fix. The reality is that warranty claims involve multiple logistical steps behind the scenes: professional diagnosis, distributor approval, and parts shipping. Setting realistic expectations for this timeline is the first step toward getting your home back to normal. Drawing on our years of experience serving local homeowners, our team at Air On Demand specializes in Daikin equipment and provides dedicated Miami AC repair services to help you cut through the red tape.

The 4-Step Daikin Warranty Claim Process (Chronological Timeline)

To understand why a warranty repair takes the time it does, you have to look at the exact chronological sequence required by the manufacturer. Skipping any of these steps can result in a denied claim, which is why our licensed technicians strictly follow this exact protocol for all Daikin HVAC and Heat Pump systems.

Step 1: Professional Diagnosis

The process begins the moment a licensed HVAC technician arrives at your home. In our daily operations across Miami, we always emphasize that a warranty claim cannot be initiated based on a homeowner's guess or a symptom described over the phone. The technician must systematically troubleshoot the equipment to officially identify the failed component. This involves testing electrical voltages, checking refrigerant pressures, and pulling specific error codes from the system's control board. Once the exact point of failure is isolated, the technician records the model number, serial number, and the specific part numbers required for the repair.

Step 2: Claim Submission & Distributor Approval

With the diagnostic data in hand, our office team takes over. We compile the technician's findings and submit the official documentation to the regional Daikin distributor. The distributor acts as the gatekeeper for the manufacturer, verifying that the unit is properly registered, that the warranty is still active, and that the requested part aligns with the diagnosed failure. This validation phase is critical and must be completed before any parts are released.

Step 3: Parts Sourcing & Shipping

Once the distributor approves the claim, the physical logistics begin. If the required OEM (Original Equipment Manufacturer) part is currently stocked at a local South Florida warehouse, our team can often secure it quickly. However, if the component is specialized or out of stock locally, it must be ordered and shipped from a larger national distribution center. The transit time during this step is highly variable depending on supply chain conditions and the specific part needed.

Step 4: Installation Scheduling

The final step occurs only after the approved replacement part physically arrives at our local facility. Our dispatch team will contact you to schedule the return visit. The technician then arrives with the authorized component, performs the installation, tests the system to ensure it is operating correctly, and finalizes the paperwork to close out the warranty claim.

The 4-Step Daikin Warranty Claim Timeline

Why Distributor Approvals Are the Biggest Bottleneck

When homeowners experience delays in their repair timeline, they often assume the hold-up is due to shipping. In our experience processing hundreds of Daikin claims, however, the administrative approval phase is often the actual bottleneck. Warranties are not automatically approved the moment a technician diagnoses a problem. The regional distributor must manually verify a significant amount of data before authorizing the release of a part.

The Hidden Paperwork Trail

Manufacturers require strict documentation to prevent warranty fraud and ensure quality control. When a claim is submitted, the distributor checks the original installation date, confirms the homeowner's registration records, and cross-references the technician's diagnostic notes against known failure patterns for that specific model. If any piece of information is missing, mismatched, or unclear, the claim is flagged and sent back for clarification. This back-and-forth communication can easily add days to the timeline if the submitting contractor is slow to respond or fails to provide comprehensive data upfront.

The Advantage of Dedicated Local Relationships

This is where your choice of HVAC contractor heavily influences your wait time in Miami and South Florida. We've seen firsthand how generic contractors who install multiple brands often lack direct, established communication channels with specific regional hubs. Their claims go into a general queue, and if an issue arises, they have to navigate standard customer service channels to resolve it.

Working with a dedicated local provider changes this dynamic entirely. Air On Demand's established relationship with local Miami Daikin distributors minimizes the approval phase and cuts down on bureaucratic downtime. Because our team submits these specific claims daily, we know exactly what technical data the distributor requires the first time. Furthermore, having direct contacts at the regional hub allows us to expedite reviews and push urgent authorizations through the system faster than a contractor who only occasionally works with the brand.

How Fall Inventory Transitions Impact Parts Shipping Times

Even with swift distributor approval, the physical movement of parts is subject to national supply chain dynamics. One of the most overlooked factors affecting repair timelines is the seasonal shift in national HVAC inventory.

Regional Hubs vs. National Warehouses

The Problem: As the northern hemisphere cools down for fall, national HVAC supply chains shift their focus heavily toward heating equipment. Freight space, warehouse shelving, and manufacturing priorities pivot to furnaces, boilers, and heavy-duty heating components.

The Cause: This transition means that regional distribution hubs naturally carry a lower stock of specific cooling components during this time of year. While standard items like capacitors or universal motors remain plentiful, proprietary cooling parts—such as specific inverter boards or specialized compressor models—might not be sitting on a shelf in a local facility.

The Reality for South Florida: At Air On Demand, we face a unique challenge during October and mid-fall. While the rest of the country is cooling down and winterizing, we know that Miami's average high remains around 86 degrees. The persistent heat and high humidity make waiting for AC parts a major comfort issue. If a part has to be sourced from a national warehouse rather than a local one, you are looking at a difference between a 1-to-2-day local turnaround and a multi-day freight shipment. Understanding this seasonal inventory shift helps explain why a specific proprietary component might take a week to arrive, even when the administrative approval was completed on day one.

Standard vs. Extended Coverage: Does the Claim Type Change the Wait?

Not all warranties are structured exactly the same, and the type of coverage you hold can subtly influence the administrative side of your timeline. Daikin HVAC and Heat Pump systems typically feature a standard limited parts warranty, which covers the cost of failed internal components for 10 to 12 years, provided the system was registered properly after installation.

The Logistics of Claim Types

If you hold a standard limited warranty, the process follows the straightforward path of part identification, authorization, and shipping. However, if you purchased an extended labor warranty or a comprehensive unit replacement guarantee, our office team must secure additional layers of authorization. Because these extended agreements cover significantly more liability—such as covering the technician's hourly rate or authorizing an entirely new condenser rather than just a single part—the distributor and the manufacturer's corporate office may require supplementary diagnostic proof before signing off.

• Standard Limited Parts — What is Covered?: Cost of the failed OEM component only. — Approval Complexity: Standard verification of registration and failure data. — Shipping Impact: None. Parts ship as soon as authorized.

• Extended Labor Contract — What is Covered?: Cost of the part plus the technician's labor hours. — Approval Complexity: Moderate. Requires verification of the third-party or factory labor agreement. — Shipping Impact: None. Physical logistics remain identical.

• Unit Replacement Guarantee — What is Covered?: A completely new unit if a major component (like a compressor) fails. — Approval Complexity: High. Requires extensive documentation and corporate sign-off. — Shipping Impact: May require freight shipping for a full unit instead of a small boxed part.

It is important to note that while the administrative approval might vary slightly based on your coverage, the physical shipping of OEM parts takes the exact same amount of time. Whether a fan motor is covered under a standard plan or an extended agreement, it still has to travel on the same truck. For a deeper dive into how these specific coverages compare, you can review our breakdown of the differences between a Daikin unit replacement guarantee vs. standard warranties.

Finalizing the Claim: Scheduling the Installation

Receiving the tracking notification that your part has arrived in Miami and South Florida is a relief, but as we often tell our customers, it is only half the battle. The final step is getting that part successfully installed into your system.

What to Expect on Installation Day

Once our local facility receives the authorized component, the repair must be scheduled based on technician availability. The complexity of the failed part dictates how much time must be blocked off on the schedule. A simple electrical component, like a contactor or a control board, might only require a brief appointment. Conversely, replacing a major component like a compressor or an evaporator coil is a highly involved process. These major repairs require recovering the existing refrigerant, unbrazing copper lines, installing the new part, pulling a deep vacuum on the system, and meticulously recharging the refrigerant levels. A repair of this magnitude requires a dedicated block of several hours.

Protecting your investment: After the new part is installed and your home is cooling again, it is your responsibility to keep the system protected to maintain the remainder of your warranty coverage. Manufacturers require proof of ongoing upkeep if future claims arise. We highly recommend scheduling routine AC maintenance to ensure your newly repaired system operates efficiently and keeps your warranty status in good standing for the years ahead.

Frequently Asked Questions About Daikin Warranty Processes

How long does it take to get Daikin replacement parts?

In our experience at Air On Demand, if the required component is in local stock at a South Florida distributor, it typically takes 1 to 3 days to secure the part. However, if the item is out of stock regionally or requires a factory order, it can take 5 to 10 business days depending on national shipping logistics. The timeline heavily depends on the specific part and current supply chain conditions.

Does the Daikin warranty cover labor costs?

Standard limited warranties typically only cover the cost of the failed OEM part itself. Labor hours, refrigerant replacement, and initial diagnostic fees are usually the homeowner's responsibility. The only exception is if you specifically purchased an extended labor warranty contract at the time of installation.

Why is my AC warranty claim taking so long?

We typically find that delays are caused by distributor approval backlogs, missing registration data, or parts being on backorder at the national level. If the submitting contractor fails to provide the exact technical data required by the manufacturer, the claim will bounce back and forth in the approval queue, extending your wait time significantly.

Are Daikin parts hard to get in South Florida?

Generally, no. We find that Daikin HVAC and Heat Pump systems are heavily supported by regional distribution hubs. However, seasonal inventory shifts or the need for specific, highly proprietary inverter components can temporarily affect local availability, requiring the part to be shipped from a larger national facility.

Can I install a warranty replacement part myself?

No. Daikin requires all warranty parts to be diagnosed and installed by a licensed HVAC professional to maintain coverage and ensure safety. Attempting a DIY repair or hiring an unlicensed handyman will immediately void the remainder of your manufacturer warranty and can create serious electrical or refrigerant hazards.

Get Your Daikin System Back Online Faster

Navigating an unexpected breakdown during October and mid-fall is stressful enough without wondering when your system will finally be repaired. While waiting for warranty-approved parts involves unavoidable logistical steps—from initial diagnosis to distributor validation and final shipping—working with a proactive local team minimizes your overall downtime.

Accurate initial diagnosis and fast, direct distributor communication are the keys to keeping this timeline as short as possible. If your system is underperforming or has shut down completely, do not wait for the problem to resolve itself. Reach out to our licensed professionals at Air On Demand to get the official diagnostic process started immediately, ensuring your warranty claim moves forward without unnecessary delays.

Dealing with AC Drainage Issues in Cutler Bay's High Water Table Zones placeholder-image  | Air On Demand
5 min read

Dealing with AC Drainage Issues in Cutler Bay's High Water Table Zones

Saturated ground from fall king tides can force water back up your air conditioner's drain line. Explore permanent rerouting solutions for coastal homes.

When Ground Saturation Defeats Standard AC Drainage

Your air conditioner is running nonstop, but the house still feels warm and sticky. Then, the system abruptly shuts off entirely, or worse, you find a growing puddle of water pooling around the indoor air handler. At Air On Demand, when we help homeowners dealing with AC drainage issues in Cutler Bay's high water table zones, we see firsthand how frustrating this cycle can be. Most homeowners immediately assume a standard internal clog—like a buildup of dirt, dust, or algae inside the pipe—is to blame for the backup.

However, the actual culprit is often the environment directly outside your home. When the ground is completely saturated from fall king tides and late-season rains, standard plumbing rules no longer apply. The water your air conditioner extracts from the indoor air has nowhere to go, forcing you to make a decision: keep paying for temporary drain line blowouts that only last a few days, or invest in a permanent solution engineered specifically for saturated ground.

Ready to stop the cycle of overflowing drain pans? Start by exploring professional Air Conditioning Services designed for coastal challenges.

Over our years of servicing Miami and Cutler Bay, the Air On Demand team has found that to understand why your system keeps backing up, it helps to identify whether you are dealing with an internal blockage or an environmental failure. The symptoms often overlap, but the underlying causes require entirely different approaches.

• Timing of Backup — Typical Internal Clog: Happens randomly, often during peak summer usage. — Environmental Saturation Failure: Aligns perfectly with heavy rainstorms or high tide events.

• Post-Clearing Result — Typical Internal Clog: System runs perfectly for months after a blowout. — Environmental Saturation Failure: System backs up again within 24 to 48 hours of clearing.

• Outdoor Pipe Exit — Typical Internal Clog: Dry soil around the exit, but no water dripping out. — Environmental Saturation Failure: Pipe exit is submerged in puddles or standing yard water.

• Water Consistency — Typical Internal Clog: Thick, sludgy water filled with green or black algae. — Environmental Saturation Failure: Relatively clear water that simply cannot drain away.

Recognizing the difference between a simple clog and environmental saturation is the first step toward a permanent fix. When the discharge point is underwater, no amount of pipe cleaning will solve the problem.

The Mechanics of Gravity-Fed Drains in Coastal Geography

A standard residential central air conditioner works by pulling heat and humidity out of your indoor air. As warm air passes over the freezing cold evaporator coil, the moisture in the air condenses into liquid water. Depending on the size of your home and the indoor humidity levels, a typical system produces anywhere from 5 to 20 gallons of condensation every single day. All of that water collects in a drain pan and must be routed safely outside your home.

Traditional condensate lines rely entirely on gravity to move this water. For gravity drainage to work, the PVC pipe must maintain a consistent downward slope (usually a minimum of one-quarter inch per foot of run) from the indoor unit to the outdoor exit. Just as importantly, the soil at the discharge point must be dry and permeable enough to absorb the water as it exits.

Living in Cutler Bay coastal zones completely changes this equation. The local geography features a naturally high water table sitting just below the surface of highly porous limestone. When heavy rains hit, the ground cannot absorb any more moisture. The standing water in your yard creates hydrostatic pressure—a physical force where the saturated ground actually pushes water back up into the open drain pipe. Instead of flowing out, the condensation hits a wall of groundwater and has nowhere to go but backward.

Miami's intense humidity creates maximum condensation precisely when the ground is least capable of absorbing it. Your air conditioner is working overtime to dehumidify the house, generating gallons of water, while the saturated yard actively prevents that water from escaping.

Why Clearing the Line Isn't Enough

The wet/dry vac illusion: Many homeowners try to fix a backed-up drain by attaching a wet/dry vacuum to the outdoor exit pipe. While this might suck out the standing water inside the PVC line, it does absolutely nothing to fix the saturated yard.

The temporary fix: Blowing out the line with compressed air yields the same frustrating result. You might clear the pipe momentarily, allowing the air conditioner to turn back on. However, because the yard itself is the actual blockage, the pipe simply refills with condensation over the next few hours. The illusion of a "fixed" drain quickly shatters when the system shuts down again the very next day.

Why Gravity AC Drains Fail in Saturated Ground

How October Weather Exacerbates Indoor Water Damage Risks

In our experience at Air On Demand, the timing of persistent AC drainage failures is rarely a coincidence. According to NOAA data, South Florida experiences its highest astronomical tides—known as king tides—during the month of October. Our technicians frequently respond to emergency calls during these predictable tidal events, which push ocean water higher than normal, creeping into drainage canals, storm sewers, and residential neighborhoods.

During fall king tides and late-season rains, coastal flooding temporarily raises the water table even further inland. You do not have to live directly on the water to feel the effects; the rising groundwater pushes up through the porous limestone foundation beneath the entire region. This completely submerges outdoor AC drain exits that might function perfectly fine during the drier spring months.

When the outdoor line is blocked by groundwater, the risk of severe indoor property damage skyrockets. The condensation continues to drip off the indoor coil, filling the primary drain pan. If the water cannot exit the house, it eventually overflows the pan, soaking into your drywall, ruining baseboards, and warping expensive flooring. In attic installations, an overflowing pan can cause ceiling collapses and massive structural damage.

Signs your home is vulnerable to seasonal backups:

• Low-lying discharge points: Your AC drain pipe exits directly into a garden bed that frequently puddles.

• Slow draining sinks: You notice other gravity-fed drains in the home running slowly during heavy rain weeks.

• Constant dripping sounds: You hear water splashing or dripping near the indoor air handler when the AC turns off.

• Musty indoor odors: A damp, mildew-like smell develops around the indoor unit, indicating standing water in the pan.

Because these environmental factors are entirely predictable, proactive system checks are highly recommended as part of your fall pre-winter inspection before peak tidal events. Identifying vulnerable discharge locations early allows you to implement solutions before the water breaches your home. Scheduling professional Cutler Bay AC maintenance with our team ensures your drain pans and safety switches are tested and ready for the wettest weeks of the year.

Why Your System Shuts Down: The Role of the Float Switch

If your air conditioner suddenly stops cooling during a heavy rainstorm, it might feel like a major mechanical failure. In reality, the shutdown is usually triggered by a tiny, inexpensive component doing exactly what it was designed to do: the AC float switch.

The float switch is a critical safety mechanism wired directly into your air conditioner's low-voltage control circuit. It is typically installed on the edge of the primary drain pan or spliced into the main condensate line. The switch contains a small plastic or cork buoy. Under normal conditions, the drain pan remains relatively empty, and the buoy rests at the bottom of the switch housing. However, if the drain line backs up due to ground saturation, water begins to fill the pan.

As the water level rises, it lifts the buoy. Once the buoy reaches a certain height, it trips the internal sensor, instantly breaking the electrical connection to the thermostat. This immediately shuts off the outdoor compressor and the indoor blower motor, stopping the system from producing any more condensation.

Our repair crews frequently find that a tripped switch during a heavy rainstorm is almost always a symptom of ground saturation, not an electrical failure. The switch is actively protecting your home from thousands of dollars in water damage.

Important Safety Warning: Never attempt to bypass a tripped float switch to force your air conditioner to run. Bypassing this safety control removes the only defense your home has against an overflowing drain pan.

Some homeowners, desperate for cool air during a humid storm, will twist the float switch wires together to complete the circuit manually. Doing this during a high-water event guarantees an indoor flood. The system will resume pulling gallons of moisture from the air, and with the drain pipe blocked by groundwater, that water will spill directly into your home. Understanding the dangers of bypassing a tripped AC float switch is critical for protecting your property.

Custom Condensate Rerouting Above the High Water Table

When the current discharge zone is consistently prone to flooding, the most effective permanent solution is physically changing where the water exits the home. Standard line blowouts will never solve a high water table issue; the line must be professionally rerouted to an area that remains dry year-round.

This is a structural fix rather than a temporary patch. Our local expertise at Air On Demand allows our technicians to engineer custom rerouting specific to Cutler Bay's coastal geography, rather than offering generic blowouts that fail the next day. The rerouting process requires careful planning and precise execution to ensure the new line functions flawlessly.

The professional rerouting process involves:

1. Elevation Assessment: Technicians survey the exterior of the property to identify higher elevation points around the foundation that do not collect standing water during heavy rain.

2. Code Compliance Check: The team determines if the condensate line can be legally tied into appropriate alternative drainage systems, such as a dedicated French drain or a specific utility runoff, depending on strict local municipal codes.

3. Pitch Calculation: The most critical step is calculating the required downward slope over the new, often longer, distance. The line must drop at least one-quarter inch for every foot it travels to maintain gravity flow.

4. Secure Installation: The new PVC routing is securely strapped and insulated where necessary to prevent sagging, which can create internal water traps over time.

Because maintaining the precise pitch over a long distance is incredibly difficult, rerouting a condensate line is never a do-it-yourself project. A slight miscalculation in the slope will cause water to pool inside the pipe, leading to rapid algae growth and secondary backups. Relying on an experienced AC repair service in Cutler Bay like Air On Demand ensures the new drainage path is mathematically sound and fully compliant with local building standards.

Installing Active Condensate Pumps for Saturated Yards

In some coastal properties, gravity rerouting is simply impossible. The home may sit too low, the yard may be entirely flat, or the required downward pitch cannot be achieved without tearing through structural concrete. When gravity fails, the second professional solution is installing an active condensate pump.

A condensate pump is a specialized device that actively pushes water upward and outward, completely overcoming gravity and high water table limitations. Instead of relying on a downward slope, the pump uses mechanical force to move the condensation wherever it needs to go, even if that means pumping it vertically into an attic space before routing it to a safe exterior drain.

How an active condensate pump works:

• The Reservoir: Condensation drips from the indoor coil into a small, built-in holding tank on the pump rather than flowing directly into a PVC pipe.

• The Internal Float: As the tank fills, an internal float rises. Once the water hits a specific level, it triggers the pump's motor.

• The Impeller: A motorized impeller spins rapidly, forcing the collected water out of the tank under high pressure.

• The Check Valve: The water travels through a specialized, flexible discharge tube. A one-way check valve prevents the water from flowing backward into the tank once the motor turns off.

Proper sizing and installation are absolutely critical for these devices. A standard, off-the-shelf pump may lack the horsepower required to handle Miami's high-humidity condensation volume, leading to premature motor burnout. Furthermore, condensate pumps require dedicated, high-voltage electrical connections tied directly into the air handler's power supply.

Because of the electrical requirements and the need for precise integration with the AC's safety switches, a pump should only be installed by a licensed professional. Upgrading your drainage system with a heavy-duty pump is often best handled during major repairs or a complete AC installation in Cutler Bay, ensuring the entire system is calibrated to handle coastal moisture loads. Our installation team strongly recommends this approach for properties where gravity drainage simply isn't an option.

Implementing Permanent Drainage Solutions for Coastal Homes

Persistent AC drainage issues in coastal zones are a complex environmental challenge, not just a routine maintenance nuisance. When the ground beneath your home is completely saturated, the physical laws of hydrostatic pressure will always defeat standard plumbing.

Reiterating a simple truth saves homeowners significant time and money: relying on standard gravity drains in saturated soil will only lead to repeated system shutdowns, warm indoor temperatures, and the looming threat of severe water damage. You cannot vacuum away a high water table, and blowing out a clear pipe will not stop the ocean from rising.

If you are tired of resetting your system after every heavy rain, it is time to address the root cause. Schedule a professional fall evaluation with Air On Demand to determine whether a permanent line reroute or an active condensate pump is the right solution for your property's specific elevation.

Frequently Asked Questions

Why does my AC drain pipe keep backing up when it rains?

Heavy rain saturates the ground around your home, preventing water from absorbing into the soil. When the outdoor drain pipe exit is submerged in puddles or a high water table, hydrostatic pressure physically pushes the water back up the pipe. Because the condensation has nowhere to exit, it backs up into the indoor drain pan, eventually triggering the safety switch and shutting down the system.

What should I do if my AC drain line is underwater outside?

First, turn off your air conditioner at the thermostat to stop the system from producing any more condensation. Do not attempt to use a wet/dry vacuum on the line, as you cannot drain a flooded yard through a small PVC pipe. You will need to contact a licensed HVAC professional to evaluate the property and either reroute the discharge line to higher ground or install an active condensate pump.

Can flooded ground affect my air conditioner's performance?

Yes, flooded ground directly impacts the system's ability to manage moisture. If the ground is flooded, the gravity-fed drain line cannot empty the condensation produced by the indoor evaporator coil. This leads to persistent shutdowns, elevated indoor humidity, and a total loss of cooling performance until the water recedes or the drainage is mechanically rerouted.

How do you fix an AC drain line that won't drain due to saturated soil?

Fixing an environmentally blocked drain requires changing how or where the water exits the home. A professional technician will either reroute the PVC line to a higher elevation point with proper downward pitch, or they will install an active condensate pump. The pump uses a motor to push the water upward and away from the saturated zone, bypassing the need for gravity drainage entirely.

Is it safe to bypass the AC float switch during a storm?

No, it is never safe to bypass the AC float switch under any circumstances. The float switch is the only safety mechanism preventing your air conditioner from continuously pumping water into an overflowing drain pan. Bypassing it during a storm guarantees that gallons of condensation will spill over the pan, causing severe water damage to your ceilings, walls, and flooring.

How much condensation does a central AC produce in high humidity?

A standard residential central air conditioner can produce between 5 and 20 gallons of condensation per day, depending on the system's size and the indoor humidity levels. In high-humidity coastal environments, the system extracts moisture almost continuously while running. This massive volume of water requires a reliable, unobstructed drainage path to safely exit the home.

What to Expect During Your First Month as an HVAC Apprentice in Miami placeholder-image  | Air On Demand
5 min read

What to Expect During Your First Month as an HVAC Apprentice in Miami

The transition from an air-conditioned classroom to sweltering condo service calls is a harsh wake-up call. Find out if you are prepared for the physical reality of the trade.

Beyond the Classroom: Facing the Realities of Miami HVAC Training

Figuring out exactly what to expect during your first month as an HVAC apprentice in Miami is often a harsh wake-up call for new technicians stepping out of trade school. You know the refrigeration cycle backward and forward, and you can read a schematic perfectly in an air-conditioned classroom. But staring down a failing compressor on a sweltering rooftop or squeezing into a cramped mechanical closet changes the equation entirely. The transition from textbook theory to the grueling logistics of real-world service calls is the first major hurdle every new technician faces.

If you are ready to take the leap into the trades, building a strong foundation starts with the right team. You can explore local opportunities by visiting our HVAC careers page.

The shock of this transition is completely normal. Most green technicians quickly reach a decision point where they must assess whether they are physically and mentally prepared for the unglamorous realities of the trade. The local environment presents unique challenges that standard national training programs rarely prepare you for. For example, a routine October fall maintenance check in other parts of the country might mean a crisp, cool afternoon. Here in South Florida, that same maintenance call often involves sweating through your uniform before noon while navigating tight spaces.

The real test of your first 30 days:

• Translating theory to practice: Learning how textbook concepts apply to older, heavily modified coastal systems.

• Physical endurance: Adapting your body to long hours of manual labor in high heat.

• Mental resilience: Accepting that you will make mistakes, get dirty, and spend more time fetching tools than diagnosing complex electrical faults in the beginning.

Entering the field requires you to unlearn the perfect scenarios presented in class and embrace the messy, unpredictable nature of residential and commercial service work.

Enduring the Elements: The Physical Demands of South Florida Fall Maintenance

The most immediate shock to the system for any new technician is the sheer physical toll of the local climate. Heat hazards do not magically end when summer officially closes. October in Miami still brings mid-80s heat paired with suffocating humidity, making fall maintenance physically intense, especially when you are working in poorly ventilated attics or stagnant mechanical rooms.

Acclimatization is a critical process during your early weeks. The Occupational Safety and Health Administration (OSHA) provides strict guidelines for heat illness prevention, emphasizing that new workers need time to build a tolerance to extreme environments. A typical pattern we see is an eager new apprentice trying to keep up with a veteran technician, only to experience heat exhaustion by 2:00 PM. Your body needs a gradual introduction to the heat stress required for an October fall maintenance schedule.

To survive and thrive, you must master several physical management strategies:

• Aggressive hydration: Drinking water is not enough. You must replenish electrolytes constantly throughout the shift, starting before you even arrive at the first job site.

• Strategic pacing: Working safely is more important than working fast. Rushing through a heavy equipment lift in an overheated space leads to mistakes and injuries.

• Recognizing physical limits: You must learn the early warning signs of heat stress—dizziness, excessive sweating, or sudden chills—and communicate with your lead technician immediately.

Finding an employer who understands these physical demands is critical. You want to learn the ropes through a structured HVAC apprentice program that prioritizes worker safety over rushing through a schedule. The heat is an inescapable part of the job, but learning to manage it properly ensures you can sustain a long, healthy career in the trades.

Conquering the Concrete Jungle: Logistics of Servicing Multi-Story Buildings

Beyond the weather, the physical landscape of South Florida introduces a massive logistical learning curve. Servicing sprawling suburban homes is one thing; navigating Miami high-rise condos is an entirely different beast. The logistical nightmares and physical toll of working in densely populated, multi-story residential buildings will test your organizational skills every single day.

The physical strain is significant. You are no longer just walking a few feet from the service van to a backyard condenser. You will frequently find yourself hauling heavy tool bags, nitrogen tanks, and 50-pound recovery cylinders up multiple flights of stairs when elevators are down or restricted.

Here is a breakdown of the common high-rise challenges and how a successful apprentice handles them:

• Severe Parking Restrictions — The Root Cause: Loading zones are often full, requiring the van to be parked blocks away in expensive or tight garages. — The Apprentice Solution: Mastering the use of collapsible utility carts and organizing the van so heavy items are easily accessible for long hauls.

• Service Elevator Delays — The Root Cause: Strict building management schedules mean waiting 20-30 minutes just to get access to a padded service elevator. — The Apprentice Solution: Extreme mental organization. You must ensure every single tool, part, and gauge is brought up on the very first trip.

• Restricted Roof Access — The Root Cause: Condenser farms on condo roofs often require navigating narrow catwalks or climbing secondary roof hatches. — The Apprentice Solution: Developing spatial awareness, practicing safe lifting techniques in confined spaces, and securing tools to prevent drops.

The most valuable trait you can develop in your first month is mental organization. Forgetting a specific pipe wrench or a specialized meter in the van costs your lead technician an hour of lost time navigating back down through a high-rise building. Anticipating the needs of the job before the elevator doors close is what separates a struggling helper from a rising professional.

Mastering the Codes: Transitioning from Theory to Field Execution

Trade schools do an excellent job teaching the fundamentals of thermodynamics, airflow, and electrical theory. However, they often gloss over the highly specific local building regulations that govern how equipment must be legally and safely installed. In South Florida, these codes are not just bureaucratic red tape; they are critical safety measures designed to protect property and lives during severe weather.

As a new apprentice, your first month will involve a crash course in strict permitting and structural codes enforced by local jurisdictions. You will learn that a perfect refrigeration charge means nothing if the condenser is not properly secured against severe wind loads. You will be trained to spot compliance issues on existing coastal units, such as rusted hurricane tie-downs or improper electrical disconnect placements on Miami high-rise condos.

Understanding Notice of Acceptance (NOA) Standards

One of the most important regulatory frameworks you will encounter is the Notice of Acceptance (NOA) standard. Issued by Miami-Dade County, an NOA certifies that a specific product or installation method has been rigorously tested to withstand extreme wind pressures and flying debris.

• What it means for daily installations: Every piece of equipment, from the condenser stand to the exact type of Tapcon screws used to secure it to the concrete pad, must match the approved NOA engineering specifications. You cannot improvise with hardware store alternatives.

• Your role as an apprentice: Your job is to ensure the mounting hardware, tie-downs, and vibration pads being loaded onto the truck exactly match the approved permitting documents for that specific job site. Learning to read and verify these requirements early on makes you an invaluable asset to your lead installer.

The Daily Routine: What Your First 30 Days Actually Look Like

To succeed early on, you need to set realistic expectations for your daily tasks. You will not be diagnosing complex variable-speed communication errors on day two. Instead, your primary job is to facilitate the workflow of your lead technician and absorb as much information as possible.

If you are curious about how these daily tasks translate into a long-term career path, reviewing the various HVAC service technician roles can give you a clear picture of where this foundational work leads. Here is what your actual daily routine will look like:

1. Shadowing and Observation: You will spend hours simply watching. You will observe how senior technicians approach a diagnostic process, how they trace electrical shorts, and importantly, how they communicate with frustrated customers whose AC has failed. Take mental notes on their troubleshooting sequence.

2. Managing Tool Requirements: You are responsible for your basic hand tools and the overall organization of the work area. Knowing the essential tools for first-year HVAC apprentices is critical, but keeping them clean, organized, and ready to hand to your lead tech is even more important.

3. Heavy Lifting and Logistics: You will fetch parts, carry recovery cylinders, haul ladders, and handle the physical grunt work. Whether you are working on a suburban split system or navigating the stairs of Miami high-rise condos, your physical effort directly speeds up the job.

4. Anticipating the Next Move: A great apprentice does not wait to be told what to do next. If the lead tech is brazing a line set, you should already have the nitrogen purge ready and a wet rag in hand. Anticipation proves you are paying attention to the process.

5. Prioritizing Punctuality and Work Ethic: Technical perfection will come with time. In your first 30 days, your lead technician is judging your reliability. Showing up 15 minutes early, maintaining a positive attitude in a 110-degree attic, and staying off your phone are the metrics of early success.

The Daily Routine of a First-Month HVAC Apprentice

Why Your Training Environment Makes or Breaks Your Career

The HVAC industry is notorious for high turnover rates among first-year helpers. Often, this is not because the work is too hard, but because the training environment is deeply flawed. A "trial-by-fire" approach—where green technicians are handed a tool bag and left to figure things out on their own—is a recipe for mistakes, injuries, and rapid burnout.

The mentor-apprentice dynamic is critical for safely navigating complex coastal systems. You need a lead technician who takes the time to explain why a specific superheat reading indicates a restriction, rather than just telling you to add refrigerant. Companies that invest in structured career growth understand that an apprentice's questions are not annoyances; they are the building blocks of a future master technician.

At Air On Demand, our commitment to thorough, hands-on training positions our company as a supportive environment that prioritizes apprentice safety and long-term development. We believe that proper guidance prevents burnout. When you are sweating through a grueling October fall maintenance schedule, knowing that your team has your back and is actively invested in your education makes all the difference. To see the kind of professionals you could be learning from, take a moment to meet our HVAC team.

Frequently Asked Questions About Starting in the HVAC Trade

Is being an HVAC apprentice hard in South Florida?
Yes, it is physically and mentally demanding. The combination of persistent heat, high humidity, and the physical labor of hauling equipment makes the early days exhausting. However, once your body acclimatizes and you learn efficient work practices, the difficulty becomes manageable and the skill set you build is highly rewarding.

What does an HVAC apprentice do on a daily basis?
An apprentice primarily supports the lead technician to ensure the job runs smoothly. This includes organizing the service van, carrying heavy tools and recovery cylinders, fetching parts, and maintaining a clean work area. Over time, daily tasks expand to include taking basic gauge readings, cleaning coils during an October fall maintenance visit, and assisting with complex installations.

What should I expect in my first year of HVAC training?
You should expect a steep learning curve focused heavily on safety, logistics, and basic mechanical skills. Your first year is less about mastering advanced diagnostics and more about understanding airflow, proper tool usage, and local building codes. Expect to make mistakes, ask a lot of questions, and gradually earn the trust to perform tasks independently.

Do I need to know local building codes before I start?
You do not need to have the codebook memorized on day one, but you must be ready to learn them quickly. Your mentors will teach you the specifics of Miami-Dade NOA standards, hurricane tie-downs, and wind load requirements. Understanding these codes is essential for ensuring every installation meets strict regional safety guidelines.

How do HVAC apprentices handle the extreme heat and humidity?
Handling the climate requires strict adherence to hydration and acclimatization protocols. Apprentices must drink water and electrolytes constantly, learn to pace their physical exertion, and take necessary breaks when working in confined, unventilated spaces. Recognizing your physical limits early on prevents dangerous heat exhaustion.

Taking the First Step Toward a Rewarding Trade Career

The reality of your first month in the trade is that it will test your resolve. The physical tax of hauling equipment up the stairs of Miami high-rise condos, the relentless heat, and the sheer volume of new information can feel overwhelming. But mastering the trade in this unique, demanding market builds an unparalleled level of expertise. If you can succeed here, you can succeed anywhere in the industry.

We encourage aspiring technicians to seek out programs that value their safety, prioritize continuous education, and offer genuine mentorship. If you are ready to put in the hard work and build a career that offers lifelong stability and growth, now is the time to take that first step. Explore local training programs, ask questions, and prepare to learn a trade that keeps our community running.

Testing Your Heat Strips in October Before Miami's First Cold Snap placeholder-image  | Air On Demand
5 min read

Testing Your Heat Strips in October Before Miami's First Cold Snap

Avoid the panic of burning dust smells and blaring smoke detectors this fall. A controlled 10-minute heat strip test in October ensures your HVAC system is ready for the first real cold front.

The Startling Reality of Miami's First Cold Snap

October is fading, and while the rest of the country is already bundling up, we are just weeks away from that inevitable first real cold front dropping evening temperatures into the 50s. Testing your heat strips in October before Miami's first cold snap is the single best way to avoid a midnight panic when you finally need to warm up your home. In our years of providing HVAC services across Miami, our technicians at Air On Demand have seen too many homeowners wait until that first chilly November night to switch their thermostats from cool to heat. Within minutes, a heavy, alarming burning smell floods the house, followed closely by blaring smoke detectors.

If you are looking for proactive AC maintenance to prepare your system for the changing seasons, our team is ready to help you navigate this transition smoothly.

The climate factor: Here in Miami FL, our HVAC systems operate under a highly unique set of demands. Our region experiences over 4,000 cooling degree days annually compared to less than 200 heating degree days. This extreme ratio means that your heating components sit completely dormant for the vast majority of the year. When you finally call upon them, our technicians usually find they are heavily coated in a season's worth of settled particulates.

Why early action matters: At Air On Demand, our deep local expertise means we understand exactly how Miami's specific climate impacts your equipment. We want to save homeowners the stress, panic, and expense of an unnecessary emergency service call at 2 AM—a pattern we see often during the first freeze. By understanding what happens inside your air handler and taking a few proactive steps weeks before the cold arrives, you can ensure your family stays warm, safe, and completely undisturbed when the temperatures finally dip.

Why Your Heat Strips Produce a Burning Dust Smell

To understand why your heating system produces such a startling odor, you have to look at the mechanics of how a heat pump operates in a subtropical climate. Unlike gas furnaces found in northern states, our installation crews at Air On Demand know that most homes in Miami FL rely on electric heat pumps. These systems are incredibly efficient at moving heat, but they occasionally need assistance when the outdoor temperature drops sharply.

The dormancy period: For 9 to 10 consecutive months during our extended cooling season, the auxiliary heating components sit completely inactive. During this time, the system is constantly pulling indoor air through the return vents. Even with a good filter, microscopic dust particles, pet dander, and household debris bypass the media and settle onto the internal metallic surfaces of the air handler.

For comprehensive care of these internal components, scheduling routine Miami AC maintenance ensures your system remains clean and efficient year-round.

The Role of Auxiliary Heating

Inside your air handler, there is a component called the auxiliary heat strip. These are essentially heavy-duty electrical resistance coils, functioning very much like the glowing coils inside a standard toaster or a hairdryer. They are designed to automatically engage when the primary heat pump needs a boost to meet the thermostat's demand.

• Extreme temperatures: When activated, these coils heat up incredibly fast, often reaching temperatures well over 130 degrees Fahrenheit in a matter of seconds.

• Instant incineration: Because they have been sitting unused for nearly a year, they are covered in a thick layer of settled dust. The intense heat instantly incinerates this dust layer.

• Airflow distribution: The blower motor then pushes the resulting particulate matter and the strong, singed odor directly into your ductwork, distributing it into every room of your house simultaneously.

This process is entirely normal, but it is highly unsettling if you are not expecting it. We always tell our customers that the key is controlling exactly when this incineration process happens.

The 10-Minute October Burn-Off Strategy

Instead of waiting for a freezing night, you can take control of the situation by performing a simple, proactive test. This strategy involves manually forcing the system to burn off the accumulated dust during a controlled timeframe when you are awake, prepared, and able to ventilate the house. In our experience, a standard 10 minutes of emergency heat operation is usually all it takes to clear the coils.

Important safety note: This is strictly a user-facing thermostat operation. You are simply changing the settings on your wall unit. You should never attempt a physical DIY cleaning of the internal heat strips, as they are connected to high-voltage electrical lines that pose a severe shock hazard. Leave the internal physical maintenance to our licensed professionals.

How to Perform the Thermostat Test Safely

We recommend following these steps on a mild October afternoon to safely clear your system:

1. Prepare the home: Open several windows across the house to create a cross-breeze. Turn on your ceiling fans to help circulate the air and push any odors outdoors.

2. Adjust the thermostat: Go to your thermostat and switch the system mode from "Cool" to "Emergency Heat" (sometimes labeled as "Aux Heat"). If your thermostat does not have this specific setting, simply switch it to "Heat" and raise the target temperature 3 to 5 degrees above the current room temperature to force the strips to engage.

3. Monitor the system: Let the system run under your direct supervision. You will likely notice the burning dust smell within the first two minutes.

4. Time the burn-off: Allow the system to run for exactly 10 minutes of emergency heat operation. You should notice the smell peaking early and then steadily dissipating as the dust is cleared away.

5. Return to normal: Once the 10 minutes are up, switch your thermostat back to "Cool" or "Off," and leave the windows open for another half hour to clear any lingering scent.

Preventing False Smoke Alarms During November's Chills

The burning dust phenomenon is more than just a nuisance odor; it is a common trigger for residential smoke detectors. Standard smoke detectors are highly sensitive to incinerated particles. When a thick layer of dust burns off all at once, the sudden rush of airborne particulates blowing out of your vents can easily trip the sensors, even if there is no actual smoke or fire present.

The psychological impact: The National Fire Protection Association (NFPA) notes that sudden bursts of dust and debris are frequent non-fire triggers for alarms. At Air On Demand, we frequently hear from customers who experienced the sheer panic of a blaring smoke alarm at 2 AM on a Tuesday during a sudden cold front. Waking up to sirens and a burning smell causes severe stress for families and pets alike.

By conducting a controlled test during the day, you eliminate the element of surprise. Understanding why Miami needs heat strip inspections and early testing gives you the power to manage this seasonal quirk on your own terms. When the real cold weather arrives in November, you can turn on your heat with total confidence, knowing the coils are already clean and your smoke alarms will remain silent.

How High Humidity Amplifies Caked-On Dust

You might wonder why this burning smell seems so much more intense in Miami FL compared to homes in northern states. The answer lies in our unique combination of climate factors: continuous cooling, extreme humidity, and airborne particulates.

The South Florida difference: In colder climates, heating systems cycle on and off frequently throughout the fall, winter, and even early spring. This frequent use burns off dust in tiny, unnoticeable increments. Here, our systems run almost exclusively on cooling mode for 9 straight months. That means 9 months of constant airflow over dormant metallic components.

Furthermore, our high indoor humidity plays a significant role. When our technicians open up air handlers for fall tune-ups, a pattern we see often is that condensation has caused airborne dust to become heavy, sticky, and caked onto the dormant heat strips. Instead of a light dusting, our heat strips develop a thick, baked-on layer of debris.

The role of filtration: This emphasizes the critical importance of high-quality air filters during the long summer months. We always advise our customers that changing your air filter regularly reduces the volume of dust that makes it into the air handler, ultimately minimizing the severity of the winter burn-off.

Distinguishing Between Normal Dust Burn-Off and Electrical Hazards

While a burning smell is almost always harmless dust, it is vital to know the difference between a routine seasonal quirk and a genuine electrical emergency. At Air On Demand, our AC repair crews prioritize homeowner safety above all else. We want you to feel empowered to recognize when a smell is normal and when it requires immediate professional intervention.

If you notice anything outside the normal parameters of the 10 minutes of emergency heat operation, you need a professional to assess the situation. For any warning signs, scheduling professional AC repair in Miami is the safest course of action.

Use this guide our technicians put together to evaluate the odors coming from your vents:

• Scent Profile — Normal Dust Burn-Off: Stale, dusty, slightly singed, similar to a hot hairdryer. — Electrical Hazard Warning Sign: Acrid, melting plastic, ozone, burning rubber, or fishy electrical smells.

• Duration — Normal Dust Burn-Off: Peaks in the first 3-5 minutes, dissipates rapidly after 10 minutes. — Electrical Hazard Warning Sign: Persists, grows stronger over time, or remains long after the system shuts off.

• Visual Signs — Normal Dust Burn-Off: None. Invisible particulate matter only. — Electrical Hazard Warning Sign: Visible smoke coming from the vents or the air handler unit itself.

• Action Required — Normal Dust Burn-Off: Open windows, monitor for 10 minutes, allow to clear naturally. — Electrical Hazard Warning Sign: Shut off the system immediately at the breaker panel and call an HVAC professional.

Normal Dust Burn-Off vs. Electrical Hazard Warning Signs

Comprehensive Pre-Winter Preparation for Your HVAC System

The 10-minute thermostat test is an excellent first step, but a mid-fall October pre-winter startup routine should involve a broader look at your system's overall health. Preparing your equipment before the first cold snap ensures efficiency and extends the lifespan of your unit.

Start with the filter: We always remind our customers to replace their HVAC filter before conducting the heat strip test. A clogged filter restricts airflow, which can cause the internal components to overheat and trip safety limits. Starting with a fresh, clean filter ensures maximum airflow to push the incinerated dust out of the system quickly.

Professional oversight: While the thermostat test is perfectly safe for a homeowner to perform, physically inspecting the internal wiring, testing the amperage of the heat strips, and verifying the defrost cycle requires a licensed technician. Heat strips draw a massive amount of electricity, and our field teams have seen firsthand how corroded connections can become serious fire hazards if left unchecked.

Scheduling a comprehensive AC inspection allows our professionals to vet every electrical connection, test the safety limit switches, and ensure your system is fully prepared to handle the sudden load of heating your home.

Secure Your Peace of Mind Before the Temperatures Drop

Taking just 10 minutes out of a mild October afternoon to test your system can save you from a highly stressful night in November. By proactively burning off the accumulated summer dust, you ensure a smooth, panic-free transition into the cooler months.

A brief burning smell is a completely normal part of owning a heat pump in a subtropical climate, provided it dissipates quickly. However, if you have any lingering concerns, notice unusual electrical odors, or simply want the reassurance of a fully vetted system, reach out to our team at Air On Demand to secure your peace of mind before the real cold sets in.

Frequently Asked Questions

Why does my heat smell like burning dust?
Your heat smells like burning dust because the auxiliary heat strips have been sitting unused for months, collecting debris. When these electrical coils finally turn on, they heat up rapidly and incinerate the settled dust layer. We find this releases a temporary, singed odor into your ductwork that usually clears up quickly.

How long does it take for dust to burn off heat strips?
In our experience, it typically takes about 10 to 15 minutes for the accumulated dust to completely burn off the heat strips. The smell will be strongest in the first few minutes and should steadily dissipate as the system runs. If the smell lasts longer than 30 minutes, you should turn off the unit and have our team inspect it.

Can a heater burning dust set off smoke alarms?
Yes, a heater burning off dust can easily trigger standard residential smoke alarms. Smoke detectors are highly sensitive to sudden rushes of airborne particulates, even if there is no actual fire. Performing a controlled burn-off during the day allows you to ventilate the home and prevent false alarms.

When should I worry about a burning smell from my AC?
You should worry if the smell resembles melting plastic, burning rubber, ozone, or fishy electrical odors. Additionally, if the smell persists for more than 15 minutes, grows stronger, or is accompanied by visible smoke, shut off the breaker immediately. These are strong indicators of an electrical hazard requiring a professional AC repair technician.

Is it safe to run emergency heat just to test it?
Yes, it is perfectly safe to run your emergency heat for a short duration to test it and clear off the dust. Operating the system from the thermostat for about 10 minutes in a controlled manner is a recommended proactive step. However, you should never open the unit to clean the high-voltage coils yourself.

Why do Miami heat pumps get so dusty during the summer?
Miami heat pumps get exceptionally dusty because they run in cooling mode for 9 to 10 months straight, constantly pulling airborne particles through the system. Combined with high indoor humidity, our technicians see this constant airflow cause dust to become heavy and cake onto the dormant heating elements much faster than in northern climates.

Why Your Health Smart Filter Whistles When the Miami Air Handler Turns On placeholder-image  | Air On Demand
5 min read

Why Your Health Smart Filter Whistles When the Miami Air Handler Turns On

Upgrading to a high-efficiency filter this fall can unexpectedly trigger a high-pitched screech. Find out how air bypass creates this noise and if your blower motor is at risk.

Hearing a High-Pitched Whistle After Your Fall Filter Upgrade?

Are you trying to figure out why your Health Smart filter whistles when the Miami air handler turns on, especially right after you swapped it out for the new season? You are not alone. At Air On Demand, our technicians field countless calls about this exact issue every September. As homeowners dive into their pre-heating-season IAQ prep, many upgrade their standard fiberglass filters to high-efficiency pleated models. The goal is cleaner indoor air, but the result is often a startling, high-pitched screech every time the thermostat calls for cooling. This jarring sound leaves many residents wondering if they have broken their system simply by trying to improve their air quality.

This unexpected noise represents a critical decision point for your system. The whistling is a direct symptom of air bypass, which occurs when your system struggles to pull enough air through the dense new filter material. Depending on the severity, this could be a simple matter of the filter sitting incorrectly in the return grille, or it could be a major warning sign that your system's blower motor is under dangerous, excessive strain. If you are looking to upgrade your indoor air filtration, understanding the root cause of this noise is essential. Finding the right balance with air conditioner filters in Miami means achieving clean air without sacrificing the health of your HVAC equipment.

The Mechanics of Air Bypass: What Causes the Whistling Sound?

Your Health Smart filter whistles because its high-efficiency material increases static pressure in your air handler. If the filter isn't seated perfectly, the system's powerful suction forces air through tiny gaps around the frame, creating a high-pitched whistling sound known as air bypass.

In any forced-air heating and cooling system, air will always take the path of least resistance. When you place a dense barrier in front of the return duct, the blower motor still demands the same volume of air to circulate through your home. If the filter frame does not form an airtight seal against the return grille housing, the resulting suction will aggressively pull air through any available opening.

Even a gap as small as 1/8 of an inch is enough to cause problems. When the blower motor ramps up to full speed, the velocity of the air being dragged through that tiny crevice creates a vibration. This vibration translates into an audible, high-frequency whistle that echoes through your ductwork and into your living space. More importantly, this means unfiltered air is bypassing the media entirely, pulling dust and debris directly into your equipment and defeating the purpose of your indoor air quality upgrade.

How Suction and Gaps Create Noise

To understand the physics of this phenomenon, think about how you whistle with your own mouth. If you open your mouth wide and exhale, the air moves silently. But if you purse your lips together tightly and force the same amount of air through that tiny opening, you generate a loud, piercing sound. The exact same principle applies to your return grille.

• High Velocity: The blower motor creates negative pressure, pulling air rapidly toward the air handler.

• Constricted Space: A microscopic gap between the cardboard filter frame and the metal grille acts like pursed lips.

• Vibration and Resonance: The fast-moving air vibrates the edges of the filter frame and the metal housing, amplifying the sound through the hollow return duct.

The Mechanics of Air Bypass in an HVAC Return Grille

Why High-Efficiency Filters Increase Static Pressure

To understand the root of the air bypass issue, we have to look at how high-efficiency filters are constructed. Filters are rated on the MERV (Minimum Efficiency Reporting Value) scale. Standard fiberglass filters, often rated MERV 1 to 4, are highly porous. They stop large debris like pet hair and heavy dust bunnies, but they allow air to flow through with virtually no resistance. High-efficiency options, like a Health Smart filter (often rated MERV 11, 13, or higher), use densely packed, electrically charged microfibers to trap microscopic particles like pollen, mold spores, and fine particulate matter.

While this dense media is excellent for your lungs, it naturally restricts the volume of air that can pass through it. This restriction introduces a concept known as High-MERV static pressure. In residential HVAC systems, static pressure is the resistance to airflow within the ductwork and components. When you install a denser filter, the static pressure in the return duct spikes. You might be wondering, do Health Smart filters restrict airflow enough to cause damage? The short answer is that they force the blower motor to work significantly harder to pull the necessary volume of air through the restrictive media.

This increased workload has a compounding effect. As the motor pulls harder, the suction inside the return duct becomes much stronger than it would be with a cheap fiberglass filter. It is this intense, magnified suction that exposes poorly sealed return grilles, finding every tiny imperfection in the filter's seating and leading directly to the whistling effect.

• Standard Fiberglass (MERV 1-4) — Media Density: Very Low — Static Pressure Impact: Minimal — Airflow Resistance: Low — Risk of Whistling: Very Low

• Basic Pleated (MERV 5-8) — Media Density: Moderate — Static Pressure Impact: Moderate — Airflow Resistance: Medium — Risk of Whistling: Low to Moderate

• High-Efficiency (MERV 11-13+) — Media Density: Very High — Static Pressure Impact: Significant Spike — Airflow Resistance: High — Risk of Whistling: High (if improperly seated)

How Restricted Airflow Impacts Your System in High Humidity

A whistling filter is far more than just a minor auditory annoyance; it is a blaring alarm that your system's efficiency is compromised. This is especially critical given Miami's extreme heat and high relative humidity. In our years of providing AC installation and repair across South Florida, we've seen firsthand that air conditioning systems do not just cool the air—they must run almost constantly to manage latent heat, which is the heavy moisture suspended in your indoor air.

Optimal airflow is absolutely critical for effective latent cooling and dehumidification. Here is a breakdown of how restricted airflow disrupts this delicate process:

• The Problem: The dense filter restricts the total volume of warm, humid indoor air reaching the air handler.

• The Cause: Because less air is moving over the indoor evaporator coil, the refrigerant inside the coil absorbs less heat than it was designed to.

• The Consequence: The temperature of the evaporator coil drops rapidly. Without enough warm airflow to keep it stabilized, the condensation on the coil can freeze.

• The Solution: Restoring proper airflow prevents the coil from dropping below freezing, allowing the system to extract moisture and drain it away safely.

If the coil freezes solid, your system will blow warm air, or stop blowing air entirely, while the compressor continues to run outside. When the block of ice eventually thaws, it often overwhelms the condensate drain pan, leading to severe water damage in your ceiling or utility closet. Ignoring a whistling sound during the humid transition months can quickly escalate into a catastrophic system failure.

Safe Troubleshooting: Checking Your Filter's Seating and Size

Before assuming your system requires major repairs, there are several safe, actionable steps you can take to verify if the whistling is simply a filter installation error. Many times, a minor adjustment is all it takes to eliminate the noise and stop the air bypass.

Important safety note: Never attempt to open the air handler cabinet, modify the ductwork, or adjust internal blower speeds yourself. These tasks carry serious electrical hazards and require a licensed professional. You should only interact with the return grille and the filter itself.

1. Turn off the power: Always start by turning your thermostat to the "Off" position. Wait for the blower motor to spin down completely. This stops the suction, making it much easier to remove and inspect the filter without tearing it.

2. Verify the actual dimensions: Filters have a "nominal" size printed in large numbers (e.g., 20x20x1) and an "actual" size printed in smaller text (e.g., 19.5 x 19.5 x 0.75). If your return housing requires an exact 20-inch fit and your filter is slightly undersized, that 1/2-inch difference will create a massive air bypass whistle. Look for any gaps larger than 1/8 inch around the perimeter.

3. Check the directional airflow arrows: Every pleated filter has an arrow printed on the edge of the cardboard frame. This arrow must point *toward* the air handler (in the direction the air is flowing). Installing it backward forces the system to pull against the structural wire mesh in the wrong direction, increasing resistance and noise.

4. Inspect for physical damage: Ensure the filter is not bent, crushed, or improperly wedged into the housing. If you had to force or bend the cardboard frame to make it fit, the seal is broken. A compromised frame allows air to rush through the crumpled sections, generating a loud screech.

5. Test the seal: If you find a small gap, some homeowners temporarily apply a thin strip of foam weatherstripping to the inner lip of the metal grille housing to create a tighter seal against the cardboard frame. If the whistle stops after doing this, you have confirmed the issue was air bypass.

When a Whistling Filter Signals Serious Blower Strain

If you have gone through the troubleshooting steps, verified the filter size is perfect, ensured it is seated flawlessly, and the whistling *still* persists, you have reached the limit of DIY adjustments. At this stage, the noise is no longer just about a tiny gap in the return grille; it indicates that the system's ductwork or blower motor is fundamentally incompatible with the high static pressure of the new filter.

When a blower motor is forced to pull against an immovable wall of dense filter media, it experiences severe mechanical and electrical strain. You may notice other warning signs accompanying the whistle. The system might emit an unusual, deep humming sound from the air handler closet. You might experience short-cycling, where the AC turns on and off rapidly without actually cooling the house. Most commonly, you will feel a noticeable, drastic drop in the volume of air coming out of your supply vents.

This is where professional intervention is mandatory to protect your equipment. An HVAC technician will use specialized tools, such as a manometer, to measure the exact Total External Static Pressure (TESP) of your system. Our team at Air On Demand brings deep expertise in balancing high-efficiency indoor air quality solutions with the specific, high-volume airflow dynamics required for South Florida homes. We regularly see the damage caused when systems are pushed beyond their limits, which is why a professional must determine if your ductwork needs modification, if the blower speed needs to be safely recalibrated, or if you need to switch to a different style of media cabinet to achieve hospital-grade filtration without destroying your air handler services components.

The Long-Term Risks of Ignoring Air Bypass

It can be tempting to just turn up the television to drown out a whistling return vent, especially if the house still feels relatively cool. However, leaving air bypass unaddressed sets off a chain reaction of wear and tear that will drastically shorten the lifespan of your HVAC system.

Here is a checklist of what happens inside your system when unfiltered air bypasses the media:

• Component Coating: The bypassed air carries dust, pet dander, and airborne debris directly into the air handler. This grime coats the sensitive interior components, particularly the wet evaporator coil and the blower wheel blades.

• Loss of Efficiency: As dust acts like an insulating blanket on the evaporator coil, the system loses its ability to absorb heat. The AC must run longer cycles to compensate for the poor airflow and reduced heat transfer.

• Increased Energy Consumption: Longer run cycles and a struggling, overheating blower motor draw significantly more electricity, causing your monthly utility bills to spike unnecessarily.

• Costly Breakdowns: Continuous blower strain leads to premature motor failure. Furthermore, a dirty, freezing evaporator coil can allow liquid refrigerant to flow backward into the outdoor compressor, destroying the most expensive part of your system.

Proactive resolution is the only way to protect your investment. Addressing a whistling filter early prevents minor airflow issues from turning into the need for major AC repair in Miami.

Frequently Asked Questions About Whistling HVAC Filters

Why does my new AC filter whistle?

Your new AC filter whistles because its dense, high-efficiency material restricts airflow, causing the blower motor to pull harder. This increased suction forces air through tiny gaps between the filter frame and the metal return grille. The high-velocity air vibrating through these small crevices creates the whistling noise.

Are high MERV filters bad for my air handler?

High MERV filters are not inherently bad, but they can be damaging if your specific HVAC system was not designed to handle their increased static pressure. If your ductwork is undersized or your blower motor is older, a high MERV filter can severely restrict airflow, leading to overheating, frozen coils, and premature motor failure. Always consult a professional to see what MERV rating your system can safely support.

How do you fix a whistling return vent?

To fix a whistling return vent, first ensure your air filter is the exact correct size for the housing, as even a 1/8-inch gap can cause noise. Verify that the directional airflow arrows on the filter point toward the system and that the cardboard frame is not crushed or bent. If the filter is perfectly seated and still whistles, you may need a technician to evaluate your system's static pressure.

Can a whistling filter cause my AC to freeze up?

Yes, a whistling filter is a strong indicator of restricted airflow, which is the primary cause of frozen AC coils. When the dense filter blocks sufficient warm indoor air from reaching the evaporator coil, the refrigerant inside gets too cold and freezes the ambient condensation. This ice buildup will eventually stop your system from cooling entirely.

Does a whistling AC mean danger?

While a whistling AC is not usually an immediate safety danger to your family, it is a serious mechanical hazard to your HVAC equipment. The noise indicates high static pressure and air bypass, meaning your blower motor is under heavy strain and unfiltered dust is coating your internal components. Ignoring it will likely lead to expensive system breakdowns.

Restore Quiet and Efficient Airflow to Your Miami Home

Ultimately, a whistling filter is your system's way of asking for an immediate airflow adjustment. While upgrading your indoor air quality is a smart move for fall preparation, it should never come at the cost of your air handler's mechanical health or your family's peace and quiet. Balancing clean, highly filtered indoor air with the efficient, high-volume cooling required in South Florida is entirely achievable with the right approach.

If you have checked your filter's sizing and seating but the high-pitched noise continues, it is time to stop guessing and get definitive answers. Schedule a professional inspection to evaluate your system's static pressure. We will ensure your IAQ upgrades are actually helping, rather than harming, your equipment, giving you a clear explanation of the mechanics and a permanent solution to the noise.

Labor vs. Parts: Understanding the Fine Print of Your Daikin Heat Pump Warranty placeholder-image  | Air On Demand
5 min read

Labor vs. Parts: Understanding the Fine Print of Your Daikin Heat Pump Warranty

A factory guarantee doesn't mean completely free repairs. Understand why manufacturers cover physical parts while local contractors charge for the time and materials required to fix your system.

The "Fully Covered" Myth: What a Warranty Actually Means for Your Heat Pump

Most homeowners believe that a ten-year factory guarantee means a decade of completely free repairs. However, exploring Labor vs. Parts: Understanding the Fine Print of Your Daikin Heat Pump Warranty quickly shatters that common misconception. A typical pattern we see is a homeowner experiencing a breakdown, assuming their relatively new system is fully protected, and then feeling frustrated when handed a substantial quote to get the unit running again. This confusion stems from a fundamental misunderstanding of how the heating and cooling industry handles equipment guarantees. The manufacturer builds the physical machine, but a local contractor must provide the expertise, time, and consumable materials to diagnose and fix it.

Understanding this division of responsibility is especially important during the September pre-fall transition. As you prepare your home for shifting weather patterns, addressing lingering performance issues becomes a priority. If your system is struggling, you need to know exactly what your factory coverage provides and what out-of-pocket costs you are responsible for before approving a repair. Relying on Daikin equipment gives you access to some of the most robust factory guarantees in the industry, but those guarantees only apply to the physical components themselves. For the actual hands-on work, such as professional AC repair in Miami, you are paying for the specialized local expertise required to implement that factory part safely and correctly.

Manufacturer Responsibility vs. Local Expertise: Breaking Down the Categories

To navigate a major repair confidently, you must separate the physical manufactured part from the skilled labor required to install it. The factory that assembled your unit operates in a controlled environment, producing thousands of identical components. Their guarantee is a promise that the metal, wiring, and circuitry they built are free from manufacturing defects. If a component fails prematurely, they will provide a replacement piece of hardware at no cost. However, the factory does not dispatch technicians, operate service vehicles, or purchase the consumable materials needed to perform repairs in your specific neighborhood.

The local contractor provides the human expertise necessary to turn a physical part in a cardboard box into a functioning climate control system. This involves diagnosing the exact failure, safely removing the broken component, and integrating the new hardware into your home's existing infrastructure. Comparing a Daikin unit replacement guarantee vs. standard warranties highlights how different tiers of coverage work, but the baseline separation between hardware and service remains consistent across the industry.

• Manufacturer Parts — What It Includes: The physical hardware (e.g., coils, motors, circuit boards, valves) built by the factory. — Who Pays For It: Covered by the manufacturer (if registered and within the active warranty period).

• Skilled Labor — What It Includes: The technician's time to diagnose, disassemble, install, and test the system. — Who Pays For It: Paid by the homeowner (unless an extended labor agreement was purchased separately).

• Consumable Materials — What It Includes: Refrigerant, brazing rods, nitrogen, wiring connectors, and recovery tanks. — Who Pays For It: Paid by the homeowner as part of the overall repair service.

• Diagnostic Fees — What It Includes: The specialized testing required to identify the root cause of the failure before ordering parts. — Who Pays For It: Paid by the homeowner to the local service provider.

A standard factory agreement protects you against the cost of a defective Daikin heat pump compressor or reversing valve, which are expensive pieces of hardware. It does not protect against the local costs of operating a service business, maintaining specialized tools, and employing licensed professionals to perform the heavy lifting.

Daikin Warranty Breakdown: Parts vs. Labor

Inside the Factory Parts Guarantee: What Daikin Pays For

When properly registered, Daikin offers some of the most comprehensive parts protection available, often extending up to 10 or 12 years depending on the specific model. This factory guarantee is designed to give you long-term confidence in the hardware itself. If a mechanical or electrical component fails due to a flaw in the manufacturing process, the company will supply a direct replacement part to your local contractor.

The scope of this coverage includes nearly every physical component inside the metal cabinet. Knowing exactly what is included helps you review repair quotes with greater clarity.

• Major mechanical components: This includes high-value items like a Daikin heat pump compressor or reversing valve, which are the heart of your system's ability to heat and cool.

• Airflow mechanisms: Blower motors, condenser fan motors, and the fan blades that move air across the coils.

• Internal electronics: Main control boards, defrost boards, sensors, and built-in capacitors that manage the system's logic and power distribution.

• Heat transfer surfaces: The indoor evaporator coil and the outdoor condenser coil, provided the failure is due to a factory defect rather than external damage.

The registration requirement: To secure this decade-plus coverage, the equipment must be registered with the manufacturer within 60 days of the original installation. If this window is missed, the coverage typically defaults to a standard five-year base period. Registration provides the factory with the exact date of installation and the original owner's details, which is necessary for tracking the lifecycle of the equipment. Always verify that your installation contractor has completed this paperwork on your behalf to lock in your maximum benefits.

Beyond the Part: Why Intensive Labor and Materials Are Your Responsibility

Once you understand that the factory only supplies the hardware, the next step is recognizing why the local contractor must charge for the surrounding service. The Miami coastal environment presents unique challenges; the combination of coastal salt air and high humidity accelerates wear on outdoor equipment. This makes accurate diagnostics and proper material handling absolutely critical for long-term reliability. A technician cannot simply swap a part in a few minutes; they must follow strict regulatory and technical procedures.

Refrigerant is a consumable, not a part: The most common surprise for homeowners is learning that refrigerant is excluded from standard parts coverage. Refrigerant is a chemical compound used to transfer heat. If your evaporator coil develops a leak, the manufacturer will provide a new metal coil. However, the factory did not lose the chemical—your system leaked it into the atmosphere. Replacing that highly regulated chemical is considered a consumable material cost, and it falls entirely on the homeowner.

The reality of diagnostic fees: Modern climate control systems are complex networks of high-voltage electricity, pressurized gases, and digital communication boards. When a system stops working, the exact cause is rarely obvious. A technician must spend time using multimeters, micron gauges, and electronic leak detectors to isolate the failure. This diagnostic time requires immense skill and specialized equipment. If you own ductless mini split systems, the diagnostic process can be even more intricate due to the advanced inverter technology and multiple indoor head units.

Environmental regulations and compliance: The handling of refrigerants is strictly governed by EPA Section 608 regulations. A technician cannot legally or safely vent old refrigerant into the air. They must use specialized recovery machines and certified tanks to capture the gas before opening the system to replace a part. These mandatory environmental protection steps add significant time and overhead to any major repair, which is reflected in the labor costs.

The Anatomy of a Compressor Replacement: Where the Labor Goes

To truly understand the value of the labor investment, it helps to look at the most demanding warranty repair possible: replacing a Daikin heat pump compressor or reversing valve. This is not a simple matter of turning a few screws. It is a highly technical, multi-hour surgical procedure on your climate control system. In a high-humidity setting like Miami, every step must be executed flawlessly to prevent moisture from destroying the new hardware.

1. Safe Refrigerant Recovery: Before the old compressor can be removed, the technician must connect a recovery machine to safely extract all existing refrigerant from the system. This process alone can take over an hour, depending on the system's size and ambient temperatures, and requires EPA-certified handling procedures.

2. Cutting and Precision Brazing: The technician must physically cut the copper lines to remove the failed compressor. Once the new heavy component is maneuvered into place, the copper lines must be welded back together through a process called brazing. To prevent oxidation (soot) from forming inside the pipes during welding, the technician must flow nitrogen gas through the lines—a meticulous step that ensures the internal system remains perfectly clean.

3. Deep Vacuuming and Dehydration: This is arguably the most critical and time-intensive step. After the system is sealed, a vacuum pump is attached to pull the internal pressure down to a near-perfect vacuum (typically 500 microns). In Miami's humid climate, this step is vital because the vacuum actually boils off any microscopic moisture trapped inside the copper lines. If even a drop of moisture remains, it will mix with the refrigerant oil, create acid, and destroy the new compressor from the inside out.

4. Recharging and Performance Testing: Once the vacuum holds, the technician introduces fresh refrigerant into the system. They must carefully weigh the charge to exact factory specifications and then run the system through a full cycle, measuring superheat and subcooling temperatures to guarantee optimal performance.

When you review a quote for labor and materials, you are paying for this rigorous, four-step technical execution, ensuring the factory's replacement part actually functions as designed.

Repair vs. Replace: Navigating Out-of-Pocket Warranty Costs

Facing a major repair bill for a system that is technically "under warranty" forces a difficult decision. You must evaluate the quoted labor and material costs against the overall age, condition, and efficiency of your existing unit. The September pre-fall transition is an excellent time to make this evaluation, allowing you to address systemic issues before the seasonal demands shift entirely.

When paying for labor makes sense: If your system is only three or four years old and has been well-maintained, investing in the labor to install a covered factory part is almost always the right financial move. The core system still has a long, efficient lifespan ahead of it, and a single component failure (like a faulty fan motor or a defective control board) is usually an isolated event.

Warning signs of cascading failures: The calculation changes as the system approaches the eight-to-ten-year mark. Even if a major component like a compressor is fully covered by the factory, you must consider the condition of the rest of the unit. If the outdoor coil is heavily corroded from coastal salt air, the indoor blower motor is noisy, and the contactors are pitted, replacing one covered part will not stop the other aging components from failing soon. Paying substantial out-of-pocket labor fees to fix one piece of a deteriorating puzzle is often a poor investment.

Making the upgrade decision: If the required labor and materials for a warranty repair approach a significant percentage of the cost of a brand-new system, it is time to weigh your options. A new installation resets your warranty clock entirely, provides vastly improved energy efficiency, and eliminates the risk of cascading failures. Consulting with professionals about AC replacement services can help you determine if absorbing the labor cost of a repair is truly worth it, or if those funds are better directed toward a more reliable, long-term solution.

Frequently Asked Questions About Daikin Warranty Coverage

Does Daikin warranty cover labor?

Standard Daikin factory warranties do not cover labor costs. The manufacturer's guarantee strictly covers the physical replacement of defective parts, while the homeowner is responsible for paying the local contractor for the time, expertise, and diagnostic work required to install those parts. Extended labor agreements can sometimes be purchased separately through your local dealer at the time of installation.

Are refrigerant leaks covered under Daikin warranty?

The physical metal coil or copper tubing that leaked is covered if it failed due to a manufacturing defect, but the refrigerant gas itself is not. Refrigerant is classified as a consumable material, meaning you will be responsible for the cost of the new refrigerant needed to recharge the system, as well as the labor to locate and repair the leak.

How long is the Daikin heat pump warranty?

When properly registered within 60 days of installation, most residential Daikin heat pumps feature a 10-year to 12-year limited parts warranty, depending on the specific model tier. If the equipment is not registered within that initial window, the coverage typically defaults to a standard 5-year base term.

What does a heat pump parts warranty actually cover?

A parts warranty covers major physical components that fail due to factory defects, such as a Daikin heat pump compressor or reversing valve, blower motors, electronic control boards, and internal coils. It guarantees that the manufacturer will supply a replacement piece of hardware to your contractor at no charge.

What actions can void a manufacturer warranty?

Failing to perform routine professional maintenance is the most common reason a factory will deny a claim. If a part fails because the system was choked by a filthy air filter or the coils were never cleaned, the manufacturer considers that neglect, not a factory defect. Additionally, having unlicensed individuals perform repairs or using unauthorized third-party parts can void your coverage entirely.

Navigate Your Warranty Confidently with Local Specialists

Understanding the exact math behind your equipment coverage empowers you to make smart, confident decisions when a breakdown occurs. By recognizing that the manufacturer supplies the hardware while your local contractor provides the essential labor, diagnostics, and consumable materials, you can evaluate repair quotes without the frustration of unexpected surprises. Protecting your home in the Miami coastal environment requires both high-quality factory parts and rigorous, technically flawless installation standards.

As dedicated Daikin specialists, Air On Demand transparently navigates the fine print and warranty bureaucracy on your behalf. We handle the complex factory claims process to maximize your hardware coverage while providing the elite technical labor required to get your system running perfectly. If you are facing a major repair and need your factory coverage reviewed, reach out for a comprehensive diagnostic and a clear, honest path forward.

The Back-to-School IAQ Check: Managing Dust and Dander in Fall placeholder-image  | Air On Demand
5 min read

The Back-to-School IAQ Check: Managing Dust and Dander in Fall

The September return to school brings new foot traffic and fresh outdoor contaminants into your home. See how to proactively cycle your HVAC filters to handle this sudden fall IAQ drop.

The Hidden Fall IAQ Drop: Why Back-to-School Means More Dust

September is officially here, and if you are noticing a sudden spike in indoor allergens as the kids head back to class, it is time for The Back-to-School IAQ Check: Managing Dust and Dander in Fall. At Air On Demand, our technicians consistently see a rise in indoor air quality concerns during this time of year. The September back-to-school transition brings a massive increase in household foot traffic, introducing a fresh wave of outdoor contaminants right into your living spaces. While outdoor temperatures remain scorching, your indoor air quality quietly drops as these new particles circulate through your ductwork. You have to proactively adjust how you monitor and cycle your HVAC system to keep your home's air clean and breathable.

For comprehensive solutions to this seasonal shift, explore our expertise in indoor air filtration and learn more about upgrading your air conditioner filters in Miami.

The Mechanics of the September Air Quality Shift

During the summer months, your household likely settles into a predictable routine. The doors stay closed to keep the heat out, and your air conditioning system manages a relatively stable environment. However, the September back-to-school transition shatters this equilibrium. Suddenly, family members are leaving early in the morning and returning during the peak heat of the afternoon. Every time that front door swings open, a rush of unconditioned, allergen-heavy air floods into your hallway.

This disruption does not just bring in hot air; it introduces a completely different profile of airborne contaminants. Fall weed pollen, particularly ragweed, begins to peak just as the school year starts. Because outdoor temperatures in South Florida are still incredibly high, your air conditioner is running at near-peak capacity. As soon as those new particles enter the house, your HVAC system's return vents pull them in, circulating them into every room before they have a chance to settle.

Understanding this dynamic is the first step in protecting your family's respiratory health. The foundation of a healthy home during this busy season relies entirely on how well your system captures these invaders. If you do not adjust your maintenance habits to account for this sudden influx of dust and pollen, your system will struggle to keep up, and your indoor air quality will visibly decline.

How the September Transition Changes Your Home's Air Dynamics

The physical dynamic of your home changes drastically the moment the school bell rings for the first time. Think about the sheer volume of door openings and closings required for school drop-offs, bus pickups, and afternoon sports practices. These events usually occur during the hottest parts of the day, creating massive pressure differentials between the inside of your home and the outside environment.

The Door-Opening Multiplier Effect

The problem: Every time an exterior door opens, the cool, dense, conditioned air spills out, and the hot, humid, particle-laden air rushes in to replace it. This is not a slow drift; it is a rapid exchange driven by temperature and pressure differences.

The cause: Unlike northern states where homeowners might turn off their cooling systems and open windows to enjoy a crisp autumn breeze, our team knows firsthand that the Miami FL indoor climate demands that homes remain tightly sealed. Our air conditioners run constantly. Because modern homes are built to be highly energy-efficient and airtight, any contaminants that enter through those frequent door openings are effectively trapped inside.

The solution: According to the Environmental Protection Agency (EPA), indoor air can be two to five times more polluted than outdoor air, and this statistic becomes glaringly obvious during the back-to-school rush. Relying on standard, low-grade filters is no longer enough. You need a strategic update to your filtration approach when household traffic increases, ensuring your system can process the heavier particulate load without suffocating the blower motor.

The Collision of Schoolyard Allergens and Pet Dander

The contaminants entering your home in September are not just floating in on the breeze; they are being actively carried inside. Children act as highly effective contaminant shuttles. They spend time on school playgrounds, athletic fields, and buses, picking up microscopic dust, mold spores, and pollen along the way.

The Afternoon Settling Phase

When kids drop their backpacks on the floor and kick off their shoes, they release a cloud of these schoolyard allergens directly into your living space. This new influx immediately mixes with the existing contaminants already present in your home, most notably pet dander. Dogs and cats shed microscopic skin flakes constantly, which settle into carpets, rugs, and upholstery.

When the afternoon rush hits, the heavy foot traffic kicks that settled pet dander back up into the air, right as the new schoolyard dust is being introduced. This collision creates a heavy, complex mixture of particulates that places an enormous burden on your HVAC system. When our technicians inspect ductwork and blower motors in the early fall, a pattern we see often is the rapid buildup caused by this afternoon phase. The airborne particles are drawn into the return vents, rapidly clogging your filters and coating your indoor coils if the filtration is inadequate.

To manage this specific combination of heavy dander and fine outdoor pollen, many homeowners find that standard HVAC filters need backup. Integrating dedicated air cleaners and purifiers into your home's ecosystem helps neutralize these contaminants before they ever reach your primary ductwork, keeping your main AC system clean and your air breathable.

Why Household Foot Traffic Dictates Filter Replacement Schedules

One of the most persistent myths we encounter in home maintenance is that air filters only need to be changed on a strict 30-day or 90-day calendar cycle. While calendar reminders are helpful, they ignore the most critical variable in air quality: how the home is actually being used.

Increased household activity drastically reduces a filter's effective lifespan. A filter that lasts three months during a quiet, low-traffic summer might clog completely in just four weeks once the back-to-school rush begins. Shifting your mindset from time-based maintenance to traffic-based maintenance is essential for keeping your system running efficiently.

Time-Based vs. Traffic-Based Maintenance

• Time-Based (Calendar) — Filter Check Frequency: Every 30 to 90 days — Trigger for Replacement: The date on the calendar — Impact on HVAC System: High risk of strain during busy months

• Traffic-Based (Usage) — Filter Check Frequency: Bi-weekly during transitions — Trigger for Replacement: Visual inspection and dirt buildup — Impact on HVAC System: Maintains optimal airflow and efficiency

You do not need specialized tools to check your filter's status. The safest, non-licensed visual cue is the light test. Simply pull the filter out and hold it up to a bright overhead light. If you cannot see light shining through the media, the filter is full and needs to be replaced immediately, regardless of how long it has been installed.

Staying on top of this schedule is vital. Timely air filter replacement in Kendall and surrounding areas prevents the blower motor from overheating and ensures your family is not breathing recycled schoolyard dust.

Managing Air Quality in the Hot and Humid Fall Climate

Contextualizing your indoor air quality strategy requires a hard look at the reality of our local weather. As Miami HVAC professionals, we know the calendar might say it is fall, but the Miami FL indoor climate tells a very different story. Average September highs remain hovering around 89 degrees, accompanied by stifling humidity. Your air conditioning system is not taking a break; it is still operating under peak summer conditions.

How Humidity Interacts with Airborne Particulates

Because your AC system is running constantly to combat the heat, it cycles the indoor air rapidly. This high-velocity circulation pulls dust and dander into the return ducts much faster than it would during milder weather. However, the real complication is the humidity.

When indoor humidity levels rise—often caused by those frequent door openings letting in sticky afternoon air—airborne particles absorb that moisture. Dust, pollen, and pet dander physically swell and become heavier. Instead of floating easily into your return vents to be caught by the filter, these heavy, damp particles stick to your walls, settle deep into your carpets, and coat your furniture.

If your AC is not effectively dehumidifying the air, these sticky allergens create an uncomfortable, stuffy environment that exacerbates indoor allergy symptoms. Fall HVAC maintenance in South Florida must account for this continuous, heavy-duty cooling requirement rather than preparing for a transition to heating.

Upgrading Your Defense: High-Humidity Filtration Solutions

Standard fiberglass air filters—the cheap, see-through blue or green ones you find at the hardware store—are designed to do exactly one thing: protect the HVAC equipment from large debris like hair and heavy dust bunnies. They are completely ineffective at capturing the fine pollen, mold spores, and microscopic pet dander introduced during the back-to-school season.

The Limits of Standard Fiberglass Filters

In our experience installing and maintaining AC systems across Miami, when you combine high household traffic with the heavy moisture loads of the local climate, standard filters quickly become overwhelmed. The cardboard frames can warp from the humidity, allowing dirty air to bypass the filter entirely and coat your sensitive evaporator coil with grime.

To properly manage this seasonal shift, you need specialized high-humidity filtration solutions designed to resist moisture while capturing microscopic allergens. Upgrading to a Health Smart filter provides superior particulate capture without restricting the vital airflow your system needs to survive the South Florida heat. These advanced filters use synthetic media that will not degrade when exposed to high moisture levels, ensuring a tight seal and consistent performance.

Because these filters capture significantly more debris than standard options, they require careful monitoring during high-traffic periods. Understanding the nuances of changing your Health Smart filter as the seasonal load increases is the key to maintaining pristine indoor air quality all autumn long.

Checklist: How to Manage Back-to-School Indoor Air Quality

Taking control of your home's environment during the September back-to-school transition does not have to be overwhelming. By implementing a few strategic habits, you can drastically reduce the amount of dust and dander circulating through your ductwork. Follow this actionable checklist to keep your air clean and your HVAC system running smoothly:

• Inspect HVAC filters bi-weekly: During the first month of school, check your filters every two weeks. The sudden increase in foot traffic will clog them much faster than during the quiet summer months.

• Establish a dedicated 'drop zone': Set up a specific area right at the entryway for backpacks, shoes, and sports gear. Keeping these items contained prevents outdoor dust and pollen from spreading into your main living areas.

• Cycle air purifiers strategically: Schedule your standalone or whole-home air purifiers to run continuously during the peak afternoon hours when kids get home and kick up settled pet dander.

• Monitor indoor humidity: Keep an eye on your thermostat's humidity reading. Ensure your AC is effectively dehumidifying the air to prevent heavy, moisture-laden dust from sticking to your surfaces.

• Wipe down return grilles: Safely use a microfiber cloth to wipe the dust off the exterior of your return vents and grilles. Do this safely from the ground without opening the ductwork or removing any hardware.

Back-to-School IAQ Management Checklist

Frequently Asked Questions About Fall Air Quality

Why is my house so dusty in the fall?

Your house gets dusty in the fall primarily due to increased foot traffic from busy school and work schedules. Every time the door opens, new contaminants rush in. Additionally, peak fall weed pollen (like ragweed) enters the home on clothing, and continuous AC usage rapidly circulates this settled dust through your rooms.

How often should I change my AC filter in the fall?

Filter replacement frequency depends heavily on household traffic, the presence of pets, and your local climate. In high-traffic homes located in continuous cooling climates, you may need to check and replace your filters every 30 days during the busy back-to-school transition to maintain proper airflow.

Why are my allergies worse inside my house in September?

Indoor allergies often spike in September because outdoor allergens are brought inside and trapped in sealed, air-conditioned homes. If your HVAC filters are already full from summer usage, the system cannot remove these new particles, causing it to distribute trapped allergens directly into your breathing space.

How do I reduce dust in my house during back to school season?

To effectively reduce dust, upgrade to specialized high-humidity filters that capture finer particles without warping. Utilize dedicated air purifiers during the afternoon rush to catch airborne dander, manage entryway traffic by creating a drop zone for bags, and clean your exterior vents regularly.

Can heavy household foot traffic impact HVAC performance?

Yes, frequent door openings let out perfectly conditioned air and let in hot, humid, and dirty air. This physical dynamic significantly increases the cooling load on your compressor and accelerates filter clogging, forcing your HVAC system to work much harder to maintain the set temperature.

Breathe Easier This Fall With Proactive Air Quality Management

Managing the hidden September IAQ drop requires proactive filter checks and a clear understanding of how household traffic impacts your HVAC system. By staying ahead of the sudden influx of dust and dander, you keep your home comfortable, your air clean, and your cooling system running efficiently. Take the time to adjust your maintenance routines for the back-to-school season. Our team at Air On Demand is always here to help you navigate these seasonal transitions and explore professional indoor air quality solutions to fully support your home's changing needs.

Retrofitting Daikin VRF Systems in Historic Coral Gables Homes placeholder-image  | Air On Demand
5 min read

Retrofitting Daikin VRF Systems in Historic Coral Gables Homes

Upgrading a 1920s home shouldn't require destroying original plaster walls. Learn how advanced VRF technology delivers modern climate control without the need for bulky, invasive ductwork.

The Challenge of Modern Cooling in 1920s Mediterranean Revival Homes

Your historic home is a masterpiece of architectural design, but struggling with relentless heat and humidity shouldn't be the price you pay to live in it. Upgrading your climate control often forces a painful choice: suffer through inefficient, noisy cooling, or rip open original walls to install massive metal ductwork. Retrofitting Daikin VRF Systems in Historic Coral Gables Homes solves this exact dilemma, allowing you to bridge the gap between century-old craftsmanship and modern comfort.

If you are exploring advanced cooling solutions that respect your property's heritage, integrating Daikin equipment offers a pathway to exceptional indoor air quality without the devastating demolition associated with traditional central air.

The Clash Between Heritage and High-Velocity Air

Properties built during the Florida land boom were designed for a different era. The iconic 1920s Coral Gables historic district features stunning Mediterranean Revival architecture, boasting thick masonry walls, arched doorways, and high ceilings intended to promote natural cross-ventilation. These homes were never built to accommodate the bulky trunk lines, return plenums, and extensive ductwork required by standard modern HVAC systems.

The traditional retrofit problem: When contractors attempt to force a standard central air system into a vintage home, the results often compromise the building's aesthetic integrity. You end up with lowered ceilings, unsightly drywall bulkheads cutting across grand hallways, or original plaster walls torn down to the studs just to create a path for the air to flow.

The modern solution: Homeowners need a system that adapts to the house, rather than forcing the house to adapt to the system. Advanced variable capacity systems route cooling power through narrow, flexible lines rather than massive metal tubes, bypassing the need for major structural alterations.

Navigating Lath, Plaster, and Hollow Clay Tile

Understanding the bones of a vintage property is the first step in protecting it. Original construction materials from the 1920s Coral Gables historic district are fundamentally different from modern drywall and concrete block. They possess a unique charm and superior acoustic properties, but they are also incredibly fragile when subjected to modern power tools.

The Anatomy of a 1920s Wall

Most historic homes in the area utilize a combination of hollow clay tile for structural support, covered by a lath and plaster finish.

• Hollow clay tile: Used extensively in the 1920s, these terra cotta blocks are strong under compression but highly brittle. A standard rotary hammer drill can easily shatter them.

• Wood lath: Thin strips of wood nailed horizontally across studs.

• Plaster keys: When wet plaster was pushed through the gaps in the wood lath, it formed "keys" on the backside that locked the wall in place as it dried.

The vibration threat: Standard masonry techniques used for modern homes create intense vibrations. When heavy drills hit historic walls, those century-old plaster keys snap off. The result is severe spider-cracking across the wall's surface, or worse, large sections of plaster sagging and detaching entirely from the lath.

Understanding these structural quirks is essential for planning a retrofit that respects the architecture. Contractors must use specialized, low-impact masonry techniques, such as diamond-bit core drilling at low speeds, to create necessary pathways without sending destructive shockwaves through the wall. For many historic property owners, transitioning to ductless mini split systems or advanced variable refrigerant setups is the only way to ensure these delicate frameworks remain intact.

Why Variable Refrigerant Flow is the Premier Choice for Historic Preservation

If traditional ductwork is the enemy of historic preservation, what is the alternative? The answer lies in changing how we transport cooling power throughout the home. Daikin VRF (Variable Refrigerant Flow) systems represent a massive leap forward in minimally invasive climate control.

Eliminating the Need for Bulky Ductwork

Traditional central air conditions the air in one central location and uses large metal tubes (ducts) to push that air to different rooms. VRF technology flips this concept. Instead of moving air, it moves refrigerant.

The spatial advantage: VRF systems utilize small-diameter copper refrigerant lines—often no thicker than a standard garden hose. These compact line sets can be routed through existing structural cavities, tucked behind baseboards, or run through defunct chimneys, drastically minimizing the need to tear into walls.

Advanced Zoning for Vintage Layouts

Historic homes often feature segmented, closed-off floor plans rather than modern open-concept designs. This makes traditional central air highly inefficient, as it attempts to cool the entire house based on a single thermostat reading.

Precise zoning capabilities allow a VRF system to manage varying heat loads in individual rooms efficiently. You can set the sun-drenched Florida room to one temperature while keeping the shaded master bedroom at another. Options like Daikin Fit systems provide high-efficiency cooling with a significantly reduced physical footprint, making them highly suitable for older properties with tight lot lines and strict aesthetic requirements.

VRF Routing vs. Traditional Ductwork in Historic Homes

Protecting Original Plaster from South Florida Humidity

With South Florida's relentless heat and high humidity, the air outside your home is constantly trying to equalize with the conditioned air inside. In a 1920s home, this creates a unique set of challenges regarding moisture management. Historic houses "breathe" differently than modern, tightly sealed construction.

The Danger of Wall Cavity Condensation

Improperly retrofitted HVAC lines can cause severe condensation issues. If standard copper pipes carrying cold refrigerant are routed through hot, uninsulated vintage wall cavities without meticulous vapor barriers, they will sweat. Over time, this constant dripping leads to plaster rot, mold growth, and the structural degradation of the wood lath.

The psychrometric advantage: Daikin VRF (Variable Refrigerant Flow) systems offer superior moisture control. Because these systems modulate their capacity rather than simply turning on and off, they run longer cycles at lower speeds. This continuous operation pulls significantly more latent heat (humidity) out of the indoor air, preventing humidity buildup inside delicate wall cavities.

Proper insulation of all line sets is mandatory to maintain the integrity of historic plaster over time. Every inch of piping must be encased in high-grade, closed-cell foam insulation to ensure zero condensation occurs within the walls. Advanced climate control ensures that the home's interior environment protects both the occupants and the irreplaceable architecture.

Strategic Piping Routes That Preserve Architectural Integrity

The success of retrofitting a historic home comes down to the planning phase. Finding pathways for refrigerant lines, power cables, and condensate drains without altering the visual appeal of a room requires a deep understanding of vintage construction.

Interior Chases and Hidden Pathways

Professionals utilize existing chases, stacked closets, and minimal exterior penetrations to route line sets. A common strategy in the 1920s Coral Gables historic district involves identifying non-primary spaces—like the back corners of utility closets or defunct laundry chutes—to run the vertical piping between floors. From there, lines can be carefully threaded between floor joists to reach individual rooms.

Careful planning ensures that indoor air handlers are placed unobtrusively. Whether utilizing low-wall floor consoles that mimic the look of vintage radiators, or slim-ducted units hidden completely inside drop-ceilings above modern bathroom renovations, the goal is to maintain the room's visual appeal.

Navigating Preservation Guidelines

Coordination with local preservation guidelines ensures all exterior modifications meet historic board standards. Exterior line sets must often be camouflaged using custom architectural covers painted to match the original stucco, ensuring the home's curb appeal remains untouched.

Expert AC installation in Miami requires a deep understanding of these specific structural routing methods. It is a meticulous process of mapping the home's anatomy before a single tool is ever powered on.

Timing Your Historic HVAC Upgrade

Retrofitting a century-old property is not a rushed weekend project. It is a deliberate, careful process that requires the home to be without primary cooling during the installation phase. Because of this, scheduling complex retrofits requires strategic planning to minimize downtime during peak heat.

The Seasonal Sweet Spot

The September pre-fall transition offers an ideal window for comprehensive system upgrades. While temperatures in South Florida remain warm, the extreme, oppressive heat of mid-summer begins to taper off. This slight drop in cooling load makes the transition period significantly more comfortable for occupants while the home is temporarily unconditioned.

Proactive planning benefits:

• Reduced emergency pressure: Completing the installation ahead of the dry season ensures the home is optimized for year-round comfort without the stress of an emergency breakdown.

• Better contractor availability: The fall transition often allows for more flexible scheduling, ensuring the installation team has the uninterrupted time needed to execute delicate plaster work.

• System optimization: Upgrading proactively prevents emergency replacements, which can rush the delicate preservation process and lead to regrettable aesthetic compromises.

Partnering with Specialized Coral Gables HVAC Experts

Retrofitting historic homes is not a standard installation. It requires specialized training, proven protocols, and a deep respect for the materials involved. Not every technician is equipped to handle hollow clay tile or understand the nuances of a Mediterranean Revival floor plan.

Air On Demand brings specialized experience as a local Miami Daikin dealer uniquely equipped to navigate 1920s historic properties. Local experts understand the municipal guidelines, permitting requirements, and preservation standards unique to the area. This ensures your project moves forward smoothly without running afoul of local architectural review boards.

Proper installation by a certified dealer ensures the system operates efficiently and protects the home from moisture damage. Furthermore, working with authorized professionals guarantees access to comprehensive Daikin unit replacement guarantees and long-term support. When dealing with Daikin VRF (Variable Refrigerant Flow) systems, factory-authorized commissioning is vital to ensure the complex electronics and variable-speed compressors communicate flawlessly.

Frequently Asked Questions About Historic Home AC Retrofits

How do you install AC in a historic home without ductwork?

The short answer is to use a ductless or variable refrigerant flow (VRF) system. These systems rely on small-diameter refrigerant lines rather than large metal air ducts to transport cooling power throughout the house. The lines are flexible enough to be routed through existing wall cavities, closets, or exterior chases, completely bypassing the need to tear down ceilings or build drywall bulkheads.

Can you put VRF in an old house with plaster walls?

Yes, VRF systems are uniquely suited for old houses with plaster walls. Because the piping is so small, technicians can use specialized, low-vibration core drills to create tiny penetrations without shattering the fragile plaster keys behind the wall. This minimizes the risk of spider-cracking and preserves the 1920s Coral Gables historic district aesthetic.

What is the best HVAC system for historic preservation?

Variable Refrigerant Flow (VRF) and multi-zone ductless systems are widely considered the gold standard for historic preservation. They offer precise room-by-room temperature control and exceptional humidity management while requiring virtually zero structural demolition. This ensures the home's original millwork, plaster, and floor plans remain entirely intact.

How do you run AC lines in plaster walls without causing cracks?

Contractors avoid standard rotary hammer drills, which create violent vibrations that destroy old plaster. Instead, professionals use high-speed, diamond-bit core drills to cut cleanly through the plaster and underlying lath or hollow clay tile. Additionally, lines are often routed through non-structural areas like stacked closets to minimize wall penetrations altogether.

How much space does a Daikin VRF system need in a 1920s home?

A Daikin VRF system requires surprisingly little space compared to traditional central air. The outdoor units feature a slim, side-discharge profile that fits easily into tight side yards or zero-lot-line spaces common in historic neighborhoods. Inside, the refrigerant lines require only a few inches of clearance, and the indoor air handlers can be mounted on walls, hidden in dropped ceilings of renovated bathrooms, or placed near the floor.

Secure Modern Comfort for Your Historic Property

Modern climate control does not require sacrificing the architectural beauty of a historic home. The craftsmanship of the 1920s Coral Gables historic district was built to last, and your cooling system should respect that legacy. With expert planning and advanced VRF technology, delicate plaster walls remain fully protected while delivering whisper-quiet, highly efficient comfort to every room.

Protecting your investment means choosing a solution designed specifically for the unique challenges of vintage architecture. Consult with a local specialist to evaluate your property's specific structural needs, map out non-invasive piping routes, and safeguard your home against humidity. Schedule an assessment today to explore minimally invasive cooling solutions that keep your historic home perfectly comfortable year-round.

Why Mismatched Condensers and Air Handlers Fail Faster in Miami's High Humidity placeholder-image  | Air On Demand
5 min read

Why Mismatched Condensers and Air Handlers Fail Faster in Miami's High Humidity

Pairing a new 15-SEER condenser with an older 10-SEER air handler creates a massive mechanical imbalance. This partial upgrade leaves your home feeling cold but clammy.

The Cold but Clammy Trap of Partial AC Upgrades

Your thermostat says it is 72 degrees inside, but you are still sweating, wondering exactly why mismatched condensers and air handlers fail faster in Miami's high humidity. You likely upgraded your outdoor unit recently to improve efficiency, expecting crisp, dry air. Instead, your house feels like a cave—cold, yet uncomfortably wet and sticky. This frustrating scenario almost always happens when you pair a brand-new, high-efficiency outdoor unit with an older, lower-efficiency indoor unit. For example, slapping a modern 15-SEER condenser onto an aging 10-SEER air handler creates a massive mechanical imbalance. The system simply cannot process the heavy moisture load. Understanding why these partial replacements fail at moisture removal is the very first step toward restoring true indoor comfort to your home.

When it is time to evaluate your air conditioning systems, getting professional AC replacement services in Miami ensures every component works perfectly together.

Can I Replace Just My AC Condenser? Understanding the Risks

Many homeowners ask, "can I replace just my AC condenser?" when their outdoor unit fails. While a technician can physically connect a new outdoor unit to an old indoor unit, a simple "yes" technically misses the broader performance catastrophe waiting to happen. To understand why this fails, you have to look at how air conditioning actually works. Your system performs two distinct jobs simultaneously: sensible cooling and latent cooling.

Sensible cooling is the process of dropping the actual temperature of the air. This is what registers on your thermostat. Latent cooling is the process of removing moisture from the air. In a humid subtropical climate, latent cooling is arguably more important for human comfort than sensible cooling. High-efficiency outdoor units are incredibly good at sensible cooling. They drop the air temperature rapidly. However, if that powerful outdoor unit is paired with older air handlers, the indoor coil cannot extract moisture effectively before the thermostat tells the system to shut off. The result is a home that reaches the target temperature but feels damp, clammy, and uncomfortable.

The Physics of Moisture Removal

Moisture removal relies on a very specific scientific process. As warm, humid indoor air blows across the cold indoor evaporator coil, the moisture in the air reaches its dew point, condenses into water droplets on the coil, and drains away.

For this to work, the air must pass over the coils at a highly specific, controlled rate. When you have a 15-SEER condenser paired with a 10-SEER air handler, the indoor fan and coil were simply not designed to handle the rapid cooling capacity of the new outdoor unit. The indoor coil gets cold very fast, but the air does not spend enough time moving across the surface to drop its moisture.

• Sensible Cooling — What It Does: Lowers the air temperature — How Mismatches Affect It: Cools too quickly, satisfying the thermostat prematurely.

• Latent Cooling — What It Does: Removes airborne humidity — How Mismatches Affect It: Fails to run long enough to allow condensation to form and drain.

The SEER Mismatch: Why a 15-SEER Condenser Overpowers a 10-SEER Air Handler

SEER (Seasonal Energy Efficiency Ratio) measures how efficiently a cooling system operates over an entire season. When you look at the specific dynamics of a SEER mismatch, the technical mechanics reveal why partial upgrades waste money. A 15-SEER condenser paired with a 10-SEER air handler is a recipe for severe operational stress. The new outdoor condenser is engineered to pump refrigerant at a specific volume and pressure, assuming it is communicating with an equally advanced indoor coil.

The older 10-SEER indoor coil has less surface area and a weaker blower motor. It physically cannot absorb the heat from your home fast enough to boil the refrigerant back into a gas before it returns to the compressor. This disrupts the entire airflow balance and coil temperature regulation.

The 30% Efficiency Penalty: Industry data shows that mismatched systems can degrade expected SEER efficiency by up to 30%. If you paid for a 15-SEER condenser, pairing it with a 10-SEER air handler means you might only be getting 10.5-SEER performance. This completely negates the financial benefits and utility savings you expected from the new condenser.

The Risk of Frozen Coils: Furthermore, this imbalance creates a severe risk of freezing your indoor coil. Because the old indoor unit cannot move enough warm air over the coil to match the extreme cold provided by the new condenser, the temperature of the indoor coil drops below freezing. The heavy moisture in the air condenses and immediately turns to solid ice. A frozen coil blocks all airflow, forcing the system to run constantly without cooling your home, eventually leading to a complete system breakdown.

The Physics of a Mismatched AC System in High Humidity

Short-Cycling During South Florida's September Transition

The consequences of a mismatched system become incredibly obvious during specific seasonal weather patterns. Consider the September lingering high humidity in South Florida. During this late summer and early fall transition period, the peak blistering heat of July begins to wane, and temperatures might slightly dip into the low 80s or upper 70s. However, the relative humidity remains oppressive, often averaging over 75 percent.

This specific climate profile requires robust latent cooling capabilities. Because the sensible heat load (the temperature) is lower, a mismatched system will cool the house down to your thermostat setting almost instantly. This leads to a destructive mechanical behavior known as short-cycling, where the system turns on and off rapidly.

Here is exactly how short-cycling destroys indoor comfort during the September transition:

1. Rapid Temperature Drop: The oversized 15-SEER condenser blasts the home with cold air, dropping the indoor temperature by a few degrees in just five to ten minutes.

2. Premature Shutoff: The thermostat registers that the target temperature is met and abruptly shuts the entire system down.

3. Moisture Remains: Because the system only ran for ten minutes, the indoor coil never had the long, steady run time necessary to condense and drain the heavy atmospheric moisture.

4. The Clammy Rebound: The air in the home is cold but fully saturated with water. Within minutes, the home feels sticky, prompting the thermostat to trigger the system again, starting the rapid cycle over.

This constant on-and-off cycling prevents the long, steady run times necessary for latent heat removal. It exacerbates the cold but clammy syndrome, making your home feel like a damp basement rather than a comfortable living space.

Can You Replace Just the Outside AC Unit? The Hidden Toll on Compressors

When homeowners ask, "can you replace just the outside AC unit?" they are usually trying to avoid the labor and equipment costs of replacing the indoor air handler. While we have covered the comfort issues, the mechanical consequences of this choice are far more severe. The compressor, located inside the outdoor unit, is the heart of your cooling system. It is designed to pump refrigerant in a continuous, balanced loop.

When a 15-SEER condenser is paired with a 10-SEER air handler, the new compressor is forced to overwork against a highly restrictive, undersized older indoor coil. This creates a bottleneck in the refrigerant line, leading to dangerously high head pressures at the compressor.

Consider these hidden mechanical tolls when mismatching equipment:

• Refrigerant Incompatibilities: Older 10-SEER air handlers were built for R-22 refrigerant, which operates at much lower pressures. Modern 15-SEER condensers use R-410A (or newer refrigerants), which operate at significantly higher pressures. Even if the old coil is flushed, it is not built to withstand the pressure of modern refrigerants.

• Liquid Slugging: Because the old indoor coil cannot boil the refrigerant back into a gas efficiently, liquid refrigerant can travel backward through the suction line into the compressor. Compressors are built to pump gas, not liquid. Liquid slugging destroys compressor valves instantly.

• Premature Compressor Failure: The constant short-cycling combined with high head pressure causes the compressor motor to overheat, leading to electrical burnout years before its expected lifespan.

• Voided Manufacturer Warranties: Major HVAC manufacturers explicitly state that their equipment must be installed as a matched system. Pairing a new condenser with an obsolete air handler will almost certainly void the warranty on your new equipment.

To avoid these catastrophic failures and protect your investment, installing properly matched new AC units is the only reliable path forward.

AHRI Standards and the Necessity of Exact System Matching

In the HVAC industry, performance is not based on guesswork; it is based on rigorous scientific testing. The Air-Conditioning, Heating, and Refrigeration Institute (AHRI) is the globally recognized authority that certifies the performance of heating and cooling equipment. AHRI certification requires matched indoor and outdoor components to guarantee performance ratings.

When a manufacturer builds a 15-SEER condenser, they submit it to AHRI for testing along with a specific, matching indoor air handler. AHRI tests the two units working together as a complete system. If they pass, AHRI issues a certification number proving that this specific combination achieves 15 SEER.

Without a matched system, the advertised efficiency of the new condenser is virtually meaningless. An AHRI certificate cannot be generated for a 15-SEER condenser paired with a 10-SEER air handler because no manufacturer would ever submit that combination for testing. Exact matching ensures proper refrigerant flow, balanced airflow, and synchronized latent and sensible cooling capacities. Furthermore, if you are looking to take advantage of generally applicable energy rebates or federal tax credits, these programs almost universally require an official AHRI certificate proving the system was installed as a matched pair.

Restoring Comfort with Proper Load Calculations and Advanced Technology

The only true solution to a cold, clammy home caused by mismatched equipment is replacing the outdated indoor air handler. However, simply buying a new indoor box is not enough. The key to long-term reliability and superior indoor air quality lies in proper load calculations and exact system matching.

Before any new equipment is installed, a technician must perform a precise heat load calculation (often called a Manual J calculation). This mathematical formula measures your home's specific thermal envelope, taking into account square footage, insulation levels, window orientation, and the intense Miami sun. This calculation ensures the new matched system is sized perfectly for your home. An oversized system will short-cycle just like a mismatched system, failing to dehumidify the air.

Air On Demand emphasizes a strict commitment to proper load calculations and exact system matching. By focusing on specialized knowledge in advanced HVAC installations, we prioritize dehumidification alongside temperature control. When you invest in matching indoor air handlers with new Daikin condensers, you are ensuring that the indoor coil's surface area, the blower motor's speed, and the outdoor compressor's capacity are all communicating flawlessly. This prevents premature component failure and guarantees that your home stays cool, dry, and consistently comfortable, no matter how humid it gets outside.

Frequently Asked Questions About AC Component Matching

Can I replace just my AC condenser?

Technically, a technician can connect a new condenser to an old air handler, but it is highly discouraged. Doing so causes severe dehumidification loss because the new, powerful outdoor unit cools the air too quickly for the old indoor coil to remove moisture. This mismatch also creates massive mechanical strain that leads to premature system failure.

Can you replace just the outside AC unit?

Replacing just the outside unit forces the new compressor to push high-pressure refrigerant into an older, restrictive indoor coil. This bottleneck causes the compressor to overheat and short-cycle constantly. Furthermore, manufacturers require matched indoor and outdoor components, so replacing only the outside unit will typically void your new equipment warranty.

Why does my AC feel cold but humid?

Your AC feels cold but humid because it is failing at latent cooling, which is the process of removing moisture from the air. This usually happens when a high-SEER condenser is paired with a low-SEER air handler, causing the system to satisfy the thermostat's temperature setting before it has time to wring the humidity out of the indoor air.

What happens if air handler and condenser don't match?

When the air handler and condenser do not match, the system suffers from imbalanced airflow and improper refrigerant pressures. You can expect up to a 30% loss in energy efficiency, frequent short-cycling, poor indoor air quality, and a high risk of the indoor evaporator coil freezing solid into a block of ice.

Will a mismatched AC system void my manufacturer warranty?

Yes, major HVAC manufacturers stipulate that their equipment must be installed as part of a complete, matched system verified by AHRI standards. If a 15-SEER condenser paired with a 10-SEER air handler suffers a compressor failure, the manufacturer will likely deny the warranty claim due to improper installation and mechanical abuse.

Protect Your Investment with a Properly Matched AC System

A clear, physics-grounded understanding of SEER mismatching proves the absolute necessity of replacing the air handler when upgrading your outdoor unit. Restoring indoor air quality and genuine comfort in high humidity requires components that are engineered to work in perfect harmony. A 15-SEER condenser paired with a 10-SEER air handler will only leave you frustrated, uncomfortable, and facing expensive repairs. To protect your home and your investment, consult with local professionals to evaluate your current system's performance and explore fully matched replacement options today.

Protecting Your Outdoor AC Unit from September Yard Debris placeholder-image  | Air On Demand
5 min read

Protecting Your Outdoor AC Unit from September Yard Debris

Late summer storms and heavy landscaping can easily choke your condenser coils with wet grass and mulch. Clearing a safe two-foot perimeter keeps your system breathing.

The Hidden Threat to Your Outdoor Condenser in Late Summer

Your lawn looks perfectly manicured after a long weekend of yard work, but your air conditioner is suddenly struggling to keep the house cool. At Air On Demand, our technicians frequently see this scenario as we transition into early fall. Protecting your outdoor AC unit from September yard debris is a common oversight that leads to unexpected breakdowns just as homeowners are starting their pre-heating-season prep. Many homeowners focus on trimming back heavy vegetation and preparing their properties for incoming weather, completely forgetting about the mechanical equipment sitting right in the middle of the landscaping zone.

When you tackle heavy yard work, it is incredibly easy to accidentally kick up wet grass clippings, dirt, and heavy mulch directly into an actively running air conditioner or heat pump. Because the unit is pulling in massive amounts of air to function, it acts like a giant vacuum for airborne landscaping waste. Navigating the September late-summer growth and storm prep season requires a specific strategy for clearing the perimeter without damaging delicate internal components.

Before you fire up the lawnmower or break out the heavy shears this weekend, it is critical to understand how landscaping impacts your cooling system. Maintaining a clean, debris-free zone is a cornerstone of proper AC maintenance, ensuring your equipment operates efficiently as we head into the autumn months.

The Hidden Cost of Yard Work

Most landscaping damage happens in the blink of an eye. A mower discharges a thick clump of wet grass directly at the unit, or a weed whacker gets a fraction of an inch too close to the exterior casing. While the outside of the cabinet might look sturdy, the internal mechanisms rely on precise, unobstructed airflow to function. When that airflow is compromised by a sudden influx of yard waste, the system immediately begins to suffer.

Understanding the relationship between your landscaping habits and your HVAC system's health is the first step in preventing unnecessary wear and tear. By adjusting how you approach perimeter clearing, you can keep your yard looking pristine without sacrificing your indoor comfort or indoor air quality (IAQ).

Why Wet Yard Debris is Dangerous for Your Air Conditioner

In our years of providing expert AC repair and AC installation across Miami, the team at Air On Demand has learned that generic fall HVAC advice often focuses on dry, falling autumn leaves and preparing systems for winter hibernation. That advice does not apply in South Florida. Here, systems are still running at near-peak capacity well into the fall. Because the equipment is actively working to cool your home, the threat is not dry leaves—it is heavy, wet Bahia grass, damp soil, and sticky mulch acting like a suffocating blanket on the unit.

To understand why this is so dangerous, you have to look at how the system actually works. The outdoor unit's primary job is to pull in massive volumes of outside air across the outdoor condenser coil fins to shed the heat it absorbed from inside your home. When wet debris plasters itself against these fins, it blocks that critical air intake. The system can no longer release heat effectively, trapping high temperatures inside the equipment.

The Mechanics of Thermal Strain

When airflow is restricted by a layer of wet yard waste, the mechanical strain on the system skyrockets. The compressor, which pumps refrigerant through the lines, is forced to work harder and run significantly hotter to achieve the same cooling output. This continuous strain leads to severe overheating.

The cascading failure process:

• Blocked Intake: Wet grass seals off the narrow gaps between the aluminum fins.

• Trapped Heat: The internal temperature of the condenser casing rises rapidly.

• Component Stress: The compressor draws more electrical current, trying to force the cooling cycle to complete.

• System Shutdown: The extreme heat eventually triggers safety switches, resulting in fan motors shutting down due to thermal overload.

Because Miami AC units run relentlessly in September to combat high humidity and temperatures, suffocating them with landscaping debris is a fast track to a complete system failure.

Comparing Debris Types and Their Impact

• Dry Autumn Leaves — Behavior Around HVAC Units: Blows away easily, tends to rest loosely on top of the fan grille. — Impact on System Performance: Minor airflow restriction; usually easy to brush off by hand.

• Wet Grass Clippings — Behavior Around HVAC Units: Clumps together, acts like a wet paste, and gets sucked into narrow gaps. — Impact on System Performance: Severely chokes airflow, plasters against fins, and traps moisture against metal parts.

• Heavy Wood Mulch — Behavior Around HVAC Units: Retains water, heavy enough to dent soft metal if thrown by a mower blade. — Impact on System Performance: Can cause physical impact damage and block lower intake vents completely.

Rules for Protecting Your AC During Yard Cleanup

Establishing clear boundaries around your HVAC equipment is the most effective way to prevent accidental landscaping damage. Across countless Miami-area residential properties we service, our technicians see a clear pattern: systems that enjoy a wide, clean perimeter consistently outlast and outperform those choked by encroaching vegetation. Following a strict set of rules during your weekend yard cleanup will keep your system breathing easily.

Essential rules for maintaining a safe HVAC perimeter:

• Enforce the 2-to-3-foot clearance rule: Keep all sides of the outdoor unit completely free of plants, tall grass, and decorative items. This provides the minimum volume of space required for adequate air intake.

• Maintain vertical clearance: Ensure there is at least 5 feet of unobstructed space directly above the unit so the exhaust fan can blow hot air upward without it bouncing back down.

• Control the mower discharge: Always point the lawnmower's discharge chute away from the HVAC unit. Never make a pass where the side-discharge sprays clippings directly at the metal casing.

• Rake and bag heavy debris: Instead of using a high-powered leaf blower near the unit—which forces dirt and dust deep into the mechanical components—rake heavy debris by hand and bag it immediately.

• Trim back encroaching shrubs: Bushes and hedges grow rapidly in late summer. Trim them back regularly so branches do not push through the protective grille.

• Inspect after every landscaping session: Before heading inside, do a quick visual walk-around of the unit to ensure no stray clippings or branches are resting against the exterior.

The Importance of Consistent Perimeter Checks

Vegetation in South Florida grows aggressively, especially after heavy afternoon rains. A perimeter that was perfectly clear in August can easily become overgrown by late September. Making the 2-to-3-foot clearance rule a mandatory part of your weekly lawn care routine ensures the equipment never starves for air.

The 2-Foot Clearance Rule for Outdoor AC Units

Safe Trimming Practices to Avoid Aluminum Fin Damage

One of the most frequent landscaping accidents our team repairs involves the improper use of string trimmers (weed whackers) near the condenser casing. While these tools are excellent for edging sidewalks, they are highly destructive when brought too close to HVAC equipment. The exterior of your unit is lined with thousands of tightly packed outdoor condenser coil fins, which are manufactured from extremely thin, fragile aluminum.

These fins are designed to be thin so they can transfer heat efficiently, but that thinness makes them highly susceptible to physical damage. A weed whacker string spinning at high speeds can easily slice through the protective outer cage and flatten dozens of fins in a fraction of a second. When these fins are bent flat, they permanently block airflow to that section of the coil, even if no dirt or debris is present.

How to Safely Clear the Immediate Area

To protect these delicate components, you must change your approach when working within the immediate 12-inch radius of the unit. Never use high-speed power tools in this danger zone.

The hand-clearing method:

1. Turn off the power to the AC unit at the thermostat so it does not kick on while you are working nearby.

2. Put on heavy gardening gloves to protect your hands from sharp metal edges.

3. Manually pull weeds, tall grass, and vines that have grown up against the concrete pad or the unit itself.

4. Use manual hand shears to carefully snip away thicker stalks that cannot be pulled by the roots.

If an accident has already happened and a large section of the aluminum fins is heavily bent, flattened, or damaged by flying debris, DIY fixes are not recommended. Attempting to pry the fins back open with a knife or screwdriver usually tears the metal, leading to expensive refrigerant leaks. In these cases, professional AC repair services in Miami are necessary to properly comb the fins back into alignment and restore proper airflow.

Managing Late-Summer Storm Prep and Heavy Debris

September is the statistical peak of the Atlantic hurricane season, bringing a unique set of challenges to early fall yard maintenance. The focus shifts from simple lawn mowing to extensive storm preparation. During this time, the types of debris threatening your HVAC system become much larger and significantly more dangerous. Daily heavy rains accelerate vegetation growth, while high winds threaten to turn loose yard waste into destructive projectiles.

Preparing your property for severe weather during the September late-summer growth and storm prep season requires careful attention to the area surrounding your outdoor unit. Heavy flying debris, such as large palm fronds, coconuts, and broken oak branches, can dent the casing, smash the fan grille, or severely damage the internal fan blades if they strike the unit during a storm.

Pre-Storm and Post-Storm Protocols

Taking proactive steps before the wind picks up can save your system from catastrophic physical damage. Follow these structured steps to secure the perimeter:

1. Clear dead branches early: Survey the trees surrounding your property. Prune any dead or dying branches that overhang the HVAC unit, as these are the first to snap during high winds.

2. Secure loose patio items: Patio furniture, children's toys, and lightweight potted plants should be moved indoors or tied down. In strong gusts, these items can smash into the condenser casing.

3. Remove heavy organic waste: Do not leave piles of trimmed palm fronds or heavy brush near the unit waiting for bulk trash pickup. High winds will scatter this debris directly into the equipment.

4. Conduct a post-storm visual inspection: After a severe weather event passes, never turn the AC back on immediately. Walk outside and inspect the unit. Look for heavy debris lodged in the top fan grille or plastered against the side intakes.

5. Clear the fan path: Ensure no branches have fallen through the top grille. If a stick is jamming the fan blade and the system tries to turn on, the fan motor will burn out almost instantly.

As a local Miami business, we know our specific weather patterns demand vigilance. The combination of intense heat, daily deluges, and tropical storm threats means your outdoor equipment is constantly battling the elements. Keeping the area clear is your best defense.

When DIY Perimeter Clearing Ends and Professional Cleaning Begins

We always tell our customers that there is a distinct line between maintaining the landscaping around your unit and actually cleaning the internal components of the HVAC system. While homeowners play a crucial role in keeping the 2-to-3-foot perimeter clear, extracting debris that has already breached the outer casing requires professional expertise.

If you notice a light accumulation of dust or dry grass on the outside of the unit, it is generally safe to gently rinse the exterior with a standard garden hose set to a low-pressure shower spray. Always spray from the top down to wash debris away from the fins. However, you must never use a pressure washer on your air conditioner. The high-velocity water will instantly flatten the outdoor condenser coil fins, causing severe and permanent airflow restriction.

The Limits of Surface Rinsing

Once wet grass, sticky mulch, and damp dirt are sucked deeply into the coil fins, surface rinsing is no longer effective. In fact, spraying water on deeply embedded dirt often turns it into thick mud, cementing it further into the narrow gaps. When debris reaches this level of penetration, the unit's outer cage must be carefully dismantled for internal cleaning—a task that requires a licensed professional.

Signs you need professional intervention:

• Visible matting: A thick, visible blanket of dirt or grass is trapped between the protective cage and the aluminum fins.

• Longer cooling cycles: The system runs constantly but struggles to reach the temperature set on the thermostat.

• Unusual heat: The air blowing out of the top of the outdoor unit feels exceptionally hot, or the metal casing is hot to the touch.

• Increased energy bills: A sudden spike in electrical costs indicates the compressor is working overtime to overcome restricted airflow.

Because South Florida's extreme weather impacts equipment so uniquely, local technicians know exactly how to safely extract stubborn, wet tropical debris from delicate coils without causing damage. Scheduling a routine AC inspection ensures that deep-seated debris is handled properly, restoring your system to peak operational efficiency.

Keep Your System Breathing Easy This Fall

Protecting your HVAC equipment from landscaping damage does not require specialized tools, just a bit of mindful planning. By enforcing a strict clearance zone, pointing your mower discharge away from the casing, and keeping weed whackers at a safe distance, you can prevent the vast majority of debris-related breakdowns across Miami-area residential properties.

As you tackle your next round of yard work, remember that a clean perimeter is the best way to keep the system running efficiently. If your unit has already ingested a heavy dose of wet grass or storm debris, do not wait for the compressor to overheat. Take action and schedule a professional AC coil cleaning before late-season storms cause further buildup. Additionally, early fall is the perfect time to consider upgrading aging equipment to a high-efficiency heat pump, which may qualify for generic federal tax credits or local utility incentive programs, ensuring your home stays comfortable year-round.

Frequently Asked Questions

How do I protect my AC unit from grass clippings?
The most effective method is to always point your lawnmower's discharge chute away from the AC unit when mowing nearby. Additionally, leave a 2-to-3-foot buffer zone around the equipment where you use hand shears instead of power equipment. If clippings do blow toward the unit, gently brush them off the exterior casing immediately after mowing.

How much clearance does an outdoor AC unit need?
HVAC manufacturers strongly recommend maintaining a minimum of 2 to 3 feet of unobstructed clearance on all four sides of the outdoor unit. Furthermore, you should ensure there is at least 5 feet of vertical clearance above the unit. This open space allows the system to pull in sufficient fresh air and exhaust hot air without restriction.

Can you spray water on your outside AC unit to clean it?
Yes, you can use a standard garden hose set to a gentle shower setting to rinse light dust and loose clippings off the exterior. Always spray at a downward angle to avoid driving dirt deeper into the fins. However, you must never use a pressure washer or a high-pressure nozzle, as the force will permanently bend the delicate aluminum fins.

What happens if grass gets in the AC unit?
When wet grass gets sucked into the AC unit, it plasters against the condenser coil fins and blocks the intake of air. This suffocation prevents the system from releasing heat, forcing the compressor to work much harder and run hotter. Over time, this extreme thermal strain can cause the fan motor to overheat and shut the entire system down.

Is it safe to use a weed whacker near my condenser?
No, it is highly dangerous to use a string trimmer within 12 inches of your outdoor AC unit. The high-speed string can easily slice through the outer protective cage and flatten the fragile aluminum fins inside. Instead, manually pull weeds by hand or use manual garden shears to clear vegetation directly against the concrete pad.

How often should I have my outdoor AC coils professionally cleaned?
For most homes, having the outdoor coils professionally cleaned once a year during a routine maintenance visit is sufficient. However, if your unit is exposed to heavy tropical storms, excessive yard debris, or sits near a high-traffic landscaping zone, you may need a professional cleaning twice a year to maintain optimal airflow.

Financing a New AC System vs. Paying Out of Pocket placeholder-image  | Air On Demand
5 min read

Financing a New AC System vs. Paying Out of Pocket

A sudden cooling failure in early fall forces a tough financial choice. See how to balance immediate comfort needs while protecting your household emergency safety net.

Facing a Sudden Cooling Failure? How to Navigate Your Payment Options

Are you suddenly dealing with a complete system breakdown and weighing the options of Financing a New AC System vs. Paying Out of Pocket right when you need cooling the most? In our years of restoring comfort across the community, the team at Air On Demand has seen firsthand how the stress of a hot, uncomfortable home is immediately followed by the anxiety of a major financial decision. This is especially true when a breakdown occurs during the September peak hurricane season, a time when maintaining a robust emergency safety net is absolutely critical for your household's security.

You need your home cooled down today, but you also need to protect your hard-earned savings from being wiped out in a single afternoon. If you are trying to figure out the smartest way forward, reviewing your HVAC financing options and scheduling professional AC replacement services in Miami is the most effective way to restore your comfort without compromising your financial stability.

Why Early Fall Breakdowns Demand Immediate Action

In many parts of the country, an early fall air conditioning breakdown might be treated as an end-of-season nuisance that can be deferred until a pre-heating-season tune-up the following spring. However, our technicians know the climate reality in Miami FL dictates a completely different approach. When September arrives, the average high temperatures remain firmly near ninety degrees, accompanied by stifling, oppressive humidity. Waiting out the heat simply is not a viable option for your family's health or the structural integrity of your property.

When an air conditioning system fails, you lose more than just chilled air; you lose your home's primary line of defense against indoor moisture. Without a functioning unit actively pulling humidity out of the air, we frequently see indoor environments rapidly become a breeding ground for mold, mildew, and warped building materials. This makes installing a new AC unit an immediate emergency rather than a casual home improvement project.

The Unforgiving Reality of South Florida Humidity

The urgency of replacing a failed system in our region cannot be overstated. High indoor humidity levels can ruin hardwood floors, damage drywall, and compromise your family's respiratory health in a matter of days. Because you are forced to make a rapid replacement decision to protect your property, you are simultaneously forced to make a rapid financial choice. This sudden pressure is exactly why understanding the strategic differences between utilizing your cash reserves and leveraging promotional financing is so essential.

Paying Out of Pocket: The Impact on Your Emergency Reserves

For many homeowners we speak with, the immediate instinct is to write a check or use a debit card to cover the cost of a new system outright. Paying out of pocket is a traditional approach that comes with distinct psychological and practical benefits, but as our team often advises, it also carries significant risks when executed at the wrong time of year.

Here is a breakdown of the pros and cons of utilizing your cash reserves for a major cooling upgrade:

• Pro: Immediate full ownership. Paying cash means the system is entirely yours from day one, with no ongoing financial obligations or monthly statements to track.

• Pro: No credit inquiries. You avoid the need for credit checks, application processes, or opening new lines of revolving credit.

• Pro: Zero interest concerns. By paying upfront, you never have to worry about promotional windows expiring or accruing interest charges over time.

• Con: Depleted liquid assets. Draining a significant portion of your savings account leaves you highly vulnerable to other unexpected household expenses or medical emergencies.

• Con: Lost investment potential. Cash tied up in a depreciating home appliance is cash that cannot be utilized in high-yield savings accounts or other wealth-building vehicles.

The Hidden Risks of Depleting Savings

While the psychological comfort of remaining debt-free is a powerful motivator, the opportunity cost of draining your liquid cash reserves can be severe. This is particularly dangerous during the September peak hurricane season. If a severe weather event damages your roof or requires a sudden evacuation, you need immediate access to liquid funds for insurance deductibles, temporary lodging, and emergency repairs. Tying up your entire safety net in an HVAC system leaves you dangerously exposed to the unpredictable realities of coastal weather patterns.

Leveraging Promotional Financing as a Strategic Tool

Instead of viewing financing as a last resort for those who lack savings, we have noticed our savviest Miami customers increasingly view it as a proactive cash-flow management strategy. Promotional financing allows you to address the immediate cooling emergency without touching your carefully built emergency fund. By utilizing structured monthly payments, you keep your cash liquid, accessible, and ready for true, unplannable disasters.

Air On Demand provides flexible financing options and promotional programs to help homeowners restore comfort immediately without upfront financial strain. When you leverage these tools, you transform a massive, sudden capital outlay into a predictable, manageable monthly line item in your household budget. This flexibility often makes it much easier to upgrade to a higher-efficiency system that you might have otherwise passed on if you were strictly paying cash.

Understanding 0% Interest Programs

Promotional financing programs, particularly those offering zero percent interest for a set number of months, are powerful financial instruments when used correctly. Here is how we recommend approaching them strategically:

1. Review the promotional window: Understand exactly how many months the zero-percent interest offer lasts. This is your timeline for paying off the principal balance.

2. Calculate the required monthly payment: Divide the total cost of the system by the number of months in the promotional window. This is the exact amount you need to pay each month to clear the balance before the promotion expires.

3. Automate your payments: Set up automatic bank transfers for that calculated amount. This ensures you never miss a payment and never accidentally trigger deferred interest charges.

4. Keep your savings intact: Leave your emergency cash in an interest-bearing account. If an unexpected weather event occurs, your funds are ready. If no emergency happens, you have successfully managed your cash flow while enjoying a brand-new cooling system.

Always take the time to review current promotional offers to find terms that align comfortably with your household budget and long-term financial goals.

Side-by-Side Evaluation: Cash vs. Financing

To help you make the best decision for your household, it helps to look at both payment methods side-by-side. The right choice depends entirely on your current liquidity, your risk tolerance, and your need for emergency preparedness during volatile weather months.

• Cash Liquidity — Paying Out of Pocket (Cash): Depletes liquid reserves immediately, reducing your available cash on hand. — Promotional HVAC Financing: Preserves your cash reserves, keeping your emergency funds fully accessible.

• Immediate Comfort — Paying Out of Pocket (Cash): Provides instant cooling relief, though the large expenditure may cause purchase hesitation. — Promotional HVAC Financing: Provides instant cooling relief while removing the stress of a massive upfront payment.

• Emergency Preparedness — Paying Out of Pocket (Cash): Leaves you highly vulnerable to subsequent expenses during the September peak hurricane season. — Promotional HVAC Financing: Maintains your financial safety net, ensuring you are ready for sudden storm deductibles.

• Long-Term Obligations — Paying Out of Pocket (Cash): Zero ongoing monthly payments or risk of future interest charges. — Promotional HVAC Financing: Requires disciplined monthly payments to avoid deferred interest after the promo period.

Cash vs. Financing for AC Replacement

Maximizing Value: Incentives and Long-Term Protection

Our installation teams consistently remind homeowners that regardless of whether you choose to pay out of pocket or utilize a promotional financing plan, there are additional ways to maximize the return on your investment. Upgrading to a modern, high-efficiency air conditioning system often opens the door to various financial incentives that can help offset your overall investment.

Many high-efficiency systems and advanced heat pumps may qualify for generic federal tax credits under current energy initiatives. Additionally, local utility providers frequently offer rebate programs for homeowners who upgrade from older, energy-wasting units to modern, eco-friendly models. Because these programs change frequently, it is always recommended to consult with a qualified tax professional or check directly with your utility provider to verify which current, applicable programs your new system qualifies for.

How Efficiency Upgrades Offset Operational Costs

Beyond initial rebates, the long-term value of a new system in Miami FL is found in its daily operational efficiency. Modern units consume significantly less electricity to produce the same amount of cooling as older models. When you finance a high-efficiency system, the monthly savings on your utility bill can actually help offset a portion of your monthly financing payment, making the upgrade far more budget-friendly than it initially appears.

Finally, maximizing your value means protecting the equipment itself. New systems come with comprehensive manufacturer warranties that cover major components for years to come. However, these warranties strictly require ongoing professional upkeep. Staying proactive about protecting your new system's warranty through routine annual tune-ups ensures you never have to pay out of pocket for a premature component failure down the road.

Common Questions About HVAC Payment Options

Is it better to finance an AC unit or pay cash?

When our customers ask this, we explain that it depends entirely on your current cash reserves and upcoming financial risks. If you have substantial savings that far exceed your emergency fund needs, paying cash avoids monthly obligations. However, if paying cash would drain your safety net during the unpredictable September peak hurricane season, financing is generally the safer, more strategic choice to maintain your household's financial security.

How do 0% HVAC financing promotions work?

These promotional programs allow you to borrow the funds for your new system without accruing interest, provided you pay off the entire principal balance within a specific promotional window. If you make your structured monthly payments and clear the balance before the term expires, you essentially borrow the money for free. It is critical to pay off the balance on time, as failing to do so usually results in retroactive interest being applied to the original amount.

Can you finance a new AC system with bad credit?

Yes, many homeowners are surprised to learn that there are multiple tiers of financing available, including options specifically designed for lower credit scores. While premium 0% interest offers typically require strong credit, alternative financing programs and lease-to-own options exist to ensure everyone can restore their home's comfort. A reputable HVAC provider like Air On Demand will walk you through various approval pathways to find a solution that works for your situation.

Is it smart to pay cash for an HVAC system during hurricane season?

Most financial advisors suggest preserving liquid cash during times of high environmental risk, a stance we strongly agree with for our South Florida customers. Draining your savings to pay for an AC replacement leaves you without the necessary funds to cover high insurance deductibles, sudden roof repairs, or emergency evacuation expenses. Utilizing promotional financing during these volatile months is a smart way to get the cooling you need while keeping your emergency funds securely in the bank.

Can I combine generic energy tax credits with promotional financing?

Absolutely. Federal energy tax credits and local utility rebates are based on the energy efficiency rating of the equipment you install, not the method you use to pay for it. You can fully finance your high-efficiency system to preserve your cash flow today, and still claim any applicable generic tax credits when you file your returns the following year, effectively maximizing your financial benefits.

Secure Your Comfort Without Compromising Your Savings

Making a clear, objective comparison between your payment options is the best way to protect your emergency funds while ensuring your home remains safe and comfortable. You do not have to choose between enduring the sweltering heat of Miami FL and completely draining your financial safety net.

By leveraging strategic payment plans, you can tackle an unexpected cooling failure head-on while keeping your cash reserves intact for whatever the season brings next. If you are ready to explore flexible payment options and find the perfect high-efficiency system for your home, reach out to our team today to schedule your consultation and get your replacement underway.

Does the Daikin Extended Warranty Cover Refrigerant Recharges? placeholder-image  | Air On Demand
5 min read

Does the Daikin Extended Warranty Cover Refrigerant Recharges?

Dealing with an unexpected AC leak? Understand the critical difference between covered mechanical parts and consumable R-410A refrigerant to confidently navigate your Daikin warranty repair.

Understanding Your Daikin Warranty: The Refrigerant Recharge Reality

Are you dealing with an unexpected breakdown and wondering, does the Daikin extended warranty cover refrigerant recharges? The short answer is no, the Daikin extended warranty typically does not cover refrigerant recharges. While the manufacturer's warranty is incredibly valuable for replacing defective mechanical parts, the R-410A refrigerant gas itself is classified as a consumable material and is explicitly excluded from coverage.

Discovering a refrigerant leak can be incredibly frustrating, especially during the intense heat of late summer/early fall (September) in Miami. When your system starts blowing warm air, you rely on your warranty to protect you from major out-of-pocket expenses. Finding out that you still have to pay for the refrigerant can feel like a blindside if you do not know how warranty terms are structured.

Understanding this distinction is the key to navigating your repair smoothly. By knowing exactly what your warranty includes and excludes, you can confidently approve necessary repairs and get your home cooled down faster. Whether you have a central air system or specialized Daikin equipment, the rules regarding parts versus consumables remain consistent across the board. The warranty is designed to cover the root cause of the failure, ensuring the heavy lifting of the mechanical repair is handled.

Why R-410A Refrigerant is Classified as a Consumable

To understand why refrigerant is excluded from your warranty claim, it helps to understand how Daikin systems utilizing R-410A refrigerant operate. An air conditioner is a closed-loop system. Under normal operating conditions, refrigerant does not break, evaporate, or get "used up" like gas in a car. If your system is low on R-410A, it means there is a mechanical failure—a leak—somewhere in the copper lines or the coils allowing the gas to escape.

In the eyes of HVAC manufacturers, a "consumable" is any material required for the operation of the system that is subject to environmental loss, regular replacement, or replenishment. Just like the air filters that keep dust out of your blower motor, or the oil used in certain mechanical compressors, refrigerant is considered a working fluid rather than a structural part.

Furthermore, the current EPA AIM Act is actively phasing down the production and importation of R-410A refrigerant. This federal regulation impacts the availability of the gas and dictates strict industry handling practices for recovery and charging. Because the cost and availability of this consumable fluctuate based on environmental regulations and market supply, manufacturers universally exclude it from long-term fixed warranty contracts.

The Difference Between Parts and Consumables

Mechanical parts have physical structures that can fail due to a manufacturer defect. If a weld breaks or a valve sticks, that is a structural failure covered by the warranty. Consumables are the materials that flow through or protect those parts.

• Mechanical Part — Examples: Evaporator Coil, Compressor, Blower Motor — Warranty Status: Covered (if registered/eligible) — Reason for Classification: Subject to manufacturing defects or structural failure.

• Consumable Material — Examples: R-410A Refrigerant, Air Filters, Lubricants — Warranty Status: Excluded (Out-of-pocket) — Reason for Classification: Working fluids or maintenance items required for operation.

Parts vs. Consumables in HVAC Warranties

What the Daikin Extended Warranty Actually Covers During a Leak

Even though the R-410A gas is excluded, your Daikin warranty still provides massive value during a leak scenario. Refrigerant leaks rarely happen in easily patchable areas; they typically occur inside the intricate aluminum or copper tubing of the major coils. When this happens on eligible Daikin systems utilizing R-410A refrigerant, the warranty steps in to cover the most substantial part of the repair.

If your system is properly registered and within its warranty term, Daikin will typically provide a brand-new replacement coil at no cost for the part itself. This is true for standard split systems as well as the specific terms of a Daikin mini split warranty, which covers functional internal components like the indoor unit's coil and circuit boards.

It is important to differentiate between parts coverage and labor coverage. A standard extended parts warranty covers the physical hardware. Unless you purchased a specific extended labor plan through your dealer, the labor required for a professional to remove the broken coil, install the new one, vacuum the system, and recharge the refrigerant will be an out-of-pocket expense. However, having the expensive mechanical failure covered makes professional AC repair in Miami significantly more manageable.

Coil Replacements Under Warranty

Evaporator coils are a primary source of leaks in modern HVAC systems due to the constant condensation they manage. Replacing an evaporator coil is a major, labor-intensive repair. By providing the replacement coil under warranty, the manufacturer is upholding their guarantee on the structural integrity of the equipment, ensuring your system can be restored to full functionality.

The Impact of Miami's Coastal Climate on AC Coils

You might wonder why a relatively new coil would develop a leak in the first place. The answer often lies in the local environment. South Florida's coastal, high-humidity environment accelerates the wear and tear on metal HVAC components. Airborne salts, high moisture levels, and volatile organic compounds (VOCs) inside the home interact with the condensation on your evaporator coil, creating a highly corrosive environment.

The Problem: Over time, this process—known as formicary or pitting corrosion—eats away at the metal, creating microscopic holes in the coil walls. These holes are often smaller than a pinprick, but they are large enough to allow the highly pressurized R-410A refrigerant to slowly escape into the atmosphere.

The Cause: The intense late summer/early fall (September) in Miami means your air conditioner is running almost constantly to combat the heat and humidity. This continuous operation increases the volume of condensation the coil must handle, accelerating the chemical reactions that cause corrosion.

The Solution: When a leak occurs during this peak season, immediate repair is critical to restore your indoor comfort and protect the compressor from burning out due to low refrigerant levels. While environmental wear is inevitable, scheduling routine AC maintenance helps technicians clean the coils, remove corrosive buildup, and spot early signs of oil spotting that indicate a microscopic leak is forming.

Navigating the Repair Process: Approving Work with Confidence

When a technician informs you that your system is low on refrigerant, the next steps are crucial. Air On Demand believes in a transparent approach to clarifying confusing warranty terms upfront, ensuring you understand exactly what you are paying for and why. Here is how to navigate a leak diagnosis on Daikin systems utilizing R-410A refrigerant:

1. Demand a Proper Leak Search: Refrigerant does not just vanish. Before approving any repair, ensure the technician performs a thorough leak search using electronic sniffers or UV dye to pinpoint the exact location of the failure.

2. Verify Warranty Coverage: Once the leaking component (usually a coil) is identified, have your contractor verify your warranty status with Daikin to confirm the replacement part is covered.

3. Fix the Root Cause: Never settle for a temporary "top off" of R-410A without a plan to fix the leak. Adding refrigerant to a leaking system is a waste of resources and harms the environment. The covered coil must be replaced to permanently solve the problem.

4. Evaluate the Repair Quote: Review the estimate knowing that the heavy lifting (the replacement coil) is covered by Daikin. The quote should clearly outline the out-of-pocket costs for the required labor, the recovery of old refrigerant, and the new R-410A consumable required to recharge the system.

5. Consider the System's Age: If your system is nearing the end of its warranty period and has multiple failing components, it might be time to discuss AC replacement services rather than investing heavily in labor and consumables for an aging unit.

Protecting Your Daikin Coverage Moving Forward

To ensure your warranty remains valid for future claims, it is essential to follow the manufacturer's guidelines. Daikin, like all major HVAC manufacturers, requires that the equipment be registered shortly after installation—typically within 60 days—to activate the full extended warranty term. Failing to register the equipment often reverts the coverage to a shorter base term.

Furthermore, all repairs, leak searches, and refrigerant recharges must be performed by licensed, qualified HVAC professionals. Attempting DIY repairs or hiring unlicensed handymen to handle R-410A is not only dangerous and illegal under EPA regulations, but it will instantly void your manufacturer warranty.

Finally, standard upkeep is a condition of your warranty. Manufacturers expect the equipment to be kept clean and operational. Neglecting basic care, such as running the system with severely clogged filters or completely ignoring annual tune-ups, can lead to claim denials. In fact, skipping annual maintenance can void your Daikin warranty if the manufacturer determines that the part failed due to neglect rather than a factory defect.

Frequently Asked Questions About Daikin Warranty and Refrigerant Coverage

Does AC extended warranty cover refrigerant?

Generally, no. Most manufacturer extended warranties cover the mechanical parts that failed, but explicitly exclude the refrigerant gas. Because refrigerant is a working fluid that escapes due to a leak rather than a structural part that breaks, it is classified as a consumable and remains an out-of-pocket expense.

What does the Daikin mini split warranty cover?

It typically covers functional internal parts like the compressor, circuit boards, and indoor coils for a specified term, provided the system was registered and properly maintained. It does not cover the external copper line sets connecting the indoor and outdoor units, the labor to replace the parts, or the R-410A refrigerant needed to recharge the system after a repair.

Is R-410A considered a covered warranty part?

No, R-410A is classified as a consumable material required for operation, not a mechanical part subject to manufacturing defects. Daikin systems utilizing R-410A refrigerant require this gas to transfer heat, but the gas itself is excluded from warranty replacement, even if it was lost due to a covered part failing.

What is covered under the Daikin 12 year warranty?

The 12-year limited parts warranty generally covers all functional mechanical parts, including the compressor, evaporator coil, and condenser fan motor, when the system is registered within the required timeframe. It guarantees that if these physical components fail due to a factory defect, the manufacturer will provide a replacement part.

Does a home warranty cover refrigerant leaks?

Third-party home warranties vary wildly; some may cover a limited amount of refrigerant per claim, while others exclude it entirely. This is entirely separate from a Daikin manufacturer warranty. You must read your specific home warranty contract to see if they cap the coverage for consumables like R-410A.

How long is the Daikin compressor warranty?

Depending on the specific model and whether it was registered on time, Daikin compressor warranties can range from 10 to 12 years. Some premium, high-efficiency units even offer a lifetime limited warranty on the compressor for the original registered homeowner. However, replacing a covered compressor will still require an out-of-pocket recharge of the excluded refrigerant.

Get Transparent, Expert Daikin Diagnostics in South Florida

Dealing with an air conditioning breakdown during late summer/early fall (September) in Miami is stressful enough without getting caught off guard by confusing warranty terms. Understanding the difference between covered mechanical parts and excluded consumables like R-410A brings peace of mind, allowing you to move forward with the necessary repairs without hesitation.

When you suspect a leak, it is vital to rely on a trusted local expert who can properly diagnose the issue, locate the exact source of the escaping gas, and navigate the warranty claim process on your behalf. Don't settle for temporary top-offs that ignore the root cause of the problem. Schedule a comprehensive diagnostic inspection today to identify the leak, claim your covered replacement parts, and restore your home's comfort efficiently and correctly.

Essential Tools Every First-Year HVAC Apprentice in Miami Needs placeholder-image  | Air On Demand
5 min read

Essential Tools Every First-Year HVAC Apprentice in Miami Needs

Standard hand tools and unsealed multimeters quickly corrode in South Florida's high humidity. See which heavy-duty gear is worth the investment to protect your livelihood.

The Hidden Cost of Cheap Tools in Extreme Weather

Here's the thing: your standard carbon-steel pliers are already showing rust spots, and your budget diagnostic gear is acting up after just one week on the job. Gathering the essential tools every first-year HVAC apprentice in Miami needs means confronting a harsh reality—the local climate will actively destroy cheap equipment. Standard, unsealed tools corrode, short out, or seize up rapidly when exposed to South Florida's relentless humidity and coastal salt air. A typical pattern we see is new technicians buying basic hardware store kits, only to watch them fail during the September peak humidity and late-summer heat.

The core decision point for any new technician is figuring out which items require a heavier upfront investment for durability, and where it is safe to be more cost-effective. Surviving the trade in this region means equipping yourself specifically for the local environment. Moving from an air-conditioned service van at 70 degrees into the oppressive 120-degree outdoor heat creates instant, heavy condensation on cold metal and circuit boards. If your gear isn't built to handle that thermal shock and moisture, you will be replacing it before your first year is up.

If you are starting your journey as an HVAC apprentice or looking to advance to a full-fledged HVAC service technician, equipping yourself for the environment is step one.

The Environmental Stress Test: South Florida's Climate Challenges

The problem: Standard DIY hand tools and entry-level electronics are designed for dry, temperate environments. They lack the specialized coatings and internal seals necessary to survive a demanding industrial setting.

The cause: Miami's average relative humidity frequently exceeds 75%, creating an atmospheric soup that wreaks havoc on unprotected gear. When you factor in the coastal salt air, the oxidation process on unprotected iron and steel accelerates by up to 10 times compared to inland areas. Furthermore, the physical toll of extreme heat means your tools must withstand heavy sweat, constant moisture, and abrasive conditions daily. Depending on the difference between commercial and residential HVAC apprenticeships, you might find yourself navigating salt-sprayed commercial rooftops or stifling, unventilated residential attics—both of which test the limits of your equipment.

The solution: Understanding the science of condensation and oxidation allows you to select tools engineered with specific marine-grade or industrial-grade protections. You have to anticipate the September peak humidity and late-summer heat by choosing alloys and electronic casings that reject moisture rather than absorbing it.

Temperature Swings: From Vans to Attics

The most immediate threat to your tool bag isn't just the ambient heat; it is thermal shock. When you pull a cold tool out of a highly air-conditioned service van and carry it into a sweltering attic, the tool's temperature is well below the dew point of the surrounding air. Moisture immediately condenses on every exposed surface. On poorly sealed equipment, this water vapor instantly coats internal circuit boards, copper wiring, and unlubricated joints, leading to micro-corrosion that degrades performance over time.

The Threat of Coastal Salt Air

Standard steel tools rust quickly in Miami because the airborne salt particles act as an electrolyte, rapidly speeding up the electrochemical process of corrosion. A standard chrome-plated wrench that might last a decade in Arizona can begin pitting and flaking within months in South Florida. This is why specific anti-corrosion coatings, such as black oxide finishes or high-grade chrome vanadium alloys, are non-negotiable for technicians working along the coast.

How Miami's Climate Destroys Standard HVAC Tools

Electrical Safety: Prioritizing Moisture-Sealed Multimeters

The multimeter is the absolute lifeline of an HVAC technician. It is the tool that tells you if a circuit is live, if a capacitor is failing, or if a compressor motor is grounded. Relying on cheap, unsealed versions is incredibly dangerous in high-condensation environments. A single drop of sweat or a layer of condensation inside a cheap multimeter can bridge a circuit board, ruining the tool or, worse, causing a catastrophic arc flash. This is one area where professional-grade investment is mandatory to ensure both accuracy and personal safety.

1. Verify the safety rating first: Always check the meter for proper CAT III or CAT IV ratings before purchasing.

2. Check for environmental sealing: Look for meters specifically advertised as moisture-sealed or possessing an IP67 rating to block dust and water vapor.

3. Assess the test leads: Ensure the test leads feature heavy-duty, temperature-resistant silicone insulation rather than cheap PVC that cracks in the heat.

4. Test the continuity speed: A professional meter will provide an instant audible beep for continuity, which is critical when working in awkward, sweaty positions where you can't easily see the screen.

Understanding CAT Safety Ratings

In the HVAC industry, CAT (Category) ratings dictate the level of transient overvoltage a meter can safely handle without blowing up in your hands. A CAT III rating is the minimum standard for residential and commercial HVAC work, designed to handle the load of hard-wired equipment and main breaker panels. CAT IV offers even higher protection for utility-level outdoor connections. These ratings are non-negotiable; using a CAT II meter designed for basic indoor electronics puts you at severe risk of electrical injury.

Preventing False Readings

Humidity actively interferes with electrical resistance and continuity testing. When moisture bridges the gap between test probes or infiltrates the meter's dial, it can create parallel resistance paths. This leads to false readings, causing you to misdiagnose a perfectly good component as faulty, or vice versa. Investing in moisture-sealed multimeters and corrosion-resistant gauges ensures that the numbers on your screen are accurate, preventing callbacks and frustrated customers.

Precision Measurement: Selecting Corrosion-Resistant Gauges

Manifold gauge sets are your window into the refrigeration cycle. They allow you to diagnose airflow issues, check superheat and subcooling, and verify that a system is operating at peak efficiency. However, standard brass fittings or cheap metal manifolds are notorious for failing in Miami's coastal air. The threads seize up, the valves stick, and the internal springs rust, rendering the tool useless.

To survive the local environment, you need gauges constructed from high-grade forged aluminum alloys or specially treated brass. The dials or digital screens must be weather-resistant to prevent internal fogging. If you are handling AC repair in Miami, accurate diagnostics are the foundation of a successful fix. A sticking valve on a cheap manifold can lead to overcharging a system, causing liquid slugging and catastrophic compressor failure. Investing in moisture-sealed multimeters and corrosion-resistant gauges is the only way to guarantee precision.

Analog vs. Digital Manifolds in High Humidity

The debate between analog and digital manifolds often comes down to personal preference, but in a highly humid climate, specific factors must be considered. Extreme humidity can affect the calibration of cheap analog gauges over time, rusting the delicate Bourdon tubes inside the dials. Digital manifolds offer incredible accuracy and automatic calculations, but they introduce electronic components to a wet environment.

• Moisture Vulnerability — Analog Manifold Gauges: Prone to dial fogging and internal tube rust if unsealed. — Digital Manifold Gauges: Screen failure or sensor shorting if IP rating is low.

• Durability in Heat — Analog Manifold Gauges: Highly durable, unaffected by screen glare or battery drain. — Digital Manifold Gauges: Requires temperature-compensated sensors; batteries drain faster.

• Calibration Needs — Analog Manifold Gauges: Requires frequent manual zeroing after temperature swings. — Digital Manifold Gauges: Auto-calibrates, but sensors can be damaged by moisture ingress.

• Ideal Miami Spec — Analog Manifold Gauges: Glycerin-filled dials to prevent fogging and flutter. — Digital Manifold Gauges: IP54 or IP67 rated casing with heavy-duty rubber overmolding.

Essential Hand Tools Built to Withstand Sweat and Salt Air

Beyond diagnostics, your daily hand tools take the brunt of the physical abuse. Working in unventilated spaces during peak summer heat means your hands will be covered in sweat, grease, and grime. Basic DIY tools feature slick plastic handles and untreated carbon steel that will slip from your grip and rust almost immediately. Professional-grade HVAC gear uses specialized metal alloys and textured grips designed specifically for these harsh conditions.

To prepare for the September peak humidity and late-summer heat, your basic tool pouch should include:

• Multi-bit screwdrivers: Look for models with heavy-duty, moisture-resistant internal storage and black oxide-coated bits to prevent rusting inside the shaft.

• Nut drivers (1/4" and 5/16"): These are the most frequently used tools in your bag. Choose hollow-shaft models with chrome plating to resist oxidation from salty fingerprints.

• Wire strippers and crimpers: Avoid cheap stamped steel. Opt for forged steel with a protective clear coat or specialized anti-corrosion finish to keep the cutting edges sharp.

• Adjustable wrenches: A sticking worm gear is incredibly frustrating. Invest in wrenches with tight tolerances and apply a light coat of oil weekly.

• Slip-resistant grips: Ensure all hand tools feature rubberized, textured grips (often called cushion grips) that channel sweat away and provide torque even when wet.

• Service valve wrenches: Essential for opening and closing system valves; choose forged, ratcheting models that resist seizing.

Organization and Maintenance: Protecting Your Investment

Buying professional-grade tools is only half the battle; maintaining them is crucial in South Florida. Even the best moisture-sealed multimeters and corrosion-resistant gauges will degrade if they are tossed into a damp bag and left in a hot van overnight. Creating a rigorous daily maintenance routine extends the lifespan of your equipment and ensures you are always ready for the next call.

The danger of leaving wet tools in a sealed bag overnight in a humid garage or van cannot be overstated. The trapped moisture creates a micro-climate that accelerates rust faster than leaving them outside. Proper organization and daily care are just as important as the tools themselves.

Choosing the Right Tool Bag

1. Look for molded, waterproof bases: A hard plastic or rubberized bottom keeps your tools elevated and dry when you have to set the bag down on wet grass, flooded AC pads, or damp attic insulation.

2. Prioritize breathable materials: Choose heavy-duty ballistic nylon that allows for some airflow, rather than completely sealed PVC bags that trap sweat and condensation inside.

3. Use vertical tool pockets: Storing hand tools vertically allows moisture to drain down and evaporate, rather than pooling inside the joints of your pliers and wrenches.

Daily Rust Prevention Tactics

1. The end-of-day wipe down: Keep a dedicated microfiber cloth in your van. Take 60 seconds at the end of your shift to wipe the sweat, dirt, and skin oils off every hand tool you used that day.

2. Apply moisture-displacing sprays: Once a week, lightly spray the hinges of your pliers, wire strippers, and adjustable wrenches with a water-displacing lubricant (like WD-40 or a specialized tool oil). Wipe off the excess so they don't attract dirt.

3. Store electronics separately: Keep your multimeters and digital gauges in padded, zippered pouches equipped with silica gel packets to absorb ambient moisture overnight.

4. Ventilate your bag: If your tools got soaked in a sudden Miami downpour, leave your tool bag open in an air-conditioned room overnight to dry completely before your next shift.

Moving Beyond DIY: The Mark of a Professional

Showing up to a job site with climate-appropriate, professional-grade tools demonstrates a deep commitment to the trade and a readiness to learn. It separates those who view HVAC as a temporary job from those building a lifelong career. At Air On Demand, we believe that high industry standards protect both the technician and the homeowner. Working with a team that values mentorship means you get guidance on how to properly prepare for the realities of the field, rather than learning the hard way through broken equipment and false diagnostics.

The tools you carry reflect the quality of the work you intend to perform. When you are equipped to handle the September peak humidity and late-summer heat without your gear failing, you can focus entirely on solving the customer's problem. Exploring HVAC careers in Miami requires this level of preparation. By investing in the right equipment from day one, you signal to your mentors, your peers, and your customers that you take your responsibilities seriously.

Frequently Asked Questions About Apprentice Toolkits

What tools does a first-year HVAC apprentice need?

The short answer is: A first-year apprentice needs basic hand tools, a high-quality multimeter, and a reliable manifold gauge set. Specifically, you should focus on items like 1/4" and 5/16" nut drivers, wire strippers, adjustable wrenches, and a multi-bit screwdriver. Because of the local climate, ensuring you have moisture-sealed multimeters and corrosion-resistant gauges is far more important than buying a massive, 100-piece introductory kit.

How do I protect my HVAC tools from rust in a humid climate?

The quick fix: Wipe them down daily and use a water-displacing lubricant weekly. Sweat and coastal salt air accelerate rust rapidly, so removing those corrosive elements at the end of every shift is vital. Store your gear in a bag with a waterproof base, and keep silica gel packets in the compartments where you store sensitive electronic testing equipment.

What makes a multimeter good for HVAC work?

Safety and accuracy are paramount: A good HVAC multimeter must have a CAT III or CAT IV safety rating to handle high-voltage spikes safely. It should also measure capacitance, microamps (for flame sensors), and temperature. In high-humidity areas, environmental sealing is essential to prevent internal moisture from causing false continuity readings or dangerous short circuits.

Why do standard hand tools fail faster in Miami's environment?

It comes down to the atmosphere: Standard hand tools are often made of untreated carbon steel that rusts rapidly when exposed to high airborne moisture and salt air. Furthermore, the extreme heat causes technicians to sweat heavily, leaving corrosive oils and salts on the handles and joints. Professional HVAC tools use specialized alloys and coatings like black oxide to resist this rapid degradation.

Do I need to buy all my professional-grade tools at once before starting?

Most professionals build their kits over time: You do not need to purchase every highly specialized tool on your first day. Start by investing heavily in the essentials—specifically a safe, moisture-sealed multimeter and durable basic hand tools. As you gain experience and encounter different types of service calls, you can gradually add specialized, heavy-duty equipment to your bag.

Equipping Yourself for Long-Term Success

Investing in moisture-sealed multimeters and corrosion-resistant gauges is much more than a preliminary checklist; it is an investment in a successful, long-term South Florida HVAC career. The local climate is unforgiving, and the right gear prevents unnecessary frustration, ensures your safety around high-voltage equipment, and allows you to diagnose complex issues accurately. By building a tool bag designed specifically to withstand high humidity, coastal salt air, and extreme heat, you set a foundation for professional excellence. If you are ready to put those tools to work, take the next step in your career by seeking out mentorship and opportunities that value high standards and continuous learning.

Zoning Solutions for Two-Story Homes in Kendall placeholder-image  | Air On Demand
5 min read

Zoning Solutions for Two-Story Homes in Kendall

If your downstairs is freezing while the upstairs bedrooms remain uncomfortably hot, you aren't alone. Explore how electronic dampers and mini-splits can finally balance your home's temperature.

The Trap of the Hot Second Floor in South Florida

Your downstairs living room feels like a refrigerator, but the moment you walk up the stairs, the air turns thick and uncomfortably warm. Finding effective zoning solutions for two-story homes in Kendall is one of the most common challenges property owners face, especially as we enter the early fall transition. During September, the ground floor cools down quickly in the evening, but those upstairs bedrooms trap the lingering heat from the intense South Florida sun. You are left tossing and turning in a stuffy room while the central thermostat downstairs registers that the house is perfectly cool and shuts the system off.

The good news is that you do not have to live with this massive temperature gap. The structural decision for homeowners usually comes down to two distinct paths: retrofitting your existing central ductwork with electronic zone dampers to manage airflow, or bypassing the ductwork entirely by installing a dedicated mini-split system for the upper level. For many properties, ductless mini split systems offer the perfect bypass, while others benefit from comprehensive airflow management. If you are ready to explore mini split installation in Kendall or damper retrofits, understanding your home's unique architecture is the critical first step.

Understanding Thermal Stratification in Kendall Properties

To fix an uncomfortably hot second floor, you first have to understand the physical and architectural forces working against your air conditioner. Thermal stratification is the basic principle of physics dictating that heat naturally rises while cool, dense air sinks. In a two-story home, the coldest air produced by your HVAC system will always pool on the ground floor, while the heat generated by daily activities, sunlight, and the roof above will gather in the upstairs bedrooms.

This natural phenomenon is heavily amplified by the mixed construction styles commonly found in Kendall two-story properties. Many of these homes feature concrete block construction on the first floor and wood frame construction on the second floor. Concrete is excellent at retaining the cool air pumped out by your AC, acting like a thermal sink. Wood framing, however, absorbs and transfers the radiant heat from your roof and attic directly into the adjacent upstairs rooms. This architectural reality creates vastly different cooling loads for the top and bottom halves of your house.

The core of the problem lies in how standard HVAC systems measure temperature. Most homes rely on a single central thermostat located in a downstairs hallway or living room. Because the downstairs concrete block retains cooling so well, the thermostat quickly reaches its set point and shuts the entire air conditioning cycle down. It has no way of knowing that the upstairs bedrooms are still sweltering. According to Department of Energy (DOE) guidelines, relying on a single temperature reading for a multi-level home significantly reduces overall HVAC efficiency and virtually guarantees uneven comfort.

The Danger of DIY Zoning: Why Closing Vents Fails

When faced with a freezing downstairs and a boiling upstairs, the most common homeowner reaction is to walk around the ground floor and manually close the supply vents. The logic seems sound: if you block the air from entering the living room, it will be forced to travel upstairs to the bedrooms. Unfortunately, modern HVAC systems do not work this way, and attempting this DIY zoning method can cause severe, expensive damage to your equipment.

Your central air conditioner is designed to move a specific volume of air across its internal coils. When you close vents, the system still produces the exact same amount of air, but now that air has fewer places to escape. This creates a dangerous bottleneck inside the ductwork, rapidly increasing the system's static pressure. Think of static pressure like putting your thumb over the end of a running garden hose. The water does not magically redirect to another hose; it just builds up intense pressure behind your thumb.

This pressure buildup is incredibly risky, particularly because undersized ductwork in older Kendall homes is already vulnerable to airflow restrictions. When static pressure spikes, the blower motor has to work twice as hard to push air through the remaining open vents, which often leads to premature motor failure. Furthermore, because less warm air from the house is returning to the system to run over the indoor evaporator coil, the coil can literally freeze solid into a block of ice. Proper zoning requires structural modifications and professional airflow management, never DIY vent adjustments.

Retrofitting Electronic Zone Dampers: Managing Existing Airflow

If you want to utilize your existing central air conditioner to cool both floors evenly, the professional solution is to install an electronic zone damper system. This approach divides your home's ductwork into distinct "zones," each controlled by its own thermostat, allowing you to direct cooling precisely where it is needed without damaging the equipment.

How Dampers Redirect Air Safely

Unlike manually closing a vent at the ceiling, an electronic zoning system uses motorized valves—called dampers—installed deep inside the main trunk lines of your ductwork. These dampers communicate directly with a central control panel and multiple thermostats placed throughout the house.

1. Independent Monitoring: The upstairs thermostat detects that the bedrooms are too warm, while the downstairs thermostat registers that the living room is already cool.

2. Targeted Airflow: The control panel signals the downstairs damper to close partially or fully, while keeping the upstairs damper wide open.

3. Pressure Management: To avoid the static pressure dangers mentioned earlier, a professional installation includes a bypass damper. This critical component takes the excess air that would normally cause a pressure spike and safely loops it back into the return duct, protecting your blower motor and evaporator coil.

Evaluating Your Existing Ductwork

While electronic dampers are highly effective, they are entirely dependent on the condition of your current duct system. Before adding zoning, a professional duct inspection is absolutely mandatory for Kendall two-story properties. If your existing ducts are leaky, adding dampers will simply force your expensive conditioned air out through the cracks and into your sweltering attic.

Additionally, if your ductwork is undersized—a common issue in older regional construction—the system will not be able to handle the redirected airflow efficiently. Pushing a damper retrofit onto failing ductwork usually results in short-cycling, high utility bills, and eventual system breakdowns. If a poorly planned zoning attempt damages your central unit, you will find yourself urgently needing AC repair service in Kendall to replace burnt motors or thawed coils.

Bypassing Ductwork: Dedicated Systems for Upstairs Bedrooms

For many homes, attempting to force a single central air conditioner to cool two vastly different environments is an uphill battle. When ductwork is inaccessible, aging, or improperly sized, the most structurally sound solution is to bypass the central ducts entirely by adding dedicated cooling capacity for the second floor.

Independent Temperature Control

Ductless mini-split systems operate independently from your main central air conditioner. By installing discrete air-handling units directly on the walls of the upstairs bedrooms, you eliminate the daily battle over a single downstairs thermostat. The central unit can be set to comfortably maintain the ground floor, while the ductless system handles the heavy lifting upstairs.

As Daikin specialists, Air On Demand frequently recommends these high-efficiency ductless solutions because they are uniquely tailored to overcome local architectural challenges. Instead of tearing open drywall and ceilings to resize old ductwork for dampers, a mini-split requires only a small three-inch hole in the wall to connect the indoor handler to the outdoor compressor. This minimally invasive installation preserves your home's structure while delivering immediate, localized relief to the hottest rooms.

Efficiency and Energy Savings

One of the primary reasons ENERGY STAR heavily recommends ductless technology is the elimination of duct losses. Traditional forced-air systems can lose 20 to 30 percent of their cooling energy as air travels through hot attics and leaky uninsulated ducts. Because mini-splits deliver conditioned air directly into the room, that energy loss drops to zero.

Furthermore, these dedicated systems utilize advanced inverter compressor technology. Instead of blasting on at full power and shutting off completely like a traditional AC, an inverter compressor smoothly ramps its speed up and down to maintain the exact temperature you request. This means your mini split AC solutions use only the precise amount of electricity needed to keep the bedrooms comfortable, drastically reducing your overall energy consumption while taking the strain off your primary central unit.

Dampers vs. Ductless: Evaluating Structural and Efficiency Factors

Choosing the right path for your home requires an objective look at your current equipment, your architectural layout, and your long-term comfort goals. Both solutions are highly effective when applied to the right situation, but they solve the problem in fundamentally different ways.

• Modification Complexity — Electronic Zone Dampers: High. Requires access to main duct trunks, bypass damper installation, and duct integrity testing. — Dedicated Ductless Mini-Split: Low. Minimally invasive wall mounting with no ductwork modifications required.

• Impact on Central AC — Electronic Zone Dampers: Increases reliance on the central unit. Requires careful static pressure management to avoid wear. — Dedicated Ductless Mini-Split: Reduces wear and tear on the central unit by taking over the second-floor cooling load entirely.

• Zoning Precision — Electronic Zone Dampers: Good. Divides the home into broad zones (e.g., upstairs vs. downstairs). — Dedicated Ductless Mini-Split: Excellent. Allows for room-by-room temperature customization.

• Energy Loss — Electronic Zone Dampers: Subject to standard 20-30% energy loss typical of forced-air duct systems. — Dedicated Ductless Mini-Split: Zero duct loss. Air is delivered directly into the living space.

The decision point usually hinges on the age of your current AC and the accessibility of your home's ductwork. If you recently installed a high-capacity central air conditioner and your ductwork is easily accessible in the attic, retrofitting an electronic damper system is a highly logical and efficient upgrade. However, if your central AC is already struggling to keep up, or if your ductwork is buried between floors and showing signs of age, adding a dedicated ductless system is the superior structural choice. It bypasses the failing infrastructure entirely and guarantees that the second floor gets the cooling capacity it needs.

Electronic Dampers vs. Dedicated Ductless Systems for Two-Story Homes

Tackling Humidity and Air Quality During the Fall Transition

Cooling the air is only half the battle in South Florida; managing humidity is equally critical for indoor comfort and air quality. This becomes especially apparent during the early fall transition in September. While evening temperatures may begin to drop slightly, the ambient humidity remains incredibly high. Because the downstairs cools quickly, the central AC shuts off sooner, leaving the upstairs bedrooms trapping significant amounts of latent heat and moisture.

When humidity is left unchecked on the second floor, the environment becomes a breeding ground for poor indoor air quality. If homeowners attempt to fix this by closing downstairs vents, the stagnant, restricted air inside the ductwork can rapidly reach its dew point. This causes condensation to form inside the dark, cool ducts—creating the perfect recipe for mold and mildew growth that will eventually be blown throughout the entire house.

Proper professional zoning solutions tackle this humidity gap head-on. Electronic dampers ensure that airflow remains balanced and continuous, preventing condensation buildup in the duct trunks. Dedicated ductless systems are even more effective at latent heat removal. Because they run on variable-speed inverter technology, they operate for longer, slower cycles. This prolonged operation acts as a powerful localized dehumidifier, wringing the sticky moisture out of the upstairs bedroom air without overcooling the space, ensuring your home stays dry, healthy, and comfortable throughout the September climate shift.

Frequently Asked Questions About Two-Story Home Cooling

Why is the second floor of my house so hot in the early fall?

The heat on your second floor is caused by thermal stratification, where heat naturally rises, combined with the radiant heat absorbing through your roof. During the early fall, the ground floor cools quickly in the evening, causing the central thermostat to shut the AC off before it can adequately cool and dehumidify the upstairs bedrooms. The mixed construction of Kendall homes often exacerbates this trapped heat.

Can you add zoning to an existing HVAC system?

Yes, you can add zoning to an existing central HVAC system by installing electronic zone dampers inside the ductwork. However, this requires a thorough professional inspection of your current ducts to ensure they are properly sized and sealed. A bypass damper must also be installed to safely manage the changes in static pressure when zones open and close.

Is it better to have two AC units for a two-story house?

In many cases, having two independent systems is the most efficient and comfortable setup for a two-story home. A dedicated unit for the second floor provides targeted cooling capacity, eliminates the energy loss associated with long duct runs, and drastically improves humidity control upstairs without overworking the downstairs unit.

How do you fix uneven cooling in a two-story house?

Fixing uneven cooling requires a structural approach, typically through retrofitting electronic dampers into the ductwork or installing a ductless mini-split system for the upper level. A professional HVAC technician must evaluate your home's airflow, duct condition, and thermal load to determine which solution will safely balance the temperatures without damaging the equipment.

Is a mini-split better than zoning for a two-story house?

A mini-split is often better if your existing ductwork is old, leaky, undersized, or difficult to access. Because a mini-split bypasses the central ductwork entirely, it guarantees precise temperature control and zero duct-related energy loss. Zoning with dampers is highly effective, but only if the underlying duct infrastructure is in excellent condition.

Will closing downstairs vents help cool my upstairs bedrooms?

No, closing downstairs vents will not push more air upstairs; it will only create a dangerous airflow bottleneck. This practice drastically increases static pressure inside the ductwork, which forces the blower motor to overwork and can cause the indoor evaporator coil to freeze solid. Always rely on professional airflow management rather than manual vent adjustments.

Make an Informed Upgrade for a Cooler, More Comfortable Home

Solving the persistent trap of a hot second floor requires a choice between advanced airflow management and dedicated cooling capacity. Because every property's architectural layout and ductwork condition is unique, there is no one-size-fits-all answer. We recommend scheduling a professional evaluation to get a clear, objective comparison between electronic dampers and mini-splits, including how each addresses South Florida's climate and indoor air quality. By understanding your home's specific structural needs, you can make an informed decision on your HVAC upgrade—whether that means modifying your existing ducts or moving forward with a mini split installation in Kendall—ensuring total comfort in every room.

Registering Your Daikin Mini Split Warranty Post-Installation: The 60-Day Window placeholder-image  | Air On Demand
5 min read

Registering Your Daikin Mini Split Warranty Post-Installation: The 60-Day Window

Missing the manufacturer deadline drops your parts protection from 12 years to just five. See exactly what installation paperwork you need to secure your coverage.

Did You Miss the Deadline? Navigating the 60-Day Warranty Window

Are you feeling stressed because you need answers about registering your Daikin mini split warranty post-installation: the 60-day window is quickly closing, and you aren't sure what paperwork you need? You are not alone in this situation. In our years of providing HVAC solutions across Miami, our team at Air On Demand often sees homeowners invest heavily in a high-efficiency cooling system, enjoy the immediate comfort it brings, and accidentally set the final installation paperwork aside. Life gets busy, and before you know it, weeks have passed. If you recently searched "forgot to register Daikin warranty" in a panic, take a deep breath. You still have time to gather your documents and secure your extended protection, provided you act within the strict timeframe set by the manufacturer.

To get started on the right foot, if you need any documentation or support for your Daikin equipment, our team is here to assist you.

The manufacturer strictly enforces this 60-day timeline because it establishes a verified, timestamped record of your professional installation. This administrative step might seem like a minor detail to handle later, but it is actually the key that unlocks the full long-term value of your investment. When the installation team packs up their tools and leaves your driveway, the registration clock starts ticking immediately. This 60-day deadline is a hard cutoff designed by the manufacturer to separate verified, professional installations from unverified ones. Gathering your paperwork today and completing the online form ensures you do not leave valuable, long-term coverage on the table just because of a missed calendar date.

The Stakes: 12-Year Protection vs. the 5-Year Default

Understanding what you stand to lose is the biggest motivator for completing your paperwork today. Manufacturer warranties are structured in tiers, and the difference between an unregistered system and a registered one is massive. If you take no action, your Daikin mini split automatically defaults to a standard 5-year parts warranty. While five years of coverage is a decent start, it leaves you entirely exposed during the later half of the system's expected lifespan.

By simply taking ten minutes to complete the online registration within the 60-day window, that baseline coverage is upgraded to a robust 12-year parts warranty. This seven-year difference covers some of the most critical, expensive internal components of your system, including the compressor, inverter boards, and electronic expansion valves.

• Parts Coverage Duration — Default Unregistered Warranty: 5 Years — Registered Warranty (Within 60 Days): 12 Years

• Compressor Protection — Default Unregistered Warranty: 5 Years — Registered Warranty (Within 60 Days): 12 Years

• Administrative Requirement — Default Unregistered Warranty: None (Automatic) — Registered Warranty (Within 60 Days): Online Registration Required

• Long-Term Vulnerability — Default Unregistered Warranty: High (Exposed in years 6-12) — Registered Warranty (Within 60 Days): Low (Protected through year 12)

This extended coverage is absolutely vital when you factor in our local climate. Our technicians know firsthand that in a demanding environment characterized by Miami's intense, year-round heat and humidity, your cooling system rarely gets a day off. The constant battle against high moisture levels and relentless temperatures means your equipment runs for thousands of hours annually. This extreme operational wear makes the parts protection in years six through twelve critical. If you recently invested in a Miami mini split installation with us, you want that system protected for the long haul, shielding you from out-of-pocket expenses for major component failures down the road.

Your 4-Item Registration Checklist

Before you navigate to the manufacturer's online portal, you need to gather specific information. Trying to register without these details will only lead to frustration and timed-out web pages. Having everything prepared in advance turns a stressful chore into a simple ten-minute task.

1. The official installation date: This is the exact day your system was successfully commissioned and turned on, which is usually listed on your final invoice. It is not the day you signed the initial estimate.

2. The precise model numbers: Mini splits are split systems, meaning you will have at least two different model numbers—one for the outdoor condenser and one for the indoor air handler.

3. The unique serial numbers: Just like a vehicle identification number, every single piece of equipment has its own specific serial number that the manufacturer uses to track production and warranty claims.

4. Your installer's details: The portal will require the name, address, and contact information of the certified company that performed the work.

As a trusted local installer, our team at Air On Demand actively helps customers navigate this window by providing clear, accessible installation invoices with all required numbers clearly listed. We know from our daily interactions with homeowners that digging for paperwork is frustrating, so we ensure your handover packet contains exactly what you need to secure your Daikin mini split coverage.

Daikin 60-Day Warranty Registration Checklist

How to Locate Your Serial and Model Numbers

If you misplace your final invoice or the handover packet provided by your installation team, there is no need to panic. You can physically locate the required model and serial numbers directly on your equipment. Manufacturers design these data plates to remain visible and intact for the life of the unit.

• The outdoor condenser data plate: Walk outside to your main compressor unit. Look on the side panel, usually near where the refrigerant lines connect to the machine. You will see a silver or white sticker containing technical data, including the model and serial numbers clearly labeled.

• The indoor air handler sticker: Head inside to the wall-mounted unit. The data sticker is typically located on the bottom right side or underneath the front plastic cover. You may need a step stool to read it clearly.

• The smartphone trick: Instead of writing these long alphanumeric codes down on a notepad, take a clear, well-lit photo of the data plates with your smartphone. This prevents you from accidentally transposing numbers or confusing a zero with the letter 'O' when typing them into the portal.

Modern mini split AC systems are designed with these data plates in highly accessible areas specifically so homeowners and technicians can verify coverage quickly. Once you have your photos, you are ready to complete the online form.

The Role of a Certified Installer in Warranty Compliance

Securing your 12-year protection isn't just about beating the 60-day clock; it also requires strict adherence to manufacturer installation standards. High-efficiency HVAC equipment is incredibly complex, and manufacturers will only guarantee parts that have been handled, installed, and commissioned by licensed professionals.

Attempting a DIY installation, or hiring an uncertified handyman to perform unpermitted electrical and refrigerant work, will instantly void your warranty—regardless of how quickly you fill out the online registration. Manufacturers require proof that proper procedures, such as pulling a deep vacuum on the refrigerant lines and correctly flaring connections, were followed. Without a licensed contractor's details on your registration form, the system will flag the entry.

Furthermore, maintaining that warranty over the next twelve years requires ongoing professional care. If a major component fails in year eight, the manufacturer may request professional maintenance records before approving the parts claim. Reassure yourself that by using our certified local team at Air On Demand for your Daikin mini split, all manufacturer guidelines were followed from day one, ensuring your coverage remains valid and undisputed.

Timing Your Registration for Seasonal Readiness

While the 60-day window is a strict administrative deadline, tying this task to your seasonal home maintenance routine makes it easier to remember. As we move into early fall and September approaches, newly installed systems have just endured peak summer usage. They have been running continuously for months to keep your Miami home comfortable.

Securing your warranty now ensures full protection as the system shifts operational modes. Even in warmer climates, the transition out of summer means your system might be called upon differently, perhaps utilizing its heat pump functions during occasional winter cold snaps. Having active, verified coverage makes scheduling future seasonal tune-ups or unexpected mini split repair much less stressful.

Think of your warranty registration as the final step of your summer cooling prep and the first step of your fall readiness. By filing your paperwork promptly, you remove a major "to-do" from your list and guarantee that your system is fully backed by the manufacturer before any seasonal weather shifts occur.

Frequently Asked Questions About Daikin Warranties

Navigating coverage terms and manufacturer rules can bring up a lot of questions. If you are researching different types of guarantees before filing your paperwork, you can learn more about the Daikin unit replacement guarantee vs. standard warranties. Here are the clear answers to the most common questions our Air On Demand technicians hear from homeowners who forgot to register Daikin warranty paperwork right away.

What happens if I don't register my Daikin warranty?

If you fail to register the equipment within the specified timeframe, the coverage automatically defaults to a standard 5-year parts warranty. This means you miss out on the extended 7 years of protection for major components. If a compressor or circuit board fails in year six, you will be responsible for the full cost of the replacement part.

Can I register my Daikin warranty after 60 days?

Generally, the manufacturer's online portal strictly enforces the 60-day limit starting from the official installation date. Once that window closes, the system typically locks you into the baseline 5-year warranty. In very rare administrative exception cases, you might be able to appeal through your certified installer, but it is highly recommended to never let the deadline pass.

What information do I need to register my Daikin mini split?

You need four primary pieces of information to successfully complete the process. First, the exact installation date. Second, the model numbers for both the indoor and outdoor units. Third, the unique serial numbers for all installed equipment. Finally, you need the contact details of the licensed installation company that performed the work.

Does the warranty cover labor or just parts?

Standard manufacturer warranties typically cover the cost of the replacement parts only. The labor costs associated with a technician traveling to your home, diagnosing the issue, and physically replacing the broken component are usually billed separately. However, many reputable local installers offer their own separate labor warranties for the first year or two after installation.

How does the unit replacement guarantee differ from standard parts coverage?

Standard parts coverage simply provides a replacement for a specific broken component, like a fan motor or a valve, while the rest of the existing unit remains in place. A unit replacement guarantee, which is often available on select premium models, goes a step further. If a major critical component like the compressor fails within a specific timeframe, the manufacturer may replace the entire outdoor condensing unit rather than just swapping the broken part.

Secure Your Coverage and Enjoy True Peace of Mind

Realizing the registration window is closing can be stressful, but taking just 10 minutes to submit your details online saves years of potential out-of-pocket expenses. By gathering your invoice, snapping a photo of your data plates, and verifying your installer's information, you lock in 12 years of robust protection for your home's comfort system. Once you complete the process, be sure to print out the confirmation email and staple it to your original installation invoice. Keep these documents in a safe place. If you are struggling to locate your paperwork this early fall or September, or if you simply want to schedule a post-installation check-up to ensure everything is running perfectly, reach out to our Air On Demand installation team today.

Sizing Health Smart Filters for Older Miami Condos Without Restricting Airflow placeholder-image  | Air On Demand
5 min read

Sizing Health Smart Filters for Older Miami Condos Without Restricting Airflow

Upgrading to a dense air filter in an aging condo can restrict airflow and freeze your AC coil. We break down why older systems require static pressure testing before any IAQ modifications.

The Hidden Danger of Upgrading Condo Air Filters

You want cleaner air in your home, but simply sliding a thick new filter into your AC might actually cause a major breakdown. At Air On Demand, we often see well-meaning homeowners accidentally suffocate their aging systems when sizing Health Smart filters for older Miami condos without restricting airflow. You might think you are doing your family a favor by capturing more dust, pollen, and dander. However, dense filters require a powerful blower motor to pull air through their tight fibers. If your air conditioning system lacks that power, the resulting airflow restriction triggers a dangerous chain reaction that ends with a frozen unit and a massive mess.

If you need help navigating your options, learn more about our professional Air Filtration services, or schedule a dedicated assessment for Air Conditioner Filters In Miami.

Upgrading your indoor air quality is a great goal, but it requires balancing your desire for clean air with the mechanical limits of your specific equipment. Many Miami condos still rely on older air handlers that were engineered long before modern high-efficiency filters hit the market. These systems were built for minimal airflow resistance. When you jam a dense, tightly woven filter into the return grille, the blower motor struggles to breathe. This is the exact decision point many condo owners face: how do you remove microscopic pollutants without pushing your aging HVAC system past its breaking point?

To make the right choice, you have to look beyond the marketing claims on the filter box. A filter that works perfectly in a brand-new house might destroy an older condo unit. Understanding the hidden dangers of airflow restriction is the first step toward safely improving your indoor air quality.

Understanding the Architectural Limits of 1980s Condo Air Handlers

To understand why a simple filter upgrade causes so much trouble, you have to look at how your building was constructed. In our years of providing AC installation and repair across the area, the Air On Demand team has serviced countless 1980s condo buildings designed with strict space limitations. Architects had to squeeze HVAC equipment into tight utility closets or drop ceilings, leaving very little room for large, powerful air handlers. Because of these architectural constraints, the systems installed in these units operate under a completely different set of rules than the AC in a typical single-family home.

The original ductwork in these buildings was engineered for minimal airflow resistance. The blowers were designed to push air through standard, fiberglass filters that captured large debris but let air flow freely. Modern high-efficiency filters simply were not factored into the original engineering of these older blowers. When you introduce a dense filter into a system designed for low resistance, you instantly disrupt the delicate balance of the entire HVAC setup.

The Problem with Compact 'Pancake' Units

Many older condos utilize ceiling-mounted "pancake" air handlers. These space-saving units are incredibly compact, which makes them convenient for tight floor plans but highly sensitive to changes in airflow. The blower motors inside these pancake units are much smaller and less powerful than standard upright air handlers.

The mechanical reality: A smaller blower motor simply cannot overcome the increased resistance of a tightly woven filter. Instead of pulling the required amount of air through the system, the motor works harder, runs hotter, and moves significantly less air.

• Space Constraints — 1980s Condo Pancake Unit: Extremely tight; ceiling or small closet mounted — Modern Single-Family System: Spacious; dedicated attic, basement, or garage space

• Airflow Tolerance — 1980s Condo Pancake Unit: Very low tolerance for added resistance — Modern Single-Family System: High tolerance; variable speed motors adjust to resistance

• Original Filter Design — 1980s Condo Pancake Unit: Thin, low-resistance fiberglass (MERV 1-4) — Modern Single-Family System: Thick, pleated media filters (MERV 8-13+)

• Blower Motor Power — 1980s Condo Pancake Unit: Small, single-speed, low torque — Modern Single-Family System: Large, multi-speed or variable speed, high torque

As the table shows, attempting to treat a compact 1980s condo unit like a modern residential system is a recipe for disaster. The architectural limits of your building dictate exactly what kind of filtration your system can safely handle.

Why Dense Health Smart Filters Cause Evaporator Coils to Freeze

When you install a dense filter, you change the physics of how your air conditioner operates. High-efficiency filters are designed with tightly packed synthetic fibers to trap microscopic particles. While this is great for air quality, it creates a massive barrier for the air trying to pass through. This barrier creates what HVAC professionals call a pressure drop.

A dense filter can easily increase the pressure drop by 0.1 to 0.2 inches of water column. In an older system, this sudden increase in static pressure directly reduces the Cubic Feet per Minute (CFM) of airflow moving across your indoor equipment. Your air conditioner relies on a precise volume of warm, unconditioned air blowing over the cold evaporator coil to function properly. When that airflow drops, the entire cooling process derails.

The Chain Reaction of Airflow Restriction

The transition from a clean filter to a frozen system happens in a predictable, destructive sequence. Here is exactly what happens inside your air handler:

• Step 1: Resistance increases. The tightly woven fibers of the dense filter block the return air, forcing the blower motor to strain against the negative pressure.

• Step 2: Airflow plummets. Because the motor cannot overcome the resistance, the total CFM of air moving through the ductwork drops significantly.

• Step 3: The coil starves for heat. The evaporator coil contains extremely cold refrigerant. Without enough warm household air blowing over it to absorb that cold energy, the coil's temperature drops rapidly.

• Step 4: Condensation freezes. As the coil temperature plunges below 32 degrees Fahrenheit, the natural moisture pulled from your indoor air freezes directly onto the metal fins instead of dripping into the drain pan.

Once the ice forms, it creates even more airflow restriction, accelerating the freezing process until the unit is completely encased in a block of ice. If you catch this happening, you will likely need professional AC Repair Miami to thaw the system and inspect for permanent damage.

The danger does not end when the system shuts off. When that massive block of ice eventually thaws, the volume of water quickly overwhelms the shallow drain pan. In a stacked condo building, this overflowing water leaks directly through the floor, causing severe water damage to the ceiling and walls of the unit below yours.

The Chain Reaction of Airflow Restriction in Condo ACs

The High-Humidity Threat During the Early Fall Transition

The risk of a frozen coil is not limited to the peak of summer. In fact, our technicians often respond to more frozen coil calls as the seasons change. During the early fall transition, Miami maintains high relative humidity—often exceeding 70%—even as the extreme summer heat begins to taper off. This unique climate condition puts incredible stress on an older air conditioning system that is already struggling to breathe.

Your air conditioner performs two distinct jobs: sensible cooling (lowering the temperature) and latent cooling (removing moisture from the air). Latent cooling is absolutely critical in coastal environments. As warm, humid air passes over the cold evaporator coil, the moisture condenses into water droplets and drains away. This dehumidification process requires a steady, unhindered volume of airflow to work properly.

When you restrict the airflow with a dense filter during this humid transition period, you effectively eliminate the system's ability to perform latent cooling. The blower moves air too slowly, allowing the excessive moisture in the September air to condense heavily on the freezing coil. Because the airflow is restricted, the coil gets colder and colder, quickly turning that heavy condensation into a solid sheet of ice.

The seasonal reality: Just because your older AC survived the peak of July does not mean it is safe from freezing in September. The combination of lower outdoor temperatures, high indoor humidity, and restricted airflow from a thick filter is the perfect recipe for a frozen system. For more insights on managing this specific seasonal challenge, you can read about Evaluating Health Smart Filters for South Florida Humidity Management. Proper airflow is your only defense against the heavy moisture loads of early fall.

The Mechanics of Static Pressure in Aging Systems

To truly grasp why older condo units fail when paired with modern filters, you have to understand a concept called static pressure. In simple terms, static pressure is the physical resistance to airflow within your ductwork and HVAC equipment. Think of it like blood pressure for your air conditioner. Just as high blood pressure strains your heart, high static pressure strains your blower motor.

The American Society of Heating, Refrigerating and Air-Conditioning Engineers (ASHRAE) sets strict guidelines regarding residential filtration and pressure drop. Every air handler is engineered to operate within a specific static pressure range. If the resistance goes above that threshold, the system cannot move enough air to function safely.

Understanding Total External Static Pressure (TESP)

HVAC professionals measure the overall health of your airflow using Total External Static Pressure (TESP). This measurement combines the resistance from both sides of your system.

1. Return Side Resistance: This includes the return grilles, the return ductwork, and the air filter itself. The filter is almost always the largest single source of resistance on the return side.

2. Supply Side Resistance: This includes the evaporator coil, the supply ductwork, the dampers, and the supply registers blowing air into your rooms.

3. The Calculation: TESP is calculated by adding the return side resistance to the supply side resistance.

Older blowers in condo units have very low maximum TESP thresholds. Because the compact ductwork and original coils already create a baseline level of resistance, there is very little "room" left in the calculation for a restrictive filter. When you add a dense Health Smart filter to the return side, you push the TESP past the motor's absolute limit. The mechanical strain causes the motor to overheat, waste energy, and ultimately fail to deliver the CFM required to keep the coil from freezing.

Why DIY Static Pressure Testing is Impossible

With all this talk of static pressure and maximum thresholds, you might be tempted to figure out your system's limits on your own. Unfortunately, guessing a filter's impact based purely on its MERV rating is inaccurate and highly dangerous for your equipment. A MERV 11 filter from one brand might have a completely different pressure drop than a MERV 11 filter from another brand. You cannot manage static pressure by reading the back of a cardboard box.

Measuring static pressure requires specialized diagnostic tools. HVAC technicians use a highly sensitive digital manometer to read the exact air pressure inside your ductwork. This process involves drilling precise test ports into the supply and return plenums in specific locations to get an accurate reading without damaging the internal components.

The danger of DIY modifications: Never attempt to drill into your air handler cabinet, modify the ductwork, or bypass safety switches to force a larger filter to fit. Hitting the evaporator coil or a refrigerant line with a drill bit will instantly destroy the system. Furthermore, bypassing safety switches to keep a freezing system running will lead to catastrophic compressor failure.

As the team at Air On Demand, with deep technical expertise in older condo HVAC infrastructure across Miami, we know exactly how these aging systems behave. Only a licensed professional can accurately calculate if a specific filter is safe for your unit's exact static pressure limits. We use precise static pressure diagnostics to ensure that any upgrades to your Miami condos are safe, effective, and mechanically sound.

Safely Improving Indoor Air Quality Without Restricting Airflow

Just because you live in an older building does not mean you have to settle for poor indoor air quality. You simply have to approach the problem differently. Instead of guessing which filter will work, you need a strategy that prioritizes the mechanical safety of your 1980s air handler while still capturing airborne pollutants.

Here is the safe, professional approach our Air On Demand technicians recommend for improving your indoor air quality without restricting your airflow:

1. Schedule a baseline static pressure test: Before buying any new filters, have a professional technician measure your system's current TESP. This establishes exactly how much resistance your blower motor can handle.

2. Choose low-resistance, high-efficiency filters: If your system has the capacity, your technician can recommend specific filter brands engineered for maximum surface area and minimal pressure drop. These filters often use deep pleats to capture particles without suffocating the motor.

3. Install a dedicated air purifier: If your AC cannot handle a denser filter, the safest solution is a standalone HEPA air purifier. These units clean the air in your living spaces independently, adding zero static pressure to your HVAC system.

4. Consider UV germicidal lights: UV lights installed inside the air handler neutralize mold, bacteria, and viruses without impeding airflow. This is a highly effective way to improve IAQ in older, sensitive systems.

5. Keep up with professional maintenance: A dirty blower wheel or a clogged evaporator coil adds massive static pressure to your system. Regular AC Maintenance Miami ensures your aging blower operates at its maximum potential CFM, giving you the best possible airflow year-round.

By separating the job of heavy filtration from the job of your air conditioner, you can achieve excellent air quality without risking a frozen coil or a flooded condo.

Frequently Asked Questions About Condo Air Filters and Static Pressure

Why does a dense filter freeze my AC coil?
A dense filter restricts the amount of warm air flowing over your evaporator coil. Without enough warm air to absorb the cold refrigerant's energy, the coil's temperature drops below freezing, turning normal condensation into solid ice. This process accelerates quickly, completely encasing the system in ice.

How does static pressure affect older condo AC units?
Static pressure is the resistance your blower motor must overcome to move air through the system. Older condo units were built with smaller, less powerful motors that cannot handle high static pressure. When resistance increases, these aging motors overheat, move less air, and fail prematurely.

Can I safely use a Health Smart filter in an older AC?
You can only use a high-efficiency filter if a professional verifies that your system's static pressure limits can handle the added resistance. Many older units cannot safely pull air through these dense filters. A digital manometer test is required to know for sure.

What MERV rating is best for an older AC?
There is no universal MERV rating for older units, as it depends entirely on the system's current airflow capacity. However, most 1980s air handlers were designed for low-resistance filters, typically in the MERV 4 to MERV 8 range. Going higher without a professional assessment risks severe airflow restriction.

How do I know if my filter is restricting airflow?
Common signs of restricted airflow include weak air coming from your vents, the AC running constantly without cooling the room, and ice forming on the copper refrigerant lines outside. You might also hear the blower motor straining or whistling loudly at the return grille.

Can a frozen AC coil cause water damage in a stacked condo building?
Yes, a frozen coil is a major flood risk. When the massive block of ice melts, the water rapidly overflows the shallow drain pan, leaks through the floor, and destroys the ceiling and drywall of the condo unit directly beneath yours.

Protect Your Condo's AC While Breathing Cleaner Air

Improving the air you breathe should never come at the cost of destroying your air conditioner. The delicate balance between upgrading your indoor air quality and protecting an older condo air handler requires precision, not guesswork. A frozen coil and a flooded floor are entirely avoidable consequences of improper filter sizing.

If you are living in an older building, sizing Health Smart filters for older Miami condos without restricting airflow is a job for experienced professionals. Don't risk your comfort or your property by forcing a dense filter into a sensitive system. Reach out to a licensed HVAC expert for a comprehensive static pressure evaluation, so you can breathe easier knowing your AC is running safely and efficiently.

Ductwork Air Leaks: When Hissing Comes from the Attic Instead of the Unit placeholder-image  | Air On Demand
5 min read

Ductwork Air Leaks: When Hissing Comes from the Attic Instead of the Unit

That loud hissing from your ceiling might sound like a catastrophic refrigerant leak, but it's often just a torn flexible duct venting cooled air into your roof space.

That Unsettling Hiss: Why Your Attic Sounds Like a Deflating Tire

Your air conditioning system kicks on to combat the afternoon heat, but instead of the quiet hum of airflow, a loud, rushing noise fills the ceiling above you. When dealing with Ductwork Air Leaks: When Hissing Comes from the Attic Instead of the Unit, the immediate reaction for most homeowners is a wave of panic. At Air On Demand, our team fields these panicked calls all the time. A sudden hissing noise that echoes through the drywall instantly triggers fears of a major mechanical breakdown, leading many to assume their system has suffered a dreaded, catastrophic refrigerant leak.

Need immediate assistance with your system? Learn more about our AC repair solutions, or book Miami AC repair services right now.

However, before you assume the worst about your compressor or evaporator coil, the physical location of the sound provides the biggest clue to the actual problem. If the hissing originates from above the ceiling rather than near the outdoor condenser cabinet or the indoor air handler unit, you are likely dealing with an entirely different issue. In our experience serving Miami homes with attic-run flexible ductwork, that aggressive hissing is usually not chemical refrigerant escaping into the atmosphere—it is your valuable, freshly cooled air blasting out of a torn duct and into the unconditioned roof space.

Understanding the difference between these two issues is the first step toward getting your home comfortable again. When you hear that deflating-tire sound overhead, you are experiencing a severe loss of static pressure. The system is working exactly as it should to cool the air, but the delivery mechanism has failed. To properly diagnose the situation, you need to know what to listen for, where to look, and why the harsh attic environment often causes these sudden ruptures in the first place.

Decoding the Hiss: Refrigerant Leaks vs. Static Pressure Loss

To the untrained ear, a hiss is just a hiss. However, the auditory characteristics of a damaged HVAC system tell a highly specific story. Clearly differentiating between the high-pressure escape of chemical refrigerant and the rushing sound of a ductwork leak prevents misdiagnosing the problem and pursuing the wrong repairs. If you are researching a hissing sound: refrigerant leak or reversing valve issues, you will quickly find that those mechanical problems have very different signatures than a ductwork failure.

Refrigerant leaks generally occur directly at the evaporator coil inside the home or at the outdoor condenser unit. Because refrigerant operates under intense chemical pressure, a leak in the copper line set produces a sharp, high-pitched, and sometimes gurgling or bubbling hiss. It sounds somewhat like a tightly pinched aerosol can. In contrast, a ductwork leak produces a broader, rushing, wind-like hiss. This sound is caused by forced air escaping through a wide tear in the flexible plastic jacket, creating a loud whooshing noise that resonates through the attic floorboards and drywall.

• Sound Profile — Refrigerant Leak: Sharp, high-pitched, sometimes bubbling — Static Pressure (Duct) Leak: Broad, rushing, wind-like whoosh

• Location of Noise — Refrigerant Leak: At the indoor coil or outdoor compressor — Static Pressure (Duct) Leak: Overhead in the attic or ceiling space

• Airflow Temperature — Refrigerant Leak: Vents blow warm air constantly — Static Pressure (Duct) Leak: Vents blow cold air, but very weakly

• System Behavior — Refrigerant Leak: Coils may freeze over with solid ice — Static Pressure (Duct) Leak: System runs continuously to reach target temp

The Timing of the Noise

The most definitive way to tell the difference between these two issues is by paying close attention to the timing of the sound. Refrigerant hissing can persist shortly after the cooling system cycles off. Because the high and low pressure sides of the system take a few minutes to equalize after the compressor shuts down, the chemical hiss will often slowly fade out.

Conversely, ductwork hissing starts and stops exactly in sync with the blower motor. The moment the blower fan engages, the rushing noise begins. The exact second the fan powers down, the noise stops completely. This is because a static pressure leak only hisses when the blower motor is actively pushing air through the torn channel.

Refrigerant Leak vs. Static Pressure Leak: Sound and Location Comparison

How Late-Summer Heat Bakes Attic Ductwork

To understand why a duct suddenly bursts and creates that loud hissing sound, you have to look at the environment where the ductwork lives. In our years of repairing HVAC systems across Miami, we've seen exactly how our hot-humid subtropical climate and intense solar radiation affect building materials. Unconditioned attic spaces act as massive solar ovens. While the outside temperature might be 92 degrees, the radiant heat trapped beneath the roof decking can easily push attic temperatures to exceed ambient outdoor temperatures by 40 to 50 degrees.

By the time September rolls around and we begin focusing on fall preparation, your flexible ductwork has endured months of extreme thermal stress. Flexible ducts consist of an inner wire helix wrapped in plastic, surrounded by fiberglass insulation, and encased in an outer vapor barrier jacket. The connections between these runs, the trunk line, and the vent boots are sealed using specialized mastic paste and heavy-duty HVAC tape.

The Breakdown Process:

• Plastic embrittlement: The constant expansion and contraction from 140-degree afternoons to 80-degree nights causes the outer vapor barrier to lose its elasticity.

• Adhesive failure: The extreme heat bakes the mastic seals and HVAC tape, causing the chemical adhesives to dry out, become brittle, and crack.

• Structural separation: Once the adhesives fail, the heavy, insulated duct sags under its own weight, pulling away from the metal collars.

By early fall, this cumulative damage often results in sudden catastrophic tears. The moment the blower motor pressurizes the weakened line, the brittle tape gives way, the duct detaches, and you are left with a massive air leak venting directly into the roof space.

The Mechanics of a Ductwork Air Leak

When HVAC professionals talk about airflow, we frequently reference "static pressure." In layman's terms, static pressure is the resistance to airflow within your duct system. HVAC systems rely on precise static pressure to push conditioned air evenly through the home, ensuring the furthest bedroom gets just as much cooling as the living room right next to the air handler. When a duct tears, the physics of your home's airflow completely changes.

Here is exactly what happens when a flexible duct fails and causes a loss of static pressure:

1. The System Pressurizes: The blower motor engages, pulling warm air from the return vents, pushing it across the cold evaporator coil, and forcing the newly cooled air into the main supply trunk line.

2. Air Seeks the Path of Least Resistance: Instead of traveling the full length of the ductwork to reach the vent registers in your rooms, the pressurized air finds the massive hole or disconnected collar in the attic.

3. The Hissing Vent is Created: Because the hole in the duct is often jagged or partially obstructed by the torn vapor barrier, the forced air squeezing through the gap creates a high-velocity rushing or hissing noise heard clearly through the ceiling.

4. Efficiency Plummets: According to Energy Star, 20 to 30 percent of air moving through duct systems is often lost to leaks, holes, and poor connections. In the case of a complete collar detachment, that localized loss can be nearly 100 percent for that specific branch.

This mechanical failure means the cooling you are paying for never reaches your living space, leaving rooms feeling stagnant and warm despite the system running constantly.

Beyond the Noise: The Hidden Costs of Vented Cooled Air

While the loud rushing noise is the symptom that usually prompts a service call, the secondary negative effects of a severe attic duct leak are far more damaging to your home and your equipment. When our team conducts pre-heating-season tune-ups, we often discover that a massive loss of static pressure overhead means homeowners are actively air conditioning the great outdoors.

Longer Run Times and Wasted Energy: Because escaping air means your system runs longer to reach the thermostat set point, your energy consumption skyrockets. The air conditioner will run continuously, trying to satisfy the thermostat, but since a large portion of the conditioned air is wasted cooling the attic space instead of the living areas, the house never quite reaches the target temperature.

Severe Indoor Air Quality Impacts: In Miami homes with attic-run flexible ductwork, a supply leak also creates a dangerous pressure imbalance. If you are blowing massive amounts of air into the attic, your home experiences negative pressure. To equalize, the house will pull air from wherever it can—often sucking dusty, unconditioned attic air, fiberglass particles, and humidity down through recessed lighting fixtures, wall cavities, and tiny gaps in the ceiling.

This influx of debris severely impacts indoor air quality and clogs filters prematurely. If you have noticed an unexplained increase in dust settling on your furniture alongside the hissing noise, the negative pressure from a duct leak is the likely culprit. Resolving this often requires targeted duct repair followed by professional air duct cleaning in Cutler Bay to remove the accumulated attic debris from your breathing air.

Pinpointing the Problem Without the Guesswork

Because duct hissing mimics refrigerant hissing to the untrained ear, proper diagnostics are absolutely crucial. Guessing at the source of the noise can lead to expensive and unnecessary procedures. A thorough diagnostic process ensures you aren't paying for an unnecessary, labor-intensive refrigerant leak search when the ductwork is the real culprit.

Working with our highly trained technicians at Air On Demand means your system receives a comprehensive evaluation that pinpoints the exact source of hissing noises, saving you time and the frustration of a misdiagnosis. We do not just listen to the noise; we test the entire system's performance. By measuring the loss of static pressure using digital manometers, our technicians can map out exactly where the airflow is dropping off.

Why DIY Tape Fails: Attempting DIY duct tape repairs in a sweltering attic is highly ineffective and physically unsafe. Standard hardware store duct tape degrades rapidly in extreme heat. Proper duct repair requires specialized mastic sealant, tensioning tools to reconnect the inner wire helix to the metal collar, and professional-grade foil tape to ensure the vapor barrier is airtight. Scheduling a professional AC inspection ensures the torn line is rebuilt to withstand future heat waves, restoring proper static pressure to the entire system.

Stop Cooling Your Attic and Restore Your Home's Comfort

A loud hissing sound from the ceiling is a clear, undeniable sign that valuable cooled air is being wasted in your roof space. Identifying whether the issue is a simple duct tear or a more complex mechanical system leak is the very first step toward getting your home back to normal. Especially as we transition into early fall and focus on improving indoor air quality for the milder months ahead, duct failures are a common but highly solvable problem.

Addressing the ductwork issue before the system overworks itself into a secondary breakdown will restore your comfort and system efficiency. A clear explanation of the problem and targeted professional diagnostics can quickly resolve the noise, stop the massive energy waste, and ensure your system is blowing cold air into your living room instead of your attic. If you are tired of hearing that rushing wind overhead, it is time to bring in our experts for reliable Miami AC repair services.

Frequently Asked Questions

Why is my AC making a hissing noise in the attic?
A hissing noise in the attic is typically caused by a tear or disconnection in your flexible ductwork. When the blower motor forces cold air through the ducts, the high-pressure air escaping through the hole creates a loud rushing or hissing sound that echoes through the ceiling. This means you are losing conditioned air into the unconditioned attic space.

Can leaking ductwork make a hissing sound?
Yes, leaking ductwork frequently produces a loud hissing or whooshing sound. This happens because the HVAC system operates under static pressure, and when that pressurized air finds a narrow escape route through a torn vapor barrier or broken mastic seal, it generates significant acoustic noise as it vents out.

What does a refrigerant leak sound like compared to an air leak?
A refrigerant leak produces a sharp, high-pitched, and sometimes bubbling hiss located near the indoor evaporator coil or the outdoor condenser unit. In contrast, an air leak in the ductwork sounds like a broader, rushing wind, is located in the attic or ceiling, and stops the exact second the blower fan turns off.

How do you find a ductwork leak in the attic?
Professionals find ductwork leaks by performing static pressure tests with digital manometers to identify zones with severe pressure drops. This is followed by a visual inspection of the attic trunk lines, branch runs, and collar connections to locate degraded tape, cracked mastic, or fully disconnected flexible ducts.

Is it safe to run my AC if the ductwork is hissing?
While running the AC with a duct leak is not an immediate electrical or chemical safety hazard, it is highly detrimental to your system and indoor air quality. It forces the equipment to run continuously, driving up energy consumption, and can pull dusty, contaminated attic air into your home through negative pressure imbalances.

Repairing a Burnt Fan Wire vs. Replacing the Entire Fan Motor placeholder-image  | Air On Demand
5 min read

Repairing a Burnt Fan Wire vs. Replacing the Entire Fan Motor

A melted wire lead on your AC condenser often signals an aging motor drawing too many amps. We break down the safety risks of a simple splice versus a complete replacement.

The Post-Summer AC Breakdown: Making the Right Call for Your System

Are you staring at a silent outdoor unit, wondering if repairing a burnt fan wire vs. replacing the entire fan motor is the safer route for your home? You rely on your air conditioner to keep your living space comfortable, but after enduring intense heat, systems often reach their breaking point. Right now, as we transition into early fall, our team at Air On Demand frequently responds to calls where a condenser unit has suddenly shut down. When one of our technicians opens the access panel and points to a charred, melted wire lead connected to your fan motor, you face a critical choice. Do you ask for a quick splice to get the cold air flowing again, or is it time to replace the aging motor completely to prevent a larger electrical failure down the road?

For homeowners navigating this exact scenario, understanding the safety implications of an AC repair is the critical first step when weighing an AC repair vs. replacement.

Diagnosing the Root Cause: Why Did the Fan Wire Burn Up?

In our years of diagnosing HVAC systems across Miami, we have found that electrical wires inside your equipment do not simply melt for no reason. When you discover a burnt wire at the terminal of your condenser fan motor, it is crucial to understand the mechanical forces that led to the failure. This is rarely just an isolated bad connection. Instead, it is typically a glaring symptom of a much deeper issue within the motor itself.

The Hidden Danger of High Amp Draw

To understand why wires burn, you have to look at how electric motors age. Over years of operation, the internal bearings inside your fan motor begin to lose their lubrication and wear down. At the same time, the protective coating on the copper windings inside the motor slowly degrades. As friction increases, the motor has to work significantly harder just to spin the fan blades at the required speed.

This extra effort requires more electricity. The motor begins pulling more current through the wires than they were designed to handle, resulting in a high amp draw causing wire overheating. The excess electrical energy converts directly into heat. This intense heat travels along the copper wire lead, eventually baking the rubber insulation until it becomes brittle, melts away, and allows the exposed wire to arc or short out against the metal casing.

Symptom Check: Compressor Running, Fan Stalled

One of the most common signs of this specific failure is hearing the deep hum of your compressor running while the fan blades remain completely motionless above it. Many homeowners immediately search for why your AC unit fan is not spinning, hoping for a simple fix like a tripped breaker.

The immediate risk: If your system continues to run in this state, it is actively destroying itself. The fan's primary job is to pull air through the metal fins to dissipate the intense heat generated by the compressor. Without the fan spinning, that heat remains trapped. The compressor will rapidly overheat, potentially leading to a catastrophic and complete system failure. Diagnosing the exact amp draw that caused the stall requires a licensed professional using specialized multimeters. DIY electrical testing on high-voltage HVAC equipment is strictly forbidden due to severe safety risks.

The Temporary Fix: Safely Splicing a Damaged Wire Lead

When an Air On Demand technician confirms that a wire has burned up, the most immediate question is whether the connection can simply be repaired. Splicing a damaged wire lead is technically possible, but it is vital to understand the limitations of this approach and view it as a temporary measure rather than a permanent cure.

What a Professional Wire Splice Entails

A proper, code-compliant wire repair is not as simple as twisting two ends together with a standard plastic wire nut. Because of the intense heat and vibration inside a condenser unit, a licensed professional must perform a highly specific repair process:

• Cutting back the damage: The technician must cut the wire back far enough to reach clean, unoxidized copper. Burnt copper cannot conduct electricity safely.

• Using high-heat connectors: Standard electrical tape and basic wire nuts will melt. Professionals use specialized, high-temperature butt connectors.

• Weatherproofing the connection: The splice must be sealed with marine-grade, adhesive-lined heat shrink tubing to prevent moisture from causing a new short.

The Dangers of Improper Splicing

Improperly spliced HVAC wires create severe fire hazards. If the connection is loose or exposed to the elements, electrical resistance spikes, generating even more heat. This is why DIY repairs are incredibly dangerous and strictly against building codes.

Furthermore, the main limitation of any splice is the underlying motor. If the root problem is a high amp draw causing wire overheating, the new splice is doomed to fail. The failing motor will continue to pull excessive current, and the new connection will eventually overheat and burn up just like the original wire.

When a Professional Splice Makes Sense

There are rare scenarios where a professional splice might be a viable short-term option. If the wire was physically damaged by flying debris during a storm, or if a rodent chewed through the insulation, the motor itself might still be healthy. Scheduling routine AC maintenance is the best way to catch physical wire damage before it shorts out. However, before any splice is finalized, our technicians always perform a professional load test to verify the motor's amp draw. If the motor is pulling too many amps, splicing the wire is just putting a temporary band-aid on a failing system.

The Permanent Solution: Replacing the Aging Fan Motor

For aging systems, opting for a complete motor replacement is almost always the safer, more reliable long-term choice. Rather than repeatedly treating the symptom of melted wires, replacing the motor eliminates the root cause entirely.

Eliminating the Root Cause of Electrical Failure

When you install a brand-new condenser fan motor, you are removing the worn-out bearings and degraded windings that caused the high amp draw causing wire overheating in the first place. A new motor operates efficiently, pulling exactly the amount of current it was designed to use. This restores the system's efficiency and completely removes the electrical fire hazard associated with overheating wire leads. In some cases, upgrading to a high-efficiency motor may even qualify you for local utility energy rebate programs, making the replacement an even smarter long-term investment.

Refreshing the Electrical Cooling Circuit

A major benefit of a full replacement is that it typically includes more than just the motor itself.

• New Run Capacitor: The capacitor acts as the battery that gives the motor the necessary jolt to start and keep running. A new motor requires a new, perfectly matched capacitor.

• Fresh Wiring Harness: New motors come with factory-sealed, pristine wire leads, ensuring there are no hidden weak points or degraded insulation.

• Restored Airflow: A fresh motor spins at its true rated RPM, pulling the maximum amount of air across the condenser coils.

Preventing Catastrophic Compressor Failure

Our professional expertise at Air On Demand prioritizes your long-term safety and system reliability over risky, temporary wire-splicing fixes. A reliable fan motor is the only thing protecting the heart of your system—the compressor—from overheating and dying. Replacing a struggling fan motor today is significantly less invasive and far more reliable than dealing with a completely fried compressor later this season. Positioning this choice as an investment in long-term peace of mind is the smartest move for the safety of your home.

How Extreme Coastal Climates Accelerate Electrical Wear

The environment your outdoor unit lives in plays a massive role in how its electrical components age. Our team knows firsthand that the specific climate challenges in Miami create a perfect storm for accelerated electrical wear and tear, making these types of motor and wire failures incredibly common.

Thermal Stress from Relentless Heat

Months of relentless summer heat put immense thermal stress on outdoor condenser units. The ambient air temperature combined with the heat rejected by the compressor creates an oven-like environment inside the metal cabinet. By the time we transition into early fall and begin performing pre-heating-season tune-ups, the motor and its wiring have endured thousands of hours of extreme temperatures. This constant baking causes the rubber insulation on wire leads to dry out, become brittle, and eventually crack, leaving the copper inside vulnerable.

The Impact of Salt Air and High Humidity

Beyond the heat, Miami's high-humidity and salt-air environment acts as a catalyst for electrical failure.

Galvanic corrosion: When salt and moisture settle on the metal terminals where wires connect to the motor or the capacitor, they accelerate galvanic corrosion. The salt eats away at the conductive metals, creating a layer of resistance. Electricity struggles to pass through this corroded layer, which generates even more heat at the connection point.

This combination of extreme heat, heavy usage, and rapid corrosion makes late-season electrical shorts highly predictable. Environmental wear-and-tear of this magnitude cannot be reversed with a simple wire splice. Once the salt air has compromised the internal workings of the motor and the integrity of the wire leads, replacement is the only way to restore true safety and reliability.

Side-by-Side Comparison: Repairing vs. Replacing

To help you make an informed decision about your system, here is a clear breakdown of the differences between attempting a professional wire repair and opting for a complete motor replacement. If your entire condenser unit has suffered severe corrosion and the compressor is also failing, you may need to discuss options for new AC units, but for isolated fan motor issues, these are your primary paths.

• Safety Risk — Professional Wire Splice: Carries a high risk of repeated shorts if the underlying motor is failing and pulling excessive current. — Complete Motor Replacement: Eliminates the electrical hazard completely by removing the high amp draw causing wire overheating.

• System Longevity — Professional Wire Splice: Acts as a temporary band-aid that buys a little time until the motor finally seizes. — Complete Motor Replacement: Resets the lifespan of the condenser's cooling mechanism, providing years of reliable operation.

• Overall Reliability — Professional Wire Splice: Leaves the aging, degraded motor in place to continue struggling through hot weather. — Complete Motor Replacement: Ensures the compressor receives consistent, powerful cooling to prevent system breakdowns.

• Best Application — Professional Wire Splice: Only viable for isolated physical wire damage (e.g., debris impact) on an otherwise healthy motor. — Complete Motor Replacement: The strongly recommended path for aging motors that have endured heavy seasonal usage.

Splicing a Burnt Wire vs. Replacing the Fan Motor

Frequently Asked Questions About Condenser Fan Motor Failures

Why did my AC fan motor wire burn up?

A burnt wire is usually the result of excessive electrical current generating intense heat. As fan motors age, their internal bearings wear out, forcing the motor to work harder and pull more electricity. This high amp draw causing wire overheating eventually melts the insulation, leading to a short circuit at the terminal.

Can you splice a wire on an AC fan motor?

Yes, a licensed professional can safely splice a wire using high-temperature connectors and weatherproofing materials. However, DIY splicing is incredibly dangerous and against building codes. Furthermore, if the motor itself is failing, a splice is only a temporary band-aid that will likely burn up again.

How do you know if your AC fan motor is bad?

Common signs of a bad fan motor include a buzzing or humming sound from the outdoor unit without the blades spinning, blades that spin very slowly, or a motor casing that is excessively hot to the touch. One of our professional technicians will use a multimeter to measure the amp draw and confirm if the internal windings have failed.

Is it worth replacing an aging AC fan motor?

Yes, replacing an aging fan motor is highly recommended to protect the rest of your system. The fan cools the compressor; if the fan fails, the compressor will overheat and suffer catastrophic damage. Replacing the motor is a smart investment in the long-term reliability of your entire AC unit.

Why is my AC fan not spinning but the compressor is running?

If you hear the compressor running but the fan is dead, the electrical connection to the fan has likely been severed. This is frequently caused by a burnt wire lead, a failed run capacitor, or a completely seized motor. You should turn the system off immediately to prevent the compressor from overheating.

Does a burnt wire mean I need a whole new AC unit?

Not necessarily. A burnt wire isolated to the condenser fan usually means you need a new fan motor and a new run capacitor. However, if the system was left running without the fan and the compressor suffered severe damage, a full system replacement might be required.

Make the Safe Choice for Your Home's Cooling System

Discovering a burnt wire inside your outdoor unit is a critical warning sign that your system needs professional attention. Especially as we transition into the early fall season, the immense thermal stress your AC has endured often reveals underlying motor issues. A melted wire is rarely just a bad connection; it is a clear indicator that your system is struggling to operate safely.

You do not have to guess whether a repair or a replacement is the right path. The experienced team at Air On Demand can perform a proper diagnostic to determine the true amp draw of your motor and identify any hidden electrical hazards. Prioritize your long-term safety and the reliability of your home's cooling system. Schedule a professional inspection with us today to weigh your options and ensure your system is prepared to keep you comfortable without the risk of sudden electrical failure.

Will Replacing Just the Condenser Improve My Home's Humidity Control? placeholder-image  | Air On Demand
5 min read

Will Replacing Just the Condenser Improve My Home's Humidity Control?

Upgrading your outdoor AC unit won't cure sticky, muggy indoor air. See why replacing only the condenser leaves heavy moisture behind and how your indoor coil actually controls humidity.

The Short Answer: Can a New Outdoor Condenser Cure Muggy Indoor Air?

Are you running your air conditioner around the clock, only to find yourself asking: will replacing just the condenser improve my home's humidity control? The short answer is no. Swapping out only the outdoor unit will not significantly improve your indoor humidity levels. If your living room feels like a swamp while the AC is running, the problem usually lies deeper within your system.

Most homeowners don't realize that their cooling system is a two-part team. The outdoor unit (the condenser) and the indoor unit (the evaporator coil) must work in perfect harmony to keep you comfortable. When you only replace the outside half, you break that harmony. This becomes incredibly obvious during the September early fall transition, when temperatures drop slightly but the heavy, sticky moisture in the air remains.

Your outdoor unit is great at releasing heat, but it doesn't actually pull the moisture out of your indoor air. That heavy lifting happens inside your house. If you want to learn more about how these components work together, reviewing your air conditioning systems is a great place to start.

How Your AC Actually Dehumidifies: Sensible vs. Latent Cooling

To understand why a new outdoor unit won't fix your sticky air, we need to look at how air conditioning actually works. Your system performs two completely different jobs at the same time: sensible cooling and latent cooling. If your system only does one of these jobs well, your home will never feel truly comfortable.

Sensible cooling is the process of lowering the actual temperature in the room. This is the number you see on your thermostat. When your outdoor condenser compresses refrigerant and pumps it through the lines, its main job is to expel heat outside. It is highly effective at sensible cooling. However, a lower temperature alone does not equal comfort.

Latent cooling is the process of removing moisture from the air. This is the hidden half of air conditioning. The outdoor condenser does not directly pull moisture from your indoor air. If your system fails at latent cooling, you will end up with indoor relative humidity remaining above 60%. At that level, your home will feel clammy, sticky, and uncomfortable, even if the thermostat says it is 72 degrees.

Here is a quick breakdown of how these two cooling types compare:

• Sensible Cooling — Primary Function: Lowers the air temperature — Component Responsible: Outdoor Condenser (primarily) — What You Notice: The thermostat number dropping

• Latent Cooling — Primary Function: Removes airborne moisture — Component Responsible: Indoor Evaporator Coil — What You Notice: The air feels crisp and dry

When you ignore latent cooling, you are only solving half the problem. For homeowners looking to actively manage their indoor moisture levels, exploring dedicated indoor air quality solutions is often the next logical step. But mechanically, your AC system's ability to handle latent cooling comes down entirely to the indoor equipment.

The Division of Labor in Your AC System: Sensible vs. Latent Cooling

Why the Indoor Evaporator Coil Dictates Moisture Extraction

If the outdoor unit isn't pulling the moisture out of the air, what is? The answer sits inside your home, usually in a closet, attic, or garage: the indoor evaporator coil. This component is the true front line for dehumidification.

The Problem: When warm, humid indoor air is pulled into your return vents, it carries a massive amount of invisible water vapor. If that water vapor stays in the air, your home feels muggy.

The Cause: Moisture removal relies on a physical reaction called condensation. Think of a glass of ice water sitting on a patio table on a hot day. Water droplets quickly form on the outside of the glass because the cold surface pulls moisture out of the warm air. Your AC system uses this exact same science.

The Solution: Here is how the indoor coil extracts that moisture step-by-step:

1. Warm, humid air is blown over the freezing cold metal fins of the indoor evaporator coil.

2. Because the coil is so cold, the water vapor in the air rapidly condenses into liquid water on the metal surface.

3. This liquid water drips down into a drain pan.

4. The water safely flows out of your house through a condensate drain line.

5. The freshly dried, cooled air is pushed back into your living spaces.

An aging, dirty, or failing indoor coil simply cannot extract moisture efficiently. The metal fins might be coated in dust, or the internal pressure might be wrong. Regardless of how brand-new and powerful your outdoor condenser is, the indoor coil dictates the moisture extraction. In heavily humid areas like Miami coastal and inland homes, the indoor coil works overtime. It is absolutely critical for your comfort. If the indoor coil is weak, the humidity stays inside.

The Hidden Dangers of a Mismatched HVAC System

When you pair a brand-new outdoor condenser with an old indoor evaporator coil, you create what the industry calls a "mismatched system." This is one of the most common mistakes homeowners make when trying to upgrade their cooling equipment on a budget.

A mismatched system means the two major components were not engineered to work together. Modern outdoor condensers operate at much higher efficiencies and different refrigerant pressures than older indoor coils can handle. Here is what happens when you force them to work together:

• Severe short-cycling: The new outdoor unit is so powerful that it cools the house down too quickly. It shuts off before the indoor coil has enough time to extract the moisture.

• Refrigerant bottlenecks: Older coils restrict the flow of modern refrigerants, causing the new compressor outside to overheat and work harder than necessary.

• Reduced equipment lifespan: Forcing a new condenser to push against a restrictive, aging indoor coil adds massive wear and tear, often leading to premature breakdowns.

This mismatch becomes painfully obvious during the September early fall transition. During this time of year, sensible cooling loads drop—meaning it doesn't take much effort to lower the temperature in the house. However, the latent cooling loads (the humidity) stay extremely high. A mismatched system will cool the house in five minutes and shut off, leaving all that heavy moisture trapped inside.

If you are weighing your options, understanding the long-term impact on your comfort is critical when deciding whether to repair vs replace your AC. A mismatched system doesn't just fail at dehumidifying; it actively damages your new investment.

Avoiding the Partial-Replacement Trap

It is completely understandable why homeowners fall into the partial-replacement trap. When the outside unit dies, the upfront cost of only swapping that single box seems appealing. The old indoor coil might still technically function, so why replace it?

Here's the thing: investing in a partial replacement almost always leads to continued poor indoor air quality. Because the old coil cannot handle the new condenser's output, you are left with indoor relative humidity remaining above 60%. When humidity stays that high for prolonged periods, you open the door to secondary issues like musty odors, damp carpets, and even mold growth inside your ductwork.

We believe in providing honest, highly technical advice that puts your long-term comfort first. That means refusing to recommend a partial system "fix" that won't actually solve your underlying muggy air problem. A cooling system is not a collection of independent parts; it is a unified, engineered ecosystem. The indoor and outdoor units must be matched in size, capacity, and efficiency ratings to function correctly.

A properly matched, fully replaced system is the only reliable way to control heavy indoor moisture. When both halves of the system communicate and operate at the same pressure, the AC runs in smooth, steady cycles. This gives the indoor coil the exact amount of time it needs to wring the water out of your air, leaving your home feeling crisp and comfortable.

Frequently Asked Questions About AC Components and Humidity

Understanding the mechanics of your cooling system can be overwhelming, especially when you are dealing with sticky, uncomfortable air. Whether you live in a modern condo or one of the many older Miami coastal and inland homes, the rules of humidity removal remain the same. If you are looking for more ways to stay comfortable, checking out humidity control tips for South Florida can help. Below, we answer the most common questions homeowners ask about AC components and indoor moisture.

Can I just replace the outside AC unit?

Technically, it is possible to only replace the outside unit, but it is highly discouraged by manufacturers and HVAC professionals. Replacing just the condenser leaves you with a mismatched system that suffers from compromised performance, poor efficiency, and a severe inability to remove humidity.

Modern outdoor units use different refrigerants and operate at higher pressures than older indoor coils were designed to handle. When you mix old and new technology, the system constantly fights itself. Furthermore, installing a new outdoor unit without upgrading the indoor coil will almost always void the manufacturer's warranty on the new equipment, leaving you unprotected if the compressor fails.

What happens if you replace the condenser but not the coil?

If you replace the condenser but leave the old indoor coil in place, your system becomes mismatched, leading to poor energy efficiency and frequent breakdowns. The older indoor coil acts as a bottleneck for the new, powerful outdoor unit.

Because the old coil cannot process the refrigerant as fast as the new condenser pushes it, the outdoor compressor has to work twice as hard. This drastically shortens the lifespan of your new investment. More importantly for your comfort, the old coil will severely limit the system's ability to extract moisture, leaving your home feeling damp and muggy even while the AC is running.

Does the AC condenser affect humidity?

The outdoor AC condenser only affects humidity indirectly. Its primary job is to compress refrigerant and expel the heat that was absorbed from inside your home out into the yard. It does not touch the indoor air.

The condenser relies entirely on the indoor evaporator coil to perform the actual dehumidification. The outdoor unit provides the cold refrigerant, but the indoor coil is the physical surface where the moisture condenses and drains away. If the indoor coil is dirty, aging, or mismatched, the best condenser in the world won't make your home feel dry.

Why is my house so humid with the AC on?

A house that stays humid while the AC is running is often suffering from an oversized AC unit that short-cycles. When a system is too powerful for the space, it cools the air too quickly and shuts off before the indoor coil has enough time to extract the moisture.

Other common culprits include a dirty indoor evaporator coil that blocks airflow, a mismatched system where the components don't communicate properly, or leaky ductwork pulling humid air from the attic. In regional climates with heavy moisture, your system needs to run in long, steady cycles to physically wring the water out of the air. If it turns on and off every five minutes, the humidity stays trapped inside.

How do I know if my indoor coil is failing to remove moisture?

The most obvious sign that your indoor coil is failing to remove moisture is a clammy, sticky feeling indoors despite having the thermostat set to a low temperature. You might also notice musty odors, condensation forming on your windows, or floors that feel slightly damp to the touch.

A more precise way to check is by using a digital hygrometer. If your hygrometer shows your indoor humidity consistently reading above optimal levels (usually anything over 55% to 60%), your indoor coil is not performing its latent cooling duties. At that point, a professional inspection is necessary to determine if the coil is dirty, failing, or mismatched with the outdoor unit.

Make the Right Call for Your Home's Long-Term Comfort

Will replacing just the condenser improve my home's humidity control? As we have seen, the answer is a definitive no. True comfort requires a system specifically designed and matched to handle both the temperature and the heavy moisture in your air. When you try to cut corners by leaving an old indoor coil in place, you are almost guaranteeing that you will be stuck with indoor relative humidity remaining above 60%.

Your home should be your sanctuary, not a sticky, muggy environment that forces you to constantly adjust the thermostat. We encourage you to consult with experts who understand the deep science of latent cooling and moisture extraction. Don't guess at partial fixes that will leave you frustrated. Reach out today to schedule an inspection for professional AC replacement services, and let us help you build a unified system that delivers the crisp, dry, and comfortable air you deserve.

The September Pre-Heating Tune-Up: Why Miami Needs Heat Strip Inspections placeholder-image  | Air On Demand
5 min read

The September Pre-Heating Tune-Up: Why Miami Needs Heat Strip Inspections

After months of running the AC, unused heat strips gather dust that causes alarming burning odors during the first cold snap. See why a proactive fall tune-up keeps your home safe and odor-free.

Preparing for the First Cold Snap: Don't Wait for the Burning Smell

Before the first winter chill arrives, prioritizing The September Pre-Heating Tune-Up: Why Miami Needs Heat Strip Inspections is the smartest move a homeowner can make. September is here, and while the outdoor temperatures haven't broken just yet, the clock is ticking toward that inevitable first cold snap. After a long, relentless summer of non-stop air conditioning, your heating system is entirely out of sight and out of mind. But ignoring it now sets the stage for a stressful surprise later.

Here is the concrete problem most homeowners face: when that first 50-degree night finally hits, you turn on the emergency heat to warm up the house. Instead of immediate comfort, you are greeted by an alarming, heavy burning dust smell that quickly fills every room. The odor is unmistakable, and it instantly triggers panic. You are left wondering if your house is catching fire or if your HVAC system is destroying itself.

This puts you at a critical decision point right now during the September pre-heating transition. You can proactively schedule a tune-up to professionally clear the system, or you can wait until the temperature drops and risk panic, potential safety hazards, and shivering through the night while waiting for an emergency repair. Taking action now ensures your system is clean, tested, and ready long before the emergency heat is actually required. To get ahead of the rush, booking AC maintenance in Miami that includes a full heat strip inspection is the most effective way to protect your home and your peace of mind.

The 300-Day Slumber: How Constant Cooling Impacts Dormant Heating Elements

To understand why your heating system requires specialized attention in our specific climate, you have to look at the unique lifecycle of a Miami HVAC unit. In northern climates, the transition from cooling to heating is gradual, spanning several months of mild weather. Here, the local climate dictates 300 or more days of intense, continuous cooling. This means the internal environment of your HVAC system is uniquely prone to heavy dust accumulation on components that are completely unused for most of the year.

Your electric resistance heating coils—commonly known as heat strips—act like giant toaster wires inside your air handler. Even though they remain turned off for 10 or 11 months straight, they are not isolated from the rest of the system. While you enjoy chilled air all summer long, the air handler is constantly pulling air from your home, pushing it through the filter, over the evaporator coil, and past those dormant heat strips.

Over the course of this 300-day slumber, microscopic particles of lint, pet dander, dead skin cells, and household dust inevitably bypass the air filter. Because the heat strips sit directly in the path of the airflow, this debris settles directly onto the cold, inactive heating elements. By the time winter arrives, those coils are wearing a thick blanket of highly flammable material.

The Air Handler's Dual Role

The core issue stems from the fact that your air handler plays a dual role. The exact same blower motor is responsible for pushing chilled air in the summer and heated air in the winter through the exact same internal compartment. The heat strips do not have their own separate, dust-free housing.

Furthermore, the cooling process naturally creates a highly humid environment inside the air handler. The evaporator coil generates significant condensation as it removes humidity from your home. This moisture in the air stream causes the bypassing dust and lint to become slightly damp and sticky. When this sticky debris hits the dormant heat strips, it clings tenaciously, baking onto the metal surfaces and creating a dense layer of buildup that cannot be removed by airflow alone.

The Lifecycle of Dormant Heat Strips

Decoding the Burning Dust Phenomenon in Your Vents

When the temperature drops and your thermostat finally calls for heat, the system energizes those dust-caked coils. High-voltage electricity surges through the elements, causing them to glow red-hot almost instantly. The immediate result is a scientific certainty: the thick layer of accumulated debris incinerates on contact. This is the exact phenomenon that causes the infamous burning dust smell to blast through your air vents.

Your alarm in this situation is completely validated. The smell is incredibly pungent, often resembling burning plastic, singed hair, or a potential house fire. It is a terrifying experience for a homeowner who simply wanted to take the chill out of the air. The National Fire Protection Association (NFPA) consistently cites heating equipment as a leading cause of home fires, which underscores exactly why neglected, dust-covered systems are a genuine, documented risk rather than just a minor nuisance.

While a brief, mild odor might be expected, heavy accumulation changes the dynamic from a simple nuisance to a potential hazard. It is vital to know the difference between a normal "burn-off" and a dangerous electrical malfunction.

• Odor Type — Normal Dust Burn-Off: Smells like dry, dusty heat or singed lint. — Dangerous Electrical Issue: Smells like melting plastic, ozone, or burning rubber.

• Duration — Normal Dust Burn-Off: Fades away completely within 15 to 30 minutes. — Dangerous Electrical Issue: Persists continuously or grows stronger over time.

• Visual Signs — Normal Dust Burn-Off: No visible smoke in the home; just the odor. — Dangerous Electrical Issue: Visible smoke from vents or the air handler unit.

• System Behavior — Normal Dust Burn-Off: Heater operates normally and warms the house. — Dangerous Electrical Issue: System short-cycles, trips breakers, or blows cold air.

If you experience any of the symptoms in the "Dangerous Electrical Issue" column, shut your system down immediately at the thermostat and the breaker panel. Do not wait to see if it improves. Neglected heat strips in Miami can cause cascading electrical failures if the buildup causes the elements to overheat and short out against their housings.

Why Early Fall is the Perfect Window for a Controlled Burn-Off

The suddenness of local winter cold snaps makes proactive fall testing absolutely critical. We do not experience a gradual, lingering autumn; the temperature drops rapidly overnight, forcing you to rely on a heating system that hasn't been tested in nearly a year. This is why the September pre-heating transition is the ideal, low-stakes time to prepare.

Right now, outdoor temperatures are still sitting comfortably in the upper 80s. This means that if a technician discovers a failing sequencer, a burnt wire, or a damaged heat strip during an inspection, your home will not freeze while you wait for a replacement part. You have the luxury of time, which vanishes completely on the first cold night of the year when every HVAC company in the region is swamped with emergency "no heat" calls.

By taking action now, you allow a technician to perform a "controlled burn-off." This is a critical seasonal step for a safe transition.

1. System Isolation: The technician safely isolates the heating elements to check for excessive, dangerous buildup before any power is applied.

2. Monitored Activation: The heat strips are energized while the technician stands right there, monitoring the amperage draw and the temperature.

3. Safe Clearing: The minor, unavoidable dust is burned off safely while the home's windows can be opened to vent the smell, rather than trapping you in a closed, smelly house on a cold night.

As true local experts with a specialized understanding of South Florida HVAC lifecycles, we know that prioritizing heating safety is paramount—even when cooling still seems like your main concern. We strongly encourage readers to schedule AC service and heating inspections concurrently. Getting both systems checked in one visit ensures total readiness for whatever the weather does next.

High Voltage Hazards: Why You Must Avoid DIY Coil Cleaning

When homeowners learn that their heat strips are covered in dust, the first instinct is often to open up the air handler and clean it themselves. You must resist this urge entirely. Attempting a DIY cleaning of your electric heat strips is incredibly dangerous and poses a severe, life-threatening electrocution risk.

Electric heat strips operate on high-voltage electricity—typically 240 volts. Even if you turn off the thermostat, the system may still hold a lethal electrical charge at the breaker or within the capacitors and sequencers. Only a licensed professional with specialized training and the correct diagnostic meters should ever open the air handler to service resistance heating elements.

Beyond the severe shock hazard, the physical components of the heat strips are highly fragile. The heating coils are supported by delicate ceramic insulators that are easily cracked or shattered by the hard plastic nozzle of a household vacuum cleaner. The wire coils themselves are thin and easily bent. If you accidentally push two coils together with a brush or a rag, you will create a direct electrical short. The second the system turns on, it will spark, potentially start a fire, and instantly destroy the heating assembly.

Furthermore, attempting to dismantle the air handler and clean these high-voltage components without proper certification will almost certainly void your equipment warranties. Manufacturers require routine maintenance to be performed by licensed technicians for a reason. Do not risk your safety, your home, or your warranty coverage to save a few dollars on a DIY cleaning attempt. In Miami, the stakes are simply too high.

Inside a Professional Fall Heating and Cooling Inspection

When you hire a professional for your September pre-heating transition tune-up, you are investing in a rigorous safety protocol. A technician doesn't just turn the heater on and walk away. They perform a deep, comprehensive evaluation of the internal components to guarantee safe, reliable operation.

Here is exactly what happens during a professional AC inspection that includes full heat strip testing:

• Visual Coil Inspection: The technician opens the air handler and visually inspects the dormant heat strips for excessive debris, signs of corrosion, or physical damage to the ceramic insulators. This ensures there are no obvious fire hazards before power is applied.

• Electrical Connection Testing: High heat causes metal to expand and contract, which can loosen electrical terminals over time. The technician tightens all high-voltage connections to prevent arcing and electrical shorts.

• Amperage Measurement: Using a specialized multimeter, the technician measures the exact electrical current drawing through the strips. If the strips pull too much power, they are failing; if they pull too little, a sequencer or relay is likely broken.

• Controlled Activation: The technician performs the safe, monitored activation of the heat strips to clear minor dust while standing by to shut the system down instantly if an anomaly occurs.

• Thermostat Verification: Finally, they verify that the thermostat correctly engages the emergency heat mode without delay, ensuring the communication between your wall unit and the air handler is flawless.

This thorough checklist removes all the guesswork and anxiety from the equation. You aren't just paying for a cleaning; you are paying for the assurance that your system won't fail or create a hazard when you need it most.

Long-Term Reliability: Connecting Heat Strip Care to Overall HVAC Health

It is a common misconception that because you rarely use the heat in Miami, the heating elements don't affect the rest of the system. In reality, the health of your heat strips is directly connected to the overall efficiency and longevity of your air conditioning.

Because the heat strips sit directly in the path of the circulating air, a heavily clogged heating element acts exactly like a dirty air filter. It restricts the vital airflow your system needs to function. When airflow is choked off by a wall of baked-on lint and dust, your blower motor has to work significantly harder to push air through the vents. This increased static pressure causes the motor to run hotter, consume more electricity, and wear out prematurely.

Restricted airflow also impacts the cooling side of the system. If air cannot move freely past the heat strips, it cannot move freely over the evaporator coil either. This can lead to the evaporator coil freezing over into a block of ice during the summer, causing catastrophic damage to the compressor. Preventative maintenance catches these small airflow and electrical issues before they cascade into major blower motor or circuit board failures.

Finally, protecting your investment means protecting your warranty. HVAC manufacturers stipulate that the entire system must be maintained annually by a professional. Skipping annual maintenance because you "only use the AC" can jeopardize your manufacturer warranties, leaving you completely unprotected if a major component fails. Regular care ensures your system remains compliant, efficient, and reliable year-round.

Frequently Asked Questions About Heat Strips and Burning Smells

Why does my heater smell like burning dust when I turn it on?

Dust and lint accumulate on the dormant heating coils over the long summer cooling season. When the heater is finally activated during the September pre-heating transition, the high-voltage electricity instantly heats the coils, burning off this debris. This rapid incineration creates the distinct, pungent odor of burning dust that circulates through your air vents.

Is a burning smell from the heater dangerous?

A brief dust burn-off is a common occurrence, but heavy accumulation can absolutely become a fire hazard. If the smell resembles burning plastic, ozone, or electrical components, or if it persists for a long time, it is highly dangerous. You should shut the system down immediately and require immediate professional attention to prevent electrical fires or equipment damage.

How long does the burning smell last when you turn on the heater?

A normal dust burn-off should dissipate entirely within 15 to 30 minutes of the heater running. Once the initial layer of dust is cleared from the coils, the air should smell clean and warm. If the burning smell continues beyond this half-hour window, or if it gets stronger, turn off the heater and call a licensed technician.

Do electric heat strips need maintenance?

Yes, electric heat strips require regular maintenance regardless of how infrequently they are used. Even if they sit dormant, they require annual professional inspections to clear restrictive debris, check tight electrical connections, and ensure safe, efficient operation before the first cold snap arrives.

Can I clean my HVAC heat strips myself?

No, you should never attempt to clean your own heat strips. Heat strips operate on dangerous high voltage and are constructed with highly fragile wire coils and ceramic insulators. DIY cleaning risks severe electrical shock, permanent physical damage to the system, and will likely void your manufacturer's warranty.

Ensure a Safe, Odor-Free Winter: Schedule Your Fall Tune-Up

The ultimate peace of mind comes from knowing your home is safe, comfortable, and fully prepared for whatever the weather brings. A proactive tune-up entirely prevents the panic of a burning smell waking you up during the first cold night of the year. Instead of worrying about fire hazards or system failures, you can simply enjoy the warmth.

Don't wait until the temperature drops and the emergency calls flood in. Taking care of The September Pre-Heating Tune-Up: Why Miami Needs Heat Strip Inspections right now guarantees a safe, panic-free heating experience. Talk to an expert today and book your pre-heating inspection before the seasonal rush begins, ensuring your system is clean, tested, and ready to perform flawlessly.

Decoding Daikin Mini Split Error Codes Before Calling for Service placeholder-image  | Air On Demand
5 min read

Decoding Daikin Mini Split Error Codes Before Calling for Service

A blinking green lamp on your Daikin ductless unit signals an internal fault. Extract the exact error code with your remote to help your technician arrive prepared with the right parts.

When the Green Operation Lamp Starts Blinking

You walk into your living room expecting a comfortable climate, but instead, you are greeted by a blinking green operation lamp on your indoor wall unit—which is why Decoding Daikin Mini Split Error Codes Before Calling for Service is the most effective first step you can take. That small flashing light is your system's way of signaling that it has detected an internal abnormality and shut down to protect its vital components from further damage. It is a built-in defense mechanism designed to prevent a minor hiccup from turning into a catastrophic failure.

This protective shutdown often happens right when you need reliable temperature control the most. In our years of experience providing expert AC repair and installation across the Miami area, the team at Air On Demand has seen firsthand how our intense climate pushes HVAC equipment to its absolute limits. As we enter early fall, your heat pump or AC system has likely been working overtime for months on end. That accumulated wear and tear from late-summer continuous run-time strain is frequently what triggers a sudden fault, leaving you uncomfortable and unsure of what to do next.

Instead of guessing what went wrong, you actually have the power to find out exactly what the system is reporting before a technician even arrives. Your standard wireless controller doubles as a diagnostic tool. By taking a few minutes to retrieve the specific alphanumeric fault code, you can relay that crucial information to your local dispatcher. This upfront communication helps the repair team understand the severity of the issue, ensuring they arrive prepared to service your ductless mini split systems efficiently and restore your comfort without unnecessary delays.

Step-by-Step: Retrieving the Error Code with Your Daikin Remote

Extracting the fault code from your system is a straightforward process that does not require any tools, ladders, or technical background. You can perform this entire diagnostic check from the comfort of your couch using the wireless remote control that came with your unit. The remote communicates directly with the indoor wall cassette to pull the active error log from the system's internal computer board.

Follow these exact steps to retrieve the code safely:

1. Position yourself correctly: Stand or sit in a spot where you have a clear, unobstructed line of sight to the indoor unit. Ensure the remote is pointed directly at the sensor on the wall cassette so it can maintain a steady signal during the diagnostic process.

2. Locate the 'Cancel' button: Find the 'Cancel' button on your remote. Depending on your specific remote model, this button is usually located near the bottom of the keypad or hidden under a sliding plastic cover.

3. Initiate diagnostic mode: Press and hold the 'Cancel' button continuously for about 5 to 6 seconds. Keep holding it until the standard temperature display disappears and a blinking "00" appears on the remote's digital screen. This indicates you have successfully entered the diagnostic menu.

4. Cycle through the codes: Tap the 'Cancel' button repeatedly, pausing for about one second between each press. As you tap, the remote will cycle through a long list of various alphanumeric codes (like A1, A5, C4, etc.).

5. Listen for the confirmation beep: Pay close attention to the sounds coming from the indoor unit. For most of the codes you cycle through, the unit will emit a short, quick beep. However, when the remote displays the specific code that matches the active fault, the indoor unit will emit a long, continuous beep.

6. Record your finding: The code displayed on your screen during that long beep is your active fault code. Write this specific combination of letters and numbers down immediately so you can relay it to the repair team.

By following this process, you will typically uncover common Daikin remote fault codes like A3 (drain system) or U4 (communication error), which immediately points the professionals in the right direction.

Extracting Daikin Error Codes via Remote Control

1. Point remote directly at the indoor unit sensor.

2. Hold 'Cancel' for 5-6 seconds until '00' appears on the screen.

3. Tap 'Cancel' repeatedly to cycle through the diagnostic codes.

4. Listen for a long beep from the unit to confirm the active fault code.

Translating Common Daikin Fault Codes

Not all blinking green lights indicate a catastrophic equipment failure. In many cases, the system is simply alerting you to a maintenance need or a specific component that has drifted out of its normal operating range. Knowing the exact code helps define the scope of the problem, shifting the situation from a stressful mystery to a manageable repair plan. Here is a breakdown of what some of the most frequent fault codes actually mean for your system.

Drain System Abnormalities (A3)

The Problem: You retrieve an A3 code from your remote, and the indoor unit refuses to blow cold air. The Cause: This code indicates a drain system abnormality. As your air conditioner cools the air, it naturally extracts moisture, creating condensation. This water collects in a drain pan inside the unit and is either gravity-fed outside or pushed out by a small condensate pump. In Miami, our year-round high humidity significantly increases condensate production. Our team at Air On Demand typically sees a spike in these drain issues by early fall, as algae, dirt, or debris clog the line after months of heavy summer use. If the internal pump fails or the line clogs, the pan fills up rapidly. A float switch detects the rising water and shuts the entire system down to prevent the water from overflowing down your drywall. The Solution: This issue requires a professional to safely access the internal components, clear the biological buildup from the condensate line using specialized equipment, and test the float switch and pump to ensure water is flowing freely again.

Communication Errors (U4)

The Problem: The remote displays a U4 code, and the system is completely unresponsive. The Cause: A U4 code points to a communication error between the indoor wall cassette and the outdoor compressor. Ductless systems rely on a continuous flow of digital information between these two units to regulate fan speed, refrigerant flow, and temperature. If that communication pathway is broken—often due to a power surge, degraded wiring, or a malfunctioning printed circuit board (PCB)—the units can no longer coordinate their actions. To prevent erratic operation, the system locks itself out. The Solution: A licensed technician must perform a step-by-step electrical diagnostic. They will test the voltage along the communication wires, inspect the terminal blocks for loose connections, and evaluate the health of the control boards to isolate the exact point of failure.

Other Notable Fault Codes

While A3 and U4 are incredibly common, your remote might display other combinations. Here are a few additional codes you might encounter during your diagnostic check:

• A5 — Primary Component Affected: Indoor Heat Exchanger — Typical Meaning: Freeze-up protection or high-pressure control activation. Often linked to dirty air filters or poor airflow.

• C4 — Primary Component Affected: Indoor Thermistor — Typical Meaning: A malfunction in the indoor heat exchanger temperature sensor. The system cannot accurately read the coil temperature.

• E7 — Primary Component Affected: Outdoor Fan Motor — Typical Meaning: The outdoor fan motor has locked up or failed, preventing the system from rejecting heat outdoors.

• U0 — Primary Component Affected: Refrigerant Circuit — Typical Meaning: The system has detected a shortage of refrigerant, usually indicating a leak somewhere in the copper lines.

How Accurate Codes Expedite Daikin Warranty Parts

Retrieving the error code is not just a neat trick; it is a vital step that directly impacts how quickly your home returns to a comfortable temperature. When you call to schedule a repair and can provide the exact alphanumeric code over the phone, you give the HVAC dispatcher a massive head start on solving your problem.

Relaying this specific data allows the team to check your Daikin warranty status upfront. Because Air On Demand brings specialized Daikin expertise to every service call, our team knows exactly how to translate these specific codes into immediate action. If your remote displays a code pointing to a failed thermistor, a bad fan motor, or a malfunctioning control board, we can cross-reference that part with your warranty file before the truck ever leaves our facility.

In many cases, technicians can pre-order the required component or pull the necessary Daikin warranty parts from local supply houses and bring them on the very first trip. This proactive communication is the difference between a single-visit repair and a frustrating multi-day wait for parts to arrive. When the heat is severe and your home is warming up by the hour, eliminating a second diagnostic trip is a massive relief.

Of course, maintaining your system properly year-round is also key to ensuring those warranty claims are approved without a hitch. Manufacturers require proof that the equipment has been cared for, which is why you might wonder, Does Skipping Annual Maintenance Void Your Daikin Mini Split Warranty? Keeping up with routine care—especially scheduling a pre-heating-season tune-up—ensures that when a component does fail, your warranty coverage remains fully intact and ready to deploy.

The Boundary Between Remote Diagnostics and Professional Repair

While modern technology empowers you to learn a lot about your system's health, it is crucial to recognize where your role ends and the professional's role begins. Using your remote control to retrieve the error code is completely safe, highly encouraged, and the best first step you can take as a homeowner. It involves no physical contact with the electrical components and poses zero risk to you or your equipment.

However, once you have written that code down, your diagnostic job is officially complete. Opening the unit casing, attempting to manually reset internal breakers, splicing communication wires, or tampering with the internal drain pan are all highly dangerous actions. Ductless systems operate on high-voltage electricity and contain pressurized refrigerant. Attempting DIY repairs not only puts you at risk of severe electrical shock but will also immediately void your manufacturer warranty.

The next step is to hand the data over to a licensed professional. Even with an accurate code from the remote, professional diagnostics are required to confirm the root cause behind the code. For example, a communication error might be caused by a chewed wire, a loose terminal, or a fried circuit board. A professional will use specialized multimeters and diagnostic tools to pinpoint the exact failure, ensuring a permanent, safe fix rather than a temporary patch.

By respecting this boundary, you protect your investment and your safety. When the accumulated wear and tear of summer finally takes its toll on your system in early fall, trust the experts who handle Miami mini split AC services to complete the physical work while you supply the crucial initial data.

Frequently Asked Questions About Daikin Diagnostics

How do I find the error code on my Daikin remote?

You can find the error code by pressing and holding the 'Cancel' button on your remote for 5 to 6 seconds until a blinking "00" appears on the screen. Once you see the "00", tap the 'Cancel' button repeatedly to cycle through the list of potential fault codes. Keep tapping and listening closely to the indoor unit; when the unit emits a long, continuous beep, the code currently displayed on your remote is the active error.

What does it mean when the green light is blinking on my Daikin mini split?

A blinking green operation light means your system has detected an internal abnormality and has automatically shut down to protect itself from further damage. This is a built-in safety feature, not a random glitch. The blinking light indicates that an error code has been logged in the system's memory, which you can retrieve using your remote control to understand what went wrong.

How do I clear the error code on my Daikin mini split?

You can temporarily clear an error code by resetting the power to the unit at your main electrical breaker panel, leaving it off for about 15 minutes, and then turning it back on. However, clearing the code does not fix the underlying mechanical or electrical problem. If the root issue—such as a clogged drain line or a failing sensor—is still present, the system will quickly detect it again, shut down, and return to blinking the green light.

Can I fix a Daikin A3 error code myself?

No, you should not attempt to fix an A3 error code yourself. This code indicates a drain system abnormality, meaning the internal condensate pan is full of water and the system is at risk of overflowing. Fixing this requires safely dismantling the indoor unit casing to access the drain pan, testing the electronic float switch, and using specialized suction equipment to clear biological clogs from the drain line—all of which require a licensed professional.

How does providing an error code speed up Daikin warranty repairs?

Providing the exact error code to your dispatcher allows the HVAC company to identify the likely failed component before they even dispatch a technician to your home. With this information, the team can verify your warranty status in advance and potentially secure the required replacement parts from a local supply house on the way to your house. This proactive step frequently turns a multi-day repair process into a single-visit solution.

Restore Your Comfort with Expert Daikin Diagnostics

Dealing with a sudden air conditioning shutdown is never convenient, but having the right information makes the recovery process much smoother. Now that you have used your remote control to retrieve your Daikin error code, you are already one step closer to enjoying a comfortable home again. You have done the crucial detective work; now it is time to hand that data over to the specialists.

Share the specific code you found with your local experts to fast-track your service, verify your coverage, and secure your warranty parts without unnecessary delays. If you are dealing with Daikin remote fault codes like A3 (drain system) or U4 (communication error), prompt professional attention is the safest way forward. Reach out today to schedule your mini split repair in Miami and let our trained technicians provide the permanent, reliable fix your system needs.

Emergency Weekend Service vs. Booking a Monday Morning Appointment placeholder-image  | Air On Demand
5 min read

Emergency Weekend Service vs. Booking a Monday Morning Appointment

When your AC fails on a humid Friday night, you have to weigh immediate risks against after-hours convenience. Use this symptom-based triage guide to determine if you can safely wait until Monday.

When the AC Quits on a Humid Weekend: Triage Your Next Steps

As September ushers in the early fall transition here in South Florida, the humidity remains unforgiving. At Air On Demand, our dispatch team fields countless Friday night calls from Miami homeowners who are suddenly faced with a critical choice: weighing the need for Emergency Weekend Service vs. Booking a Monday Morning Appointment. Making the right decision in this moment is about more than just staying comfortable—it is about protecting your home from secondary damage while avoiding unnecessary stress.

If you need an immediate assessment, reaching out to our team for professional AC repair is always a safe bet. However, in our years of serving the community, we've seen that not every cooling hiccup requires an after-hours dispatch. Many homeowners panic at the first sign of warm air, assuming the worst, when the system might simply need a standard weekday check-up.

We designed this triage guide to walk you through exactly what to look for when your system acts up outside of normal business hours. By evaluating specific symptoms, assessing safety risks, and understanding how your home reacts to our coastal climate, you can confidently decide whether to pick up the phone immediately or safely power down the unit and wait for Monday.

Why Indoor Humidity Determines Your Repair Timeline

Most homeowners judge an air conditioning failure entirely by the number on the thermostat. While temperature is certainly the most noticeable factor, it is only half of the equation. Your HVAC system performs a vital secondary job that is often just as critical as cooling the air: dehumidification. In our daily work across Miami, we constantly remind customers that how quickly your home absorbs moisture often dictates exactly how urgently you need a repair.

Air conditioners and heat pumps remove latent heat (moisture) from the air as it passes over the cold evaporator coil. When the system shuts down, that dehumidification process stops instantly. Because homes are not perfectly sealed bubbles, ambient outdoor moisture immediately begins infiltrating your living space. This is where the real discomfort—and potential property damage—begins.

The 60 Percent Threshold

Our technicians warn that the urgency of your situation heavily depends on indoor humidity levels exceeding 60%. Once your home crosses this threshold, several negative effects begin to compound rapidly:

1. Perceived Temperature Spikes: High humidity prevents your body from cooling itself through evaporation. A home sitting at 78 degrees with 45% humidity feels perfectly comfortable. That same 78 degrees at 65% humidity feels sticky, suffocating, and much hotter than the thermometer indicates.

2. Risk to Structural Materials: Prolonged exposure to high indoor moisture allows hardwood floors to swell, doors to stick in their frames, and drywall to absorb ambient water vapor.

3. Air Quality Degradation: Mold and mildew thrive in warm, damp environments. If a home sits stagnant with elevated humidity for multiple days, biological growth can begin inside dark ductwork, severely impacting your home's indoor air quality (IAQ).

If you are monitoring your indoor climate and notice the humidity climbing rapidly toward that 60% mark, the situation is escalating from a mild inconvenience to a more pressing issue. For a deeper look at managing these sudden outages, understanding the mechanics of handling a midnight AC failure can help you stay ahead of the moisture curve.

Red Alert Symptoms: When You Need Emergency Air Conditioning Repair

There are specific scenarios where waiting for regular business hours is not just uncomfortable—it is actively dangerous to your property or your family. If you observe any of the following symptoms, our dispatch matrix strongly points toward immediate action.

Here are the critical warning signs that prompt us to recommend requesting emergency AC repair in Miami without delay:

• Electrical Burning Smells: If you detect the sharp, acrid scent of burning plastic, melting wire insulation, or an ozone-like smell coming from your vents or the indoor air handler, this is a severe electrical hazard. Turn the system off at the breaker immediately and call for emergency dispatch.

• A Repeatedly Tripping Breaker: Your electrical panel is designed to protect your home. If the dedicated breaker for your air conditioner trips, you can safely reset it once. If it trips a second time immediately or shortly after, leave it off. This indicates a dead short, a failing compressor, or a dangerous electrical fault that requires immediate professional intervention.

• Rapid Ceiling Leaks or Overflowing Pans: A clogged condensate drain line can back up quickly. If your indoor unit is located in an attic or a closet above living spaces, an overflowing drain pan can dump gallons of water through your drywall in a matter of hours. Active, rapid water leaks are always an emergency.

• Severe Coil Freezing: If you see a thick block of solid ice encasing the copper refrigerant lines or the indoor coil, the system cannot function. While you must turn the unit off to let it thaw, a rapid freeze-up often indicates a severe airflow restriction or a critical refrigerant leak that needs immediate attention to prevent compressor failure.

• Vulnerable Family Members in the Home: Mechanical symptoms aside, the occupants of the home dictate the urgency. If you have infants, elderly family members, or individuals with severe respiratory conditions in the house, a lack of climate control is a health emergency.

If your situation involves active water damage, electrical fire risks, or health hazards, do not wait. These are the exact scenarios our after-hours dispatch teams at Air On Demand are built to handle.

Safe to Wait: Symptoms That Can Hold Until a Monday Morning Appointment

Not every unusual noise or slight drop in performance is a catastrophe. In many cases, turning the system off and waiting for a standard appointment is the smartest, most practical choice you can make.

Our team at Air On Demand operates with a highly transparent dispatch approach. We act as an honest advisor to help you avoid unnecessary after-hours premiums by clearly defining what constitutes a true emergency versus a temporary inconvenience. If your home is safe and the damage is contained, waiting for Monday is perfectly acceptable.

Signs You Can Safely Wait:

• A Slight Drop in Cooling Performance: If the air coming from the vents feels slightly less cold than usual, but the system is still running and the house is maintaining a tolerable temperature, you likely have a dirty filter or a minor refrigerant issue. It is safe to monitor the situation and book a standard visit.

• A Blank Thermostat Screen: If your thermostat suddenly goes completely blank, but there are no burning smells or active water leaks, you might simply have dead batteries. Alternatively, a safety float switch in the drain pan may have tripped, cutting low-voltage power to the thermostat to prevent a flood. The system is doing its job by protecting your home. You can safely wait for our technicians to clear the drain line on Monday.

• Unusual but Non-Threatening Noises: A new rattle, a slight hum, or a vibrating sound from the outdoor unit usually indicates a loose panel, a failing capacitor, or debris in the fan area. As long as it isn't a violent metal-on-metal grinding or a deafening screech, you can turn the system off to prevent further wear and schedule a weekday repair.

• Minor Condensation: A small amount of sweating on the ductwork or a slow, manageable drip outside the home is normal in high humidity. Unless water is actively pooling inside the house or damaging drywall, it is not an immediate crisis.

Catching these minor inconveniences early is the best way to prevent weekend panics altogether. As we transition into the fall season, staying consistent with routine AC maintenance or a pre-heating-season tune-up allows our technicians to spot failing capacitors, clear sluggish drain lines, and optimize refrigerant levels long before they cause a Friday night shutdown.

Decision Matrix: Emergency Weekend Service vs. Booking a Monday Morning Appointment

To make your triage process as simple as possible, use this quick-reference matrix based on what our dispatchers use daily to evaluate your symptoms and determine your next steps.

• Electrical — Specific Signs Observed: Burning smells, sparking, breaker trips multiple times — Risk Level: Critical Safety Hazard — Action Required: Call Now (AC Emergency)

• Water / Leaks — Specific Signs Observed: Water pouring through ceiling, rapidly overflowing drain pan — Risk Level: High Property Damage Risk — Action Required: Call Now (AC Emergency)

• Airflow / Temp — Specific Signs Observed: System blowing slightly warm air, minor performance drop — Risk Level: Low (Inconvenience) — Action Required: Wait for Monday

• System Noises — Specific Signs Observed: Slight rattle or hum, no loss of cooling — Risk Level: Low (Inconvenience) — Action Required: Wait for Monday

• Controls — Specific Signs Observed: Blank thermostat, but system is safely shut down — Risk Level: Low (Inconvenience) — Action Required: Wait for Monday

Decision Matrix: Call Now vs. Wait for Monday

How to Safely Shut Down Your System While You Wait

If you have consulted the decision matrix and determined that your symptoms fall into the "Wait for Monday" category, your immediate goal shifts to protecting the equipment from further wear and tear. Running a struggling air conditioner will only exacerbate the problem, potentially turning a minor repair into a catastrophic compressor failure.

Here is how we advise customers to safely secure their HVAC system until an Air On Demand professional arrives to evaluate whether to repair or replace your AC (and keep in mind that federal tax credits or local utility incentive programs may apply to qualifying high-efficiency heat pump installations if replacement is necessary):

1. Turn the Thermostat to OFF: Do not simply raise the temperature. Manually switch the system mode from "COOL" to "OFF." This stops the thermostat from calling for cooling and gives the overworked components a chance to rest.

2. Switch the Fan to AUTO or OFF: Ensure the fan setting is not left in the "ON" position unless a technician specifically instructs you to do so (sometimes done to help thaw a frozen coil). Otherwise, leaving it off prevents the blower motor from running needlessly.

3. Flip the Breaker (If Necessary): If you suspect an electrical issue, or if the thermostat is unresponsive and the outdoor unit refuses to shut off, locate your home's main electrical panel. Find the breaker labeled "AC" or "HVAC" and flip it to the OFF position. This completely severs power to the unit, eliminating any fire hazards.

4. Do Not Attempt DIY Repairs: Under no circumstances should you open the metal service panels on the outdoor condenser or the indoor air handler. These cabinets house high-voltage capacitors that hold a lethal charge even when the power is turned off. Opening the cabinet risks severe injury and immediately voids active manufacturer warranties.

Managing Comfort Without Opening the AC Cabinet

Once the system is safely powered down, your focus should turn to managing the indoor climate. Surviving a warm weekend without central air requires a strategic approach to locking out heat and moisture.

• Lock Out Ambient Moisture: Keep all exterior doors and windows tightly closed. While it might be tempting to open a window for a breeze, doing so in a coastal climate simply invites heavy, humid air into the house, causing the indoor humidity to spike much faster.

• Deploy Standalone Dehumidifiers: We highly recommend setting up a portable dehumidifier in your central living area if you have one. Removing moisture from the air will make the ambient temperature feel significantly cooler and protect your home's interior.

• Utilize Ceiling Fans: Ceiling fans do not lower the temperature of the room, but they create a wind-chill effect on your skin, making you feel cooler. Ensure they are spinning counterclockwise to push air straight down.

• Avoid Heat-Generating Appliances: Do not use the oven, the stove, or the clothes dryer while you are waiting for your repair. These appliances dump massive amounts of heat and moisture into your living space. Stick to microwave meals or outdoor grilling until the AC is restored.

Frequently Asked Questions About AC Emergencies

What qualifies as an AC emergency?

At Air On Demand, we classify an AC emergency as any situation that poses an immediate threat to your home's safety, your property, or your family's health. This includes electrical hazards like burning smells or sparking, active water leaks that threaten drywall and flooring, and complete system failures during extreme heat waves when vulnerable individuals are in the home. If the issue is purely a matter of mild discomfort without any secondary risks, it is generally not classified as a true emergency.

Is a leaking AC an emergency in Florida?

It depends entirely on the volume and location of the leak. Our Miami repair crews frequently see rapid, overflowing drain pans leaking through a ceiling or pooling heavily on hardwood floors—this is absolutely an emergency that requires immediate intervention to prevent severe property damage. However, a slow, minor drip near the outdoor condenser or a small amount of condensation on ductwork in high humidity is usually a nuisance that can safely wait for standard business hours.

How long can you go without AC in extreme humidity?

While healthy adults can tolerate a lack of AC for a day or two with proper hydration and fans, the home itself begins to suffer much faster. Once indoor humidity levels exceed 60% for more than 24 to 48 hours, the risk of mold growth, warped wood, and musty odors increases significantly. We recommend securing a repair appointment as soon as possible to prevent secondary moisture damage to your home's interior.

Can I wait until Monday to fix my AC?

Yes, you can absolutely wait until Monday if your system is experiencing minor issues like a slight drop in cooling, unusual but non-grinding noises, or a blank thermostat screen, provided there are no electrical or water hazards. The safest action is to turn the system completely off at the thermostat to prevent further mechanical damage, use alternative cooling methods, and let our team book you for the first available standard appointment.

How should I manage indoor humidity if my AC is turned off for the weekend?

The most effective way to manage humidity is to keep all windows and exterior doors firmly closed to block humid outdoor air from entering. Run portable dehumidifiers if you have them, utilize exhaust fans in the bathrooms and kitchen to vent localized moisture, and avoid activities that generate steam, such as taking long hot showers or boiling large pots of water on the stove.

Make the Right Call for Your Comfort and Safety

Experiencing an air conditioning failure on a weekend is undeniably frustrating, but knowing exactly how to triage the situation puts the control back in your hands. By understanding the difference between a critical hazard and a temporary inconvenience, you can protect your equipment, safeguard your home against moisture damage, and avoid the stress of second-guessing your decisions.

Trust the symptoms you observe. If you spot electrical warning signs, active water leaks, or rapid indoor humidity spikes, do not hesitate to act. If the system is simply underperforming but safe, power it down and rest easy knowing a standard service call will resolve the issue. Whether you need to book a standard Monday morning slot or require immediate dispatch for a true crisis, the professional support team at Air On Demand is just a phone call away.

The Role of the Contactor in Powering Your Outdoor Fan Motor placeholder-image  | Air On Demand
5 min read

The Role of the Contactor in Powering Your Outdoor Fan Motor

When your thermostat says cool but the outdoor fan isn't spinning, a burnt-out electrical contactor is likely to blame. Find out why this high-voltage failure requires a professional diagnosis.

When the Heat Lingers but the Air Stops Flowing

Your thermostat is set to cool, but the house is growing uncomfortably warm, and when you investigate outside, you realize the AC unit fan is not spinning—which brings us to the role of the contactor in powering your outdoor fan motor. You can hear a low humming sound coming from the condenser cabinet, but without that large blade pulling air through the coils, your home is rapidly losing ground against the heat. This is a classic symptom of a high-voltage electrical interruption. When you reach the September post-summer transition, your cooling equipment has already endured thousands of grueling on-and-off cycles. That cumulative mechanical and electrical stress often targets a single, hidden switch inside your outdoor unit.

If you are dealing with a sudden cooling failure, getting professional AC repair is the safest way to restore your system.

Most homeowners naturally assume that a motionless fan means the motor itself has died. While motors certainly fail, the actual culprit is frequently the electrical gatekeeper that supplies the motor with power. Diagnosing a high-voltage electrical failure is never a do-it-yourself task. It requires an expert eye to trace the voltage, test the components, and safely replace the exact part that has broken the circuit.

What Is an AC Contactor and How Does It Operate?

To understand why your fan has stopped, you first need to understand the electrical hierarchy of your cooling system. Your outdoor condenser relies on two entirely different types of electrical current to function: a low-voltage control signal and a high-voltage power supply. The AC contactor is the electromechanical switch that bridges these two systems. Without it, your thermostat would have no safe way to turn on the heavy-duty components sitting in your backyard.

When you need reliable AC repair in Miami, technicians almost always check this specific component first because it acts as the primary electrical gateway for the entire outdoor unit.

The Bridge Between Thermostat and Motor

Your thermostat operates on just 24 volts of electricity. This low voltage is completely safe for the small wires running through your walls, but it is nowhere near powerful enough to spin a heavy fan blade or pump refrigerant. The outdoor fan motor and compressor require 240 volts of electricity. The contactor solves this mismatch through a simple but brilliant mechanical process.

The sequence of operations:

1. The Call for Cooling: The indoor thermostat detects that the room temperature has risen above your set point and sends a 24-volt signal outside.

2. The Magnetic Coil Engages: This low-voltage signal travels into the base of the contactor, energizing a small copper coil.

3. The Electromagnetic Pull: The energized coil creates a strong magnetic field, which physically pulls down a set of metal contacts (often creating a loud "clack" sound).

4. The High-Voltage Connection: When those metal contacts snap shut, they bridge the gap in the 240-volt circuit, allowing high-voltage electricity to flood into the compressor and the outdoor fan motor simultaneously.

• Thermostat — Voltage Level: 24V (Low) — Primary Function: Sends the command to cool the home — Failure Result: System never attempts to turn on

• Contactor Coil — Voltage Level: 24V (Low) — Primary Function: Creates magnetic field to close the switch — Failure Result: Outdoor unit remains completely silent and off

• Contactor Pads — Voltage Level: 240V (High) — Primary Function: Passes heavy current to the motors — Failure Result: Motors hum, struggle, or fail to start

• Fan Motor — Voltage Level: 240V (High) — Primary Function: Pulls air through condenser coils — Failure Result: System overheats and trips safety switches

The Anatomy of an AC Contactor Failure

The Mechanical Reality of Electrical Arcing Over a Long Season

Electricity does not like to wait. When the contactor's magnetic coil pulls the metal plates together, the 240-volt current doesn't wait for them to physically touch. In the microsecond before the metal plates meet, the high voltage jumps across the microscopic air gap. This jump is called an electrical arc, and it is essentially a tiny, controlled lightning bolt.

Every single time your system cycles on, this arc occurs. The arc generates immense heat—thousands of degrees at a microscopic level—which literally vaporizes a tiny amount of the metal on the contact pads. Over the course of the September post-summer transition, after thousands upon thousands of cooling cycles, this constant micro-burning takes a severe toll on the hardware.

The stages of contactor degradation:

• Discoloration: The shiny metal contacts turn black as carbon buildup begins to form from the arcing process.

• Pitting: The smooth surface of the metal becomes cratered and rough, reducing the surface area available to pass electricity.

• High Resistance: The carbon buildup and pitting act as an insulator. The electricity struggles to push through the damaged metal, creating even more heat.

• Total Failure: The contacts become so burnt that the 240-volt current can no longer cross the threshold, leaving the connected motors without power.

This electrical degradation is entirely different from a mechanical failure within the motor itself. If you are diagnosing a seized condenser fan motor, the motor bearings have usually locked up from physical friction. But with a burnt contactor, the motor is perfectly healthy—it is simply being starved of the electricity it needs to spin.

Why Is the Compressor Running While the Fan Stays Still?

One of the most confusing scenarios for a homeowner in Miami FL is walking outside to find the condenser cabinet vibrating and humming loudly, yet the fan blade at the top is completely stationary. If the contactor controls power to both the compressor and the fan, how can one run while the other does not?

The answer lies in how the contactor is physically constructed and wired. Many residential cooling systems use what is known as a single-pole or double-pole contactor. A double-pole contactor has two separate sets of metal pads that close simultaneously. One side of the high-voltage power flows through the left pad, and the other side flows through the right pad.

Because electrical arcing is slightly unpredictable, one set of contact pads often degrades faster than the other. If the specific contact pad that feeds power to the fan motor becomes severely pitted and carbonized, it will block the electricity to the fan. Meanwhile, the adjacent contact pad feeding the compressor might still be clean enough to make a solid electrical connection. The result is a system where the compressor successfully powers on, but the fan remains completely dead.

The danger of a stationary fan:
Allowing the compressor to run without the fan is highly destructive. The fan's entire job is to pull outside air across the condenser coils to exhaust the heat your system removed from your home. Without that airflow, the heat and pressure inside the compressor will spike rapidly. Within minutes, the compressor will overheat, potentially causing permanent internal damage or triggering an emergency thermal overload switch.

How Severe Heat Accelerates Electrical Component Wear

The lifespan of an electrical contactor is directly tied to how often it has to open and close, and how long it has to hold that electrical connection under a heavy load. This is where regional climate plays a massive role in system longevity. The relentless heat and high humidity of Miami FL create an environment that pushes electrical components to their absolute limits.

In a mild climate, an air conditioner might cycle on for fifteen minutes, satisfy the thermostat, and shut down for an hour. In our region, the latent heat load—the amount of moisture in the air that must be removed—forces the equipment to work much harder. To properly cool and dehumidify a home during the peak of summer, the compressor and fan must run in long, heavy cycles.

How the climate multiplies wear and tear:

• Heat saturation: When a contactor is engaged, the magnetic coil generates its own heat. During a 45-minute cooling cycle in 95-degree weather, that heat has nowhere to dissipate, causing the plastic housing and internal springs to weaken over time.

• Cycle frequency: High humidity causes homes to gain heat rapidly the moment the system turns off. This leads to "short cycling" or simply more frequent on/off commands, meaning the metal contacts suffer the destructive electrical arc far more often than the national average.

• Voltage drops: During extreme heat waves, neighborhood power grids often experience slight voltage drops due to high demand. When voltage drops, amperage increases, causing the contactor to run even hotter than normal.

By the time early fall arrives, the contactor has absorbed the brunt of this extreme climate stress, making it one of the most common failure points of the season.

Recognizing the Warning Signs Before Total Fan Failure

While a contactor can fail suddenly, it usually gives off subtle warning signs before it completely stops transferring power. Catching these symptoms early can save you from an unexpected breakdown during the September post-summer transition. Because this is a high-voltage component, your inspection must be strictly visual and auditory—never touch the equipment or attempt to open the electrical panel.

1. Loud buzzing or chattering noises
A healthy contactor makes a single, solid "clack" when it engages, followed by a very quiet hum. If you hear a loud, aggressive buzzing or a rapid chattering noise (like a machine gun) coming from the electrical panel of the outdoor unit, the magnetic coil is failing. It is struggling to hold the metal contacts tightly closed against the 240-volt current.

2. Intermittent fan operation
If you notice that the outdoor fan struggles to start, spins sluggishly, or only turns on every other cooling cycle, the metal contacts are likely heavily pitted. The electrical current is occasionally finding a clean path through the carbon buildup, but the connection is unreliable.

3. Delayed system shutdown
Sometimes, the extreme heat of the electrical arcing actually welds the metal contacts together. When this happens, the thermostat can send the signal to turn off, but the contactor remains physically stuck in the closed position. Your outdoor fan and compressor will continue to run endlessly until you manually shut off the breaker.

4. A burning plastic odor
As the internal coil overheats or the plastic housing begins to melt from electrical resistance, you may catch a faint, acrid smell of burning plastic near the condenser cabinet. This is a severe warning sign of imminent electrical failure.

The best way to prevent these issues is through routine AC maintenance. During a professional tune-up, a technician uses a multimeter to measure the voltage drop across the contactor. If the resistance is too high, they can replace the pitted switch long before it strands you without cooling.

The Hidden Dangers of High-Voltage Electrical Troubleshooting

When the house is hot and the fan isn't moving, the temptation to grab a screwdriver and investigate is strong. However, the condenser cabinet is arguably the most dangerous appliance on your property. The contactor handles 240+ volts of electricity, which is highly dangerous and potentially lethal.

Working with a professional, licensed technician means you are relying on someone who has passed rigorous exams and understands the strict safety protocols required for high-voltage diagnostics. A licensed professional knows exactly how to isolate the power, discharge the stored energy in the system, and test the live circuits safely.

Why this is never a DIY repair:

• Live line voltage: Even when the thermostat is turned off, the line voltage coming from your breaker panel is still live at the bottom of the contactor. One slip of a tool can cause a catastrophic electrical short.

• Capacitor hazards: The contactor is wired directly to the dual run capacitor, which acts as a high-voltage battery. Even with the main breaker turned off, a capacitor can store a lethal electrical charge for hours or days.

• Exact part matching: Contactors are rated for specific coil voltages (24V) and specific amperage loads (e.g., 30 amp or 40 amp). Installing the wrong size contactor can create a severe fire hazard or instantly destroy the fan motor and compressor.

In Miami FL, where the equipment runs constantly, the wiring inside the cabinet can also become brittle from the heat. A professional has the specialized tools to strip, re-terminate, and secure the high-voltage wires so that the new contactor operates safely and reliably for years to come.

Frequently Asked Questions About AC Fan Motor Failures

Why is my AC fan not spinning but the compressor is running?

This usually happens when the electrical contactor has a burnt or pitted pole on the fan side, while the compressor side still makes a solid connection. The high voltage is successfully crossing the switch to power the compressor, but the carbon buildup is blocking the electricity from reaching the fan motor. You should turn off the system immediately to prevent the compressor from overheating.

Can a bad contactor stop the fan from spinning?

Yes, a bad contactor is one of the most common reasons a fan stops spinning. If the metal contacts inside the switch are too pitted or burnt from thousands of electrical arcs, the high voltage simply cannot pass through to power the fan motor. Even if the motor is in perfect condition, it cannot operate without that electrical bridge.

What causes an AC contactor to burn out?

Electrical arcing during thousands of on and off cycles slowly degrades the metal contacts over time. Every time the switch closes, a microscopic electrical arc generates intense heat, vaporizing a tiny amount of metal and leaving behind carbon buildup. In hot climates with heavy cooling demands, this cumulative wear accelerates rapidly.

How do I know if my AC contactor is bad?

Symptoms of a failing contactor include a loud buzzing or chattering noise coming from the outdoor unit, an outdoor fan that won't spin, or a system that refuses to turn on or off properly. If the contacts become welded together from the heat, the outdoor unit may continue running even after you turn the thermostat off.

Is it safe to manually push the contactor button in to start the fan?

No, this exposes you to live high voltage and risks severe electrical shock, burns, or death. Pushing the contactor in manually with a stick or insulated tool bypasses the system's safety controls and puts you in direct proximity to 240 volts of exposed electricity. Always call a licensed professional to handle high-voltage diagnostics.

Restoring Reliable Cooling to Your Home

A non-spinning outdoor fan is a clear, immediate sign of an electrical interruption. While it is easy to assume the worst about the motor itself, the true culprit is often the hardworking contactor that has simply endured too many cycles over the September post-summer transition. The relentless heat forces this small electromechanical switch to open and close thousands of times, battling electrical arcing and intense heat until the metal contacts finally give out.

Because this failure involves 240 volts of raw electrical power, it is never something you should attempt to diagnose or bypass on your own. Recognizing the symptoms—like a humming cabinet, a stationary fan blade, or a loud buzzing noise—is your cue to step back and call for help. By relying on a licensed professional to safely inspect, test, and replace the degraded components, you can quickly restore your system's functionality and get your home back to a comfortable temperature.

How Often Should You Change a Health Smart Filter During Allergy Season? placeholder-image  | Air On Demand
5 min read

How Often Should You Change a Health Smart Filter During Allergy Season?

The standard 90-day filter replacement rule falls short during the autumn ragweed peak. We break down the exact timeline for swapping your filter so you can breathe easier this fall.

When Fall Allergens Invade Your HVAC System

When September ragweed and fall allergens arrive in Miami, the most important question homeowners ask our team at Air On Demand is: How Often Should You Change a Health Smart Filter During Allergy Season? Many homeowners assume their standard maintenance routine will carry them through the autumn months, only to find themselves waking up with congestion, itchy eyes, and constant sneezing inside their own houses.

The problem usually traces back to a simple oversight: relying on generic timelines for filter replacements during periods of extreme demand. Your HVAC system acts as the lungs of your home, pulling in hundreds of cubic feet of air every minute. During the fall allergy peak, that air is heavily laden with microscopic pollen spores, dust, and outdoor particulates. When these contaminants hit your return vents, your filter is the only barrier standing between those allergens and your living space.

Knowing exactly when to swap out that filter is the ultimate decision point for maintaining a healthy indoor environment. If you wait too long, the filter media becomes fully saturated. Once a filter reaches its maximum holding capacity, it can no longer trap new particles. Instead, the incoming air simply bypasses the clogged media, forcing those allergens directly into your ductwork and back into your bedrooms and living areas.

Establishing a proactive approach to indoor air filtration is your first and most vital line of defense. A high-quality Health Smart Filter is designed to capture microscopic irritants efficiently, but its performance is entirely dependent on its available surface area. As the September ragweed count climbs, that surface area disappears rapidly, requiring a much more aggressive replacement strategy than you might use during the milder winter months.

The Danger of the 90-Day Manufacturer Rule

If you look at the packaging on almost any standard pleated air filter, you will see a familiar guideline: replace every three months. This 90-day standard manufacturer recommendation is heavily marketed, leading most homeowners to simply set a calendar reminder for four times a year. However, in our years of servicing HVAC systems across Miami, our technicians at Air On Demand frequently see the fallout of this generic rule. Relying on a 90-day timeline during allergy season leaves your home completely vulnerable to poor air quality and places immense stress on your cooling and heating equipment.

Manufacturer testing environments are highly controlled and typically simulate temperate climates with moderate AC use. They base their 90-day lifespan on systems that only run a few hours a day, often with long periods of downtime between heating and cooling seasons. That is simply not the reality for homes operating air conditioner filters in Miami or similar subtropical environments, especially when allergen loads are at their highest.

National Averages vs. Local Realities

Generic timelines completely fail to account for sudden, intense spikes in airborne particulates. When ragweed blooms, the volume of particulate matter entering your return ducts multiplies exponentially. The compounding effect of trapped particulates on the filter's surface area over three months is staggering. What starts as a highly efficient synthetic media quickly turns into a solid, impenetrable wall of dust and pollen.

• Daily AC Runtime — National Testing Average: 4 to 6 hours — Subtropical Allergy Season Reality: 12 to 18+ hours

• Allergen Load — National Testing Average: Moderate, seasonal shifts — Subtropical Allergy Season Reality: Heavy, continuous pollen & dust

• Indoor Humidity — National Testing Average: 30% to 50% — Subtropical Allergy Season Reality: 50% to 60%+

• Actual Filter Lifespan — National Testing Average: 90 days — Subtropical Allergy Season Reality: 30 to 45 days

The Impact on AC Performance

The danger of waiting 90 days goes beyond just sneezing and coughing. A loaded filter forces your air conditioning or heat pump system to work significantly harder to pull air through the return vents. This restricted airflow creates a cascade of mechanical issues. The blower motor has to draw more amperage to overcome the resistance, driving up your monthly energy bills.

More critically, restricted airflow prevents enough warm air from passing over your indoor evaporator coil. Without that warm air, the refrigerant inside the coil drops below freezing, causing the condensation on the coil to turn into solid ice. A frozen evaporator coil will completely shut down your cooling system, turning a simple filter replacement issue into an emergency AC repair call right in the middle of a hot afternoon.

Why the Subtropical Climate Accelerates Filter Loading

At Air On Demand, a pattern we see often during early fall tune-ups is that the unique climate of Miami and South Florida plays a massive role in how quickly your HVAC filter degrades. While northern homes might shut their systems down entirely during the crisp days of early fall, homes in our subtropical zones continue to run their air conditioners almost around the clock. This continuous runtime fundamentally changes the math on filter lifespans.

Because your system operates for so many hours each day, the filter is forced to process vastly more air volume than a unit in a temperate region. Filtration is a numbers game: if your system pushes 1,200 cubic feet of air per minute through the filter, and it runs for 14 hours a day instead of 5, the filter is catching nearly triple the amount of dust, dander, and pollen in the exact same calendar week. More air volume always equals faster filter degradation.

Continuous Airflow and Particle Accumulation

In a home with continuous airflow, allergens never have a chance to settle on the floor or furniture where they can be vacuumed up. Instead, they remain suspended in the air currents and are constantly cycled back through the return vents. This continuous cycling increases the capture rate at the filter face. The HVAC system essentially acts as a whole-home vacuum for local flora, pulling in heavy loads of outdoor allergens every time a door opens or a window draft occurs.

Humidity's Role in Air Filtration

The combination of high indoor humidity and continuous AC runtime creates a perfect storm for filter loading. Moisture in the air interacts with airborne particulates in a way that makes them heavier and stickier. When dry dust hits a filter, it often remains loose and powdery. But when humid air carries dust, pet dander, and ragweed pollen into the filter media, those particles bind together.

This sticky accumulation rapidly reduces the filter's permeability. The pores in the Health Smart Filter media clog much faster when coated in this humid, heavy dust mixture, turning the filter into a restrictive barrier long before the 90-day mark approaches.

The Adjusted Timeline: 30 to 45 Days

During South Florida's fall allergy season, you should change your Health Smart filter every 30 to 45 days. This is the most effective timeline to maintain peak indoor air quality and protect your HVAC equipment. Discard the 90-day rule entirely during the autumn months.

Adopting this proactive schedule prevents the filter from ever reaching its maximum capacity during the heaviest ragweed peaks. By swapping the filter at the 30-day mark, you guarantee that the synthetic media always has enough open pores to capture new irritants without restricting the vital airflow your air handler needs to function efficiently.

This 30-to-45-day window strikes the perfect balance between protecting your respiratory health and maintaining your system's energy efficiency. It ensures that your blower motor isn't straining against a wall of debris and that the air circulating back into your living spaces is actually clean.

Tracking the Fall Ragweed Spike

To optimize your filter changes, you need to monitor the actual conditions outside your home. Local pollen counts begin to surge in September. When you see local weather reports indicating high or severe pollen days, you should adjust your replacement frequency closer to the 30-day mark.

The easiest way to manage this accelerated seasonal schedule is through technology. Instead of relying on memory, set calendar reminders on your phone specifically for the first of every month during the fall. If you have a smart thermostat, you can often program it to alert you based on actual system runtime hours rather than calendar days, which provides a much more accurate gauge of when the filter is actually full.

The 30-45 Day Allergy Season Filter Schedule

Visual and System Signs Your Filter is Full

Even with a strict 30-day schedule, exceptional weather events or sudden spikes in local pollen can overwhelm a filter early. Learning how to identify a clogged filter before a month passes is a crucial skill for any homeowner managing severe allergies. You do not need specialized tools to diagnose a loaded filter; your eyes and your HVAC system will give you all the clues you need.

If you are ever wondering do Health Smart filters restrict airflow, the answer is no—unless they are completely full of debris. A clean filter allows air to pass freely, while a dirty one acts as a choke point. Paying attention to these physical and operational changes will help you catch a failing filter before it impacts your comfort.

Physical Dust and Debris Buildup

The most reliable way to check your filter is to pull it out of the housing and inspect it directly. Here is what you should look for:

• The Light Test: Hold the filter up to a bright ceiling light or the sun. If you cannot see any light shining through the pleated media, the filter is completely saturated and must be replaced immediately.

• Surface Discoloration: A clean Health Smart filter is typically bright white. Look for a thick, gray, brown, or even black coating across the entire pleated surface.

• Visible Clumping: Check for visible pet dander, hair, or dust bunnies clinging to the intake grille or the face of the filter itself. If debris is hanging off the filter, it is long past its lifespan.

Changes in System Airflow

Your HVAC system will also loudly protest when it cannot breathe properly. Listen and feel for these common symptoms of a choked system:

• Weak Vent Pressure: Notice if the air coming from your ceiling or floor vents feels significantly weaker than usual. If some rooms feel stagnant while others are cool, restricted airflow is often the culprit.

• Unusual Noises: Listen for high-pitched whistling or wheezing sounds near the return vent. This indicates the blower motor is creating a high vacuum, struggling to pull air through the clogged media.

• Extended Cooling Cycles: If your AC seems to run for hours without actually dropping the temperature on the thermostat, a dirty filter is likely preventing proper heat exchange.

Upgrading Your Defense: Beyond Basic Filters

While frequent filter changes are absolutely crucial during the fall allergy peak, they are only one part of a comprehensive indoor air quality strategy. A Health Smart filter does an excellent job capturing larger particulates like dust mites, pollen, and pet dander. However, homes dealing with severe seasonal allergies often require a more robust, multi-layered approach to truly neutralize airborne threats.

If you find that changing your filter every 30 days still leaves you waking up with a scratchy throat, it is time to look at whole-home purification systems that work alongside your HVAC equipment. Advanced air cleaners and purifiers are designed to target the microscopic contaminants that easily slip through standard pleated media. These systems integrate directly into your ductwork, treating all the air that circulates through your home.

Technologies like UV germicidal lights can neutralize biological contaminants, mold spores, and bacteria that thrive in dark, humid ductwork. Meanwhile, electronic air cleaners use an electrical charge to magnetize and trap microscopic smoke particles, smog, and ultra-fine allergens. By combining a 30-day filter replacement schedule with active air purification, you create a sterile indoor environment where fall allergens simply cannot survive.

Local Support for Filter Management and IAQ

Managing indoor air quality is not a one-size-fits-all endeavor. What works for a home in a dry, northern climate will fail miserably against the humidity and heavy pollen loads of the coastal South. This is why having an HVAC system calibrated specifically for local environmental demands is essential for long-term comfort.

Professional routine maintenance plays a huge role in how effective your filters actually are. If the filter housing inside your air handler is not sealed properly, incoming air will simply take the path of least resistance, bypassing the filter entirely and pulling raw, unfiltered attic or garage air directly into your ductwork. A professional technician ensures that tracks are tight and seals are intact, so every ounce of air passes through the media as intended.

Working with experts who understand Miami's unique allergen profiles means you get reality-based recommendations, not generic national advice. If you are struggling to keep your home's air clean, scheduling a professional air filter replacement in Kendall or a comprehensive IAQ audit can identify hidden sources of indoor air pollution. Our team at Air On Demand can measure your static pressure, check for duct leaks, and design a customized filtration strategy that actually works for your specific home and health needs.

Frequently Asked Questions

How often should you change your AC filter if you have allergies?

If you suffer from allergies, you should change your AC filter every 30 to 45 days during peak seasons. Waiting for the standard 90-day mark allows allergens to build up and circulate back into your home. A fresh filter ensures maximum trapping capacity for pollen, dust, and pet dander. Staying on a strict monthly schedule is the easiest way to reduce indoor allergy symptoms.

Why is my AC filter getting dirty so fast in Florida?

Florida's climate requires your air conditioner and heat pump to run for significantly more hours each day compared to other regions. Because the system runs almost continuously, the filter processes a massive volume of air, catching more dust and debris in a shorter amount of time. Additionally, high indoor humidity makes particles sticky, causing them to clump together and clog the filter pores much faster.

Do smart filters last longer than standard pleated filters?

While Health Smart filters are highly efficient at capturing microscopic particles, they do not necessarily last longer in terms of time. In fact, because they are so good at trapping tiny allergens, they can actually fill up faster than cheap fiberglass filters that let debris pass through. Their value lies in superior air quality, not extended replacement timelines.

What happens to my HVAC system if I don't change my AC filter?

Failing to change your filter restricts the airflow returning to your air handler. This forces the blower motor to work harder, increasing your energy bills and risking premature motor failure. Furthermore, restricted airflow can cause the evaporator coil to freeze solid, which will completely shut down your cooling system and potentially damage the compressor.

How do I know if my AC filter is dirty before the 30 days are up?

You can perform a simple light test by holding the filter up to a bright light source; if you cannot see light shining through the media, it is full. You might also notice weaker airflow coming from your vents or hear a whistling sound near the return grille. A visible gray or brown coating of dust on the filter surface is a clear indicator it needs replacing.

Can a dirty AC filter make fall allergy symptoms worse?

Yes, a dirty filter can significantly worsen fall allergy symptoms. Once the filter media is fully saturated, it can no longer capture incoming ragweed pollen or outdoor dust. These irritants bypass the clogged filter, travel through your ductwork, and are blown directly into your living spaces, leading to increased sneezing, congestion, and respiratory irritation.

Breathe Easier This Fall

Navigating the September allergen spike doesn't have to mean suffering in your own living room. By discarding the outdated 90-day rule and committing to a 30-to-45-day replacement schedule, you take direct control over your indoor air quality. If you want to ensure your system is properly sealed and equipped to handle the heavy demands of the season—and prepare your heat pump for the upcoming cooler months—reach out to a local professional. A quick evaluation can provide the clear, adjusted strategies you need to keep your air clean, your system efficient, and your family breathing comfortably all year long.

Managing High Water Tables and Sunken Condenser Pads in Palmetto Bay placeholder-image  | Air On Demand
5 min read

Managing High Water Tables and Sunken Condenser Pads in Palmetto Bay

September heavy rains often cause the ground to shift, leaving your outdoor AC unit leaning. We explain why a tilted condenser pad is a mechanical emergency that requires professional leveling.

The Impact of Late-Summer Deluges on Palmetto Bay Homes

Here at Air On Demand, our team typically sees a spike in service calls right as we transition into early fall. Nearly 10 inches of rain can fall across Miami-Dade County in a single month during the peak wet season, completely overwhelming the soil around your property. Managing high water tables and sunken condenser pads in Palmetto Bay requires proactive attention before severe weather causes permanent mechanical damage. The September heavy rains saturate the ground so deeply that heavy outdoor equipment inevitably begins to shift and settle. You might walk outside after a severe storm and notice your outdoor unit starting to lean slightly to one side. This creates a critical decision point for any homeowner: do you ignore a visibly tilted unit because it still seems to be blowing cold air, or do you call a professional to re-level the pad before the compressor suffers irreversible damage?

While that sinking pad might look like a minor cosmetic issue or a simple landscaping annoyance, we can tell you from firsthand experience that it is actually a ticking time bomb for your entire heating and cooling system. The outdoor unit is precision-engineered to operate on a flat plane. Deciding to ignore the tilt rather than seeking professional help often leads to catastrophic, system-ending mechanical failure. If you rely on professional air conditioning services to keep your home comfortable, understanding the hidden threats of a shifting foundation is your first line of defense against sudden breakdowns.

The Geological Reality: High Water Tables and Soil Shifting

In our years of installing and servicing heat pumps and AC units across Miami-Dade, we've learned that the coastal geography of South Florida presents a unique set of challenges for heavy outdoor appliances. The ground beneath your home features uniquely porous, sandy soil combined with a naturally high water table. Most of the year, this soil provides a stable enough foundation for standard concrete or composite equipment bases. However, the environment changes drastically during the transition from late summer into early fall.

When the ground becomes hyper-saturated during heavy tropical downpours, the soil rapidly loses its load-bearing capacity. The water table rises, turning previously solid earth into a soft, shifting mass. Your outdoor equipment, which often weighs hundreds of pounds, continuously presses down on this softened earth. Because the weight distribution inside the cabinet is not perfectly symmetrical—the heavy compressor sits on one side while the hollow fan area sits on the other—the resulting shift rarely happens perfectly straight down.

The stages of soil destabilization we observe in Palmetto Bay:

• Dry season stability: The sandy soil remains tightly packed, easily supporting the weight of the concrete pad and the equipment above it.

• Initial saturation: As heavy rains begin, water fills the porous gaps in the soil, loosening the friction between dirt particles.

• Hyper-saturation: The local water table rises to meet the surface water. The soil loses all structural integrity, allowing heavy objects to sink.

• Uneven settling: One corner of the pad gives way first, creating a dangerous tilt that worsens with every subsequent rainstorm.

This localized environmental trigger means that simply waiting for the ground to dry out will not fix the problem. Once the pad sinks and the unit tilts, the damage to the base is done, leaving your system operating at a dangerous angle.

Why a Leaning Outdoor Unit is a Mechanical Emergency

Our technicians at Air On Demand often have to explain that the transition from an environmental soil issue to a severe mechanical emergency happens faster than most homeowners realize. HVAC manufacturer specifications and ASHRAE (American Society of Heating, Refrigerating and Air-Conditioning Engineers) guidelines dictate that an outdoor AC condenser must remain level within extremely tight tolerances. In most cases, a tilt of more than 10 degrees pushes the system outside of its safe operating parameters.

Your compressor relies on a delicate, continuous balance of chemical refrigerant flow and specialized lubricating oil returning through the copper lines. This oil travels alongside the refrigerant, coating the internal moving parts to prevent friction. When the unit tilts, gravity actively works against this highly calibrated circulation system. The oil cannot flow uphill effectively, causing it to pool in the lower sections of the tilted cabinet or get trapped in the refrigerant lines.

Without proper, continuous lubrication, the compressor experiences severe mechanical friction. Metal grinds against metal, generating extreme internal heat that the system cannot dissipate. If you spot a leaning unit during your fall yard prep, scheduling prompt AC repair in Palmetto Bay is critical to correct the angle before this friction destroys the internal components.

The Threat of Catastrophic Compressor Failure

Oil starvation inevitably leads to overheating and internal scoring of the compressor's moving parts. The compressor is the heart of your cooling system, and its internal mechanisms are sealed. Once a compressor fails due to a lack of lubrication, it cannot be repaired or rebuilt—it can only be completely replaced.

The timeline of compressor degradation:

• Initial Tilt — Internal Symptom: Oil begins pooling in the lowest corner of the unit. — External Warning Sign: The unit visibly leans; slight increase in operating noise.

• Moderate Starvation — Internal Symptom: Upper compressor bearings lose their protective oil coating. — External Warning Sign: Grinding, rattling, or harsh metallic sounds during startup.

• Severe Friction — Internal Symptom: Internal temperatures spike; metal parts begin to score and warp. — External Warning Sign: System frequently trips the circuit breaker due to high electrical draw.

• Catastrophic Failure — Internal Symptom: The compressor seizes completely and permanently. — External Warning Sign: The fan runs, but the air blowing into the home is completely warm.

This progression turns what started as a simple pad stabilization issue into a massive, irreversible system failure that requires major equipment replacement.

The Anatomy of Compressor Oil Starvation

When an outdoor unit tilts, the internal mechanics suffer immediately:

1. Optimal level tolerance: Units must remain level within <10 degrees to function safely.

2. Gravity effect: Oil separates from the refrigerant and pools in the low spots of the tilted unit.

3. Friction: The lack of returning lubrication leads to extreme friction and heat inside the compressor.

4. Result: Permanent compressor failure requiring full replacement.

The Hidden Danger of Refrigerant Line Stress

Beyond the internal damage to the compressor, a sinking pad introduces a secondary, highly volatile danger: physical damage to your refrigerant lines. The outdoor AC condenser is permanently connected to your indoor air handler via a set of rigid copper lines. These lines carry pressurized chemical refrigerant back and forth to transfer heat out of your home.

As the concrete or composite pad sinks into the hyper-saturated soil, it physically pulls the heavy equipment down and away from the exterior wall of your house. Because the copper lines are anchored to the side of your home, this sinking motion puts immense, unintended tension on the connections. Copper is somewhat malleable, but the brazed joints where the lines connect to the service valves are rigid and brittle under sheer physical stress.

The consequences of line stress include:

• Kinking: The copper tubing bends sharply, restricting the flow of refrigerant and causing the indoor coil to freeze over.

• Crimping: The line flattens out, forcing the compressor to work twice as hard to push refrigerant through a narrowed opening.

• Snapping: The tension exceeds the strength of the brazed joint, causing the line to rupture completely.

A ruptured line results in the immediate, violent loss of all chemical refrigerant. This creates an environmental hazard, halts all cooling capacity instantly, and leaves the system open to moisture contamination. The cost of repairing torn lines, vacuuming the system, and recharging the refrigerant is substantial. In many cases, the combined damage to the lines and the compressor makes replacing a condenser out of warranty the only viable option. (If you are facing a major replacement this fall, keep in mind that generic federal tax credits and local utility incentive programs may apply to qualifying high-efficiency heat pump installations—we always recommend verifying current programs with your utility provider or a tax professional.)

Why DIY Leveling is a Recipe for Disaster

When homeowners notice their outdoor unit leaning after the September heavy rains, the first instinct is often to search for a quick fix. Online tutorials frequently suggest using a shovel, some gravel, and a pry bar to prop up a leaning pad. We strongly advise our Palmetto Bay customers against this. Attempting this on your own is highly dangerous and rarely solves the underlying geological problem.

The severe risks of DIY pad leveling:

• Refrigerant line ruptures: Attempting to lift a heavy piece of equipment without specialized stabilizing tools almost always results in jerking or dropping the unit. This sudden movement can easily snap the taut, pressurized copper lines, releasing dangerous chemicals into your face and eyes.

• Electrocution hazards: The outdoor unit is connected to your home's electrical panel via a high-voltage whip. Jostling the unit while it is still energized, or accidentally pulling the electrical conduit loose during a lift, poses a severe and potentially fatal electrocution risk.

• Improper compaction: Shoving gravel under one side of a sinking pad does not address the hyper-saturated soil beneath it. The unsupported weight will simply crush the new gravel into the mud, causing the unit to sink again within a few weeks.

Only a licensed professional has the expertise to safely isolate the high-voltage power, manage the tension on the copper lines, and properly compact the sub-base. Attempting to bypass professional AC replacement services or repair protocols usually results in thousands of dollars in self-inflicted damage.

Professional Pad Stabilization: Protecting Your Investment

Addressing a sunken condenser pad requires a methodical, authoritative approach that prioritizes the safety of the equipment and the long-term stability of the foundation. When the Air On Demand team arrives, we do not just prop the unit up; we engineer a solution designed to withstand the next round of severe weather.

The process begins with a thorough assessment of the soil condition and the exact extent of the tilt. Technicians must determine if the existing pad can be salvaged or if a new, higher-density composite pad is required. Before any lifting occurs, the technician safely secures the refrigerant lines and disconnects the high-voltage electrical whip so the connections are not compromised during the lift.

Leveraging deep local expertise in South Florida's unique coastal environment, our professionals understand exactly how the sandy soil reacts to the local water table. We use proper aggregate materials—such as crushed limestone or specialized leveling sand—to rebuild and heavily compact the base. This ensures the new foundation can withstand future water table fluctuations without washing out.

Once the pad is perfectly leveled, the equipment is carefully lowered back into place. The final, crucial step is recalibration. The technician runs the system and monitors the pressures to ensure that oil is returning to the compressor correctly after being run at a tilt. Catching the problem early and relying on routine AC maintenance is the ultimate protection against premature failure.

Frequently Asked Questions About Leaning HVAC Units

What happens if my outside AC unit is not level?

An unlevel outside unit forces the internal compressor to work against gravity, preventing lubricating oil from circulating properly. This lack of lubrication causes severe internal friction, overheating, and eventual mechanical failure. Additionally, a leaning unit puts dangerous tension on the rigid copper refrigerant lines connected to your home, which can cause them to kink or snap.

Does an AC condenser need to be perfectly level?

Yes, an outdoor AC condenser needs to be as close to perfectly level as possible to function safely. Manufacturer specifications generally require the unit to remain level within a very tight tolerance, often less than 10 degrees of variance. Anything beyond this slight tolerance disrupts the delicate balance of refrigerant flow and oil return.

How much tilt is acceptable for an AC condenser?

Most HVAC manufacturers state that an outdoor AC condenser should not tilt more than 10 degrees in any direction. However, the safest operating angle is zero degrees. If you can visibly see that your outdoor AC condenser is leaning without using a leveling tool, the tilt is already severe enough to warrant immediate professional correction.

Can a sinking AC pad cause a refrigerant leak?

Yes, a sinking pad is a leading cause of severe refrigerant leaks. As the heavy unit sinks into the soft ground, it physically pulls away from the house, stretching the copper lines that connect the outdoor and indoor systems. This extreme tension can easily crack or snap the brazed joints, releasing all the pressurized refrigerant into the atmosphere.

How quickly does an unlevel compressor suffer from oil starvation?

The internal damage from oil starvation begins almost immediately once the unit tilts beyond its operational tolerance. While the compressor might not seize up on the very first day, running the system for even a few weeks at a severe angle will cause permanent scoring to the internal bearings. The longer it runs unlevel, the higher the risk of sudden, catastrophic failure.

Secure Your System Before the Next Storm Hits

Don't wait for a leaning unit to cause a catastrophic breakdown during the transition into fall. The soil in Palmetto Bay is deeply affected by heavy rains, and ignoring a sinking pad will only lead to severe compressor damage and ruptured refrigerant lines. Addressing soil shifting now saves the heart of your system and prevents costly, avoidable repairs.

Reach out to the local experts at Air On Demand who understand the unique ground conditions and water tables in the area. By having our professionals properly stabilize the ground and re-level the system, you ensure your equipment operates safely, efficiently, and reliably for years to come.

What Invalidates a Daikin Compressor Warranty? placeholder-image  | Air On Demand
5 min read

What Invalidates a Daikin Compressor Warranty?

When a compressor fails, a denied warranty claim is a worst-case scenario. Review the exact installation and maintenance records Daikin requires to approve your replacement claim.

Facing a Failed Compressor Risking Claim Denial?

When your air conditioner suddenly stops cooling and points to a dead compressor, the first question on your mind is likely: what invalidates a Daikin compressor warranty? Because replacing this critical component represents a significant expense, finding out your warranty claim has been denied is the last thing you want to hear. Understanding exactly what the manufacturer requires for approval is the first step toward protecting your investment and getting your home comfortable again.

Manufacturer warranties are designed to cover defects in materials and workmanship, not issues caused by neglect, improper handling, or environmental abuse. Whether you rely on standard central air or high-efficiency Daikin equipment, the rules remain the same. The manufacturer expects the system to be installed correctly, maintained regularly, and operated within specific design parameters. If those conditions are not met, the financial responsibility for the repair shifts entirely back to you.

The High Stakes of Compressor Replacement

The compressor is often called the heart of the air conditioning system. Its job is to pump refrigerant between the indoor and outdoor units, facilitating the heat transfer process that cools your home. Because it is a complex, hard-working mechanical component—especially in advanced systems like Daikin inverter compressors—it is also one of the most expensive parts to replace.

Why warranty approval matters:

• Financial relief: An approved claim covers the cost of the replacement part, shifting the heavy burden away from the homeowner.

• System longevity: Going through proper warranty channels ensures you receive a genuine replacement part designed specifically for your unit.

• Peace of mind: Knowing your system is repaired to factory standards prevents future catastrophic failures.

When a compressor fails prematurely, the manufacturer will investigate the root cause. They need to verify that the failure was due to a factory defect rather than external factors. This is where your documentation and the history of your system's care become absolutely critical to getting your claim approved.

Unlicensed Installation and DIY Attempts

One of the fastest ways to void your coverage is by having the equipment installed or serviced by someone without the proper credentials. Daikin mandates that all equipment must be installed by a licensed HVAC contractor. If you attempt a DIY installation or hire an uncertified handyman to set up your system, you immediately void the daikin heat pump warranty.

When you submit a claim for a failed compressor, the manufacturer will ask for proof of professional installation. This typically means providing the original invoice containing the contractor's license number, business details, and the date of installation. Without this documentation, the manufacturer will rightfully assume that the system was not set up according to their strict engineering standards, and the claim will be denied.

Why Manufacturer Certification Matters

Modern HVAC systems are highly sophisticated pieces of technology. Certified installers understand brand-specific requirements, from electrical clearances to precise refrigerant line sizing. Proper initial setup prevents long-term mechanical stress that eventually causes the compressor to burn out.

Working with a dedicated local expert like Air On Demand ensures flawless, manufacturer-approved installations that keep warranties completely intact. A professional AC installation guarantees that every electrical connection is secure, every pipe is properly brazed, and the system operates exactly as the engineers intended.

Top Factors That Invalidate a Daikin Compressor Warranty

The Impact of Skipped Annual Maintenance

Daikin requires proof of continuous annual maintenance by a licensed contractor to keep the compressor warranty valid. Skipping routine tune-ups allows minor, easily correctable issues to compound into catastrophic compressor failure. When a claim is filed, the manufacturer will request your maintenance logs to prove the system was properly cared for throughout its lifespan.

In our years of providing expert HVAC services across Miami, the team at Air On Demand routinely sees that our climate plays a massive role in system wear and tear. Miami's intense year-round humidity and heat force AC systems to work continuously. A pattern we see often is that this relentless operational demand makes skipped maintenance immediately obvious during warranty reviews. A system that hasn't been cleaned or serviced will show heavy dirt accumulation, restricted airflow, and thermal stress marks—clear signs of neglect that lead straight to a denied claim.

Maintaining Your Service Documentation

Without proper documentation, the manufacturer assumes neglect caused the failure. Keeping your records organized is just as important as scheduling the service itself. Whether you own a single-family home or manage multiple Miami coastal and inland properties, consistent record-keeping is your best defense against a denied claim.

Follow these steps to secure your documentation:

1. Save every invoice: Keep digital or physical copies of every service visit, tune-up, and repair.

2. Ensure details are legible: Verify that the technician's notes, the date of service, and the company's license number are clearly visible on the receipt.

3. Track continuous service: Schedule routine AC maintenance at least once a year, without skipping seasons, to build an unbroken timeline of care.

4. Store records safely: Keep a dedicated folder for your HVAC system so you can produce the logs immediately if a compressor fails.

Mismatched Indoor and Outdoor Components

A common, yet heavily penalized, invalidator is pairing a new outdoor unit with an old, incompatible indoor coil. Daikin requires systems to be properly matched and AHRI (Air-Conditioning, Heating, and Refrigeration Institute) certified to ensure proper refrigerant flow, pressure, and electrical communication.

When a contractor tries to save time or upfront costs by leaving an old indoor coil in place, they inadvertently force the new outdoor compressor to overwork. The mismatched components cannot properly regulate the refrigerant cycle, leading to extreme pressure imbalances and premature failure. This is a critical factor for anyone checking their daikin mini split warranty requirements, as ductless systems are particularly sensitive to component mismatches.

The Danger of Mismatched Coils

Incorrect sizing alters system pressure in ways that the compressor was never designed to handle. During a warranty claim, manufacturers verify the model numbers of both the indoor and outdoor units. If those numbers do not form an approved match in the AHRI database, the warranty is instantly voided.

• AHRI Matched System — Impact on Compressor: Balanced pressure, optimal refrigerant flow, designed efficiency. — Warranty Status: Valid

• Mismatched Coils — Impact on Compressor: Erratic pressure, excessive thermal stress, poor oil return. — Warranty Status: Voided

• Old Indoor / New Outdoor — Impact on Compressor: Compressor overworks to compensate for poor indoor heat transfer. — Warranty Status: Voided

Investing in Daikin inverter compressors means investing in precision engineering. Pairing that advanced technology with an outdated, incompatible indoor coil guarantees a shortened lifespan and zero manufacturer protection when it breaks.

Improper Refrigerant Charging and System Stress

Compressors are designed to pump refrigerant gas, not liquid. When a system is installed or serviced poorly, incorrect refrigerant levels become a leading cause of catastrophic failure. Overcharging or undercharging the system causes extreme thermal and mechanical stress that the unit cannot survive for long.

If a system is overcharged, liquid refrigerant can flow backward into the compressor—a destructive event known as liquid slugging. Because liquid cannot be compressed, it shatters the internal valves and destroys the compressor instantly. If the manufacturer's teardown reveals that liquid slugging caused the failure, the claim is typically denied due to improper charging. Coastal and inland properties running high-load cooling require absolute precision in refrigerant charging to survive continuous operation without burning out.

Diagnosing Airflow and Refrigerant Issues

Only licensed technicians have the specialized tools, such as digital manifolds and micron gauges, to precisely measure and adjust refrigerant levels based on subcooling and superheat calculations. Attempting to add refrigerant without these tools is a guaranteed way to void your coverage.

The complexities of proper diagnostics:

• Airflow mimics refrigerant issues: A dirty filter or blocked coil can make a system look undercharged. Adding refrigerant without checking airflow first leads to a dangerous overcharge.

• Leak detection is mandatory: Simply "topping off" a leaking system is bad practice. The leak must be found and sealed to maintain proper operating pressures.

• Professional tools are required: Relying on a professional for AC repair in Miami ensures that diagnostics are accurate, preventing misdiagnosis and protecting your warranty coverage.

Failing to Register Your Daikin Warranty on Time

Many homeowners forget the crucial administrative step of completing their daikin warranty registration online. While failing to register a new system does not completely invalidate the base coverage, it does result in a massive loss of extended protection.

Manufacturers use registration to track where their equipment is installed and to communicate important updates. In exchange for this information, they extend the warranty terms significantly. Registration must typically occur within 60 days of the installation date. Missing this window means you are leaving years of valuable coverage on the table.

Base vs. Registered Coverage Terms

Unregistered equipment often defaults to a shorter base warranty, which can be the difference between a fully covered compressor replacement and paying completely out of pocket if the failure happens in year six.

Typical coverage differences:

• Unregistered System: Defaults to a 5-year parts limited warranty.

• Registered System: Extends to a 10-year or 12-year parts limited warranty, depending on the specific model.

If you are unsure of your current status, you can perform a daikin warranty check on the manufacturer's website using your serial number. Fortunately, a dedicated local HVAC partner handles or assists with all necessary registration paperwork to protect the homeowner's investment from day one. Taking care of this paperwork during the September transition after peak summer cooling ensures your system is fully protected before the next heavy usage cycle begins.

Using Non-OEM Replacement Parts

When an air conditioner breaks down, the priority is getting it running again quickly. However, allowing a technician to use generic or aftermarket parts during a repair can have severe consequences for your compressor's warranty. Manufacturer warranties stipulate the use of Original Equipment Manufacturer (OEM) parts to maintain the system's integrity.

Installing a generic contactor, a mismatched capacitor, or an aftermarket fan motor can alter the electrical load on the compressor. Daikin inverter compressors, in particular, rely on precise electrical communication and specific tolerances. If a cheap, aftermarket part fails and sends a power surge or incorrect voltage to the compressor, the resulting damage is not considered a factory defect.

The Hidden Costs of 'Cheap' Repairs

Generic parts may save a small amount of money upfront, but they risk thousands in lost warranty coverage. If the manufacturer determines that an unauthorized aftermarket part contributed to the compressor's failure, the entire warranty claim is voided.

Always insist on genuine, brand-approved replacement components during any repair. This ensures the system operates exactly as engineered. Understanding the relationship between proper repairs, skipping maintenance and your Daikin warranty is vital. Every component in the system affects the compressor, and compromising on small parts eventually destroys the largest one.

Frequently Asked Questions About Daikin Warranty Claims

Does skipping maintenance void my Daikin warranty?

Yes, lack of continuous maintenance logs is a primary reason for claim denial. Daikin requires proof that the system has been professionally serviced every year to ensure it operates within safe parameters. Without these records, the manufacturer assumes that neglect, such as dirty coils or restricted airflow, caused the compressor to fail.

What proof is needed for a Daikin compressor claim?

Invoices from a licensed contractor proving annual maintenance and proper initial installation are required. The manufacturer will look for the contractor's license number, the date of service, and clear notes indicating what work was performed. Keeping these records organized is essential for a smooth claims process.

Can mismatched coils void my AC warranty?

Yes, systems must be AHRI matched; mismatched coils cause excessive strain and void coverage. Pairing a new outdoor unit with an old or incompatible indoor coil disrupts refrigerant flow and pressure. The manufacturer verifies model numbers during a claim, and mismatched setups are immediately denied.

How long is a Daikin compressor warranty valid?

It is typically 10 to 12 years if registered within 60 days of installation, but defaults to a shorter term if unregistered. An unregistered system usually drops down to a standard 5-year base warranty. Always complete your registration paperwork promptly to secure the maximum coverage period.

Are Daikin warranties transferable to a new homeowner?

Terms vary, but transfers often require specific paperwork within a short window after home purchase. Usually, the new homeowner must notify the manufacturer and complete a transfer form within 60 to 90 days of closing. If this window is missed, the warranty may revert to a shorter base term or be voided entirely.

Will an unlicensed installation void my daikin heat pump warranty?

Absolutely. Daikin strictly mandates that all equipment be installed by a licensed HVAC professional. DIY installations or work performed by uncertified handymen cannot guarantee that the system meets safety and engineering standards, resulting in an automatic void of all warranty protections.

Secure Your Warranty Coverage Before the Next Season

Protecting your system requires an uncompromising approach to documentation and care. To ensure your warranty remains fully intact, you must insist on licensed installation, matched AHRI coils, strict use of OEM parts, and consistent annual maintenance logs. Manufacturers have clear guidelines, and deviating from them leaves you financially responsible for major component failures.

Now is the perfect time to audit your maintenance records and gather your installation invoices. If you have fallen behind on routine care, the September transition after peak summer cooling is the ideal moment to get back on track. Consult with a licensed local expert to verify your system's health, perform any overdue service, and ensure your warranty status is secure before the next heavy cooling season begins.

Inverter-Driven Compressors vs. Two-Stage Systems for Miami Weather placeholder-image  | Air On Demand
5 min read

Inverter-Driven Compressors vs. Two-Stage Systems for Miami Weather

When fall temperatures drop but heavy humidity lingers, your AC's moisture control is put to the test. Compare the exact differences between inverter and two-stage systems for true indoor comfort.

The September Struggle: Why Miami Humidity Outlasts the Summer Heat

Have you ever walked into your living room on a muggy early fall afternoon, checked the thermostat to confirm it reads a cool 73 degrees, but still felt a sticky, clammy chill in the air? When evaluating Inverter-Driven Compressors vs. Two-Stage Systems for Miami Weather, the choice often comes down to solving that exact discomfort. During the early fall, South Florida enters a very specific weather pattern where the intense, blistering heat of summer backs off, but the heavy moisture in the air remains.

If you are exploring new AC units, comparing standard models against advanced Daikin Fit inverter systems is the best place to start. Making the right choice now ensures your home stays comfortable regardless of what the forecast throws your way.

The Physics of Early Fall Comfort

To understand why your home feels this way, we have to look at the September transition (high humidity, lower sensible heat load). At Air On Demand, when our technicians evaluate Miami homes during this transition, we measure two types of heat: sensible heat and latent heat. Sensible heat is the actual temperature you read on a thermometer. Latent heat is the moisture suspended in the air—the humidity that makes a 75-degree day feel suffocating.

During peak summer, both sensible and latent heat are extremely high. Your air conditioner runs constantly to battle the high temperatures, and because it runs for long periods, it naturally pulls a massive amount of moisture out of the air. However, as we move into September, the sensible heat drops. It might only be 78 degrees outside, but the humidity is still hovering around 80 percent.

Because Miami's subtropical climate means homes require significantly longer AC run cycles to dehumidify without freezing out the occupants, this seasonal shift exposes the limitations of older cooling technology. Your system doesn't need to run very long to cool the house down to your set temperature, but it shuts off long before it has a chance to extract the heavy moisture. You are left deciding between a fully variable inverter vs. a two-stage compressor to solve this specific, deeply uncomfortable climate challenge.

Understanding Part-Load Conditions in Coastal and Inland Miami

The situation described above is what HVAC professionals call a "part-load" condition. A full-load condition happens on the hottest day of the year when your system needs every ounce of its cooling capacity just to keep up. A part-load condition occurs when your home only requires a fraction of that cooling power to lower the indoor temperature, yet still desperately needs the system to run in order to extract moisture.

The Reality of Part-Load Days

Our AC repair and installation teams at Air On Demand see these conditions frequently across Miami coastal and inland residential zones. In fact, for a large portion of the year outside of the peak summer months, your air conditioner is operating under part-load demands. Overcast days, rainy afternoons, and early mornings all present scenarios where the temperature is relatively mild, but the air is thick with humidity.

The mechanics of moisture removal: Your air conditioner does not act like a sponge. Instead, it removes humidity by passing warm, moist indoor air over a freezing cold set of indoor coils (the evaporator coil). As the warm air hits the cold metal, condensation forms—just like water droplets forming on the outside of a cold glass of iced tea. That condensation drips into a pan and drains outside. However, this process takes time. The air has to pass over the coils continuously for the system to wring out enough moisture to make a difference.

The Over-Cooling Trap

When standard systems face part-load conditions, they fall into the over-cooling trap. Because they only know how to blast cold air at maximum speed, they drop the indoor temperature incredibly fast. The thermostat senses that the target temperature has been reached and shuts the system down.

The result? The house is cold, but the moisture was never removed. To combat this clammy feeling, many homeowners turn the thermostat down even lower, forcing the system to run longer. This leads to a house that is uncomfortably frigid, wasting energy while failing to address the root cause. This is why reviewing humidity control tips for South Florida homeowners always brings the conversation back to how your compressor technology dictates your indoor climate.

Two-Stage Compressors: The Step-Down Approach to Cooling

For decades, the standard air conditioner only had one speed: full blast. Whenever it turned on, it ran at 100 percent capacity, regardless of whether it was 95 degrees outside or 75 degrees outside. Upgrading to a two-stage compressor was a massive leap forward in home comfort technology.

How Two-Stage Cooling Operates

A two-stage compressor is designed to operate at two distinct speeds, providing a step-down approach to cooling your home. Here is how it generally functions:

1. High Stage (100% Capacity): On blistering summer afternoons, the system runs at full capacity to quickly remove intense heat and keep the home comfortable.

2. Low Stage (65% to 70% Capacity): On milder days, or once the initial heat has been removed, the system drops down to a lower gear. It uses less electricity and blows a gentler stream of cool air.

This stepped-down capacity is a vast improvement over older single-stage systems. By running at 65 percent capacity, the system runs longer than a single-stage unit would, allowing more air to pass over the cold evaporator coils, which in turn removes more humidity.

The Limitation During Early Fall

While a two-stage system is excellent for general cooling, it still has limitations when facing the extreme moisture of South Florida. When comparing a fully variable inverter vs. two-stage compressor during the September transition, that 65 percent capacity can still be too much cooling power.

If it is raining and 76 degrees outside, even running at 65 percent capacity will cool your living room down too quickly. The system will still short-cycle—meaning it turns on, blasts a moderate amount of cold air, reaches the thermostat setting, and shuts off before adequately removing indoor humidity. Homeowners looking into AC replacement services in Miami often upgrade from a single-stage to a two-stage without realizing an even better option exists for our specific coastal humidity.

Inverter-Driven Compressors: Precision Moisture Removal at 30% Capacity

If a single-stage system is an on/off switch, and a two-stage system is a switch with a "high" and "low" setting, an inverter-driven compressor is like a dimmer switch. This fully variable technology represents the absolute pinnacle of residential climate control.

The Car Accelerator Analogy

The best way to understand inverter technology is to think about how you drive a car. You don't drive by stomping the gas pedal to the floor, reaching the speed limit, taking your foot completely off the gas until you slow down, and then stomping it to the floor again. You press the accelerator just enough to maintain a steady, consistent speed.

An inverter compressor does exactly this for your home's temperature. It can modulate its speed in tiny increments, adjusting its output precisely to match the exact cooling load of the house at any given moment.

Why Low and Slow Wins the Humidity Battle

The true magic of a fully variable inverter vs. two-stage compressor becomes obvious during part-load conditions. Instead of dropping to 65 percent capacity, an inverter system can drop to capacities as low as 20 to 30 percent.

Continuous Dehumidification: By running at such a low speed, the system almost never shuts off. It continuously circulates air over the cold evaporator coils. Because the cooling output is so low, it doesn't drastically drop the temperature in the room. Instead, it gently sips power while constantly wringing moisture out of the air like a sponge.

Set-Point Precision: This continuous operation eliminates temperature swings entirely. If you set your thermostat to 74 degrees, an inverter system will hold the house at exactly 74 degrees, rather than fluctuating between 72 and 76 degrees like older systems do. The non-monetary value of eliminating these temperature swings and achieving precise climate control completely transforms how your home feels.

Side-by-Side Performance Comparison for South Florida Homes

When you are preparing for an early fall AC upgrade, seeing the differences laid out clearly can help clarify which technology makes the most sense for your daily life. Both systems are massive upgrades over outdated single-stage units, but they behave very differently when battling the September transition (high humidity, lower sensible heat load).

Breaking Down the Performance Metrics

The table below outlines how these two advanced technologies handle the most critical aspects of indoor comfort.

• Dehumidification — Two-Stage Compressor: Moderate (Good for average climates) — Inverter-Driven Compressor: Superior (Continuous moisture extraction)

• Cycle Length — Two-Stage Compressor: Medium (Steps down to 65% capacity) — Inverter-Driven Compressor: Long/Continuous (Modulates down to 20-30% capacity)

• Temperature Consistency — Two-Stage Compressor: Minor Swings (Usually within 2-3 degrees) — Inverter-Driven Compressor: Exact Precision (Maintains exact set-point)

• Acoustic Comfort — Two-Stage Compressor: Quiet on low stage, noticeable on high — Inverter-Driven Compressor: Ultra-quiet, barely noticeable operation

• Part-Load Handling — Two-Stage Compressor: Can still over-cool during mild, humid days — Inverter-Driven Compressor: Perfectly matches mild, humid conditions

It is also worth noting that qualifying high-efficiency heat pumps and ACs of both types may be eligible for generic federal tax credits or utility rebates. We always advise readers to verify current programs locally with their utility provider or a tax professional to see what incentives apply to their upgrade.

Two-Stage vs. Inverter AC Performance in High Humidity

Why the Daikin Fit is the Ultimate Solution for Miami's Climate

Understanding the technology is one thing, but finding the right equipment to deliver those results is another. When homeowners in Miami coastal and inland residential zones ask the Air On Demand team how to permanently solve their humidity issues, we consistently point them toward inverter technology based on our years of local HVAC experience.

Engineered for Subtropical Demands

The Daikin Fit is a premier example of inverter technology specifically designed for challenging climates. As a dedicated Daikin dealer, our installation experts have seen firsthand how this fully variable compressor addresses the latent heat challenges unique to our area. It doesn't just cool the air; it actively manages the indoor climate profile, ensuring that even on a rainy, 75-degree day, your home feels crisp and dry.

Beyond the compressor technology, the Daikin Fit offers several unique advantages for South Florida homeowners:

• Compact Footprint: It features a unique side-discharge design. Instead of a massive, bulky cube sitting in your yard blowing air upward, it is a slim profile unit that blows air outward.

• Space-Saving: This slim design is ideal for the zero-lot-line homes common in South Florida, fitting easily into tight side yards or narrow clearances where traditional units struggle to breathe.

• Acoustic Profile: Because the inverter compressor rarely runs at 100 percent speed, the outdoor unit is incredibly quiet, meaning you won't hear a loud mechanical roar every time the system cycles on.

However, choosing the right equipment is only half the battle. A fully variable system must be paired with precise ductwork evaluation and accurate load calculations. Proper sizing and professional AC installation are absolutely critical to realizing these benefits. If an inverter system is oversized, it will still short-cycle, completely negating the technology you invested in.

Make the Right Choice for Long-Term Comfort in Miami

Living in South Florida means dealing with high moisture levels year-round. True Miami comfort relies heavily on effective part-load humidity removal, especially during the September transition (high humidity, lower sensible heat load). If your system cannot handle the moisture without freezing you out of your living room, you aren't getting the comfort you deserve.

Weighing Your Long-Term Comfort

While two-stage systems are undeniably good and offer a solid step up from basic builder-grade units, inverter-driven systems provide the ultimate non-monetary value in comfort, consistency, and quiet operation. The ability to run continuously at a low speed transforms how a house feels, turning a clammy, sticky environment into a crisp, consistently comfortable sanctuary.

The Air On Demand team encourages homeowners to weigh these operational benefits carefully when planning their early fall AC upgrade. The initial investment in your home's infrastructure dictates your daily comfort for the next decade or more. Consult with our local experts who understand the specific cooling load of your neighborhood to evaluate which system best fits your home's unique layout and your family's comfort needs.

Frequently Asked Questions

What is the difference between a 2-stage and an inverter AC?
The primary difference lies in how they adjust their cooling capacity. A 2-stage AC operates at either 100 percent full blast or steps down to roughly 65 percent capacity. An inverter AC uses a fully variable compressor that can modulate its speed in tiny increments, often running as low as 20 to 30 percent to match your home's exact cooling needs continuously.

Does a variable speed AC dehumidify better?
Yes, a variable speed (inverter) AC provides vastly superior dehumidification. Because it can run at very low speeds for long, continuous cycles, it constantly pulls indoor air across the cold evaporator coils. This extended run time wrings out significantly more moisture from the air without causing the indoor temperature to drop uncomfortably low.

Is an inverter AC worth it for high humidity?
An inverter AC is widely considered the best solution for high-humidity environments. Standard systems often "short cycle" on humid days, shutting off before they can extract enough moisture. By running continuously at a low capacity, an inverter system eliminates the clammy feeling in your home, making the operational benefits highly worthwhile for coastal residents.

Which AC is best for Florida weather?
For Florida weather, a fully variable inverter-driven AC is generally the best choice. Florida experiences high latent heat (humidity) for most of the year, even when the actual temperature is mild. Inverter systems are uniquely capable of handling these "part-load" conditions, ensuring your home stays dry and comfortable without over-cooling.

How do part-load conditions affect my AC's performance in September?
In September, part-load conditions occur because the outdoor temperature drops, but the humidity remains extremely high. A standard AC will quickly cool the house to your set temperature and shut off, leaving the heavy moisture behind. This results in a cold but sticky indoor environment, which is why advanced systems that run longer cycles are necessary during this transition.

Identifying Leaky Schrader Valves on Your Outdoor Condenser placeholder-image  | Air On Demand
5 min read

Identifying Leaky Schrader Valves on Your Outdoor Condenser

A slow, unexplained loss of cooling power and a faint hissing sound often point to a failing O-ring. See why this small component causes major cooling loss.

Unexplained Cooling Loss: Is a Small Valve to Blame?

Your air conditioner is running nonstop, but the house still feels uncomfortably warm, and you know something is wrong before the system completely freezes up. Identifying leaky Schrader valves on your outdoor condenser is often the missing piece of the puzzle when you experience a slow, frustrating loss of cooling power. At Air On Demand, a pattern we see often is homeowners immediately assuming the worst—a punctured evaporator coil or a failed compressor—when they feel their vents blowing lukewarm air. However, in our experience, the culprit is frequently much smaller and far easier to address if caught early.

If you are noticing these symptoms, scheduling prompt AC repair is the best way to protect your equipment, and our Air On Demand team provides expert Miami AC repair services to get your system back on track.

The Hidden Toll of the Cooling Season

By the time we reach September, marking the transition into early fall, your cooling system has endured immense operational strain. Our technicians frequently notice that months of continuous cycling take a heavy toll on the smallest components of your outdoor unit. When refrigerant levels drop slowly over several weeks, the system has to work twice as hard to remove heat and humidity from your indoor air. This extended runtime drives up your energy bills and puts dangerous stress on the compressor motor.

A gradual cooling loss is one of the most deceptive problems a homeowner can face. Because the temperature shift happens slowly, you might not notice the decline until the hottest part of the afternoon when the system simply cannot keep up. Recognizing the physical signs of a leaky Schrader valve—specifically faint hissing or visible oil residue on the service valve—is a crucial first step in restoring your home's efficiency before a minor leak turns into a complete system breakdown.

What Is a Schrader Valve on an AC Condenser?

To understand why a small leak causes such significant cooling issues, it helps to know exactly what this component does. A Schrader valve on an air conditioning condenser looks and functions almost exactly like the air valve on a car or bicycle tire. It is a small, threaded brass service port sticking out of the refrigerant lines near your outdoor unit. These ports serve as the primary access points for technicians to interact with the sealed refrigeration cycle.

The Anatomy of a Service Port

Inside the brass housing of the service port sits the valve core. This core features a tiny depressor pin and a delicate rubber O-ring seal. When a professional connects their gauge manifold hoses to these ports, the hose depresses the pin, opening the valve and allowing the technician to check internal pressures, recover old refrigerant, or add new refrigerant. As soon as the hose is removed, the pin pops back up, and the rubber O-ring creates an airtight seal to keep the refrigerant securely inside the system.

While the design is simple, the operating conditions are extreme. Modern residential cooling systems utilize R-410A refrigerant, which operates at incredibly high pressures often exceeding 400 PSI on the high side of the system. This immense pressure puts constant, relentless strain on those tiny rubber seals. Furthermore, the Miami coastal environment accelerates wear on outdoor unit components. In our years of providing HVAC services across Miami, we've found that the combination of extreme internal pressure and harsh external conditions means these small valves carry a heavy burden in keeping your home comfortable.

Why Schrader Valve O-Rings Fail After Peak Summer

The Problem: You start noticing a gradual decline in your air conditioner's ability to pull humidity out of the air, and the indoor temperature creeps up despite the thermostat setting. The system is low on refrigerant, but there is no obvious damage to the large copper lines or the aluminum fins.

The Cause: Schrader valve O-rings fail primarily due to a combination of severe thermal stress and environmental degradation. As your air conditioner cycles on and off throughout the summer, the refrigerant lines experience rapid temperature swings. This constant thermal expansion and contraction forces the rubber O-rings inside the valves to expand and shrink repeatedly. Over months of relentless operation, the rubber eventually loses its elasticity, turning hard and brittle. By the time September arrives at the end of peak summer stress, these weakened seals are highly susceptible to cracking and failing.

The Impact of Miami's Coastal Climate

Our Air On Demand installation and repair crews know exactly how massive a role the local environment plays in the lifespan of your outdoor HVAC components. Miami's intense year-round heat, high humidity, and coastal salt air create a highly corrosive environment that prematurely ages both metal and rubber parts. Salt-laden air constantly blows across the outdoor condenser, accelerating the oxidation of the brass valve housings and drying out the internal rubber seals much faster than in inland climates. We consistently see that this coastal weathering means O-rings which might last a decade in other regions can degrade in just a few years here.

The Solution: The best defense against degraded O-rings is early detection and professional replacement. Because the rubber degrades naturally over time due to heat, pressure, and salt air, routine inspections are critical. Catching a brittle O-ring before it completely blows out prevents a total loss of refrigerant, saving the system from catastrophic compressor damage and keeping the repair simple and straightforward.

Telltale Signs of a Leaky Schrader Valve

We always tell our customers that you do not need specialized gauges or technical training to spot a failing service port. In fact, visual and auditory clues are often the most reliable early warning signs. If you suspect your system is losing refrigerant, you can safely inspect the exterior of the outdoor cabinet without touching any of the electrical or pressurized components. Knowing what to look and listen for can help you understand why an AC hissing sound requires immediate attention.

Spotting Oil Residue

• The role of refrigerant oil: Refrigerant does not travel through your system alone; it carries a specialized lubricating oil to keep the compressor motor running smoothly.

• The oily footprint: When refrigerant gas escapes through a compromised Schrader valve, it brings microscopic droplets of this oil with it.

• What to look for: Inspect the area around the brass service ports. Look for a dark, greasy spot, a wet appearance, or visible oil residue accumulating directly on or around the valve threads.

• Dust accumulation: Because the leaking oil is sticky, it quickly attracts dirt and debris. A service port that is unusually dirty or caked in grime compared to the rest of the unit is a strong indicator of a slow leak.

Listening for the Hiss

• The sound of escaping pressure: A compromised O-ring cannot hold back the 400+ PSI of pressure inside the lines. This creates a distinct auditory signal.

• The pitch and consistency: Listen closely to the area near the valves. A leaky Schrader valve produces a continuous, faint hissing or bubbling sound.

• Checking when off: The most reliable way to confirm this sound is to listen when the condenser fan and compressor are completely powered down. A genuine leak will continue to hiss even when the unit is not actively cycling.

These two physical signs—faint hissing or visible oil residue on the service valve—are the most definitive ways a homeowner can diagnose a potential valve failure before calling in a professional for verification.

Normal Pressure Equalization vs. Continuous Valve Leaks

It is important to differentiate between normal operational noises and actual leaks to prevent unnecessary panic. Outdoor air conditioning units are inherently noisy machines, and they make a variety of sounds as they manage high-pressure gases. Not every hiss indicates a failing component.

• Sound Duration — Normal Pressure Equalization: Brief hiss lasting 30 to 60 seconds. — Continuous Valve Leak: Continuous, uninterrupted hissing that never stops.

• Timing of Sound — Normal Pressure Equalization: Occurs immediately after the compressor shuts off. — Continuous Valve Leak: Persists at all times, even hours after the unit is off.

• Visual Appearance — Normal Pressure Equalization: Service ports remain completely dry and clean. — Continuous Valve Leak: Visible oil residue or greasy dirt buildup on the valve.

• Cooling Performance — Normal Pressure Equalization: System maintains steady, reliable cooling power. — Continuous Valve Leak: Gradual, noticeable loss of cooling efficiency indoors.

• Cause of Sound — Normal Pressure Equalization: High and low pressures balancing inside the system. — Continuous Valve Leak: Failing rubber O-ring allowing refrigerant to escape.

Normal pressure equalization is simply the system relaxing. When the compressor turns off, the high-pressure liquid and low-pressure gas need to balance out, which pushes refrigerant through the metering device, occasionally creating a brief hissing noise. A Schrader valve leak, on the other hand, is a mechanical failure that requires intervention.

Normal AC Sounds vs. Schrader Valve Leaks

Environmental Regulations and the Danger of DIY Refrigerant Handling

When we arrive at a home, we sometimes hear that the immediate temptation was to grab a wrench and try to tighten the port to stop the hiss. However, handling air conditioning refrigerant is absolutely not a do-it-yourself task. The extreme pressures involved and the toxicity of the chemicals make tampering with service ports incredibly dangerous for untrained individuals.

The Risks of Over-Tightening

If you attempt to tighten a brittle, degraded Schrader valve with standard hand tools, you run a high risk of snapping the brass core entirely. What started as a slow, manageable leak can instantly turn into a catastrophic blowout, rapidly venting the entire refrigerant charge directly into your face and the atmosphere. This not only poses a severe freeze-burn risk to your skin and eyes but also guarantees a much more expensive repair bill.

EPA Section 608 Strict Guidelines

Beyond the physical dangers, there are strict legal realities. The Environmental Protection Agency (EPA) Section 608 regulations strictly prohibit the intentional venting of refrigerants into the atmosphere due to their ozone-depleting and greenhouse gas properties. It is a legal requirement that only certified technicians recover, handle, and recharge refrigerant. Licensed professionals use specialized electronic leak detection equipment to accurately pinpoint valve leaks and safely handle refrigerant according to EPA regulations. This ensures the job is done safely and legally, which is why having a professional perform routine AC maintenance is so vital in the Miami coastal environment, where salt air accelerates wear on outdoor unit components.

How Professionals Diagnose and Repair Valve Leaks

Understanding the professional repair process helps demystify the situation and provides peace of mind that a leaky valve is a routine, manageable fix when caught early. You do not need to replace the entire condenser just because a tiny O-ring failed in September at the end of peak summer stress. When you call Air On Demand for AC service in Miami, our technicians follow a precise, safety-first protocol.

1. Verification and Pinpointing: The technician begins by verifying the exact source of the leak. They utilize highly sensitive electronic leak detectors (often called "sniffers") that beep when they detect refrigerant gas in the air. To confirm the exact microscopic failure point, they apply a specialized micro-bubble soap solution over the valve. If the valve is leaking, the escaping gas will blow highly visible bubbles.

2. Safe Core Removal: Once confirmed, the technician does not need to empty the entire system. They attach a specialized tool called a valve core removal tool. This device locks onto the service port and creates an airtight vacuum chamber. The technician can unscrew the broken valve core inside this chamber and extract it without losing the system's remaining refrigerant charge.

3. Installing the New Core: A brand-new valve core, complete with a fresh, pliable rubber O-ring, is inserted through the tool and threaded securely into the brass housing. The tool is then removed, and the new seal is tested with bubbles to ensure it is completely airtight.

4. Recharging and Balancing: Finally, the technician connects their digital gauges to check the system's total refrigerant charge. They will carefully weigh in the exact amount of new refrigerant needed to replace what was lost, ensuring optimal pressure levels are restored. Fixing this small component promptly prevents the compressor from overheating or the indoor evaporator coil from freezing into a block of ice.

Restore Your Cooling Safely Before Fall

A slow loss of cooling power can make your home miserable, but the solution is often simpler than you think. A small oily spot or a faint hissing or visible oil residue on the service valve is a clear indicator of a failing Schrader valve. While the Miami climate is tough on these small components, addressing the issue promptly means a quick, routine professional fix rather than a catastrophic system failure.

If your system is struggling to keep up and you suspect a leak, do not wait for the unit to freeze over completely. Reach out to our local experts to verify the leak, replace the degraded core, and restore your system's cooling efficiency. For prompt, professional assistance, trust the experienced team at Air On Demand and our Miami AC repair services to keep your home comfortable year-round.

Frequently Asked Questions

How do you know if your AC Schrader valve is leaking?
The most reliable indicators are visual and auditory clues at the outdoor unit. You will typically notice a faint, continuous hissing sound coming from the brass service ports, even when the unit is off. Additionally, a leaking valve will often leave a dark, greasy spot or visible oil residue on the threads, which quickly attracts dirt and grime.

Is a hissing AC unit always a leak?
No, not every hissing sound indicates a refrigerant leak. It is completely normal to hear a brief hissing sound for 30 to 60 seconds immediately after the air conditioner shuts off, which is just the internal pressures equalizing. However, if the hiss is continuous and never stops, or if it is accompanied by a loss of cooling power, it is highly likely to be a leak.

Why do AC Schrader valves fail?
These valves fail primarily due to the degradation of the tiny rubber O-ring inside the core. Constant thermal expansion and contraction from daily use, combined with the extreme internal pressure of modern refrigerants, cause the rubber to turn brittle over time. In our daily service calls across Miami, we see harsh salt air and high heat further accelerate this wear and tear.

Can a Schrader valve cause a freon leak?
Yes, a compromised Schrader valve is one of the most common causes of slow refrigerant leaks. Because the valve's rubber O-ring is the only barrier keeping the high-pressure gas inside the system, a cracked or hardened seal will allow refrigerant to slowly seep out into the atmosphere, eventually causing the system to lose its cooling capacity.

Why is my outdoor AC unit hissing?
If your outdoor unit is hissing constantly, it usually means high-pressure refrigerant gas is escaping through a tiny opening. This is most commonly found at the Schrader valve service ports, but it can also occur if there is a pinhole leak in the copper refrigerant lines or the condenser coil itself. Any continuous hiss requires professional diagnosis.

How does coastal salt air affect outdoor AC components?
Coastal salt air creates a highly corrosive environment that rapidly accelerates the oxidation and degradation of outdoor HVAC equipment. The salt-laden moisture attacks aluminum fins, rusts steel cabinets, corrodes brass valve housings, and dries out rubber seals much faster than in non-coastal regions, making routine maintenance and early leak detection essential.

Post-Hurricane Power Surges and Your AC Compressor placeholder-image  | Air On Demand
5 min read

Post-Hurricane Power Surges and Your AC Compressor

Most homeowners think lightning is the biggest threat during a storm. In reality, repetitive grid fluctuations as power is restored are what silently degrade your AC compressor windings.

When the Storm Passes: The Immediate Threat to Your Cooling System

At Air On Demand, our team has spent years helping Miami homeowners navigate the height of the September hurricane season, which brings a familiar routine: tracking the forecast, securing the property, and eventually breathing a sigh of relief when the worst of the weather moves on. But while the physical winds may have died down, understanding the hidden danger of post-hurricane power surges and your AC compressor is critical before the next storm hits. Most homeowners assume that once the sky clears and the utility trucks begin their work, their home appliances are safe. Unfortunately, this is exactly when your cooling equipment is at its most vulnerable.

If you need help evaluating your air conditioning systems or require emergency AC repair in Miami, our team is ready to assist.

In our experience servicing local HVAC equipment, the true danger to your home comfort system rarely comes from a direct lightning strike. Instead, the threat lies in the chaotic, repetitive grid fluctuations that occur as power is restored to neighborhoods across the region. When utility companies work to bring sections of the grid back online, the supply of electricity is rarely smooth. Power flickers, drops, and surges repeatedly. During these moments, homeowners face a critical decision: simply hoping that their standard electrical breakers will hold up against the erratic voltage, or taking proactive steps to install dedicated HVAC surge protection.

The Post-Storm Electrical Environment

Miami's severe tropical weather creates unique challenges for utility infrastructure. After a major weather event, tree branches, flooded substations, and wind-damaged lines cause localized grid instability. This instability means the electricity flowing into your home is highly inconsistent. For low-draw devices like LED lights or phone chargers, these fluctuations are mostly a nuisance. However, for a high-draw appliance like a central air conditioner or heat pump, this erratic power delivery is incredibly stressful. The sudden starts and stops force the system's motors to pull massive amounts of current, creating immense heat and electrical strain on the internal components.

The Reality of Grid Restoration: More Than Just Lightning Strikes

The Problem: When most people think of power surges, they picture a massive, direct lightning strike hitting a utility pole and frying every television on the block. Because direct strikes are relatively rare, many homeowners believe their cooling equipment is safe as long as the storm didn't score a direct hit on their property. However, this misconception leaves expensive equipment completely exposed during the days following a major weather event.

The Cause: The actual threat comes from the standard process of utility grid restoration. As power is routed back into a neighborhood, it frequently flickers. This creates two distinct electrical hazards: brownouts and voltage spikes. A brownout occurs when the voltage drops significantly below normal levels. Because an air conditioner still needs a specific amount of power to run, a drop in voltage forces the system to pull more amperage to compensate, which generates dangerous amounts of heat. Conversely, a voltage spike sends a sudden, massive wave of electricity into the home, far exceeding what the equipment was designed to handle.

The Solution: Understanding that these repetitive micro-fluctuations send erratic electrical loads directly to major household appliances is the first step in protecting your home. High-draw equipment is particularly vulnerable to these rapid on-and-off cycles. The aftermath of a Miami storm often involves localized grid instability that can last for days, meaning your system might be subjected to dozens of minor surges and brownouts before the power supply fully stabilizes. Recognizing that the September hurricane season brings prolonged periods of grid instability helps homeowners shift their focus from worrying about lightning to preparing for the realities of power restoration, especially as we transition into the early fall season.

Silent Degradation: What Happens Inside the Unit

To understand why these grid fluctuations are so destructive, it helps to look at the heart of your cooling system: the compressor. The compressor is responsible for pumping refrigerant throughout the system, and it requires a massive, stable draw of electricity to function properly. When erratic power hits the unit, it attacks the AC compressor windings—the tightly coiled copper wires inside the motor that generate the magnetic field required to turn the compressor.

This leads to a phenomenon known as silent degradation. When voltage spikes exceed the system's operating limits, they do not always cause an immediate, catastrophic failure. Instead, they slowly compromise the electrical components over time. You might turn your thermostat down after a storm, hear the unit hum to life, and assume everything is fine. This creates a false sense of security while the internal damage actually worsens with every cooling cycle. Over the following weeks, the system works harder, runs hotter, and eventually fails completely long after the storm has passed.

The Vulnerability of Electrical Insulation

The AC compressor windings are coated in a thin layer of protective lacquer insulation. This coating is designed to keep the tightly packed copper wires from touching each other and shorting out. However, this insulation is highly sensitive to extreme heat and excess voltage. When a power surge or brownout forces the motor to run hot, that protective coating begins to bubble, melt, and break down.

Once this coating degrades, the risk of a catastrophic short circuit increases exponentially. Bare wires touch, electrical current arcs where it shouldn't, and the motor eventually burns out. Because these failures can be incredibly complex to trace back to a specific weather event, it requires a trained eye to spot the damage. A pattern we see often at Air On Demand is systems failing weeks after a storm, right as homeowners are starting to schedule their early fall tune-ups. Our expertise lies in diagnosing these specific, complex post-storm electrical failures that other contractors often miss. If you suspect your system has been compromised, reaching out for professional Miami AC repair services is the safest way to assess the health of your compressor.

The Cycle of Silent Degradation in HVAC Systems

Why Whole-Home Breakers Fail to Protect High-Draw Equipment

A common misconception among homeowners is that the standard electrical panel in their garage provides sufficient protection for all their appliances. While the breakers in your panel are a critical safety feature, they are designed with a very specific, limited purpose. They exist to protect the house's wiring from overloading and catching fire, not to protect sensitive electronic appliances from external voltage spikes.

Furthermore, the standard plug-in power strips you might use for a television or computer are entirely irrelevant for hardwired, high-voltage cooling systems. A central air conditioner is wired directly into the home's electrical system, meaning it requires a specialized, dedicated line of defense to intercept voltage anomalies before they reach the AC compressor windings.

• Primary Purpose — Standard Whole-Home Breaker: Protects the home's internal wiring from overloading and overheating. — Dedicated HVAC Surge Protector: Protects the specific HVAC equipment from external voltage spikes and surges.

• Trigger Mechanism — Standard Whole-Home Breaker: Trips when the equipment pulls too much amperage from the panel. — Dedicated HVAC Surge Protector: Clamps down when too much voltage attempts to enter the equipment from the grid.

• Reaction Time — Standard Whole-Home Breaker: Relatively slow; designed to tolerate brief spikes before tripping. — Dedicated HVAC Surge Protector: Instantaneous clamping speed to redirect excess voltage into the ground.

• Protection Level for AC — Standard Whole-Home Breaker: Minimal; allows micro-fluctuations to pass through to the motor. — Dedicated HVAC Surge Protector: Maximum; acts as a sacrificial barrier for sensitive electrical components.

As the comparison shows, the massive electrical draw of a cooling system requires a completely different approach to electrical safety. The reaction time of a standard breaker is simply too slow to stop a micro-fluctuation from reaching the equipment. By the time a standard breaker physically trips and breaks the circuit, the excess voltage has already traveled down the line and struck the motor.

Warning Signs of Electrical Damage After a Storm

If your neighborhood has recently experienced the rolling blackouts and flickering lights typical of the September hurricane season, our technicians recommend monitoring your cooling equipment closely as we move into early fall. Because silent degradation takes time to present as a total failure, catching the early warning signs can sometimes save the system from catastrophic burnout. Here is what you should be looking and listening for in the days following a major weather event:

• Repeatedly tripping the circuit breaker: If the unit trips the breaker immediately upon startup, it usually means the AC compressor windings have already suffered a short circuit and are pulling dangerous amounts of amperage.

• Unusual electrical noises: Loud humming, heavy buzzing, or a distinct hissing sound coming from the outdoor cabinet often indicates severe electrical strain, a locked rotor, or internal shorting. (For more details on what these sounds mean, diagnosing unusual AC noises is a great next step).

• Failure to turn on: If the thermostat indicates a call for cooling, the screen is active, but the outdoor unit remains completely silent and still, the internal capacitors or contactors may have been fried by a surge.

• Inconsistent cooling performance: If the air coming from the vents is lukewarm, or if the system is short-cycling (turning on and off rapidly without completing a full cooling cycle), the electrical components are likely struggling to maintain a consistent magnetic field in the motor.

• Acrid burning smells: A faint smell of burning plastic or ozone near the outdoor cabinet or the indoor air handler is a massive red flag that wire insulation has melted.

If you notice any of these symptoms, turn the thermostat to the "off" position immediately. Continuing to force a compromised system to run will only accelerate the damage and guarantee a more expensive repair.

Proactive Defense: The Role of a Dedicated HVAC Surge Protector

In our years of protecting Miami's cooling systems, we've found that the most effective way to break the cycle of silent degradation is to stop the erratic voltage before it ever reaches the equipment. This is where a dedicated HVAC surge protector becomes a vital addition to your home's electrical defense. Unlike standard power strips, an HVAC surge protector is a heavy-duty device wired directly into the disconnect box located near your outdoor compressor unit.

How It Works: The protector acts as a highly sensitive, high-speed gatekeeper. When normal voltage flows from the grid, the protector allows it to pass through to the air conditioner seamlessly. However, the moment a voltage spike hits the line, the internal components of the surge protector instantly clamp down. It absorbs the excess electrical energy and redirects it safely into the earth through the system's ground wire, keeping it far away from the AC compressor windings.

A Sacrificial Layer: In the event of a massive surge, the protector acts as a sacrificial layer. It is designed to take the fatal electrical blow so that your expensive cooling equipment does not have to. If the protector is destroyed while stopping a surge, replacing it is a minor, cost-effective insurance policy compared to the massive expense of a full AC replacement. (Note that if you do require a replacement, federal tax credits may apply to qualifying high-efficiency heat pump installations, though you should always verify current programs with your utility or a tax professional).

Professional Installation is Mandatory: It is critical to stress that installing these devices involves handling high-voltage components and interacting directly with the main electrical supply. This work MUST be performed by a licensed professional. Attempting to wire a surge protector yourself is incredibly dangerous and can easily void your equipment's manufacturer warranty.

Frequently Asked Questions About Storms and AC Protection

Can a power surge damage an AC compressor?

Yes, a power surge can severely damage an AC compressor. When excess voltage enters the system, it generates extreme heat that melts the thin lacquer insulation coating the internal windings. Once that insulation is compromised, the wires can touch, creating a short circuit that permanently destroys the motor.

How do I know if a power surge ruined my AC?

The most common signs of surge damage include a system that repeatedly trips the circuit breaker the moment it tries to turn on, loud humming or buzzing noises from the outdoor unit, or a complete failure to power up despite a working thermostat. If you smell burning plastic near the unit after a storm, that is also a strong indicator of fried electrical components.

Do surge protectors work for air conditioners?

Yes, but only if they are dedicated, hardwired HVAC surge protectors. Standard plug-in power strips cannot handle the massive electrical draw of a central air conditioner, nor can they be connected to hardwired equipment. A professionally installed HVAC surge protector is specifically designed to clamp down on high-voltage spikes and redirect them safely to the ground.

Should I turn off my AC during a hurricane?

It is highly recommended to turn off your AC at the thermostat during a severe thunderstorm or hurricane. By keeping the system off during the height of the storm and during the initial, chaotic stages of grid restoration, you prevent the unit from trying to operate on unstable, fluctuating power, thereby reducing the risk of electrical damage.

How long does it take for silent degradation to cause a total system failure?

Silent degradation is unpredictable and can take anywhere from a few days to several weeks to cause a total failure. The initial surge weakens the wire insulation, but the system may continue to run normally for a short time. With each subsequent cooling cycle, the compromised wires generate more heat until they finally short out completely.

Secure Your Cooling System Against Grid Instability

Surviving the high winds and heavy rains of a major weather event is only half the battle; surviving the unpredictable grid restoration process is the other. The erratic power that flows through your neighborhood in the days following a storm is the true threat to your home comfort system. Understanding the hidden danger of post-hurricane power surges and your AC compressor allows you to take control of the situation before the damage is done.

There is immense peace of mind that comes with knowing your most expensive home appliance is shielded from unpredictable voltage spikes. Don't wait until the AC compressor windings are already compromised by a failing grid. Schedule a professional early fall assessment with our team and have a dedicated HVAC surge protector installed before the next major weather event hits our coast.

Transitioning from Automotive AC Repair to Residential HVAC placeholder-image  | Air On Demand
5 min read

Transitioning from Automotive AC Repair to Residential HVAC

Trading 12V DC automotive systems for 240V residential AC requires specific high-voltage training. Find out which mechanical skills transfer directly and what certifications you need.

The Core Challenge: Translating Automotive AC Diagnostics to Home Cooling

You know exactly how to diagnose a struggling compressor under a cramped hood, but transitioning from automotive AC repair to residential HVAC brings a completely different set of technical roadblocks. At Air On Demand, our team frequently trains experienced auto mechanics who already possess a deep, practical understanding of how refrigeration cycles work. You know how to track down leaks, read gauges, and understand the relationship between pressure and temperature. The primary barrier to entry is not learning how air conditioning functions—it is translating that knowledge to a completely new physical and electrical environment.

The concrete problem we see most mechanics face is moving away from engine-driven compressors and low-voltage systems to handle high-voltage residential equipment safely. Navigating the jump between 240V AC and 24V control circuits vs 12V DC power requires targeted retraining, not starting from scratch. You do not need a beginner's course in thermodynamics; you need a specific roadmap that bridges your existing mechanical aptitude with residential building codes, high-voltage safety protocols, and home ductwork dynamics.

Making this career pivot is highly rewarding, offering excellent job security and consistent year-round work. To get started, you must identify the exact certifications and electrical retraining required to safely navigate HVAC careers.

Directly Transferable Skills: Why Mechanics Have a Head Start

One of the biggest misconceptions we hear from applicants moving into the home heating and cooling industry is that you have to start at the absolute bottom. In our experience hiring and training technicians across Miami, automotive technicians enter the field with a massive head start. The mechanical and thermodynamic principles that cool a sedan are identical to the principles that cool a four-bedroom house.

The foundational components are the same:

• The Compressor: While driven by an electric motor rather than an engine belt, it still pumps refrigerant vapor and raises its pressure.

• The Condenser: It still rejects heat to the outside air, turning high-pressure vapor back into a high-pressure liquid.

• The Expansion Valve (TXV): It still meters the flow of liquid refrigerant into the indoor coil, dropping its pressure and temperature.

• The Evaporator: It still absorbs heat from the indoor air, boiling the liquid refrigerant back into a vapor to return to the compressor.

Because these fundamental steps remain identical across both fields, your diagnostic mindset is immediately valuable. Troubleshooting a pressure imbalance, identifying a restricted metering device, or tracking down a microscopic refrigerant leak requires the exact same logical deduction you use in the auto shop.

Mastery of the Refrigeration Cycle

Mechanics already understand phase changes and heat transfer. You are familiar with identifying superheat and subcooling concepts to determine if a system is properly charged or if a component is failing. When our technicians encounter a residential system with low airflow across the evaporator coil, it will freeze up—just like a car's AC system will freeze up if the cabin blower motor fails.

Furthermore, many of your existing tools and procedures transfer directly. The shared use of manifold gauges, vacuum pumps, and refrigerant recovery machines means you already know how to pull a deep vacuum and why removing non-condensables from a system is critical. While you will need different hose adapters for residential refrigerants, the physical process of recovering, evacuating, and charging a system utilizes the exact same muscle memory. The true transition begins when you step away from the sealed mechanical loop and look at how the equipment is powered.

The Electrical Learning Curve: 12V DC vs. 240V AC Power

The most significant technical gap we see mechanics face when transitioning to residential HVAC revolves entirely around electricity. In an automotive setting, you are dealing with a chassis-grounded 12V DC electrical system. In a home, you are dealing with alternating current, requiring a completely different approach to diagnostics, safety, and component testing. A successful HVAC service technician must master this electrical divide before ever touching a live wire.

Residential air conditioners and heat pumps operate on a dual-voltage system. The major, heavy-lifting components—like the outdoor compressor and the indoor blower motor—typically require high-voltage 240V AC power. However, the thermostat on the living room wall does not operate on 240 volts. Instead, a transformer steps that high voltage down to a safe, low-voltage 24V AC control circuit.

Understanding Dual-Voltage Residential Systems

This separation of high-voltage power and low-voltage control circuits is the primary focus of the electrical diagnostic retraining we provide. When a homeowner sets their thermostat to cool, the thermostat sends a 24V signal out to the outdoor unit. That low-voltage signal energizes the magnetic coil of a contactor. When the contactor pulls in, it closes a heavy-duty switch, allowing the 240V AC power to flow into the compressor and condenser fan motor.

Comparing the electrical environments:

• Primary Power Source — Automotive AC Diagnostics: 12V DC (Battery / Alternator) — Residential HVAC Diagnostics: 240V AC and 24V control circuits vs 12V DC

• Compressor Drive — Automotive AC Diagnostics: Mechanical (Engine Belt) — Residential HVAC Diagnostics: Electrical (Internal 240V Motor)

• Control Logic — Automotive AC Diagnostics: Vehicle ECU / BCM — Residential HVAC Diagnostics: 24V Thermostat & Defrost Boards

• Safety Risk Level — Automotive AC Diagnostics: Low voltage shock risk, high heat — Residential HVAC Diagnostics: Lethal high-voltage shock risk (240V)

• Diagnostic Tooling — Automotive AC Diagnostics: 12V Test Light, OBD2 Scanner — Residential HVAC Diagnostics: True RMS Multimeter, Amp Clamp

Because of these differences, heat pump control boards and residential defrost controls require specific electrical troubleshooting retraining. You can no longer rely on an OBD2 scanner to tell you which sensor is out of range. You must use a multimeter to trace 24V control voltage through a series of safety switches, pressure limits, and relays to find exactly where the circuit is broken. Emphasizing the critical safety protocols required when handling high-voltage equipment is why our formal apprenticeships at Air On Demand are heavily focused on electrical theory rather than refrigeration basics.

Transferable vs. New Skills for Mechanics Entering HVAC

Certification Shifts: Moving from EPA 609 to EPA Section 608 Universal

Beyond the electrical learning curve, there are strict legal and regulatory requirements for handling residential refrigerants. If you have been servicing car air conditioners, you likely hold an EPA Section 609 certification. Our service managers always clarify to new applicants that an existing automotive EPA 609 certification does not legally cover residential HVAC work. The Environmental Protection Agency strictly separates motor vehicle air conditioning (MVAC) from stationary residential and commercial equipment.

To legally attach gauges to a home air conditioner, recover refrigerant, or purchase cylinders of residential refrigerants like R-410A or the newer mildly flammable R-32, you must obtain an EPA Section 608 Universal Certification. The transition from automotive refrigerants (like R-134a or R-1234yf) to residential refrigerants also means dealing with significantly higher operating pressures, which requires updated safety knowledge.

The educational steps required to study for and pass the EPA 608 exam include:

1. Passing the Core Section: This covers general safety, ozone depletion theory, the Clean Air Act, and proper recovery techniques. You must pass this section to earn any level of 608 certification.

2. Passing Type I (Small Appliances): This covers equipment containing five pounds of refrigerant or less, such as window units and domestic refrigerators.

3. Passing Type II (High-Pressure Appliances): This is the most critical section for residential HVAC technicians. It covers high-pressure refrigerants used in split-system air conditioners and heat pumps.

4. Passing Type III (Low-Pressure Appliances): This covers low-pressure systems, typically large commercial chillers.

5. Achieving Universal Status: By passing the Core and all three Types, you earn your EPA Section 608 Universal Certification, allowing you to legally work on any stationary HVAC system regardless of size or refrigerant type.

Navigating the Work Environment: From the Shop to the Attic

The technical skills are only half of the transition; the physical work environment represents the other half. Working under a hood or standing beneath a hydraulic lift provides a relatively controlled, stationary shop environment. You have immediate access to your tool chest, compressed air, and a parts room just steps away. Residential HVAC service introduces a completely different physical reality.

Instead of pulling a car into your bay, you are navigating tight residential attics, muddy crawlspaces, and sun-baked rooftops. The physical demands of carrying heavy equipment, vacuum pumps, and recovery cylinders up extension ladders cannot be overstated. You are transitioning from a stationary shop environment to a highly mobile service role, which means your service van becomes your rolling shop, and you will be interacting directly with homeowners on their property.

Furthermore, the environment itself becomes part of the diagnostic process. In an automobile, the cabin is a small, factory-sealed box with engineered airflow. In a home, airflow and ductwork dynamics introduce a massive new layer of environmental diagnostics. You must learn how to measure static pressure, identify leaky return ducts pulling in hot attic air, and calculate whether the blower motor is moving enough cubic feet per minute (CFM) across the coil.

This environmental shift is especially notable in South Florida. At Air On Demand, we know firsthand that Miami's year-round extreme heat and high humidity makes attic work physically demanding, but it also guarantees exceptional job security and consistent year-round work compared to seasonal auto repair lulls. When you combine your mechanical skills with the stability of residential HVAC apprenticeships in Miami, you secure a career that is virtually immune to economic downturns.

Strategic Timing: Why Fall is the Ideal Time to Begin Retraining

If you are considering making the jump from auto mechanics to home cooling, timing your transition strategically can make a massive difference in your training experience. We always advise that September and the early fall season represent a strategic window for beginning an apprenticeship in the HVAC industry.

During the peak of summer, service companies are running non-stop emergency calls. Technicians are moving as fast as possible to restore cooling to sweltering homes, which leaves less time for patient, step-by-step instruction. Transitioning out of peak summer cooling demand allows for more structured, hands-on training. In the fall, the pace becomes slightly more manageable, giving our senior technicians the time to properly explain the nuances of 240V AC and 24V control circuits vs 12V DC power without the pressure of a dozen backed-up emergency calls waiting on the board.

This timing prepares transitioning mechanics to be fully up to speed, properly certified, and comfortable with high-voltage diagnostics before the next high-demand cooling season hits. Framing the transition as an investment in long-term career stability means choosing an employer who understands your background. Air On Demand actively seeks out crossover talent for our Miami apprenticeships, offering targeted hands-on training that respects a mechanic's existing knowledge while safely and thoroughly bridging the high-voltage electrical gap.

Frequently Asked Questions About the Automotive to HVAC Transition

Can an auto mechanic transition to HVAC easily?

Yes, because the core understanding of the refrigeration cycle is identical across both fields. An experienced mechanic already knows how compressors, condensers, and evaporators manipulate refrigerant to remove heat. The main learning curve is mastering high-voltage electrical diagnostics and understanding residential ductwork dynamics, which is why targeted retraining is necessary.

Is residential HVAC harder than automotive AC?

It is not necessarily harder, but it requires different safety protocols due to 240V AC power and involves different physical environments like attics and rooftops. Automotive AC work often involves tighter spaces under a dashboard or hood, while residential HVAC requires carrying tools up ladders and working in confined, unconditioned spaces. Both require a high level of critical thinking and mechanical aptitude.

Do I need EPA 608 if I already have EPA 609?

Yes, you absolutely do. EPA 609 only covers motor vehicle air conditioning and does not legally permit you to work on stationary residential or commercial equipment. You must obtain an EPA Section 608 Universal Certification to legally purchase, recover, and handle residential refrigerants like R-410A.

What specific tools transfer from auto mechanics to HVAC?

Basic hand tools, wrenches, ratchets, and cordless drills transfer immediately. Multimeters can transfer if they are rated for high voltage (Category III or IV) and have an amp clamp. Manifold gauge sets and vacuum pumps often transfer, though you will need HVAC-specific hose adapters for residential refrigerants, and eventually, you will need specialized tools like digital psychrometers and duct calculators.

Do I have to start completely over in an HVAC apprenticeship?

While you will start as an apprentice to learn residential codes and electrical safety, your existing mechanical aptitude often allows for much faster progression than a true beginner. You do not have to relearn how a compressor works; you simply have to learn how it is powered and controlled in a home setting. Employers highly value this crossover knowledge.

Take the Next Step Toward a Rewarding HVAC Career

A mechanic's existing refrigeration knowledge is a massive advantage in the home service industry. The ability to read gauges, understand superheat, and troubleshoot mechanical failures puts you years ahead of someone entering the trades for the very first time. The key to a successful transition is acknowledging the specific areas where you need retraining—namely, the jump between 240V AC and 24V control circuits vs 12V DC power, and the acquisition of your EPA 608 certification.

At Air On Demand, we encourage transitioning mechanics to seek out employers who value these crossover skills and provide the structured electrical retraining necessary to keep you safe and successful in the field. If you are ready to trade flat-rate auto shop frustrations for the stability of residential home services, explore local opportunities and apply to become an HVAC apprentice with our team today. You will find that a realistic, respectful map of transferable skills and new electrical requirements is exactly what you need to make the jump successfully.

Are Daikin Extended Warranties Transferable When Selling Your Miami Home? placeholder-image  | Air On Demand
5 min read

Are Daikin Extended Warranties Transferable When Selling Your Miami Home?

A 12-year Daikin warranty is a powerful asset during a home sale. Find out exactly what paperwork is required to successfully transfer coverage to your buyer before closing.

Will Your Daikin Warranty Transfer to the Next Homeowner?

Are Daikin Extended Warranties Transferable When Selling Your Miami Home? The short answer is yes, but the process requires specific, timely administrative action to ensure the coverage successfully passes to the new buyer. If you are preparing to list your property, you already know that navigating the precise paperwork required during a hectic real estate transaction can feel overwhelming. Between appraisals, inspections, and title documents, the status of your heating and cooling system's coverage often falls to the bottom of the priority list.

However, leaving this detail to the last minute is a critical mistake. At Air On Demand, we frequently guide Miami homeowners through this exact process, especially during the late-summer back-to-school real estate rush when buyers are hyper-focused on cooling. Homeowners face a clear decision point: proactively initiating the transfer before closing to use the active coverage as verifiable leverage in the sale, or waiting until the last minute and risking the buyer losing the coverage entirely due to missed manufacturer deadlines. When you have invested in premium climate control, proving that the system is protected adds tremendous valuation to your property, provided the paperwork is handled correctly.

To maximize your home's appeal, highlighting your Daikin equipment and specific Daikin Fit systems as fully covered assets can set your listing apart in a crowded market.

Why an Active Warranty is a Premium Asset in the Miami Real Estate Market

Prospective home buyers carry a significant amount of anxiety regarding major appliance replacements, and nowhere is this more pronounced than with residential cooling systems. When a family is preparing to invest in a new property, the fear of an unexpected, catastrophic equipment failure within the first year of ownership looms large. An active warranty directly neutralizes this anxiety, providing tangible peace of mind and financial security for the buyer.

In Miami, this dynamic is amplified by the environment. Our technicians at Air On Demand see firsthand how our subtropical climate subjects HVAC systems to nearly 3,500 cooling hours per year. This constant demand means that local equipment endures heavy wear and tear caused by extreme heat and relentless humidity. Buyers are acutely aware that a cooling system in South Florida works significantly harder than one in a temperate climate, making a warrantied system highly desirable.

Instead of viewing the warranty transfer as a post-sale administrative chore, savvy sellers frame it as a strategic real estate asset. During the highly competitive August late-summer real estate market, when temperatures are peaking and indoor comfort is paramount, a fully covered HVAC system can be the deciding factor that pushes an offer across the finish line.

• Active, Transferred Warranty — Buyer Perception: High confidence, protected investment, lower first-year risk. — Impact on Real Estate Negotiation: Strengthens asking price, reduces requests for seller concessions.

• Expired or Non-Transferred Warranty — Buyer Perception: High risk, potential immediate out-of-pocket expense. — Impact on Real Estate Negotiation: Often leads to requests for closing cost credits or price reductions.

By securing the coverage transfer proactively, you transform a mechanical component of your house into a documented financial benefit that real estate agents can actively market to prospective buyers.

Understanding the Rules for the Daikin 12-Year Extended Warranty Transfer

Not all warranties are created equal, and understanding the specific rules governing your coverage is essential before making promises to a buyer. The Daikin 12-year extended warranty is one of the most robust protections in the industry, but it operates under strict manufacturer guidelines regarding how and when it can change hands.

In our years of handling Daikin installations and warranty services across Miami, we always emphasize to our customers that a transfer is a formal process requiring official manufacturer approval. It is not an automatic right that simply follows the property deed. If the proper channels are not followed, the manufacturer is under no obligation to honor the remaining term for the new owner.

Base vs. Extended Coverage Rules

The original term length of your coverage depends heavily on whether the system was properly registered immediately after installation. Here is how the coverage tiers typically break down and what they mean for the next homeowner:

• Unregistered Base Coverage: If the equipment was never registered within the initial window (usually 60 days post-installation), it typically defaults to a shorter base term, often covering parts for a fraction of the system's lifespan.

• Registered Extended Coverage: When properly registered, the system qualifies for the Daikin 12-year extended warranty. This is the premium tier that buyers are most interested in retaining.

• Component Specifics: The extended term generally covers vital, high-value components such as internal functional parts and the compressor. Retaining coverage on the compressor is particularly valuable, as it is the heart of the cooling system.

• Term Reversion Risks: Depending on the specific terms of your original agreement, manufacturer guidelines dictate whether the full remaining duration remains intact for the second owner, or if the coverage reverts to a shorter term upon transfer. Reviewing your specific registration documents is the only way to confirm the exact remaining duration.

Sellers must clearly communicate these coverage specifics to buyers so there are no surprises at the closing table. Providing the exact documentation showing the registered status proves the value of the asset being transferred.

Critical Deadlines: The 60 to 90-Day Post-Closing Window

A pattern we see often is that warranties fail to transfer not due to a lack of eligibility, but because of a failure to meet strict administrative deadlines. Manufacturers enforce a rigid timeline to process ownership changes, and missing this window has permanent consequences.

Most transfers must be fully executed within a strict 60 to 90-day window following the official real estate closing date. The clock starts ticking the moment the deed is recorded, not when the buyer moves in. If this window closes before the paperwork is processed, the extended coverage is permanently lost, leaving the new homeowner completely responsible for future component failures.

Key factors to manage during this critical window:

• Manufacturer Administrative Fees: Processing the transfer requires an applicable administrative fee paid directly to the manufacturer. This fee covers the cost of updating the national registration database and issuing new coverage documents.

• Responsibility for Filing: While the buyer ultimately benefits from the coverage, it is often in the seller's best interest to facilitate the paperwork as part of the closing agreement to ensure the terms of the sale are fully met.

• Proactive Communication: Because the August late-summer real estate market moves quickly, waiting until after closing to figure out the requirements is a recipe for missed deadlines.

Our team at Air On Demand strongly advises sellers to initiate the conversation with their HVAC contractor well before the closing date. Gathering the necessary documents while you still own the home prevents last-minute rushing and ensures a seamless handoff once the sale is finalized.

Steps to Successfully Transfer Your Daikin Warranty to a New Buyer

Executing the administrative transfer of a Daikin 12-year extended warranty requires precision. Based on our experience helping countless Miami sellers, missing a single document can delay the process beyond the allowable timeframe. We recommend following these exact administrative steps to ensure the new owner receives their coverage without interruption:

1. Locate the original installation invoice and warranty registration confirmation. These documents prove the exact date the system was installed, the specific model and serial numbers, and that the initial registration was completed on time.

2. Gather all routine professional maintenance records to prove the system is in good standing. Manufacturers need evidence that the equipment has not been neglected. Compile all receipts and service tickets from your licensed HVAC provider.

3. Obtain the official real estate closing documents showing the date of sale and new owner's name. This legal proof of transfer is required to start the 60 to 90-day countdown and verify the identity of the new policyholder.

4. Submit the completed manufacturer transfer form along with the applicable administrative fee within the required 60-90 day window. Ensure the form is filled out completely and accurately, matching the information on the closing documents exactly.

5. Receive written confirmation from the manufacturer that the transfer is complete. Do not consider the process finished until you or the buyer has official written documentation from the manufacturer acknowledging the new coverage status.

Daikin Warranty Transfer Timeline and Checklist

The Role of Professional Maintenance History in Warranty Transfers

Having the right forms is only half the battle; proving the system deserves continued coverage is the other. Manufacturers require verifiable proof that the system has been properly maintained to honor extended warranties. An air conditioning system is a complex mechanical asset, and neglecting routine care places undue stress on critical components, increasing the likelihood of premature failure.

If a homeowner cannot produce a history of professional upkeep, the manufacturer may determine that the equipment has been neglected, which can lead to a denied transfer request. This is why a stack of service receipts is just as important as the original installation invoice.

To prepare for a sale in Miami, FL, sellers should compile these records into a comprehensive "home portfolio" for prospective buyers. This portfolio should include dates of service, detailed notes on what was inspected or cleaned, and the credentials of the servicing company. If you are wondering does skipping maintenance void your Daikin warranty, the reality is that significant gaps in service history are a major red flag for both the manufacturer and the buyer's home inspector.

If you have missing records or gaps in your service history, scheduling a comprehensive, professional inspection right before listing the home can help mitigate concerns. As trusted local Daikin experts, our team at Air On Demand ensures homeowners have the correct documentation, thorough system evaluations, and the verifiable history required to successfully transfer warranties during real estate transactions.

What if the System is Out of Warranty Before You List?

Not every seller is in a position to transfer an active policy. When we evaluate older AC systems during the sweltering August heat, we often find that aging, out-of-warranty cooling equipment is frequently flagged as a major concern during professional home inspections. If your system is older and the original coverage has already expired, you face a different set of challenges when listing your home in Miami, FL.

When buyers see an old system with no safety net, they immediately calculate the cost of a future replacement and factor that into their offer. It is incredibly common for buyers to ask for significant seller concessions, closing cost credits, or outright price reductions if the AC is nearing the end of its functional lifespan.

Signs Your Out-of-Warranty AC Could Derail a Sale:

• Visible rust or severe corrosion on the outdoor condenser cabinet.

• Inconsistent cooling performance during the home inspection.

• Loud, grinding mechanical noises during startup or operation.

• Use of obsolete refrigerants that are no longer actively supported or are prohibitively expensive to recharge.

For many sellers, there is a strong return on investment in upgrading the system prior to listing. Installing a modern, highly efficient unit provides the buyer with a brand-new, unregistered warranty that they can put entirely in their own name. Modernizing the HVAC system significantly boosts the home's overall market appeal, often allowing sellers to command a higher asking price and secure a faster sale. If you are considering this strategic upgrade, exploring Miami AC replacement services before the "For Sale" sign goes up can yield excellent returns at the closing table.

Frequently Asked Questions About Daikin Warranty Transfers

Is a Daikin warranty transferable to a new owner?

Yes, Daikin extended warranties are generally transferable to a new homeowner, provided the seller follows the manufacturer's specific administrative guidelines. The transfer is not automatic; it requires submitting proper documentation and an administrative fee within a strict timeframe after the home sale. Failing to complete this process within the required window will result in the new owner losing the extended coverage.

What happens to a Daikin mini split warranty when I sell my house?

The rules for transferring coverage on a Daikin mini split generally mirror those of traditional central systems, requiring formal paperwork and adherence to deadlines. The new owner can retain the remaining balance of the registered extended term if the transfer is executed correctly. Always verify the specific model's terms, as ductless systems must also show a history of proper professional maintenance to remain eligible.

How do I transfer my Daikin warranty?

To transfer the coverage, you must submit a completed manufacturer transfer form, the official real estate closing documents, the original installation invoice, and the required administrative fee. This packet must be sent to the manufacturer within 60 to 90 days of the real estate closing date. Working with your local HVAC contractor to gather the maintenance records beforehand ensures the application is complete and ready for approval.

What paperwork is needed to transfer an HVAC warranty?

You will need the original installation invoice showing the date and model numbers, the initial warranty registration confirmation, and a documented history of routine professional maintenance. Additionally, you must provide the official real estate closing documents that prove the date of sale and legally identify the new homeowner. Missing any of these documents can cause the manufacturer to deny the transfer request.

Is there a fee to transfer a Daikin extended warranty?

Yes, the manufacturer requires an applicable administrative fee to process the transfer of the Daikin 12-year extended warranty. This fee covers the administrative costs of updating the national database and issuing the new coverage documents to the buyer. This fee must be submitted alongside the transfer form within the strict 60 to 90-day post-closing window.

Secure Your Home's Value with Expert Daikin Documentation Support

A successfully transferred warranty is one of the most powerful selling tools a homeowner can wield in the Miami, FL real estate market. It provides buyers with the ultimate peace of mind, knowing their indoor comfort is protected against unexpected mechanical failures. However, unlocking this value requires precise paperwork, a verifiable history of professional maintenance, and strict adherence to manufacturer deadlines.

Don't let a missed form or a lost receipt jeopardize your home's valuation at the closing table. You need clear confirmation of transferability and the exact steps to take to protect the buyer's coverage. Contact our experts at Air On Demand today to gather your complete maintenance records, verify your current coverage status, or schedule a comprehensive pre-listing inspection to ensure your system is ready for the market.

The Piston to TXV Upgrade: What Happens When You Modernize Half Your AC System placeholder-image  | Air On Demand
5 min read

The Piston to TXV Upgrade: What Happens When You Modernize Half Your AC System

When your outdoor condenser fails in the extreme heat, replacing just half your system requires a critical indoor modification. Here is why a new TXV is an absolute technical necessity.

Navigating a Late-Summer Condenser Failure

Your outdoor condenser has just failed in the sweltering heat, and understanding the piston to TXV upgrade: what happens when you modernize half your AC system is the key to making a smart replacement decision. When a catastrophic breakdown hits your home in late August—just as the kids are heading back to school and the end-of-summer humidity is peaking—the immediate priority is getting the cold air flowing again as quickly as possible. The outdoor unit sits dead in the yard, but the indoor air handler in your closet or attic seems perfectly fine. This creates a highly common dilemma we see all the time at Air On Demand: you want to replace the broken outdoor equipment while leaving the indoor unit untouched to save time and resources.

However, an air conditioning system is not a collection of independent parts; it is a carefully balanced, closed-loop network. When you connect a brand-new, high-efficiency outdoor condenser to an older indoor air handler, you are essentially asking modern technology to communicate with outdated hardware. To make this partial modernization work, a critical, often misunderstood modification must take place inside your home. Upgrading the indoor metering device is not an optional upsell tacked onto your AC installation and replacement quote. It is an absolute technical necessity that determines whether your new equipment will survive its first season or fail prematurely under the heavy cooling load.

Can I Replace Just My AC Condenser?

The short answer is yes, it is physically possible to replace only the outside unit, but doing so comes with strict compatibility rules that must be followed to the letter. In our years of providing HVAC services across Miami FL, our team frequently hears homeowners assume that because the outdoor unit does the heavy lifting of compressing the refrigerant and exhausting the heat, the indoor unit is just a fan blowing air over cold pipes. In reality, the indoor coil and the outdoor compressor are a matched pair that must operate in perfect synchronization.

When you are weighing the options of repairing vs. replacing your AC, you have to consider the "brain" of the refrigerant flow. Inside your indoor air handler sits a small but vital component called the metering device. This part regulates exactly how much liquid refrigerant enters the indoor evaporator coil. If you connect a highly advanced, modern condenser to an older indoor setup without changing this metering device, the system will suffer immediate performance issues.

Here are the critical steps professional technicians take when evaluating partial replacements:

1. Assess the indoor coil condition: Before any partial replacement, we meticulously inspect the indoor coil for leaks, rust, and airflow restrictions. If the coil is failing, replacing only the condenser is a wasted investment.

2. Verify refrigerant type: Older systems use R-22 refrigerant, which is obsolete. Modern systems use R-410A or newer A2L refrigerants. The indoor coil must be rated to handle the pressure of the new refrigerant.

3. Identify the existing metering device: Older air handlers typically use a fixed-orifice piston. Modern condensers require a dynamic valve to manage the flow.

4. Perform the necessary modifications: If the indoor coil is structurally sound and compatible with the new refrigerant pressures, a licensed technician must remove the old piston and braze in a new, responsive valve to ensure the two halves of the system can communicate safely.

Understanding the Hardware: Fixed-Orifice Pistons vs. Thermal Expansion Valves

To understand why modernizing half your system requires an upgrade, you need to know the difference between the two primary types of metering devices: the fixed-orifice piston and the Thermal Expansion Valve (TXV). While they both serve the same basic function—restricting the flow of high-pressure liquid refrigerant so it drops in pressure and turns into a cold gas—they go about it in completely different ways.

A fixed-orifice piston is an older, static device. As the name suggests, it features a small, precisely drilled hole (the orifice) that allows a constant, unchanging volume of refrigerant to pass through. Think of it like a standard garden hose nozzle locked into one position. Whether your home is slightly warm on a mild morning or baking in the late August sun, the piston pushes the exact same amount of refrigerant into the indoor coil. It cannot adjust, adapt, or respond to changing conditions.

A Thermal Expansion Valve (TXV), on the other hand, is a dynamic, highly responsive piece of engineering. A TXV features a sensing bulb strapped to the suction line leaving the indoor coil. This bulb constantly measures the temperature of the refrigerant exiting the coil. If the coil is getting too warm, the TXV actively opens wider to feed more refrigerant. If the coil is getting too cold, the valve throttles back to restrict the flow. Returning to the analogy, a TXV is like a smart irrigation system that measures soil moisture and delivers the exact amount of water needed at any given second.

• Refrigerant Flow — Fixed-Orifice Piston: Static and constant, regardless of demand. — Thermal Expansion Valve (TXV): Dynamic and variable, adjusting in real-time.

• Response to Heat/Humidity — Fixed-Orifice Piston: Cannot adapt to sudden spikes in indoor load. — Thermal Expansion Valve (TXV): Actively opens and closes based on coil temperature.

• Efficiency — Fixed-Orifice Piston: Lower; wastes energy during mild cooling loads. — Thermal Expansion Valve (TXV): High; maximizes efficiency by optimizing refrigerant use.

• Best Suited For — Fixed-Orifice Piston: Older, lower-efficiency AC units (Sub-13 SEER). — Thermal Expansion Valve (TXV): Modern, high-efficiency SEER2 condensers.

Piston vs. TXV: How Refrigerant Metering Works

Why High-Efficiency SEER2 Condensers Demand a TXV

The HVAC industry has undergone massive regulatory changes in recent years, specifically with the rollout of the updated Department of Energy SEER2 guidelines. SEER2 stands for Seasonal Energy Efficiency Ratio 2, and it represents a stricter, more rigorous testing standard for how air conditioners perform under real-world conditions. To meet these new, mandated efficiency minimums, manufacturers have entirely redesigned the internal components of their outdoor units.

When you look at new AC units today, you are looking at sophisticated machines featuring advanced scroll compressors, enhanced fan blade designs, and highly calibrated internal sensors. These modern outdoor units are built with the assumption that they will receive a precise, highly managed return flow of refrigerant from the indoor unit. They rely on that exact flow not just for cooling your home, but for cooling the compressor motor itself as it operates.

A fixed piston simply cannot meter refrigerant accurately enough for a high-efficiency system to achieve its rated performance. Because a piston delivers a static flow, there are times during the cooling cycle when the modern compressor is starved for refrigerant, causing it to run hotter and pull more electricity. Failing to upgrade the valve during a partial replacement means you are paying for high-efficiency equipment—which may even qualify for generic federal tax credits or local utility incentives—but forcing it to operate with low-efficiency results. The advanced SEER2 condenser will be handcuffed by the outdated piston, effectively erasing the energy savings you expected to see on your monthly utility bills.

The Dehumidification Factor in Subtropical Climates

Beyond mechanical compatibility, there is a physical reality to how a mismatched system impacts your daily comfort, particularly regarding latent cooling. Sensible cooling is the act of dropping the temperature in a room; latent cooling is the system's ability to remove moisture from the air. In a subtropical climate with extreme late-summer humidity, latent cooling is arguably more important than sensible cooling for keeping your home comfortable.

With end-of-season temperatures and moisture levels surging in Miami FL, a fixed piston struggles to manage the heavy latent load. Because the piston cannot adjust to sudden spikes in indoor humidity, it often leaves the evaporator coil running too warm to extract moisture effectively. Water vapor in the air only condenses into liquid (and drips down your condensate drain) when the indoor coil is kept consistently cold. If the piston is feeding too much refrigerant during a humid afternoon, the coil temperature rises, and the dehumidification process grinds to a halt.

A TXV solves this problem by actively throttling the refrigerant flow to keep the indoor coil at the perfect, consistently cold temperature required to wring maximum humidity out of the air. It continuously adapts to the heat and moisture load inside the house, ensuring the coil stays cold enough to act as a powerful dehumidifier without dropping so low that it freezes.

Why Your Home Feels Clammy With a Piston

• Inability to adapt to peak humidity loads: When a heavy rainstorm rolls through and indoor humidity spikes, a piston cannot increase refrigerant flow to compensate.

• Shorter cooling cycles that fail to pull moisture: A mismatched system often cools the air too quickly (sensible cooling) before it has time to remove the moisture (latent cooling), causing the thermostat to shut the system off prematurely.

• Overworking the outdoor unit: Because the home feels sticky and clammy, homeowners naturally push the thermostat lower and lower to compensate, forcing the outdoor unit to run nonstop and accelerating wear and tear.

The Dangers of Mismatching: Frozen Coils and Dead Compressors

Refusing a TXV upgrade during a partial replacement isn't just an efficiency issue; it presents severe mechanical risks that can destroy your investment in a matter of weeks. When you force a modern condenser to work with an incompatible fixed piston, you disrupt the delicate balance of pressures and temperatures required to keep the system stable.

One of the most common consequences of this mismatch is starving the indoor coil of refrigerant. If the older piston restricts the flow too much for the new condenser's capacity, the pressure inside the indoor coil drops rapidly. As pressure drops, temperature drops. The coil quickly falls below freezing (32°F), causing the natural condensation on the fins to turn to solid ice. Within hours, the entire indoor coil can become encased in a block of ice, completely blocking airflow and shutting down your cooling right in the middle of late August.

An even more catastrophic risk is the reverse scenario: the piston feeding too much refrigerant into the coil. If the liquid refrigerant does not fully boil off into a gas before leaving the indoor unit, it travels down the suction line and enters the new outdoor compressor as a liquid. Compressors are designed to compress gas, not liquid. When liquid refrigerant hits the compressor valves—a condition known as liquid slugging—the immense hydraulic pressure shatters the internal mechanical components. Our technicians at Air On Demand have seen far too many destroyed compressors that resulted from liquid slugging simply because a previous installer cut corners. These are mechanical realities, not theoretical risks, which is why matching indoor air handlers with new condensers is a critical phase of any installation.

Demystifying Your HVAC Quote: The TXV Line Item

When reviewing an estimate for a partial system replacement, seeing unfamiliar technical terms can be frustrating. However, spotting a "TXV upgrade" or "indoor coil modification" on a quote for an outdoor condenser replacement is actually a sign of a thorough, honest assessment. It means the technician is evaluating the entire system's ecosystem rather than just swapping out a box in your yard and hoping for the best.

The Air-Conditioning, Heating, and Refrigeration Institute (AHRI) sets strict matching standards for HVAC equipment. Manufacturers test specific combinations of outdoor condensers, indoor coils, and metering devices to ensure they operate safely and efficiently together. If a specific Daikin condenser requires a TXV to meet AHRI standards, installing it on an older piston setup is a direct violation of those installation requirements.

Working with a team that has deep technical expertise, like ours at Air On Demand, ensures that these partial replacements meet exact manufacturer specifications. Installing a new condenser on an incompatible metering device will almost certainly void the manufacturer's warranty. If the compressor dies from liquid slugging because a required TXV was omitted, the manufacturer will deny the warranty claim, leaving you responsible for the full cost of a second replacement. We prioritize long-term system survival over a quick, mismatched install, ensuring your new equipment is fully protected.

Frequently Asked Questions About Partial AC Upgrades

Can you replace just the outside AC unit?

Yes, you can replace just the outside unit if the indoor air handler is in good condition, but the indoor metering device must be updated to match the new outdoor technology. The indoor coil must also be thoroughly inspected for leaks and rated for the operating pressures of modern refrigerants. A professional assessment is required to confirm that the existing indoor equipment is structurally sound enough to handle the upgrade.

Do I need to upgrade to a TXV valve?

If you are installing a modern, high-efficiency SEER2 condenser on an older piston-style air handler, a TXV upgrade is a mandatory requirement to prevent damage. Modern compressors require highly precise refrigerant management that an older fixed piston simply cannot provide. Skipping this upgrade guarantees poor performance and significantly increases the risk of premature system failure.

What happens if I use a piston with a new AC unit?

The system will suffer from poor dehumidification, reduced efficiency, and severe risks of frozen coils or catastrophic compressor failure. Because the piston cannot adapt to changing temperatures, it will either starve the compressor of refrigerant (causing freezing) or flood the compressor with liquid (causing mechanical destruction). Your home will also likely feel clammy and uncomfortable during peak humidity.

Will a mismatched system void my warranty?

Yes, manufacturers require equipment to be installed according to AHRI matching standards; failing to install the required TXV typically voids the compressor warranty. When a compressor fails due to liquid slugging or improper refrigerant return, factory diagnostics easily reveal the cause. To protect your investment, the installation must adhere exactly to the manufacturer's engineering specifications.

How long does a TXV upgrade take during a condenser replacement?

It is a standard procedure that a qualified technician handles seamlessly during the outdoor unit installation, adding minimal time to the overall project. Because the technician must already recover the old refrigerant, cut the lines, and braze in the new outdoor unit, modifying the indoor coil's metering device at the same time is highly efficient. It generally adds less than an hour to a standard partial replacement timeline.

Ensuring Your New Condenser Is Protected

The TXV upgrade is the critical bridge between an old air handler and a new, high-efficiency condenser. While it may seem like a small component tucked away inside your indoor unit, it dictates the performance, efficiency, and lifespan of the expensive new machinery sitting outside. Proper matching prevents premature failure, stops indoor coils from freezing, and ensures your home receives comfortable, consistent dehumidification even on the hottest days in Miami FL.

When facing a major equipment failure, the goal shouldn't just be to get the air running again; the goal is to ensure the repair lasts for years to come. By understanding the mechanics behind your quote, you can make an informed decision that protects your new equipment. If you are considering a partial system upgrade, always consult with professionals who prioritize technical accuracy and warranty protection. Reach out to our team for expert AC replacement services in Miami to ensure your system is matched, optimized, and ready to handle whatever the season brings.

Electronic Polarized Media Filters vs. Traditional Pleated Health Smart Filters placeholder-image  | Air On Demand
5 min read

Electronic Polarized Media Filters vs. Traditional Pleated Health Smart Filters

In peak summer heat, highly restrictive AC filters can suffocate your system. Decide if an active electronic filter or a passive pleated option is the best choice for your airflow and air quality.

The Myth of Maximum Density: Why Thicker Isn't Always Better for Your AC

Here at Air On Demand, our HVAC technicians find that the debate between Electronic Polarized Media Filters vs. Traditional Pleated Health Smart Filters often starts with a common misconception: that the thickest, most densely woven filter will automatically provide the best results for your home. Most homeowners assume that blocking allergens requires a physical barrier so tight that almost nothing can get through. The reality is that your air conditioning system needs to breathe, and cutting off its air supply to trap dust can create a cascade of mechanical failures.

If you want to explore broader solutions first, reviewing your options for indoor air cleaners and purifiers is a great starting point. However, if you are specifically weighing high-efficiency filtration methods, understanding the mechanical trade-offs is non-negotiable.

Our AC repair crews see this conflict peak during the late summer. The combination of August peak humidity and late-summer AC strain means your system is running nearly 24/7. When you introduce a highly restrictive filter into an air handler that is already working overtime to dehumidify the air, you are essentially asking your blower motor to run a marathon while breathing through a thick wool blanket. The core decision you face is whether to upgrade to an active electronic system that captures particles without restricting air, or to rely on passive, high-MERV disposable pleated filters that prioritize physical trapping over system breathability.

Understanding Traditional Pleated Health Smart Filters

A "health smart" filter generally refers to a passive, disposable pleated media filter designed to trap microscopic allergens, pet dander, and fine dust. These filters rely entirely on physical interception. To capture smaller and smaller particles, the manufacturer must weave the synthetic fibers closer and closer together.

The effectiveness of these passive filters is measured by the Minimum Efficiency Reporting Value (MERV) scale. While standard fiberglass filters sit around MERV 1 to 4, and standard pleated filters sit around MERV 5 to 8, health smart filters typically start at MERV 11 and can go up to MERV 16. Here is the step-by-step reality of how this passive filtration impacts your system:

1. Physical Interception: The HVAC blower motor pulls return air from your home through the return ducts and forces it through the pleated filter media.

2. Particulate Trapping: As air passes through, particles larger than the gaps in the media are physically trapped on the surface of the filter.

3. Airflow Restriction: Because the weave is exceptionally tight (to catch particles as small as 1 to 3 microns), there is significantly less open space for the actual air to pass through.

4. Increased Resistance: The tight weave creates a physical wall. The blower motor must work exponentially harder to pull the same volume of air through this dense barrier.

This physical trade-off is the primary drawback of passive high-efficiency filtration. The high static pressure and airflow restriction from MERV 11+ passive filters can severely alter how your system performs. For a deeper dive into how these filters handle local climate challenges, you might find it helpful to read about evaluating Health Smart filters for South Florida humidity. Ultimately, while passive filters are excellent at stopping contaminants, their dense physical barrier fundamentally limits the volume of return air your system can process efficiently.

How Electronic Polarized Media Filters Work

To understand why active filtration is different, we have to look at the mechanics of polarization. The problem with passive filters is that increasing capture efficiency always requires increasing the density of the media. Electronic polarized media filters solve this problem by changing how particles behave, rather than just putting a thicker wall in front of them.

The Problem: Airborne particles, such as fine dust, pollen, and smoke, are incredibly small and easily slip through standard, breathable filter media. To catch them passively, you have to restrict the airflow to a dangerous degree.

The Cause: Particles naturally repel each other or remain neutral, floating independently through the air. Because they remain microscopic, they require microscopic physical barriers to stop them.

The Solution: Electronic polarized media filters use an active electrical field to change the physical properties of the contaminants. When the filter is connected to a power supply, it generates a safe, 24-volt polarized electrical field across a relatively porous fiberglass or synthetic media pad. As airborne particles pass through this field, they become polarized—essentially turning into tiny, charged magnets.

Once polarized, these particles undergo a process called agglomeration. They become attracted to each other and stick together, forming much larger clusters. They are also drawn directly to the polarized fibers of the media pad. Because the particles are clumping together and actively seeking out the filter fibers, the media pad itself does not need to be densely woven. It remains highly breathable. This active process delivers the high capture efficiency of a dense pleated filter but completely eliminates the high static pressure and airflow restriction from MERV 11+ passive filters.

The Airflow Impact: Static Pressure vs. System Efficiency

The most critical difference between these two technologies is their impact on your HVAC system's static pressure. Think of static pressure as the blood pressure of your air conditioning system. It is the measurement of resistance to airflow within the ductwork and the air handler.

The danger of high static pressure: When you install a dense passive filter, you immediately spike the system's static pressure. The blower motor is designed to move a specific volume of air (measured in cubic feet per minute, or CFM). When a thick filter blocks the return air, modern variable-speed (ECM) blower motors will automatically ramp up their RPMs to try and overcome the resistance. This leads to massive energy consumption, loud operation, and premature motor burnout. Older single-stage motors will simply fail to pull enough air, severely reducing your home's cooling capacity.

The risk of frozen evaporator coils: This lack of airflow becomes incredibly dangerous in our specific regional climate. With summer temperatures regularly exceeding 90°F and extreme moisture in the air, your AC relies on a steady, heavy volume of warm return air passing over the cold indoor evaporator coil to prevent freezing. The August peak humidity and late-summer AC strain create the perfect storm. When our team responds to emergency AC repair calls for frozen coils during the back-to-school transition, a restrictive passive filter choking off that warm airflow is one of the most common culprits we find. The heavy condensation pulled from Miami's humid air rapidly turns to solid ice, completely shutting down your cooling system and potentially damaging the compressor.

The breathability advantage: This is where polarized media excels. Because the media pad is loosely woven, it maintains optimal static pressure. The system breathes easily, the blower motor operates at its intended speed, and the optimal volume of warm air continually washes over the evaporator coil, preventing ice buildup. Upgrading your air conditioner filters in Miami requires balancing this need for maximum airflow with the need for clean air.

Particulate Capture Efficiency Comparison

When evaluating how well each system removes allergens, dust, and contaminants, it is important to look at how their efficiency changes over time.

Passive Trapping (Traditional Pleated)

Traditional health smart filters are highly effective on day one. A MERV 13 pleated filter will capture up to 90% of particles in the 1.0 to 3.0-micron range, which includes pet dander, mold spores, and fine dust. However, as the filter catches these particles, the tiny gaps in the media become clogged. While this technically increases the filter's capture efficiency (because the holes are getting smaller), it rapidly accelerates the airflow restriction. The filter becomes a solid wall of dirt, suffocating the system long before the recommended replacement date.

Active Agglomeration (Polarized Media)

Electronic polarized media filters typically provide a capture efficiency equivalent to MERV 13 or higher, but their performance curve is vastly different. Because the electrical field causes particles to agglomerate, the filter actually becomes more efficient as it loads with dirt, without suffering the same drastic drop in airflow. The polarized dust particles attached to the media fibers act as extensions of the electrical field, actively attracting more particles.

Which is Better for Sensitivities?

For homes with severe allergy or asthma concerns, both filters offer excellent particulate removal. However, the traditional pleated filter will only maintain that performance if you are willing to change it obsessively to prevent system damage. The polarized media filter offers the same high-level capture of microscopic allergens but maintains that performance safely over a longer period, making it the superior choice for continuous indoor air quality management.

Side-by-Side Comparison: Active vs. Passive Filtration

To make the decision easier, here is a breakdown of how these two approaches compare across the most important operational metrics.

• Filtration Method — Electronic Polarized Media Filters: Active (Electrical polarization & agglomeration) — Traditional Pleated Health Smart Filters: Passive (Physical barrier interception)

• Airflow Impact — Electronic Polarized Media Filters: Minimal restriction; highly breathable media — Traditional Pleated Health Smart Filters: High restriction; dense physical barrier

• Capture Efficiency — Electronic Polarized Media Filters: High (MERV 13+ equivalent); improves as it loads — Traditional Pleated Health Smart Filters: High (MERV 11-16); clogs rapidly

• System Strain (Static Pressure) — Electronic Polarized Media Filters: Low static pressure; protects blower motor — Traditional Pleated Health Smart Filters: High static pressure; strains blower motor

• Maintenance Style — Electronic Polarized Media Filters: Replace internal media pad periodically — Traditional Pleated Health Smart Filters: Dispose of and replace the entire filter

Active vs. Passive Filtration Comparison

Long-Term Maintenance and System Protection

Beyond the daily performance, you must consider what it takes to live with these filters year-round. The maintenance routines for these two systems are entirely different.

Traditional pleated filter maintenance: During high-usage months, particularly given the August peak humidity and late-summer AC strain, a high-MERV pleated filter may need to be replaced every 30 to 45 days. Because it traps everything on the surface, leaving it in place for the standard 90 days can lead to severe system suffocation. You are entirely responsible for monitoring the airflow and constantly purchasing thick, disposable replacements.

Polarized media filter maintenance: The maintenance for an active system is slightly different but highly manageable for homeowners. The durable outer frame remains permanently installed in your ductwork and remains plugged into its power source. Every few months, you simply unplug the frame, open it, remove the dirty fiberglass media pad, wipe down the carbon contacts, and slide a fresh, inexpensive media pad inside.

The real long-term value of the polarized system lies in system protection. By maintaining low static pressure, you are actively extending the life of your expensive variable-speed blower motor and reducing your monthly energy consumption. In our years of providing AC installation and repair services across Miami, the Air On Demand team has learned that proper system matching is absolutely critical for any high-efficiency filtration upgrade. We ensure that whichever filtration method you choose, it aligns perfectly with your specific air handler's CFM requirements to prevent airflow restriction in South Florida homes. You can review more about integrating these units by looking into whole-home air filtration systems.

Frequently Asked Questions About High-Efficiency Air Filters

Do electronic air filters restrict airflow?

No, they operate with a highly breathable media that allows air to pass through easily. They use an electrical field rather than dense physical material to trap particles. This active polarization means you get excellent air cleaning without choking off the return air your system needs to function.

Are polarized media air filters better than pleated?

They offer superior airflow and comparable or better capture efficiency over time. They are generally better for system longevity due to lower static pressure. While pleated filters are great for short-term trapping, polarized filters protect the blower motor from unnecessary strain while keeping the air clean.

What is a health smart filter?

It is typically a high-MERV, passive pleated filter designed to trap smaller allergens like pet dander and fine dust. Because it relies on a very tight physical weave, it requires careful monitoring to ensure it doesn't suffocate the HVAC system. If left in too long, the high static pressure and airflow restriction from MERV 11+ passive filters can cause mechanical failures.

How often should you change a polarized media filter?

The internal media pad usually needs replacing every few months. The exact frequency depends on household factors like the number of pets, indoor dust levels, and continuous fan usage. Unlike traditional filters, the frame stays in place, and you only replace the inner pad.

Can a restrictive filter cause an AC to freeze in summer?

Yes, restricted airflow prevents warm return air from passing over the cold evaporator coil. Without that heat exchange, the coil's temperature drops below freezing. The heavy condensation pulled from the humid summer air then turns into solid ice, completely blocking the system.

How does static pressure affect an HVAC blower motor over time?

High static pressure forces the motor to work significantly harder to push and pull air through the ductwork. This constant resistance leads to increased energy consumption and overheating. Over time, this strain causes premature motor failure. In our experience, this often turns a simple filter choice into an extensive AC repair.

Making the Right Filtration Choice for Your Home

The short answer is that achieving pristine indoor air quality should never come at the expense of your air conditioner's health. The high static pressure and airflow restriction from MERV 11+ passive filters can turn a well-intentioned upgrade into a mechanical nightmare, especially when fighting the August peak humidity and late-summer AC strain.

Electronic polarized media filters provide an elegant solution, giving you the high-level particulate capture you need while maintaining the breathability your system demands. Protecting your HVAC equipment is just as important as cleaning the air you breathe. If you are unsure which path is right for your specific air handler, consult with our local professionals to evaluate your current system's static pressure and find a balanced, long-term filtration strategy.

Preparing Your Kendall Home for Back-to-School AC Scheduling placeholder-image  | Air On Demand
5 min read

Preparing Your Kendall Home for Back-to-School AC Scheduling

When August routines shift and the house sits empty, turning the AC off completely invites severe humidity. Here is the ideal thermostat strategy to balance cooling costs and comfort.

Navigating the Late-Summer Empty House Cooling Dilemma

August is here, and the shift in daily routines is in full swing. As the kids head back to class and adults return to the office, your house is about to sit completely empty during the most intense part of the afternoon. At Air On Demand, we have helped countless local families realize that preparing your Kendall home for back-to-school AC scheduling is about solving a very specific seasonal puzzle. You want to stop wasting energy cooling an empty house, but you cannot afford to let extreme indoor humidity take over. When the August back-to-school transition hits, finding the exact smart thermostat setback temperature becomes a crucial balancing act. You have to reduce your cooling load without letting the heavy moisture of late summer overwhelm your living space.

Before you start adjusting your daily schedule, starting with professional AC maintenance ensures your system is clean and ready to handle the changing demands. For true local expertise, exploring our Kendall AC maintenance services is the best way to keep your home protected and efficient as the seasons shift.

Why Kendall's Late-Summer Climate Complicates Empty Home Cooling

If you lived in a dry, arid climate, turning off your air conditioner when you leave for work might make perfect sense. However, in South Florida, that strategy is a recipe for disaster. The specific environmental challenges of our region make generic HVAC advice completely ineffective. Our technicians at Air On Demand deal with intense late-summer humidity in the Miami and Kendall area daily, and we know firsthand that your AC must run periodically just to remove moisture, even when no one is home.

During the back-to-school months, the reality of peak afternoon heat is unavoidable. Miami's average August afternoon relative humidity frequently exceeds 70 percent. This high outdoor moisture level creates a massive "latent cooling load" on your home. Latent heat refers to the energy required to remove moisture from the air. Even when your doors and windows remain tightly shut, humidity infiltrates through the natural ventilation of the house, seeping through micro-cracks and roof vents.

Generic Advice vs. Kendall Climate Reality:

• Turn the AC completely off when you leave for the day. — Kendall Climate Reality: The AC must run periodically to extract heavy indoor moisture.

• Set the "away" temperature to 85 degrees to save energy. — Kendall Climate Reality: Temperatures above 80 degrees allow dangerous humidity levels to build up.

• Use aggressive factory "eco-modes" for maximum efficiency. — Kendall Climate Reality: Eco-modes often ignore humidity control, leading to a damp, uncomfortable house.

When you follow generic national advice, you ignore the extreme humidity that defines our local weather. Your air conditioner is your primary defense against that moisture, and our installation and service teams will tell you it needs a specific schedule to do its job properly.

The Hidden Danger of the 'Off' Switch: Humidity vs. Temperature

Many homeowners mistakenly believe that an air conditioning system's only job is to lower the air temperature. In reality, your system performs two vital, simultaneous functions: sensible cooling (lowering the temperature you feel) and latent cooling (removing physical moisture from the air). When you use the "off" switch during the August back-to-school transition, you completely disable the latent cooling process.

The Problem: Walking into a home that feels like a stagnant, heavy swamp after a long day at work. The air feels thick, and the house takes hours to cool down.

The Cause: Without the air conditioner running, indoor humidity rapidly climbs to match the muggy outdoor levels. The EPA strongly recommends keeping indoor humidity below 60 percent to prevent mold growth and protect your home's interior. When a house sits stagnant, moisture accumulates fast. This risks severe damage to your drywall, wood cabinetry, hardwood floors, and overall indoor air quality. Mildew thrives in dark, warm, and damp environments—exactly what an empty house becomes when the AC is turned off.

The Solution: Instead of cutting the power, you need to focus on adjusting your AC dehumidification settings. This ensures the system runs just long enough to extract moisture without constantly cooling an empty space. By keeping the air circulating and the evaporator coil cold, you pull gallons of water out of your indoor air every single day.

The 78-80 Degree Rule for Optimal Moisture Control

National energy-saving blogs often recommend setting your away temperature as high as 85 degrees. As a local HVAC authority, Air On Demand explicitly warns against this generic national advice. What works in the dry Midwest will ruin a home in South Florida. Based on our years of experience handling AC installations and repairs across Miami, our deep understanding of the local climate points to a highly specific 78-80°F setback temperature as the absolute limit for preserving homes in our humid environment.

Upgrading to a smart thermostat makes it effortless to maintain this precise temperature range without manual intervention. You simply program the limits, and the system handles the rest.

Why 78-80 Degrees is the Sweet Spot

This specific temperature range keeps your compressor cycling frequently enough to extract latent heat. For an air conditioner to dehumidify, it has to run long enough to pull warm air over the freezing cold evaporator coil, condense that moisture into water drops, and drain it outside. At 78-80 degrees, the system turns on just enough to perform this extraction. Crucially, this prevents your home's interior mass—your couches, rugs, and drywall—from acting like a sponge and absorbing excess moisture.

The Risks of Pushing Past 80 Degrees

If you push the thermostat to 82 or 85 degrees, the system stays dormant for extended periods. This leads to stagnant, damp air. Furthermore, when the family finally returns and drops the temperature back to 72 degrees, the AC requires massive energy spikes to cool the house back down. It has to work twice as hard to remove the built-up humidity before the air actually starts to feel cool against your skin. You end up erasing any energy savings you gained during the day.

Structuring Your Smart Thermostat Schedule for the School Day

With the 78-80 degree rule in mind, the next step is programming your system to match your family's new routine. The August back-to-school transition provides a predictable, steady timeline, making it easy to divide the weekday into specific cooling blocks. The goal is gradual temperature shifts rather than sudden, drastic changes.

Morning Departure Settings

Maintain your normal comfort levels while the family gets ready for the day. You do not want everyone sweating while trying to eat breakfast and pack lunches. Program the setback temperature to initiate about 15 to 20 minutes after the last person leaves the house. This gives the system a brief rest period as the house slowly begins to warm up naturally.

Peak Afternoon Setback

During the hottest part of the day, lock the temperature at the 78-80 degree threshold. This is the crucial period where you must disable aggressive "eco-modes" that might override your carefully planned humidity controls. By holding this steady limit, the system will cycle on occasionally, keeping the indoor air moving and the moisture levels safely in check while the sun beats down outside.

Pre-Arrival Recovery

Schedule the system to drop back to your preferred comfort levels 30 to 45 minutes before everyone returns. This recovery period begins cooling the home gradually. By the time the kids open the front door, the house is comfortable, and you avoid forcing the AC to cool a hot, humid house during the peak 4:00 PM heat.

Ideal Smart Thermostat Schedule for Empty South Florida Homes

Avoiding Extreme Eco-Modes and Geofencing Pitfalls

Modern climate control systems come packed with advanced features designed to make your life easier. However, not all of them are suited for South Florida's unique weather. Our team frequently responds to late-summer AC repair calls that stem directly from two common pitfalls you must avoid during the back-to-school season: geofencing errors and extreme factory eco-modes.

The Geofencing Trap: Geofencing uses your smartphone's location to determine if you are home or away. If you commute far away for work, the system assumes the house is completely empty and pushes the temperature up to save energy. However, if it pushes past the 78-80°F setback temperature limit, your home sits in a dangerous humidity zone all day. By the time you cross back into the geofence boundary on your evening commute, the system cannot recover fast enough to make the house comfortable upon your arrival.

Aggressive Eco-Modes: Factory-default eco-modes are designed by software engineers who prioritize pure energy reduction over humidity management. These settings will happily let your house reach 85 degrees if it saves kilowatt-hours, completely ignoring the fact that your walls are absorbing moisture.

The Quick Fix: You must manually cap the maximum away temperature in your thermostat's app settings. Never let an automated feature override your humidity control strategy. The delay in recovery time when a home is allowed to get too hot and humid completely negates any energy saved during the day. Take control of the app and set hard limits.

Complementary Strategies to Reduce the Afternoon Cooling Load

When our HVAC professionals perform maintenance checks, we always remind homeowners that your thermostat shouldn't have to do all the heavy lifting alone. There are holistic home strategies you can implement right now to support your AC schedule and reduce the overall burden on the system during sweltering Kendall afternoons. If your system struggles to recover from the setback temperature even after applying these tips, a pattern we see often is that it may be time to seek AC repair in Kendall to address underlying mechanical or efficiency issues.

Managing Solar Heat Gain

• Utilize blackout curtains: Closing blinds and heavy curtains on east and west-facing windows physically blocks solar heat gain. Sunlight streaming through glass acts like a greenhouse, raising the indoor temperature rapidly.

• Seal your windows: Ensure all windows are fully closed, locked, and weather-stripped to prevent humid outdoor drafts from sneaking into the home while you are away.

Optimizing Interior Airflow

• Keep interior doors open: Leave bedroom and bathroom doors ajar while everyone is at school. This allows return vents to pull stagnant air from every room, circulating it efficiently and preventing hot spots.

• Never close air vents: Closing vents in unused rooms does not save energy. It disrupts the system's static pressure, forces the blower motor to work harder, and can lead to frozen evaporator coils.

• Replace air filters routinely: A clean filter is absolutely essential. As the system works hard to extract heavy moisture during the late summer, a clogged filter will choke the airflow and cripple the dehumidification process.

Ensuring Your Home Remains Cool and Protected All Season

Balancing energy efficiency with critical indoor humidity control is entirely possible when you have the right smart thermostat strategy in place. By adhering to the 78-80 degree setback rule for empty homes during the back-to-school transition, you protect your Kendall property from moisture damage without wasting unnecessary power. Remember that a well-maintained system is the foundation of efficient cooling and dehumidification. Explore professional maintenance options to ensure your air conditioner can easily handle the late-summer humidity, and consult with our local HVAC experts to perfectly optimize your home's daily cooling schedule for the months ahead.

Frequently Asked Questions

What temperature should I set my AC when I am away in Florida?
You should set your AC between 78 and 80 degrees Fahrenheit when you are away in Florida. This specific range balances energy savings with the need for the system to run often enough to remove excess humidity from the air. Setting it any higher risks allowing heavy moisture to build up inside your home.

Should I turn my AC completely off when I go to work?
No, you should never turn your AC completely off when leaving for work in a humid climate. Your air conditioner is responsible for both cooling the air and removing moisture. Turning it off completely allows indoor humidity levels to spike, which can lead to mold growth, musty odors, and damage to your home's interior.

How do I set my smart thermostat for school hours?
Set your smart thermostat to initiate an "away" mode of 78 to 80 degrees about 15 minutes after the last person leaves for school. Then, schedule a recovery period to begin cooling the house back to your preferred comfort temperature 30 to 45 minutes before the family returns. This ensures a comfortable arrival without overworking the system during the hottest part of the day.

Does setting the AC higher during the day actually save energy in high humidity?
Setting the AC slightly higher (up to 80 degrees) does save energy, but pushing it too high can actually waste power. If the house gets excessively hot and humid, the air conditioner has to work twice as hard and run continuously for hours to remove the built-up moisture and cool the space back down when you return.

What is the ideal indoor humidity level for a home in Miami?
The ideal indoor humidity level for a home in Miami is generally between 40 and 60 percent. The EPA strongly recommends keeping indoor humidity below 60 percent to prevent mold growth and maintain healthy indoor air quality. Your air conditioning system plays the primary role in maintaining this balance.

Can extreme eco-modes on smart thermostats cause mold growth?
Yes, extreme eco-modes can potentially contribute to mold growth in humid climates. These factory settings often prioritize maximum energy savings by allowing the home's temperature to rise significantly. If the AC doesn't turn on frequently enough to extract moisture, indoor humidity can surpass 60 percent, creating the perfect environment for mold to thrive.

The Difference Between Commercial and Residential HVAC Apprenticeships in Miami placeholder-image  | Air On Demand
5 min read

The Difference Between Commercial and Residential HVAC Apprenticeships in Miami

Deciding your HVAC career path in South Florida means choosing between 130-degree suburban attics and sun-baked downtown rooftops. See which environment fits your future.

The Heat is On: Deciding Your HVAC Career Path in South Florida

Your boots are laced up, your tool bag is packed, but you are staring down a career crossroads that will dictate your daily physical reality for years to come. At Air On Demand, we have guided countless new technicians through this exact transition, and we know that the difference between commercial and residential HVAC apprenticeships in Miami is not just about the size of the equipment—it is about choosing which extreme environment you will face every single day. Stepping into the trade means committing to a grueling physical routine, especially when the late-summer August peak cooling season hits and systems are running at maximum capacity.

Choosing an apprenticeship track is the foundational decision of your career. It dictates the technical training you receive, the soft skills you develop, and the type of physical endurance you need to build. Both paths demand resilience, but they challenge you in completely different ways. If you are ready to start your journey, explore HVAC careers in Miami to find the right fit for your future.

The Physical Grind: 130-Degree Attics vs. Sun-Baked Concrete

Working in South Florida means dealing with intense late-summer heat and extreme humidity, but how you experience that weather depends entirely on your chosen career path. Our veteran technicians at Air On Demand often tell new recruits that the physical environments of residential and commercial HVAC work could not be more different, and apprentices must be prepared for the unvarnished reality of both.

The Residential Reality: Confined Heat and High Humidity

If you choose the residential track, your daily battlefield is often the attic. In our years of providing AC repair and installation across Miami suburban residential neighborhoods, we have seen enclosed attics easily exceed 130 degrees by midday. You are not just dealing with the heat; you are navigating tight spaces, balancing on wooden joists to avoid stepping through a customer's ceiling, and working around fiberglass insulation that sticks to sweating skin. The year-round high humidity makes these enclosed spaces particularly dangerous if you do not manage your hydration and take necessary breaks. Our residential apprentices must develop incredible core strength and agility to maneuver heavy components, like evaporator coils and vacuum pumps, through narrow drop-down stairs and into cramped corners.

The Commercial Reality: Relentless Sun and Heavy Lifting

Commercial apprentices face a completely different physical test. Instead of cramped attics, you are working on massive flat concrete roofs. While you have room to move, there is absolutely nowhere to hide from the sun. The brutal UV exposure and solar radiation reflecting off high-rise rooftops can drain your energy rapidly. Commercial work also involves significantly heavier lifting. You are dealing with massive compressors, heavy-gauge steel panels, and thick copper piping. Moving this equipment often requires coordinating cranes, utilizing heavy-duty hoists, and working as a synchronized team. The physical stamina required to survive a full shift on a sun-baked roof is immense.

Safety First: Managing Heat Stress

Regardless of the path, heat stress is the primary enemy of any Florida HVAC technician. For our crews, OSHA-recommended safety protocols are a daily requirement, not just a suggestion. Apprentices on both tracks must learn to recognize the early signs of heat exhaustion, maintain strict hydration schedules, and understand when to step back from a task to cool down. The stamina required to survive the back-to-school late-summer cooling demand is built slowly, day by day, under the guidance of experienced lead technicians.

Equipment Breakdown: Residential Split Systems vs. Commercial Chillers

The scale and complexity of the equipment you service will define your technical education. While the fundamental principles of refrigeration remain the same across the industry, our team notes that the application of those principles varies wildly between residential and commercial environments.

Standard residential equipment focuses heavily on single-phase electrical power. At Air On Demand, our apprentices spend their days mastering split systems, traditional air handlers, heat pumps, and increasingly popular ductless mini-splits. The troubleshooting process is highly localized. If a system goes down, the issue is usually contained within a single unit serving a single family. You learn to diagnose airflow restrictions, trace low-voltage control issues at the thermostat, and perform precise refrigerant charge adjustments.

Commercial equipment operates on an entirely different scale. Apprentices working on Downtown Miami high-rises must understand 3-phase electrical power, which is inherently more dangerous and complex. You will be introduced to massive cooling towers, centrifugal chillers, commercial boilers, and variable refrigerant flow (VRF) systems. Troubleshooting is rarely localized. A commercial apprentice must learn to navigate complex building automation systems (BAS) that control the climate for hundreds of occupants across dozens of floors. Diagnosing a problem might involve tracing a chilled water loop through an entire facility before finding a faulty actuator valve.

• Power Supply — Residential Apprenticeship: Single-phase (120V / 240V) — Commercial Apprenticeship: 3-phase (208V, 277V, 480V)

• Primary Systems — Residential Apprenticeship: Split systems, heat pumps, mini-splits — Commercial Apprenticeship: Chillers, cooling towers, packaged RTUs

• Troubleshooting Scope — Residential Apprenticeship: Localized to one home or unit — Commercial Apprenticeship: Facility-wide diagnostics and automation

• Component Size — Residential Apprenticeship: Manageable by 1-2 technicians — Commercial Apprenticeship: Often requires cranes or hoists

• Controls — Residential Apprenticeship: Standard thermostats and smart home hubs — Commercial Apprenticeship: Complex Building Automation Systems (BAS)

Residential vs. Commercial HVAC Apprentice Duties in Miami

The Daily Routine: Homeowners vs. Facility Managers

Technical skills are only half the job. The environment you work in dictates who you interact with and how your daily schedule is structured. The soft skills required to thrive as an HVAC service technician vary greatly depending on your customer base.

The Residential Customer Experience

In the residential sector, your primary contact is the homeowner. When our Air On Demand crews arrive at a house in the Miami suburban residential neighborhoods, we are often greeting people who are stressed, uncomfortable, and worried about unexpected AC repair needs. A successful residential apprentice learns how to communicate complex technical problems in everyday language. You must be empathetic, patient, and highly respectful of private property. Laying down drop cloths, wearing shoe covers, and maintaining a pristine workspace are non-negotiable habits for our team. The schedule often involves on-call emergency rotations, meaning you might be dispatched to a sweltering house at 8:00 PM on a Saturday.

The Commercial Facility Environment

Commercial apprentices interact primarily with facility managers, maintenance directors, and corporate stakeholders. The conversation shifts from personal comfort to operational budgets, system uptime, and liability. You must learn to adhere to strict corporate protocols, sign in at security desks, and coordinate shutdowns that affect entire businesses. While commercial work also has emergency calls, much of the heavy maintenance is scheduled during off-hours or weekends to avoid disrupting business operations. The soft skills here revolve around professional documentation, clear reporting, and strict adherence to commercial safety standards.

Mastering Local Codes: Hurricane Tie-Downs and Coastal Corrosion

Training in South Florida means adapting to some of the strictest building codes in the country. A generic HVAC education is not enough; we emphasize to all our trainees that you must master the specific regional regulations that keep systems secure during extreme weather.

Defending Against the Wind: Hurricane Tie-Downs

Miami-Dade County enforces rigorous building codes designed to withstand catastrophic wind events. Whether you are working as an AC installation and duct mechanic on a suburban home or assisting on a commercial roof, mastering hurricane tie-downs is mandatory. Apprentices must learn how to properly anchor condensing units to concrete pads using approved tapcons, heavy-duty straps, and specific mounting hardware. On Downtown Miami high-rises, the requirements are even more stringent, involving engineered stands and vibration isolators designed to handle intense wind shear at elevation. Understanding the Notice of Acceptance (NOA) for different equipment stands is a critical part of the learning curve we teach daily.

Fighting the Elements: Coastal Corrosion

The salty ocean air is highly corrosive to standard HVAC equipment. Our apprentices quickly learn that untreated aluminum fins and copper coils will degrade rapidly in this climate. Training involves applying coastal corrosion mitigation techniques, such as proper coil coating applications, installing specialized marine-grade heat pumps, and recognizing the early signs of galvanic corrosion. A strong grasp of these local regulations and environmental challenges is a non-negotiable part of any local apprenticeship. If you do not build systems to survive the salt and the wind, they will fail long before their expected lifespan.

Why Rigorous Local Training Matters for Your Apprenticeship

Choosing to enter the trade is the first step, but choosing the right employer to train you is what determines your long-term success. Generic textbook training falls short when faced with South Florida's unique demands. You need hands-on mentorship that bridges the gap between classroom theory and field reality.

Bridging the Gap Between Classroom and Field

When the late-summer August peak cooling season hits, a textbook cannot prepare you for the physical toll of the job. Working alongside experienced journeymen is how apprentices learn to pace themselves, handle tools efficiently in tight spaces, and diagnose complex electrical faults when the pressure is on. Mentorship protects apprentices from heat-related illnesses and costly technical errors. A good training program provides a structured pathway from carrying tools and fetching parts to independently troubleshooting advanced systems. If you want to understand the timeline, learning about becoming a lead service technician in Miami shows the value of a clear, structured career ladder.

The Air On Demand Training Standard

Working with a company dedicated to rigorous local training means you are equipped for South Florida's unique climate from day one. At Air On Demand, our commitment to developing top-tier HVAC professionals involves hands-on guidance that respects the extreme local architecture and weather. We teach our apprentices not just how to fix a machine, but how to survive and thrive in the environment, ensuring they build a sustainable, long-term career rather than burning out in their first summer.

Frequently Asked Questions About Florida HVAC Apprenticeships

What is the difference between commercial and residential HVAC apprenticeships?

The primary difference lies in the equipment scale and the work environment. At Air On Demand, our residential focus is on single-phase split systems and heat pumps installed in private homes. Commercial involves massive 3-phase power systems, chillers, and large-scale facility equipment. Residential requires strong homeowner communication skills, while commercial focuses on coordinating with facility managers and navigating complex building automation.

Which HVAC path is more physically demanding in Florida?

Both paths are incredibly demanding, but they stress the body in different ways. We find that residential work often requires navigating extreme heat in enclosed, unventilated attics, demanding flexibility and heat tolerance. Commercial work involves heavy lifting, moving massive components, and enduring direct, relentless sun exposure on flat concrete roofs.

Is commercial HVAC harder to learn than residential?

Commercial systems are generally larger and technically more complex, involving advanced automation, pneumatic controls, and 3-phase electrical systems. However, our team knows that residential HVAC requires a broader range of customer service skills, the ability to adapt to wildly different home layouts, and the patience to troubleshoot localized airflow issues. Both require intense study and hands-on practice.

What does a residential HVAC apprentice do on a daily basis?

A residential apprentice assists lead technicians with installing split systems, running copper linesets, and pulling vacuums. They navigate attics and crawlspaces to repair or replace damaged ductwork. A major part of their daily routine also involves learning to communicate effectively with homeowners, explaining repairs, and keeping the job site spotless.

How do local building codes impact HVAC training in South Florida?

Local codes completely dictate installation practices in South Florida. Apprentices must learn specific, highly regulated hurricane tie-down procedures to ensure equipment survives high-wind events. Training also heavily emphasizes applying coastal corrosion mitigation techniques to protect sensitive coils and electrical components from the salty ocean air.

Take the Next Step Toward Your HVAC Career

Whether you choose to navigate the tight, sweltering spaces of residential attics or tackle the heavy, sun-baked machinery on commercial rooftops, a realistic understanding of the environment is your best tool for success. The August peak cooling season will test your resolve, but it will also forge you into a highly skilled, resilient technician. The key is finding an employer who understands these unique local challenges and is committed to your safety and education.

Robust, locally adapted training makes all the difference between a frustrating job and a rewarding lifelong career. If you are prepared to put in the work and learn the trade the right way alongside our team, it is time to explore your options. Take the next step and look into a residential HVAC apprenticeship to begin building your future in the South Florida climate.

Can a Punctured Evaporator Coil Be Patched or Must It Be Replaced? placeholder-image  | Air On Demand
5 min read

Can a Punctured Evaporator Coil Be Patched or Must It Be Replaced?

A hissing indoor unit usually points to a punctured aluminum coil. Understand why the intense pressure of modern refrigerants makes brazing a temporary fix at best.

Is a Hissing Evaporator Coil a Permanent Problem?

Is your indoor unit making a strange, continuous noise, leaving you wondering: can a punctured evaporator coil be patched or must it be replaced? When our technicians at Air On Demand get called out to a hissing, leaking indoor unit during the late-summer peak cooling season here in Miami, it usually indicates a punctured evaporator coil actively venting refrigerant into the air. This is a critical mechanical failure that immediately halts the system's ability to extract heat and humidity from your home. The hissing sound is the physical escape of pressurized gas through a breach in the metal, presenting homeowners with a difficult decision regarding the best path forward.

The short answer is that while patching a punctured coil is theoretically possible in a controlled environment, our team has found that the extreme high pressures of modern refrigerants and the ultra-thin materials used in today's systems make replacement the only mechanically sound, long-term solution. Attempting a quick patch on a compromised coil often leads to immediate failure, secondary leaks, and severe compressor damage. When facing this critical system failure, securing professional AC repair is the first step toward restoring reliable cooling.

Common symptoms our technicians see accompanying a punctured, hissing coil include:

• Rapid loss of cooling power: The air coming from your vents will quickly transition from cold to lukewarm as the refrigerant charge depletes.

• Ice accumulation: As the pressure drops inside the coil, the remaining refrigerant becomes too cold, causing ambient condensation to freeze solid on the metal fins.

• Short-cycling: The system may turn on and off rapidly as low-pressure safety switches trip to protect the compressor.

• Increased humidity: Without a fully functioning indoor coil, the system loses its ability to pull moisture out of the indoor air.

Understanding why a simple patch is insufficient requires looking closely at how modern cooling equipment is engineered and the intense physical stresses these components endure every time the thermostat calls for cooling.

The Mechanical Reality of Modern Aluminum Evaporator Coils

In our years of servicing Miami's cooling systems, we've seen firsthand how HVAC manufacturing has evolved. Decades ago, indoor coils were primarily constructed from thick copper tubing. Copper was highly durable and relatively forgiving when subjected to the intense heat of a brazing torch, making physical repairs somewhat feasible. However, copper was also heavy, expensive, and prone to a specific type of degradation known as formicary corrosion—a chemical reaction caused by volatile organic compounds (VOCs) commonly found in household cleaning products, paints, and building materials.

To combat formicary corrosion and increase energy efficiency, the HVAC industry shifted toward modern aluminum evaporator coils. Aluminum offers exceptional thermal conductivity, meaning it transfers heat out of the indoor air much faster than older materials. However, the physical properties of aluminum make it incredibly unforgiving when it comes to structural repairs.

Why Manufacturers Use Thinner Aluminum

The engineering behind modern coils relies on maximizing the surface area while minimizing the thickness of the metal. This design choice is intentional and serves several critical functions for system performance:

• Better thermal conductivity: Thinner metal allows the cold refrigerant inside the tubes to absorb heat from the warm indoor air with minimal thermal resistance, resulting in higher energy efficiency ratings.

• Reduced weight and material footprint: Aluminum is significantly lighter than copper, allowing for larger, higher-capacity coils to be installed in tighter indoor spaces without overloading the structural supports of the air handler.

• The trade-off—repair difficulty: The primary drawback to this highly efficient, ultra-thin aluminum is its extreme susceptibility to melting, warping, or distorting when subjected to the high-temperature brazing torches required for metal repair.

Whether a breach in the coil is caused by a physical puncture (such as a tool slipping during maintenance) or microscopic pinhole leaks caused by environmental factors, the resulting structural weakness cannot be easily isolated. The thin walls of the tubing are designed for heat transfer, not for enduring the localized thermal shock of a repair torch.

• Thermal Conductivity — Legacy Copper Coils: Moderate — Modern Aluminum Coils: Exceptionally High

• Material Thickness — Legacy Copper Coils: Thick and rigid — Modern Aluminum Coils: Ultra-thin for efficiency

• Formicary Corrosion Risk — Legacy Copper Coils: High susceptibility to household VOCs — Modern Aluminum Coils: Highly resistant to VOC damage

• Brazing/Repair Viability — Legacy Copper Coils: Possible by skilled technicians — Modern Aluminum Coils: Highly prone to melting and failure

Why Patching Aluminum Coils is Highly Prone to Immediate Failure

We often explain to our customers that the core issue with patching a modern indoor coil lies in the exact metallurgical challenges of brazing aluminum. Brazing is a metal-joining process where two pieces of metal are heated, and a filler metal is melted into the joint to create a seal. When working with copper, the melting point of the base metal is significantly higher than the filler, giving the technician a wide margin of error.

Aluminum, however, has a very narrow temperature window before it reaches its melting point. The filler rods required to patch an aluminum puncture melt at temperatures dangerously close to the melting point of the aluminum coil itself. When a technician applies a torch to patch a hole in the thin aluminum tubing, the surrounding metal absorbs the intense heat almost instantly.

The hidden damage of the Heat-Affected Zone (HAZ):

• Microscopic stress fractures: The rapid heating and cooling of the ultra-thin aluminum creates microscopic stress fractures in the metal immediately surrounding the patch.

• Warping and distortion: The localized heat causes the thin walls of the tubing to warp, altering the internal diameter of the coil and disrupting the precise flow of refrigerant.

• Compromised structural integrity: Even if the filler metal successfully covers the initial puncture, the surrounding aluminum is now brittle and permanently weakened.

It is crucial to understand that this is a technical limitation of the material itself, not a lack of technician skill on our part. The physics of applying high-temperature flames to paper-thin aluminum dictate that the area around the patch will always be weaker than the original factory extrusion. Once the structural integrity of that specific coil section is compromised, it is only a matter of time before the extreme internal forces of the system tear the weakened metal apart.

The Stress Test: Operating Pressures in High-Demand Climates

To fully grasp why a brazed patch on an aluminum coil is destined to fail, we tell our customers to look at the immense internal forces pushing against that patch from the inside. Modern air conditioning systems utilize R-410A high operating pressures to move heat efficiently. Compared to legacy R-22 systems, which operated at relatively moderate pressures, R-410A is a highly volatile, high-pressure compound.

During a standard cooling cycle, the pressure on the high side of an R-410A system can easily exceed 400 psi (pounds per square inch). To put that into perspective, the average car tire is inflated to roughly 35 psi. The refrigerant inside your indoor coil is pushing outward against the thin aluminum walls with more than ten times the force of a fully inflated tire. When a coil has been compromised by a puncture and subsequently weakened by the heat of a brazing torch, that 400 psi of force is constantly pressing against the most fragile, brittle section of the metal.

Here in Miami, our team knows that your air conditioner must run almost continuously, especially during the late-summer back-to-school transition, to properly dehumidify and cool the home. This continuous operation prevents the system from resting, keeping pressure stress on the coil at maximum levels for hours on end. The constant cycling of the compressor also introduces thermal expansion and contraction. As the coil rapidly cools down during operation and warms up when the system eventually shuts off, the metal expands and contracts. This microscopic movement flexes the weakened area around the patch over and over again.

Ultimately, our field experience shows that the combination of continuous high-pressure stress, thermal expansion, and the brittle nature of the heat-affected zone inevitably blows out temporary brazed patches. This is a primary reason why an AC hissing sound requires immediate attention—the forces at play are too extreme for a compromised component to withstand.

Why Patching Aluminum Coils Fails Under Pressure

Chemical Leak Sealants: A Temporary Band-Aid, Not a Cure

When we explain that brazing an aluminum coil is highly unreliable, Miami homeowners often ask us about alternative patching methods, such as exterior epoxies or chemical leak sealants injected directly into the refrigerant lines. While these products are heavily marketed as quick fixes, they present severe mechanical risks to the entire cooling system.

Chemical leak sealants are designed to circulate through the system along with the refrigerant and oil. When the sealant encounters a leak and is exposed to atmospheric moisture or oxygen, it is supposed to crystallize and plug the hole. However, air conditioning systems are incredibly sensitive to foreign contaminants. If there is any existing moisture inside the refrigerant lines—which is highly likely if the system has been leaking and sitting idle—the sealant can prematurely crystallize inside the moving parts of the system.

The dangers of relying on chemical sealants and epoxies:

• Gummed-up components: Sealants frequently clog the thermostatic expansion valve (TXV), a precision component that meters the exact flow of refrigerant into the evaporator coil. A clogged TXV completely halts the cooling process.

• Compressor failure: If the crystallized sealant reaches the outdoor compressor, it can destroy the internal valves and bearings, turning a coil problem into a catastrophic total system failure.

• Inadequate exterior epoxies: Two-part epoxies applied to the outside of a puncture cannot withstand the continuous thermal expansion, contraction, and high operating pressures of R-410A. The epoxy eventually cracks and peels away, reopening the leak.

These methods are unreliable band-aids that often lead to much more severe secondary breakdowns. Relying on a chemical additive to fix a structural failure is a gamble that frequently results in a homeowner needing emergency AC repair when the compressor ultimately locks up.

When Coil Replacement is the Only Mechanically Sound Solution

Given the insurmountable challenges of brazing thin aluminum, the extreme operating pressures of modern refrigerants, and the catastrophic risks of chemical sealants, full replacement is the scientifically and mechanically correct approach to a punctured coil. Installing a new, factory-sealed evaporator coil is the only way to guarantee that the system's original pressure tolerance and structural integrity are fully restored.

A factory-sealed coil is manufactured under strict quality control standards. The aluminum tubing is extruded flawlessly, and the entire assembly is pressure-tested at the factory to ensure it can withstand the rigors of R-410A refrigerant. By opting for a replacement, you eliminate the risk of secondary leaks forming around a weakened, heat-damaged patch area. Furthermore, restoring proper, unimpeded refrigerant flow ensures the system can adequately dehumidify and cool the home without forcing the compressor to overwork.

At Air On Demand, our team's commitment to transparent diagnostics means we will always give you an honest assessment on when a temporary patch is a waste of money versus when a coil replacement is the only safe, long-term solution. Framing the replacement recommendation as an issue of mechanical safety and long-term reliability ensures that homeowners are not throwing good money after bad. A proper Miami AC repair strategy prioritizes the longevity of the entire HVAC system, protecting the expensive outdoor compressor from the strain of operating with a compromised indoor coil.

Frequently Asked Questions About Evaporator Coil Damage

Can you repair a hole in an evaporator coil?

While physically possible in a controlled environment, our technicians highly discourage repairing a hole in an evaporator coil due to the extreme operating pressures of modern refrigerants. The process of applying intense heat to thin aluminum creates structural weaknesses that almost guarantee the patch will fail once the system is pressurized. For long-term reliability, replacing the damaged coil is the standard mechanical recommendation.

Can you weld an aluminum AC coil?

Welding or brazing thin aluminum coils is incredibly difficult and often results in melting the surrounding metal, creating further damage. Because the melting point of the aluminum tubing is so close to the melting point of the filler material, the torch heat frequently warps the coil and causes microscopic stress fractures. These fractures become new leak points as soon as the system resumes operation.

Why do aluminum evaporator coils leak?

Leaks typically occur due to physical punctures, continuous high-pressure stress, or formicary corrosion from household VOCs. While modern aluminum is highly resistant to the chemical corrosion that plagued older copper coils, it is still susceptible to physical damage from tools, severe vibration, or the continuous stress of high-pressure R-410A refrigerant pushing against a weak point in the factory extrusion.

How long does an evaporator coil last?

With proper maintenance and optimal operating conditions, a factory-sealed evaporator coil can last 10 to 15 years. Regular filter changes, maintaining proper airflow, and ensuring the system is operating with the correct refrigerant charge all contribute to the longevity of the coil. However, once a coil suffers a physical puncture, its lifespan is effectively over.

Is it safe to run my AC if I hear a hissing sound from the indoor unit?

No, continuing to run the system with a refrigerant leak forces the compressor to overwork and can lead to complete system failure. When the system loses refrigerant, the compressor loses its primary source of cooling, causing it to overheat. Running a compromised system turns a localized coil issue into a catastrophic failure of the most vital component in your air conditioner.

Secure Long-Term Reliability for Your Cooling System

Dealing with a punctured indoor coil can be a frustrating experience, especially when the failure occurs during the hottest weeks of the late-summer cooling season. However, understanding the mechanical realities of your HVAC system empowers you to make informed decisions. The intense pressures of R-410A and the delicate nature of modern aluminum make patching a punctured coil an unreliable gamble that places your entire system at risk. Re-pressurizing a weakened, patched coil is simply delaying the inevitable.

Reiterating the facts, a full coil replacement guarantees restored system integrity, proper dehumidification, and consistent cooling performance without the looming threat of a sudden blowout. You deserve the confidence to make the right repair versus replace decision without the stress of repeated breakdowns. If you are dealing with a hissing indoor unit or a sudden loss of cooling, seek a professional, honest diagnostic assessment from our team to determine the best path forward. Protect your home's comfort and your system's lifespan by exploring professional AC replacement services today.

Daikin Unit Replacement Guarantee vs. Standard Compressor Warranties placeholder-image  | Air On Demand
5 min read

Daikin Unit Replacement Guarantee vs. Standard Compressor Warranties

When your AC compressor dies in the August heat, you face a critical choice. Learn how Daikin's full outdoor unit replacement compares to standard part-only coverage.

The Reality of Compressor Failure in Peak Heat

Your air conditioning system abruptly stops blowing cold air right in the middle of a brutal August late-summer heat wave, leaving you sweating in your own living room. Here at Air On Demand, our technicians see a surge of these exact breakdowns as Miami families transition into the back-to-school season. Navigating the differences between a Daikin Unit Replacement Guarantee vs. Standard Compressor Warranties is the last thing you want to do when your house feels like an oven, but it is the most important decision you will make regarding your home's comfort. When the outdoor unit falls silent and the indoor temperature starts climbing by the hour, you are suddenly faced with a massive mechanical failure that requires immediate action.

To learn more about premium system options that offer superior protection, explore our full lineup of Daikin equipment.

The compressor is the heart of your air conditioning system. It is the heavy-duty motor responsible for pumping refrigerant between the indoor and outdoor coils, making the entire heat-transfer process possible. When a compressor fails, your system is essentially reduced to a giant fan blowing warm air through your ductwork. This is not a minor repair like a blown capacitor or a clogged drain line; a dead compressor is a catastrophic system event.

At this critical juncture, homeowners must navigate their warranty coverage to restore system functionality. Most people assume that if their system is "under warranty," a major breakdown will be fully covered and quickly resolved. However, not all manufacturer warranties offer the same level of protection for major component failures. The industry standard approach heavily favors providing a replacement part, while premium coverage tiers offer a completely new outdoor unit. Understanding the mechanical and financial differences between receiving just a replacement part versus a factory-fresh outdoor condensing unit is the key to making a smart, long-term investment in your home cooling system.

How Standard Compressor Warranties Actually Work

To understand the value of premium coverage, you first have to understand the limitations of traditional HVAC warranties. When a contractor tells you that your failed compressor is covered under a standard manufacturer warranty, it sounds like excellent news. But in our years of performing AC repair across Miami, we've found that the mechanical reality of how that warranty is fulfilled often catches homeowners off guard.

The Problem: Hidden Out-of-Pocket Expenses

A standard compressor warranty is a "parts-only" agreement. It legally covers the physical, uninstalled compressor unit sitting in a supply house—and absolutely nothing else. The manufacturer provides the metal box containing the motor, but the homeowner is entirely responsible for the complex labor required to install it. Replacing a compressor is one of the most labor-intensive jobs in the HVAC industry. A professional technician must recover the existing refrigerant, use a torch to cut out the dead compressor, weld the new compressor into place, replace the liquid line filter drier, pull a deep vacuum on the entire system to remove moisture, and then weigh in fresh refrigerant. You are responsible for the labor hours, the brazing materials, the recovery process, and the costly new refrigerant required to get the system running again.

The Cause: Degraded Surrounding Components

Beyond the immediate labor expenses, there is a severe mechanical downside to this approach. When you install a brand-new compressor under a standard warranty, you are putting a pristine, high-performance motor into an aging, degraded chassis. In Miami coastal and high-humidity zones, the surrounding components—such as the condenser coil, the fan motor, the contactor, and the aluminum fins—are likely already suffering from environmental wear and tear by the time the original compressor fails. The new compressor is forced to push refrigerant through a coil that may be partially corroded or inefficient, which immediately puts excess strain on the new part.

The Solution: Recognizing the Vulnerability

This parts-only approach leaves the rest of the outdoor unit highly vulnerable to subsequent failures. You might successfully replace the compressor this season, only to have the condenser fan motor burn out or the outdoor coil spring a massive refrigerant leak next season. A standard warranty fixes the immediate symptom but ignores the overall health of the aging outdoor unit, forcing you into a cycle of ongoing repairs.

The Daikin Unit Replacement Guarantee Explained

Daikin recognized the mechanical flaws of putting new parts into old, degrading outdoor units. To provide a higher level of protection for homeowners investing in high-efficiency systems, they introduced a premium warranty tier that fundamentally changes how major failures are handled.

The Daikin Unit Replacement Guarantee is available on select high-efficiency models and operates on a simple but powerful premise: if the compressor fails within the specified guarantee period, the manufacturer does not just send a replacement part. Instead, the homeowner receives a completely new outdoor condensing unit. This completely bypasses the mechanical mismatch of pairing a new motor with an old coil.

Here is how the process typically works when a failure occurs during an August late-summer heat wave:

1. Professional Diagnosis: A certified HVAC technician inspects the system, performs electrical and mechanical tests, and officially condemns the compressor.

2. Warranty Verification: The technician verifies the system's serial numbers to confirm the Unit Replacement Guarantee is active and valid.

3. Equipment Order: Instead of ordering a bare compressor, the local dealer orders a factory-fresh outdoor unit that perfectly matches your indoor air handler.

4. Clean Installation: The technicians remove the entire old outdoor chassis and install the new one. This is a much cleaner, faster process than field-welding a new compressor into an old box.

The long-term value of this guarantee is immense. By replacing the entire outdoor unit, you are effectively resetting the lifespan of the outdoor system. You get a new coil, a new fan motor, new electrical contactors, and a pristine chassis. To ensure you have comprehensive coverage for the installation process itself, it is highly recommended to explore Daikin extended labor warranties, which can cover the technician's time during the unit swap.

It is important to note that this premium coverage requires action on the homeowner's part. To activate the Unit Replacement Guarantee, the equipment must typically be registered with the manufacturer within 60 days of the original installation. Failing to register the equipment often causes the warranty to revert to a standard parts-only policy.

Side-by-Side: Part Replacement vs. Entire Outdoor Unit

When faced with a major system failure in Miami coastal and high-humidity zones, seeing the direct mechanical comparison makes the decision much clearer. Here is exactly how a standard compressor warranty compares to a Unit Replacement Guarantee.

• Physical Outcome — Standard Compressor Warranty (Part Only): A brand-new compressor installed inside an old, degrading metal chassis with aging coils. — Daikin Unit Replacement Guarantee: A factory-fresh outdoor unit, including a new cabinet, coils, fan motor, and compressor.

• Labor Intensity — Standard Compressor Warranty (Part Only): Extremely high. Requires cutting, brazing, vacuuming, and extensive field labor. — Daikin Unit Replacement Guarantee: Moderate. Involves disconnecting the old unit and setting a new, factory-sealed unit in place.

• System Reliability — Standard Compressor Warranty (Part Only): Low to Moderate. The new compressor is bottlenecked by the wear and tear on the old condenser coil. — Daikin Unit Replacement Guarantee: Maximum. Factory reliability is completely restored with matched, brand-new components.

• Adjacent Part Risk — Standard Compressor Warranty (Part Only): High. The fan motor, contactor, or coils could fail weeks or months later. — Daikin Unit Replacement Guarantee: Eliminated. All outdoor components are brand new and reset to day-one condition.

• Long-Term Value — Standard Compressor Warranty (Part Only): A temporary fix that extends the life of a declining system. — Daikin Unit Replacement Guarantee: A permanent resolution that resets the lifespan of the outdoor equipment.

Part Replacement vs. Entire Outdoor Unit Replacement

The Mechanical Toll of Coastal Environments on Your AC

Understanding the difference between these two warranty types is especially critical when you factor in regional climate extremes. In our extensive experience handling AC installation and maintenance across Miami, we've seen firsthand how our continuous high-heat and humid coastal environment subjects your air conditioning system to workloads that systems in milder climates never experience. This relentless environment dictates whether repairing vs. replacing your AC is a viable mechanical choice.

Continuous High-Heat Workloads: During the peak of summer, your compressor runs almost continuously to remove heat and humidity from your home. This does not just wear out the compressor motor; it wears out everything simultaneously. The contactor that sends voltage to the compressor arcs and pits with every cycle. The condenser fan motor bearings slowly dry out from the intense heat radiating off the coils. By the time the compressor finally gives out, the surrounding parts are usually on their last legs as well.

Salt Air Corrosion: Miami coastal and high-humidity zones present a unique threat: salt air. Airborne salt is highly corrosive to the aluminum fins and copper tubing that make up your outdoor condenser coil. Over several years, this galvanic corrosion literally eats away the thin metal fins, significantly reducing the coil's ability to reject heat into the outside air. The metal chassis itself may begin to rust and degrade.

The Inefficiency of Mismatched Parts: If you use a standard warranty to put a pristine new compressor into a salt-corroded coil system, you are setting the new part up for failure. A degraded coil cannot dissipate heat efficiently, which forces the new compressor to operate at higher pressures and temperatures than it was designed for. This drastically reduces the efficiency of the new part and shortens its lifespan. Because regional climate extremes accelerate wear on the entire outdoor unit simultaneously, the Unit Replacement Guarantee becomes exceptionally valuable. It allows you to discard the corroded, inefficient coil and start fresh, ensuring your new compressor operates in an optimal, factory-clean environment.

Can I Replace Just My AC Condenser?

When a compressor fails during August late-summer heat, many homeowners wonder if they can simply buy a new outdoor condenser unit while keeping their older indoor air handler to save on costs. While this sounds like a logical workaround, it introduces severe mechanical and warranty complications.

The Danger of Mismatched SEER Ratings

Air conditioning systems are engineered to operate as matched pairs. The outdoor condenser and the indoor evaporator coil are designed to move a specific volume of refrigerant at specific pressures to achieve their rated SEER (Seasonal Energy Efficiency Ratio). If you attempt to connect a modern, high-efficiency outdoor unit to an older, less efficient indoor coil, the system will not perform correctly. The indoor coil will likely be too small to handle the refrigerant flow of the new outdoor unit, leading to poor humidity removal, frozen coils, and premature compressor failure.

Refrigerant Compatibility Issues

The HVAC industry has undergone significant regulatory changes regarding refrigerants. Older systems utilized R-22, which has been completely phased out, while most current systems use R-410A (and the industry is currently transitioning to newer A2L refrigerants). You absolutely cannot connect an outdoor unit designed for one type of refrigerant to an indoor coil designed for another. The oils are incompatible, and the operating pressures are vastly different. Doing so will destroy the new compressor almost immediately.

Warranty Implications for Matched Systems

Manufacturer warranty policies, including Daikin's, are very strict about matched systems. To qualify for premium coverage tiers like the Unit Replacement Guarantee, the outdoor unit and the indoor unit must be an AHRI-certified matched system. If you attempt to replace just the AC condenser and pair it with an incompatible or third-party indoor coil, the manufacturer will likely void the warranty entirely. If you are dealing with a failed system and want the flexibility of zoned cooling without extensive ductwork matching, exploring ductless mini split systems is often a smarter route than trying to cobble together mismatched traditional components.

Why Proper Installation Protects Your Warranty Coverage

Premium warranty coverage is only as reliable as the technicians who install the equipment. It is a common misconception that manufacturer warranties are unconditional. In reality, warranties—including the Daikin Unit Replacement Guarantee—can be easily voided by improper installation or neglect.

Strict Manufacturer Specifications: HVAC manufacturers engineer their equipment to operate under specific parameters. If an installer cuts corners, the warranty is at risk. Proper installation requires exact refrigerant charging; if a system is overcharged or undercharged, the compressor will suffer liquid slugging or overheating, and the manufacturer will deny the warranty claim. Adequate airflow is equally critical. If the ductwork is undersized or the indoor blower speed is set incorrectly, the system will suffocate, leading to premature failure that is not covered by the factory.

The Necessity of Routine Maintenance: Beyond the initial installation, homeowners must uphold their end of the warranty agreement through documented routine maintenance. Manufacturers require proof that the system has been regularly serviced by a licensed professional. Skipping annual tune-ups allows dirt to clog the coils and electrical components to weaken, causing preventable breakdowns that void coverage.

The Value of Local Expertise: This is why working with certified local technicians is non-negotiable. Our team at Air On Demand has spent years mastering Daikin equipment, ensuring that every AC installation meets strict manufacturer standards so your warranties remain fully valid. We understand the specific demands of Miami coastal and high-humidity zones, and we meticulously size, install, and commission every system to protect your investment. A premium warranty is a powerful shield against unexpected costs, but only if the equipment is installed by professionals who respect the manufacturer's engineering standards.

Secure Your Long-Term Comfort with the Right Coverage

When the August late-summer heat is pushing your air conditioner to its absolute limits, you need to know that your system is backed by coverage that actually protects your home. Investing in equipment backed by a Unit Replacement Guarantee offers vastly superior protection against major failures compared to standard industry warranties.

The mechanical advantage is clear: receiving a completely new outdoor unit eliminates the risks of putting a new compressor into a degraded, salt-corroded chassis. It restores factory reliability, ensures optimal efficiency, and prevents a domino effect of adjacent part failures. A standard parts-only warranty may sound reassuring, but it often leaves homeowners burdened with significant labor expenses and an aging system that will inevitably break down again.

Before peak temperatures arrive and put maximum strain on your cooling equipment, take the time to evaluate your current system's age, performance, and warranty status. If your system is aging out of its coverage window, now is the time to explore high-efficiency replacements that offer total peace of mind. Secure your long-term comfort today by exploring our premium Daikin Fit systems and experience the difference that true manufacturer backing can make.

Frequently Asked Questions

What is the Daikin Unit Replacement Guarantee?

The Daikin Unit Replacement Guarantee is a premium warranty tier available on select high-efficiency models. If the compressor fails within the specified guarantee period, Daikin provides a completely new outdoor condensing unit rather than just a replacement compressor part. This ensures the new compressor operates in a factory-fresh chassis with brand-new coils and electrical components.

Is labor included in a standard Daikin warranty?

No, standard manufacturer warranties across the HVAC industry typically only cover the cost of the uninstalled replacement part. The homeowner is responsible for all labor costs associated with diagnosing the failure, removing the old part, installing the new component, and recharging the system with refrigerant. Extended labor warranties must usually be purchased separately through the installing dealer.

How long is a Daikin mini split warranty?

Daikin ductless mini split systems often come with up to a 12-year parts limited warranty when properly registered. This extensive coverage protects the major internal components of both the indoor air handlers and the outdoor condenser. Unregistered equipment typically defaults to a much shorter 5-year parts warranty.

Do I need to register my Daikin equipment to get the 12-year warranty?

Yes, registration is strictly required to activate maximum warranty benefits. Homeowners must register their new Daikin equipment online within 60 days of the installation date. If the equipment is not registered within this window, the warranty coverage usually reverts to a standard 5-year base policy.

What actions can void an HVAC manufacturer warranty?

Manufacturer warranties can be voided by improper installation, lack of documented annual maintenance, or the use of unapproved third-party replacement parts. Additionally, pairing a new outdoor unit with an incompatible or uncertified indoor coil will typically void the warranty immediately, as the system must operate as an AHRI-matched pair to meet engineering standards.

Thermal Overload: Why Your Fan Motor Shuts Down While the Compressor Keeps Pumping placeholder-image  | Air On Demand
5 min read

Thermal Overload: Why Your Fan Motor Shuts Down While the Compressor Keeps Pumping

A silent fan paired with a humming compressor is a critical mechanical mismatch. This thermal overload event means you must shut down your AC immediately to prevent total compressor failure.

A Silent Fan and a Humming Compressor: The Immediate Warning Signs

Understanding Thermal Overload: Why Your Fan Motor Shuts Down While the Compressor Keeps Pumping is your most urgent priority when your air conditioner runs nonstop but only blows lukewarm air. When you step outside into the brutal August late-summer heat to investigate, you are met with a highly specific and alarming scenario: the loud, vibrating hum of the compressor is echoing through the casing, but the fan blades on top of the unit are sitting dead still. If you are facing this exact mechanical mismatch, you need to act quickly.

If you need immediate assistance with this specific breakdown, scheduling professional AC repair in Miami is the safest way to restore your cooling and protect your system.

This combination of symptoms is not a minor glitch or a temporary pause in the cooling cycle. It is a critical mechanical failure. The loud buzzing you hear is the compressor actively trying to pump refrigerant through the system, completely unaware that its cooling partner—the condenser fan—has been forced off line. In the vast majority of cases, this sudden shutdown is triggered by a thermal overload event. The fan motor has grown dangerously hot, and an internal safety switch has deliberately severed its power supply to prevent a catastrophic meltdown. Recognizing this distinct sound profile is your immediate warning sign that the system is in distress and must be shut down at the thermostat right away before secondary damage occurs.

The Hidden Safety Feature: Understanding Thermal Overload

It is easy to view a dead fan motor as nothing more than a broken part, but the reality is slightly more complex. The sudden shutdown is actually a vital safety mechanism working exactly as intended. Inside the casing of your condenser fan motor is a small, specialized component known as a thermal overload protector. This switch is designed to monitor the internal temperature of the motor windings. When the heat exceeds safe operational limits—a frequent occurrence in Miami FL during peak cooling season—the switch trips, cutting electrical power to the fan motor instantly.

This mechanism exists for one primary reason: to prevent electrical fires and stop the motor from literally melting its own internal components. While the switch successfully saves the fan motor from catching fire, the system's wiring configuration often allows the compressor to continue receiving power, creating a dangerous imbalance.

How the Thermal Switch Operates

Understanding how this hidden protector functions helps clarify why your system is behaving so strangely. The process follows a specific sequence of events:

1. Heat accumulation: Friction, electrical resistance, or extreme ambient temperatures cause the motor's internal heat to rise steadily.

2. Physical reaction: A bimetallic disc inside the thermal overload protector responds to the heat. Because it is made of two different metals, it warps or bends as temperatures peak.

3. Circuit break: As the disc bends, it physically breaks the electrical connection, instantly stopping the flow of electricity to the fan motor.

4. Cooling phase: Once the motor cools down sufficiently, the disc snaps back into its original position, theoretically restoring the connection.

While the switch will eventually reset once cooled, the underlying problem that caused the extreme heat remains unresolved. The motor will simply overheat and trip again if the root cause is not addressed.

Safety Thresholds and Temperatures

According to National Electrical Manufacturers Association (NEMA) and Department of Energy (DOE) standards regarding motor safety, these protectors are highly calibrated. They typically trip when internal temperatures reach between 105 and 130 degrees Celsius (220 to 266 degrees Fahrenheit). Reaching these extreme thresholds indicates that the motor is operating far outside its intended limits, requiring professional intervention to diagnose the strain.

The Silent Threat: What Happens When the Compressor Runs Alone

The Problem: The outdoor unit of your air conditioner relies on a symbiotic relationship between two main components: the compressor and the condenser fan. The compressor's job is to pressurize warm refrigerant gas, while the fan's job is to pull massive volumes of outdoor air across the condenser coils to dissipate that heat into the atmosphere. When the fan shuts down due to thermal overload, this delicate balance is shattered.

The Cause: Without the fan actively pulling air across the coils, the heat generated by the compressor has nowhere to go. The refrigerant remains hot and highly pressurized. As the compressor continues to run in the August late-summer heat, the internal pressure and temperature inside the compressor shell begin to skyrocket. Unlike the fan motor, the compressor does not always have a rapid-response secondary safety switch that will trip in time to save it from this specific type of pressure buildup.

The Solution: A compressor running without a functioning condenser fan will rapidly burn out its own electrical windings or suffer catastrophic mechanical failure. What started as a relatively simple fan motor issue can quickly escalate into a full-system failure requiring extensive emergency AC repair. The only solution is immediate human intervention to break the cycle.

The Dangers of Thermal Overload: Fan vs. Compressor

Your First Step: Shutting Down the System to Save the Compressor

If you walk outside and observe a silent fan paired with a humming compressor, you must take immediate action to prevent further damage. Your very first step is to go straight to your indoor thermostat and switch the cooling system to the OFF position. Do not wait to see if the fan will restart on its own, and do not lower the temperature setting hoping to force a reset.

Turning the system off at the thermostat stops the electrical signal calling for cooling, which immediately stops the compressor from pumping. Halting the compressor stops the dangerous pressure buildup and gives the entire outdoor unit a chance to cool down safely.

Critical safety warnings for homeowners in Miami FL:

• Never try to manually spin the fan blades: Sticking a tool or stick through the top grate to "jump-start" the blades is highly dangerous and will not fix a thermally overloaded motor.

• Do not force a restart: Flipping the breaker on and off repeatedly will only subject the struggling motor to damaging voltage spikes.

• Leave the wiring alone: Bypassing a thermal switch or attempting internal electrical repairs requires a licensed professional. High-voltage capacitors retain a lethal electrical charge even when the power is turned off.

Why Late-Summer Heat Pushes Fan Motors to the Breaking Point

Thermal overload events rarely happen on a mild spring morning. In our years of keeping homes cool across Miami, our team at Air On Demand typically sees a massive spike in these specific service calls right as kids head back to school and late-summer wear catches up with aging equipment. The brutal subtropical climate and high humidity of our region create the perfect storm for this specific mechanical failure.

During the peak of August late-summer heat, your air conditioner is forced into continuous operation. This relentless demand pushes the system's duty cycle—the percentage of time the unit is actively running versus resting—near 100 percent. In a typical climate, an AC unit might run for twenty minutes and then rest for twenty minutes, allowing the fan motor to naturally dissipate its internal heat. In extreme subtropical humidity, those natural cool-down periods are completely eliminated.

• Mild Spring Weather — Typical Duty Cycle: 30% to 40% — Motor Heat Dissipation: Excellent (frequent rest periods) — Thermal Overload Risk: Very Low

• Early Summer Days — Typical Duty Cycle: 50% to 70% — Motor Heat Dissipation: Adequate (moderate rest periods) — Thermal Overload Risk: Low to Moderate

• Late-Summer Heat Waves — Typical Duty Cycle: 90% to 100% — Motor Heat Dissipation: Poor (zero cool-down time) — Thermal Overload Risk: Extremely High

When you combine ambient outdoor temperatures hovering near 95 degrees with the internal mechanical heat generated by a motor running non-stop for hours, the combined temperature easily pushes the motor past its thermal overload threshold. The motor simply cannot shed heat fast enough to survive.

Beyond the Switch: Identifying the Root Cause of the Overheating

A tripped thermal switch is a symptom, not the root disease. While the switch itself did its job perfectly, something caused the motor to run dangerously hot in the first place. Diagnosing this requires looking past the safety feature to find the underlying mechanical or electrical stressor. Because these diagnostics involve testing live high-voltage components, they must be handled by a licensed HVAC technician. Air On Demand provides rapid emergency diagnostics to accurately pinpoint the root cause of the overload, preventing catastrophic compressor failure for homeowners across Miami FL.

Electrical Strain and Capacitors

One of the most common culprits behind thermal overload is a failing run capacitor. The run capacitor provides a continuous, steady supply of electrical energy to keep the fan motor spinning efficiently.

1. When a capacitor begins to degrade, its electrical output drops.

2. The fan motor receives less voltage than it needs to operate.

3. To compensate for the lower voltage, the motor pulls higher amperage.

4. Higher amperage creates excessive electrical resistance, which generates massive amounts of heat, quickly triggering the thermal overload switch.

Mechanical Resistance

If the electrical supply is sound, the heat is likely being generated by physical friction. Over time, the sealed bearings inside the fan motor can lose their lubrication or wear down. When bearings fail, the motor has to fight against severe mechanical resistance just to turn the blades. This is often the primary cause of a seized condenser fan motor. Alternatively, thick debris, vines, or sticks blocking the fan blades can create physical resistance, forcing the motor to work twice as hard and overheat rapidly.

Breaking the Cycle: How to Prevent Future Thermal Overload Events

The best way to handle a thermal overload event is to prevent it from happening in the first place. Proactive care reduces the workload on your fan motor, ensuring it stays well below its critical temperature thresholds even during the worst of the August late-summer heat. By implementing a few straightforward preventative measures, you can dramatically extend the life of both your fan motor and your compressor.

The Thermal Overload Prevention Checklist:

• Maintain clear airflow: Keep the outdoor condenser unit entirely clear of debris, fallen leaves, and overgrown vegetation. Trim bushes back at least two feet from the casing to ensure the fan doesn't have to struggle to pull air.

• Schedule professional coil cleaning: Routine professional cleaning of the aluminum condenser coils removes insulating dirt and grime, vastly reducing the workload on the fan motor.

• Invest in pre-season inspections: Scheduling routine AC maintenance allows a technician to test the microfarad readings on your capacitors and check the motor bearings for friction before they fail.

• Monitor aging units: If your air conditioner has endured more than a decade of harsh subtropical summers, pay close attention to unusual noises. A grinding or squealing sound is often the first sign of failing bearings that will soon lead to thermal overload.

Frequently Asked Questions About AC Fan Motors and Compressors

Why is my AC compressor running but the fan is not?
When the compressor is running but the fan is not, it usually indicates that the fan motor's internal thermal overload switch has tripped to prevent an electrical fire. The fan motor shuts down due to extreme heat, but the system's wiring allows the compressor to keep receiving power. Other causes can include a blown fan capacitor or a burnt-out fan motor winding.

What happens if the AC compressor runs without the fan?
If the AC compressor runs without the fan, the system loses its ability to dissipate heat into the outdoor air. This causes the internal pressure and temperature of the compressor to spike rapidly. Left running in this state, the compressor will eventually overheat and suffer permanent, catastrophic failure.

Is it bad if the AC fan is not spinning?
Yes, it is a critical emergency if the AC fan is not spinning while the rest of the unit is active. The fan is essential for removing heat from the refrigerant cycle. Without it, the entire cooling process breaks down, and the expensive compressor is put at immediate risk of burning out.

How do you fix an AC fan that won't spin?
Fixing an AC fan that won't spin begins by turning off the thermostat immediately to protect the equipment. A licensed technician must then use a multimeter to test the dual run capacitor, check the motor for seized bearings, and verify voltage at the contactor to determine the exact component failure.

How do I know if my AC fan motor is burnt out or just overheated?
An overheated motor will often reset and try to run again once the thermal overload switch cools down, whereas a burnt-out motor will remain completely dead regardless of temperature. A professional technician determines the difference by testing the electrical continuity of the motor's internal windings using specialized diagnostic meters.

Can a tripped thermal overload switch reset itself?
Yes, most thermal overload switches in HVAC motors are automatic-reset devices that reconnect the circuit once the motor cools to a safe temperature. However, the switch will simply trip again as soon as the motor heats back up, meaning the underlying mechanical or electrical issue in Miami FL must still be repaired.

Protect Your Compressor with Expert Diagnostics

Discovering a silent fan and a humming compressor is a stressful moment for any homeowner, especially during the relentless August late-summer heat. However, recognizing that the thermal overload switch is a built-in safety mechanism gives you the knowledge you need to react properly. Your immediate action—shutting the system off at the thermostat—is the critical step that saves your compressor from secondary damage.

Because thermal overload always points to a deeper electrical or mechanical strain, trusting expert diagnostics is the only way to break the cycle of overheating. By seeking professional help promptly, you can ensure the root cause is resolved safely, restoring reliable, efficient cooling to your home without risking your most expensive system components.

Flat-Rate Repair Pricing vs. Time-and-Materials Billing in HVAC placeholder-image  | Air On Demand
5 min read

Flat-Rate Repair Pricing vs. Time-and-Materials Billing in HVAC

When a late-summer heatwave breaks your AC, you shouldn't have to stress over an open-ended invoice. Understanding your contractor's billing structure protects you from escalating diagnostic fees.

Uncovering the Hidden Risks of AC Repair Billing Models

Paying an HVAC technician by the hour doesn't guarantee a fair price—in fact, when you are weighing Flat-Rate Repair Pricing vs. Time-and-Materials Billing in HVAC, the traditional hourly model often penalizes the homeowner. A common misconception in the service industry is that paying strictly for time and parts ensures you only pay for the exact work performed. However, this assumption ignores the unpredictable reality of troubleshooting complex mechanical systems. When a severe malfunction strikes during the late-summer August heat, the last thing you need is the anxiety of an open-ended invoice while a technician searches for the root cause of the problem.

Facing a sudden system breakdown when cooling is absolutely critical creates an incredibly stressful environment. You want your home comfortable again as quickly as possible, but you also need to know what the restoration will cost before committing to the work. Choosing a contractor based on their billing structure is just as important as evaluating their technical expertise. If you are scheduling AC repair services, understanding how your contractor calculates their fees protects you from escalating costs during complex diagnostics. We need to look closely at how these two primary billing models impact your final invoice, your stress levels, and the overall quality of the service you receive.

How Time-and-Materials Billing Leaves Homeowners Vulnerable

Time-and-materials billing is a traditional pricing structure where the homeowner pays for the exact time the technician is on-site, plus the cost of any parts required for the repair. On the surface, this sounds entirely logical. However, it introduces a significant vulnerability for the homeowner: the "ticking clock" effect. If a technician is less experienced, lacks the proper diagnostic equipment, or simply struggles to locate a hidden malfunction, the homeowner absorbs the financial cost of that inefficiency. You are essentially paying for the time it takes the technician to figure out the problem, not just the time it takes to fix it.

This vulnerability becomes glaringly obvious when you factor in the extreme working conditions common to Miami and surrounding South Florida areas. During the peak of summer, attic temperatures can easily exceed 100 degrees. Working in this extreme heat physically slows technicians down. They must move carefully, take necessary safety breaks to prevent heat exhaustion, and navigate cramped, sweltering spaces. Under a time-and-materials contract, these environmentally driven delays directly inflate your invoice. You are paying for the extra time it takes to work safely in extreme heat, turning what seems like a simple service call into a massive, unpredictable expense. If you are wondering how much AC services cost, an hourly model makes it impossible to get a straight answer until the job is completely finished.

The Problem with Open-Ended Diagnostic Times

Finding the root cause takes time: Locating an electrical short hidden behind drywall or pinpointing a micro-leak in a heavily insulated refrigerant line is rarely instantaneous. These diagnostics require methodical, step-by-step testing. Under an hourly model, every minute spent testing adds to your bill.

Lack of efficiency incentives: Hourly models provide no financial incentive for the contractor to invest in faster, more advanced diagnostic tools. If the company gets paid more when the job takes longer, there is little motivation to equip technicians with the latest technology that could cut diagnostic times in half. The homeowner assumes all the financial risk for slow, outdated troubleshooting methods.

The Mechanics of Flat-Rate Pricing for HVAC Services

Flat-rate pricing offers a completely different approach, providing a predetermined cost for a specific repair based on national or regional industry averages. This fixed price encompasses both the necessary parts and the labor required to complete the job, regardless of how long the technician actually spends at your home. By utilizing standardized completion times for thousands of specific HVAC repairs, contractors can offer a guaranteed upfront cost before any wrenches are turned.

The process of flat-rate billing is designed around transparency and homeowner consent. When dealing with a breakdown in the oppressive late-summer August heat, this structured approach eliminates the anxiety of the unknown. Here is how the flat-rate process typically unfolds when you call for Miami AC repair:

1. Comprehensive Diagnostic: The technician arrives and performs a thorough evaluation of your cooling system to identify the exact cause of the failure.

2. Problem Identification and Solution Building: Once the issue is pinpointed, the technician consults their standardized pricing guide to find the specific repair code associated with your system's problem.

3. Firm Upfront Presentation: The technician presents you with a firm, guaranteed price for the complete repair. This price includes all parts, labor, and necessary materials.

4. Homeowner Approval: You review the proposed cost and authorize the work. No repair work begins until you are completely comfortable with the price.

5. Execution of the Repair: The technician completes the repair. Whether the job takes thirty minutes or three hours, your final bill remains exactly what you agreed to in step three.

The most significant advantage of this model is consistency. You are paying for the solution, not the time it takes to deliver it. This model completely removes the financial penalty of a difficult diagnostic process from the homeowner's shoulders.

Why Hard-to-Diagnose AC Issues Inflate Hourly Invoices

Modern HVAC systems are not simple appliances; they are complex networks of sensitive electronic sensors, intricate circuit boards, and highly pressurized refrigerants. When these systems fail, the cause is not always a glaringly obvious broken belt or a completely shattered fan blade. Often, the most frustrating breakdowns involve intermittent failures—a system that only trips a breaker occasionally, or a unit that cools perfectly for an hour before suddenly shutting down. Tracing these erratic behaviors requires extensive, time-consuming troubleshooting.

Environmental factors heavily influence the frequency and severity of these complex failures. In Miami and surrounding South Florida areas, the coastal humidity and salt air accelerate corrosion on outdoor condenser coils, contactors, and electrical connections. This corrosion leads to hard-to-diagnose intermittent failures that take significantly longer to trace. A technician might need to test multiple corroded contact points before finding the exact spot where the voltage is dropping. Under an hourly billing model, this meticulous testing process causes the invoice to skyrocket.

For example, diagnosing high-pressure hissing sounds often involves searching for a microscopic refrigerant leak. Tracing a leak through lines that are hidden inside walls, buried underground, or routed through tight attic spaces can take substantial time. With time-and-materials billing, you are paying for every minute the technician spends waving a leak detector over those hidden lines. With flat-rate pricing, the cost of repairing the leak is set upfront, protecting you from a bloated bill if the leak proves exceptionally difficult to locate.

Electrical Shorts and Sensor Failures

The tedious testing process: Modern air conditioners rely on an array of safety switches and temperature sensors. When one of these fails, the system locks out to protect itself. Finding which specific sensor failed out of a dozen possibilities requires testing each one individually with a multimeter. This is a tedious, methodical process.

Protection through upfront pricing: Flat-rate pricing protects the homeowner during this lengthy process. The diagnostic fee covers the time it takes to find the problem, and the subsequent repair quote is fixed. You aren't left watching the clock while the technician tests the tenth wire in a complex harness.

Flat-Rate vs. Hourly: A Side-by-Side Comparison

When you are evaluating your options during a stressful breakdown in the late-summer August heat, having a clear understanding of how these two billing models stack up against each other is crucial. The differences go far beyond just how the math is calculated; they fundamentally change the relationship between the homeowner and the service provider.

The core differences: The table below highlights the stark contrasts between time-and-materials billing and flat-rate pricing, specifically focusing on cost predictability, risk assumption, and the overall homeowner experience.

• Cost Predictability — Time-and-Materials (Hourly): Completely unknown until the repair is fully completed. — Flat-Rate (Upfront) Pricing: Guaranteed and agreed upon before any repair work begins.

• Risk Assumption — Time-and-Materials (Hourly): Homeowner assumes the financial risk for slow or difficult repairs. — Flat-Rate (Upfront) Pricing: Contractor assumes the financial risk if the repair takes longer than average.

• Efficiency Incentives — Time-and-Materials (Hourly): No financial penalty for slow work; contractor earns more the longer it takes. — Flat-Rate (Upfront) Pricing: Contractor is highly motivated to work efficiently and use advanced diagnostic tools.

• Homeowner Stress Levels — Time-and-Materials (Hourly): High anxiety due to the "ticking clock" and unpredictable final invoice. — Flat-Rate (Upfront) Pricing: Complete peace of mind knowing the exact cost upfront.

Flat-Rate vs. Time-and-Materials Billing Comparison

How Upfront Pricing Shifts the Risk to the HVAC Contractor

One of the most critical, yet often overlooked, aspects of flat-rate pricing is how it functions as a robust consumer protection mechanism. In the service industry, the concept of "risk-shifting" determines who bears the financial burden when things don't go according to plan. Under an hourly model, the homeowner holds all the risk. If a rusted bolt snaps, or if a replacement part requires unexpected modifications to fit an older system, the homeowner pays for the extra hours required to solve the new problem.

A flat-rate agreement completely reverses this dynamic. By providing a guaranteed upfront price, the HVAC company takes on the financial responsibility if a repair proves to be more stubborn or complex than initially anticipated. If a job that typically takes one hour ends up taking four hours due to unforeseen complications, the contractor absorbs the cost of those extra three hours, not you. This is why transparent, upfront flat-rate pricing provides ultimate peace of mind and eliminates hidden fees during highly stressful AC emergencies.

Because the contractor assumes the risk, this model heavily encourages HVAC companies to elevate their internal standards. To remain profitable under a flat-rate model in Miami and surrounding South Florida areas, a company must hire highly trained, competent technicians. They must equip those technicians with the most advanced, efficient diagnostic tools available. They cannot afford to employ slow, inexperienced workers because the company—not the customer—pays for that inefficiency. Ultimately, a company's willingness to offer transparent, flat-rate billing is a strong indicator of their confidence in their team's skills and their commitment to trustworthy business practices.

Factoring Diagnostic Realities into Long-Term System Upgrades

Sometimes, the diagnostic process reveals a reality that no homeowner wants to face: the system has suffered a catastrophic failure. A technician might spend an hour troubleshooting a system that won't start in the late-summer August heat, only to discover that the compressor has grounded out or the evaporator coil is severely compromised beyond repair. In these moments, the conversation must pivot from a simple fix to a major financial decision regarding system replacement.

The billing model you are operating under drastically affects your ability to make a clear-headed decision in this scenario. If you are trapped in a time-and-materials contract, you have already racked up a significant hourly bill just to find out the system is dead. This creates a "sunk cost" dilemma, where you might feel pressured to throw good money after bad by attempting a risky repair simply because you've already paid so much for the diagnostic time.

Conversely, upfront diagnostic pricing allows you to evaluate your options without the burden of an escalating hourly invoice. You know exactly what the diagnostic visit costs, and you know exactly what the repair would cost. If the repair quote is prohibitively high due to a failed compressor, you can clearly compare that fixed cost against the investment of a new system. Eliminating the sunk cost of a massive, open-ended hourly diagnostic bill makes it much easier to objectively weigh AC repair vs. replacement and allocate your funds toward a long-term upgrade if that is the most sensible path forward.

Frequently Asked Questions About HVAC Repair Pricing

What is flat-rate pricing in HVAC?

Flat-rate pricing is a billing method where an HVAC contractor provides a single, guaranteed price for a specific repair before any work begins. This predetermined cost is based on industry-standard completion times and includes both the necessary parts and the labor required. It ensures the homeowner knows the exact final bill upfront, regardless of how long the technician actually takes to complete the job.

Is flat-rate or hourly better for AC repair?

For the vast majority of homeowners in Miami and surrounding South Florida areas, flat-rate pricing is significantly better because it eliminates financial surprises. Hourly billing forces the homeowner to pay for a technician's diagnostic struggles or delays caused by extreme attic heat. Flat-rate pricing shifts that risk to the contractor, ensuring you only pay for the solution, not the time it takes to find it.

What are the disadvantages of time-and-materials contracts?

The primary disadvantage of a time-and-materials contract is the lack of a guaranteed final price, leaving the homeowner vulnerable to an open-ended invoice. If a technician is inexperienced, lacks proper tools, or encounters unexpected complications, the homeowner pays for all the extra time required. This "ticking clock" scenario creates immense stress during emergency breakdowns.

How do HVAC contractors charge for complex diagnostics?

Under a flat-rate model, contractors typically charge a standard diagnostic fee to assess the system, followed by a firm, upfront quote for the necessary repair. Under an hourly model, contractors charge for every minute spent troubleshooting, meaning a complex electrical issue or a hard-to-find refrigerant leak can result in a massive diagnostic bill before any actual repair work even begins.

Does flat-rate pricing include both parts and labor for the repair?

Yes, a true flat-rate quote encompasses all the costs required to complete the specific repair. This includes the replacement parts, the technician's labor, any necessary minor materials, and the expertise required to safely restore the system. Once you agree to a flat-rate price, you should not face any additional, hidden fees for that specific repair scope.

Secure Your Peace of Mind with Upfront HVAC Pricing

You should never have to guess what an essential home repair will cost, especially when dealing with a severe system failure in Miami and surrounding South Florida areas. The traditional hourly billing model forces you to bear the financial burden of unpredictable diagnostic times, turning a stressful situation into a complete liability. By choosing a contractor who utilizes flat-rate pricing, you secure clear expectations, eliminate the anxiety of a ticking clock, and guarantee that the service provider remains accountable for their efficiency. When your comfort is on the line, insist on a team that respects your budget through transparent, upfront agreements, ensuring you have the information you need to make the best decision for your home.

Diagnosing a Seized Condenser Fan Motor Bearing After Heavy Summer Usage placeholder-image  | Air On Demand
5 min read

Diagnosing a Seized Condenser Fan Motor Bearing After Heavy Summer Usage

An outdoor AC unit that hums without spinning often points to a mechanical failure. Find out how to safely observe your system's symptoms and decide when to bring in a professional for repairs.

Late Summer AC Stress: When Your Condenser Fan Stops Spinning

By the time August arrives in South Florida, your cooling system has already endured months of relentless heat. At Air On Demand, our technicians see a massive spike in late-summer service calls, making diagnosing a seized condenser fan motor bearing after heavy summer usage a common reality for many Miami homeowners. You might walk outside because your house feels unusually warm, only to discover that the outdoor unit is making a low humming noise, but the large fan blades at the top are completely stationary. This specific symptom points to a system that is desperately trying to run but is being blocked by either a physical barrier or an electrical failure.

When your AC condenser fan stops spinning in late summer, you are faced with a critical decision point: determining whether the issue is a mechanical breakdown of the motor's bearings or an electrical failure of the run capacitor. Understanding the difference between these two issues can save you from unnecessary panic and help you communicate effectively with a technician. Fortunately, the initial steps of this diagnosis require zero tools and can begin with safe, hands-off observation before you ever need to call our professionals to open the cabinet.

Need immediate assistance? Explore our AC repair solutions to restore your home's comfort.

The Impact of Continuous Heavy Load on Fan Motor Bearings

To understand why a fan motor stops spinning, you first have to understand the immense mechanical workload it carries. The condenser fan is responsible for pulling vast amounts of air through the outdoor coil, exhausting the heat that the refrigerant has absorbed from inside your home. At the heart of this spinning motion are the motor bearings—small, precision-engineered metal spheres housed around the motor shaft. These bearings allow the heavy fan blades to rotate thousands of times per minute with almost zero friction.

In our years of providing AC solutions, we've learned firsthand that the Miami FL high-humidity environment changes the operational rules for HVAC equipment. In milder climates, an air conditioner might cycle on and off, giving the motor time to cool down. In South Florida, the relentless heat forces condenser units to run almost non-stop throughout the summer. This extreme, continuous heavy load generates intense internal heat within the motor housing, placing severe stress on the components that keep the system moving.

How Factory Lubrication Fails

Modern residential HVAC fan motors utilize sealed bearings. This means the manufacturer packs the bearing housing with a specific amount of high-grade lubricating oil and seals it permanently at the factory. Under normal conditions, this oil maintains its viscosity and keeps the metal parts gliding smoothly.

When our technicians inspect systems that have run continuously for months, we frequently find that the internal temperature of the motor has stayed elevated for excessive periods. Over time, this extreme heat causes the factory-sealed oil to break down, thin out, and eventually evaporate or degrade into a sticky sludge. Once the lubrication fails, metal begins grinding directly against metal. This friction generates even more heat, which causes the metal shaft and bearing components to expand. Eventually, the expansion and physical scoring become so severe that the shaft physically locks in place—a condition known as a seized bearing. While standard motors are designed to last 10 to 12 years, the environmental stressors of continuous high-load operation can drastically reduce this lifespan, which is a pattern we see often when explaining why your AC fan motor stops working prematurely.

Identifying the Problem: Visual and Auditory Cues

Before any physical testing occurs, your outdoor unit will usually provide clear visual and auditory clues that the motor is struggling. By August / Late Summer, a failing motor rarely dies silently; it usually exhibits a pattern of distress that you can observe from a safe distance without touching the equipment.

Listen for the hum: When your thermostat calls for cooling, a switch inside the outdoor unit (the contactor) pulls in, sending high-voltage electricity to both the compressor and the fan motor. If the fan motor is seized, it cannot convert that electrical energy into mechanical rotation. Instead, the electricity surges through the motor windings, creating a very distinct, loud humming or buzzing sound. This sound tells you that the system is receiving power, but physical movement is blocked.

Observe the fan blades: Look straight down through the top grille of the condenser. Are the blades completely frozen in place, or are they twitching slightly? Sometimes, a motor with badly worn—but not completely seized—bearings will attempt to start, causing the blade to shudder or twitch before giving up. If the blade is dead still while the unit hums, the shaft is likely locked.

Feel for radiating heat: Because the motor is receiving electricity but cannot spin, it draws what is known as "locked rotor amps" (LRA). This massive draw of electrical current converts directly into heat. If you stand near the unit or carefully hover your hand a few inches above the fan grille (without touching the metal cabinet), you will often feel an intense wave of heat radiating upward. Eventually, a built-in safety device called a thermal overload protector will trip, shutting off the motor entirely to prevent it from catching fire. When this happens, the humming will stop, but the fan will remain dead.

The Safe Observational Spin Test (Power Off)

If you suspect your fan motor is seized, there is one safe, purely mechanical test you can perform to confirm physical resistance. This test does not require opening any panels, and it strictly avoids any dangerous electrical components. Because the Miami FL high-humidity environment frequently causes both bearing failures and electrical failures, our team often recommends this test as the fastest way for homeowners to differentiate between the two.

1. Shut off all power immediately: This is the most critical step. Turn your thermostat to the "Off" position. Next, go to your main electrical panel and flip the dedicated breaker for the AC condenser to the "Off" position. Do not skip this step, as a sudden startup while you are testing the blade could cause severe injury.

2. Find a non-conductive probing tool: Locate a long, thin object made of wood or plastic. A wooden dowel, a long wooden spoon, or a sturdy plastic rod works perfectly. Never use a metal screwdriver, a metal measuring tape, or your bare fingers.

3. Gently push the fan blade: Insert the wooden or plastic stick through the top metal grille of the condenser unit. Carefully press it against one of the fan blades to try and manually rotate the fan in its natural spinning direction.

4. Analyze the mechanical resistance: If the blade feels incredibly stiff, requires significant force to move, grinds, or completely refuses to budge, the bearings are mechanically seized. The motor has failed physically and must be replaced.

5. Analyze the electrical alternative: If the blade spins smoothly and freely, rotating several times with just a gentle push, the bearings are intact. This indicates that the failure is likely electrical—most commonly a blown run capacitor—meaning the motor simply isn't receiving the "jolt" it needs to start.

If your system fails the spin test or you are unsure of the results, it is time to call in professionals who provide expert Miami AC repair services to diagnose the root cause safely.

Mechanical Seizure vs. Electrical Capacitor Failure

Understanding the distinction between a mechanical seizure and an electrical capacitor failure is vital. The run capacitor is a small, cylindrical component that stores electricity and delivers a continuous, precise jolt of voltage to keep the fan motor spinning. When a capacitor fails—a common occurrence during August / Late Summer due to heat exposure—the motor loses its electrical support, but the physical shaft remains perfectly fine.

We constantly see how confusing these two issues leads homeowners down a frustrating path. Assuming a motor is dead when it only needs a capacitor wastes time and money. Conversely, replacing a capacitor when the motor shaft is physically locked will not solve the problem, and the new capacitor will quickly burn out as the system repeatedly tries to start a seized load.

• The Spin Test Result — Mechanical Seizure (Bad Bearings): Blade is stiff, grinds, or will not move by hand. — Electrical Failure (Bad Capacitor): Blade spins freely and smoothly by hand.

• Auditory Cues — Mechanical Seizure (Bad Bearings): Loud humming followed by a thermal overload click. — Electrical Failure (Bad Capacitor): Humming sound, but no physical grinding.

• Primary Cause — Mechanical Seizure (Bad Bearings): Lubrication breakdown from extreme heat and heavy use. — Electrical Failure (Bad Capacitor): Electrical component degradation or power surges.

• Risk of Cascading Damage — Mechanical Seizure (Bad Bearings): High. A seized motor can destroy a good capacitor. — Electrical Failure (Bad Capacitor): Moderate. Can cause the compressor to overheat.

• Professional Resolution — Mechanical Seizure (Bad Bearings): Complete replacement of the condenser fan motor. — Electrical Failure (Bad Capacitor): Replacement of the dual run or single run capacitor.

If your system requires a new motor or more extensive work, exploring professional AC replacement services ensures the new components are properly matched to your system's exact specifications.

Mechanical Seizure vs. Electrical Capacitor Failure

The Risks of DIY Diagnostics and Why Professional Expertise Matters

Once you have safely observed the symptoms and performed a power-off spin test, your diagnostic journey should end. The internal cabinet of an air conditioner houses high-voltage components that present severe safety hazards. The run capacitor, for instance, acts like a powerful battery. It can hold a lethal electrical charge long after the main power to the unit has been turned off. Attempting to test a capacitor with a DIY multimeter without properly discharging it first is incredibly dangerous.

Additionally, the internet is full of outdated advice suggesting that homeowners can "unseize" a motor by spraying WD-40 or applying 3-in-One oil to the shaft. On modern HVAC equipment, this is a dangerous myth. Because the bearings are factory-sealed, external oil cannot reach the internal mechanism. Even if it could, the metal-on-metal scoring has already permanently damaged the spherical bearings. External oil will only attract dust and dirt, creating a fire hazard without restoring the motor's function.

This is exactly why our team at Air On Demand emphasizes a professional diagnostic process. Our licensed technicians use precise, specialized tools to verify both electrical continuity and mechanical integrity. By properly distinguishing between a mechanically seized bearing and a blown capacitor, we prevent the frustration of unnecessary part replacements. We ensure that the root cause of the failure in the Miami FL high-humidity environment is addressed correctly the first time. Investing in routine AC maintenance can also help our team catch these bearing wear issues long before they result in a complete system lockup.

Frequently Asked Questions About AC Fan Motors

Why is my AC condenser fan not spinning?

Your AC condenser fan typically stops spinning due to either an electrical failure or a mechanical blockage. Electrically, a blown run capacitor or a bad contactor can prevent voltage from reaching the motor. Mechanically, the motor's internal bearings can lose their lubrication and seize up, locking the shaft in place. A tripped breaker or blown fuse can also cut power entirely to the outdoor unit.

How to tell if AC fan motor or capacitor is bad?

The safest way to tell the difference is the power-off spin test. Turn off all power to the unit, then use a wooden stick to gently push the fan blade. If the blade spins freely but the unit only hums when turned on, the capacitor is likely bad. If the blade is stiff, difficult to push, or grinds, the motor bearings have failed, indicating the motor itself is bad.

Can you fix a seized AC fan motor?

No, a mechanically seized AC fan motor cannot be reliably fixed and must be replaced. Modern HVAC motors use factory-sealed bearings that cannot be repacked with grease or oil once they fail. Any metal-on-metal friction that causes a seizure permanently damages the internal components, making replacement the only safe and effective solution.

What causes an AC fan motor to seize up?

An AC fan motor seizes up when the internal bearing lubrication breaks down due to age, extreme heat, or continuous heavy usage. By August / Late Summer, units that have run non-stop experience severe thermal stress, which degrades the oil inside the sealed bearings. Once the oil fails, friction causes the metal parts to expand and lock together.

Is it safe to leave the AC running if the fan is stopped?

No, it is never safe to leave your AC running if the outside fan is not spinning. You should immediately turn the thermostat to the "Off" position. The fan is responsible for cooling the compressor; without it, the compressor will rapidly overheat, potentially causing catastrophic and expensive damage to the heart of your cooling system.

Restoring Your AC System Safely

Distinguishing between a mechanically seized bearing and a simple electrical issue is the first step in protecting your cooling system from further cascading damage. By recognizing the physical resistance of a locked shaft versus the free-spinning nature of a bad capacitor, you can prevent the Miami FL high-humidity environment from taking a heavier toll on your equipment.

Remember that while observation is safe, any internal testing, capacitor discharging, or motor replacement requires the specialized tools and training of a licensed professional. If your condenser fan has stopped spinning, turn off the system immediately and contact our team at Air On Demand to restore your home's cooling safely, accurately, and efficiently.

Salt Spray Corrosion on Cutler Bay Coastal AC Condensers placeholder-image  | Air On Demand
5 min read

Salt Spray Corrosion on Cutler Bay Coastal AC Condensers

When late-summer heat pushes your AC to its limit, hidden rust and flaking fins often become obvious. Explore why standard units fail prematurely in coastal zones and how to protect your next system.

The Hidden Threat Destroying Outdoor Cooling Equipment

Your AC is running nonstop, but the house still feels warm, and that strange humming noise from the outdoor unit isn't going away on its own. Dealing with salt spray corrosion on Cutler Bay coastal AC condensers is a frustrating reality for many homeowners, especially when late-summer heat pushes equipment to its absolute limit. When August arrives and temperatures peak, systems that have been silently deteriorating all year finally begin to show their underlying weaknesses, leaving families uncomfortable and searching for immediate answers.

Most homeowners assume that a struggling air conditioner is simply suffering from standard wear and tear. However, if you walk outside and inspect your condenser, you might notice visual signs of severe degradation. Flaking fins that crumble at the touch, a heavily rusted outer casing, and chalky white oxidation covering the copper refrigerant lines are not normal aging. These are the hallmarks of a specific environmental attack that compromises the structural integrity of your cooling system long before its expected expiration date.

Identifying the Signs of Environmental Damage

Because coastal environments introduce unique stressors, catching the early warning signs of degradation can mean the difference between a minor intervention and a catastrophic failure. Here is what to look for when inspecting your outdoor unit:

• Chalky white powder: This is aluminum oxide, the first sign that the delicate fins surrounding your condenser coils are beginning to break down.

• Brittle or missing fins: As corrosion advances, the thin metal fins will literally dissolve and blow away in the wind, leaving the copper tubing exposed.

• Rust on the cabinet: While the painted outer shell is more resilient, scratches or dents can quickly become breeding grounds for deep, spreading rust.

• Unusual compressor noise: When the fins degrade, the compressor has to work much harder to reject heat, leading to louder operational cycles and a noticeable strain on the motor.

Addressing this level of structural damage requires specialized air conditioning services rather than standard, run-of-the-mill fixes. A technician who understands the local climate must evaluate whether the system's heat transfer capabilities have been permanently compromised or if proactive measures can still salvage the equipment.

How Biscayne Bay Winds Accelerate Galvanic Corrosion

To understand why outdoor cooling equipment degrades so rapidly in Cutler Bay coastal zones, it is essential to look at the localized science of galvanic corrosion. Galvanic corrosion is an electrochemical process that occurs whenever two dissimilar metals are in physical contact and exposed to an electrolyte. In the case of a standard air conditioning condenser, the manufacturer uses copper for the refrigerant tubes and aluminum for the surrounding heat-transfer fins. Under perfectly dry conditions, these metals coexist without issue.

However, Cutler Bay's immediate proximity to Biscayne Bay changes the equation dramatically. The continuous easterly sea breezes carry airborne chlorides—microscopic salt particles—directly into the condenser's intake. When combined with the region's notoriously high humidity, the moisture on the coils turns into a highly conductive electrolyte solution. This salt-laden moisture bridges the gap between the copper and the aluminum, essentially turning your AC coil into a weak, short-circuiting battery. The aluminum acts as the anode, sacrificing itself and corroding away to protect the copper cathode.

The Cutler Bay Microclimate Effect

This rapid oxidation is vastly different from the slower, more predictable wear seen in non-coastal environments. Inland systems might face dust, pollen, and rain, but they do not endure the relentless chemical assault of airborne salt. The combination of intense heat, high humidity, and salt-laden winds creates the perfect storm for metal degradation.

• Airborne Particulates — Inland Miami Impact: Dust, pollen, and standard urban pollution. — Cutler Bay Coastal Impact: Heavy concentration of airborne chlorides (salt spray).

• Moisture Type — Inland Miami Impact: Freshwater rain and standard high humidity. — Cutler Bay Coastal Impact: Highly conductive, salt-saturated moisture acting as an electrolyte.

• Corrosion Rate — Inland Miami Impact: Slow surface oxidation over 10 to 15 years. — Cutler Bay Coastal Impact: Rapid galvanic corrosion, often visible within the first 24 months.

• Primary Failure Mode — Inland Miami Impact: Electrical components or standard mechanical wear. — Cutler Bay Coastal Impact: Structural collapse of aluminum condenser fins and heat transfer failure.

Because the condenser fan constantly pulls this salty air through the unit to cool the refrigerant, the system is actively ingesting the very elements that destroy it. Without a barrier to stop the electrochemical reaction, the degradation is continuous and inevitable.

The Galvanic Corrosion Process on Coastal AC Units

The 5-to-7 Year Lifespan of Unprotected Condensers

When homeowners invest in a new air conditioning system, they typically expect it to last well over a decade. However, authoritative data from the Department of Energy (DOE) and ASHRAE guidelines regarding standard outdoor AC condenser lifespans in coastal zones paint a very different picture. Out-of-the-box, unprotected units installed directly in the path of ocean breezes often fail in just 5 to 7 years due to severe structural degradation.

The timeline of this degradation is remarkably consistent in coastal environments. During the first two years, the unit may operate normally, though chalky white oxidation will begin to appear on the fins. By years three and four, the galvanic corrosion accelerates, causing the fins to become brittle and flake away during heavy storms or even routine cleaning. By years five through seven, the loss of aluminum fins drastically reduces the unit's ability to transfer heat. The copper tubes are left bare, and the system can no longer efficiently cool the hot refrigerant gas coming from inside the house.

The Ripple Effect of Heat Transfer Loss

When the fins disappear, the entire thermodynamic balance of the system collapses. The compressor, which is the heart of the air conditioner, relies on those fins to dissipate heat. Without them, the compressor runs hotter, works longer cycles, and consumes significantly more electricity to achieve the same indoor temperature. This chronic overheating eventually leads to premature compressor burnout.

Dealing with a severely compromised unit at the 6-year mark is incredibly frustrating, especially when homeowners discover the complications of replacing a condenser out of warranty. Many standard manufacturer warranties contain clauses that exclude damage caused by corrosive coastal environments unless specific, approved protective measures were taken at the time of installation. This leaves homeowners bearing the full cost of replacing a system that feels like it should still be relatively new.

Why Corroded Coils Finally Give Out in Peak Heat

It is no coincidence that severely corroded units tend to suffer catastrophic failure right when you need them most. In Cutler Bay, August brings peak temperatures and maximum AC runtimes, causing severely corroded and restricted condenser coils to overheat and fail under the late-summer stress. The structural damage of galvanic corrosion and the operational demands of peak heat create an unsustainable burden on the equipment.

As we discussed earlier, missing or deteriorating fins force the compressor to work harder to reject heat. When the outside temperature climbs into the upper 90s, the thermal load on the house increases dramatically. The system attempts to run continuously to meet the demand of the thermostat. However, because the bare copper coils cannot shed heat into the already sweltering outdoor air, the internal pressures and temperatures of the refrigerant skyrocket. The compressor's internal thermal overload switch may trip repeatedly, causing the unit to shut down abruptly to prevent an electrical fire.

Warning Signs of an Impending Late-Summer Breakdown

If your system is suffering from advanced salt spray corrosion, it will usually give you several warning signs before it completely shuts down. Recognizing these symptoms can help you call for help before you are left entirely without cooling:

• Constantly running cycles: The system never seems to shut off, yet the indoor temperature barely drops.

• Spiking utility bills: Because the system is running inefficiently and continuously, your energy consumption will surge dramatically compared to previous summers.

• Insufficient indoor cooling: The air coming from the vents feels lukewarm rather than crisp and cold.

• Tripped circuit breakers: An overheating compressor will draw excess amperage, frequently tripping the dedicated breaker in your electrical panel.

When your system can no longer handle the thermal load due to severe fin loss, DIY troubleshooting is no longer an option. This level of mechanical distress highlights the absolute necessity of calling for professional AC repair service to safely diagnose the extent of the damage and prevent further electrical hazards.

Defending Your Equipment with Coastal-Grade Coatings

The most effective preventative measure against salt spray corrosion is not found in reactive repairs, but in proactive defense. For homes in Cutler Bay coastal zones, defending your equipment requires the application of coastal-grade anti-corrosion coatings. These specialized chemical treatments are designed to insulate dissimilar metals from each other, effectively blocking the electrolyte (saltwater) from bridging the gap between the copper and aluminum.

What most homeowners do not realize is that standard factory finishes are insufficient for homes directly in the path of sea breezes. A standard painted cabinet might resist rust for a while, but the internal coils are typically left bare to maximize heat transfer in normal environments. Coastal-grade coatings, such as specialized epoxies or polyurethanes, are engineered to be incredibly thin—often just a few microns thick. This allows them to provide a robust chemical barrier against airborne chlorides without significantly insulating the coil and trapping heat.

The Importance of Proper Application

It is crucial to understand that these specialized coatings must be specified and applied before or during a new installation, not as an afterthought. Trying to coat a coil that has already begun to oxidize is largely ineffective, as the corrosion process is already trapped beneath the surface.

The right way to protect a new system:

1. Factory-applied dips: The most durable coatings are applied at the factory, where the entire coil assembly is dipped into a chemical bath, ensuring 100% coverage of every microscopic crevice before the unit is ever assembled.

2. Professional OEM sprays: If a factory-dipped coil is unavailable, certified professionals can apply high-grade aerosol coatings to a brand-new, perfectly clean coil prior to installation.

Air On Demand's deep local expertise in Cutler Bay's microclimate means they understand exactly what it takes to survive here. They have the ability to source and install coastal-grade units specifically designed to withstand severe salt exposure, ensuring your investment is protected from day one. While these coated units represent a slightly higher initial investment, the long-term ROI of doubling the viable lifespan of your condenser in a harsh environment makes it the only logical choice for coastal homeowners.

Essential Upkeep for Salt-Exposed Systems

Even with the best coastal-grade coatings applied, your outdoor unit still requires specific, tailored upkeep to mitigate salt buildup. Airborne chlorides will inevitably accumulate on the cabinet and the coils. If left unchecked, this heavy layer of salt can eventually wear down protective barriers and begin the corrosion process. The goal of coastal maintenance is to consistently remove this corrosive blanket without damaging the delicate components underneath.

The most important thing a homeowner can do is perform regular, gentle fresh-water washdowns of the outdoor cabinet to rinse away accumulated salt deposits. Taking a standard garden hose with a gentle spray nozzle and lightly rinsing the exterior of the unit once a month can significantly reduce the concentration of salt sitting on the metal.

Safe Cleaning Practices vs. Dangerous Mistakes

While rinsing is highly recommended, it is vital to avoid aggressive cleaning methods that can instantly ruin your equipment. We strongly warn against using high-pressure washers or harsh, acidic chemical cleaners on your outdoor unit. A pressure washer will effortlessly bend and flatten the delicate aluminum fins, blocking airflow entirely and ruining the coil. Similarly, off-the-shelf chemical degreasers can strip away factory paint and protective coatings, leaving the metal completely vulnerable to the sea air.

Beyond gentle rinsing, a tailored coastal preventative AC maintenance schedule is critical. Professional coil cleaning and inspection play an essential role in catching early signs of oxidation. A trained technician uses specialized, non-acidic foaming cleaners that safely push dirt and salt out from deep within the coil bed. They also check the integrity of the electrical connections, which are equally susceptible to salt-induced corrosion. By adhering to a strict coastal upkeep schedule, you can easily extend the viable life of your equipment and keep it running efficiently through the hottest months of the year.

Evaluating a Severely Rusted Outdoor Unit

When late summer arrives and a heavily corroded system finally stops cooling, homeowners are faced with a difficult decision: attempt to repair the severely rusted outdoor unit or opt for a fresh start. Guiding the homeowner through this decision-making process requires an honest evaluation of the equipment's current structural integrity and its realistic remaining lifespan.

There are severe limitations to repairing heavily oxidized coils. If galvanic corrosion has eaten through the copper tubing and caused a refrigerant leak, simply brazing (welding) the hole is rarely a permanent fix. Because the entire coil bed has been weakened by the salt air, patching one leak often leads to a new blowout just a few inches away within a matter of weeks. You end up chasing leaks and paying for expensive, environmentally damaging refrigerant recharges over and over again.

Criteria for Repair vs. Replacement

How do you know when a unit is truly beyond saving? Here are the critical criteria that indicate a replacement is the only financially responsible path forward:

• Extensive fin loss: If more than 20% of the aluminum fins have crumbled away or flattened, the system can no longer reject heat efficiently.

• Multiple refrigerant leaks: A history of recurring leaks indicates systemic thinning of the copper lines.

• Severe compressor strain: If the compressor is pulling high amps, overheating, or has already failed due to thermal overload, the heart of the system is compromised.

• Age of the unit: If an unprotected unit in Cutler Bay is past the 5-to-7 year mark and showing deep rust on the base pan and casing, its structural integrity is gone.

Choosing to upgrade rather than endlessly repair brings immediate efficiency gains and profound peace of mind. Modern systems built specifically for the coastal environment operate much more quietly, consume far less electricity, and are backed by warranties that actually account for the local climate. If you are tired of crossing your fingers every time the thermostat clicks on, it is time to set the stage for consulting with a local expert regarding an AC replacement in Cutler Bay to properly assess the damage and explore your coastal-grade options.

Frequently Asked Questions

How does salt air affect AC condensers?

Salt air introduces airborne chlorides to the metal components of the outdoor unit, creating a highly conductive environment. When this salt mixes with humidity, it acts as an electrolyte that triggers galvanic corrosion between the copper tubes and aluminum fins. This electrochemical reaction rapidly dissolves the aluminum, destroying the unit's ability to transfer heat and eventually leading to system failure.

Can you fix a rusted AC coil?

The short answer is no; once an AC coil has severely rusted and begun to lose its fins, it cannot be structurally repaired. While a technician can sometimes patch a small, isolated refrigerant leak, heavy oxidation means the metal is fundamentally weakened. Attempting to repair a deeply corroded coil usually results in new leaks forming shortly after, making replacement the only viable long-term solution.

What are coastal-grade AC units?

Coastal-grade AC units are specialized systems designed specifically to withstand harsh, salt-heavy environments. They feature heavy-duty protective coatings—often applied at the factory—that insulate the dissimilar metals and block the chemical reaction that causes galvanic corrosion. These units also typically include more robust, rust-resistant exterior cabinets and weather-sealed electrical components to ensure longevity near the ocean.

How long do air conditioners last on the coast?

Standard, unprotected air conditioners in coastal environments often fail in just 5 to 7 years due to accelerated salt spray corrosion. However, if a unit is properly equipped with coastal-grade protective coatings and receives meticulous, specialized maintenance, its lifespan can be extended to 10 to 12 years or more. The key factor is how well the system is defended against airborne chlorides from day one.

Does washing my outdoor AC unit prevent salt corrosion?

Yes, gently washing your outdoor AC unit with fresh water is one of the most effective ways a homeowner can slow down salt corrosion. Lightly rinsing the exterior cabinet once a month removes the accumulated salt deposits before they have time to deeply penetrate and degrade the metal. Just be sure to use a gentle hose spray, as high-pressure washers will bend the delicate fins and cause permanent damage.

Why do Cutler Bay AC units rust faster than inland Miami units?

Cutler Bay units rust faster because of their immediate proximity to the continuous, easterly sea breezes coming off Biscayne Bay. These winds carry a heavy concentration of airborne salt directly into the condenser's intake, a localized environmental stressor that inland Miami neighborhoods simply do not experience. This constant exposure to salt spray exponentially accelerates the galvanic corrosion process compared to standard urban environments.

Protecting Your Comfort Against the Coast

Dealing with a failing air conditioner in the peak of late summer is stressful, but understanding exactly why your unit rusted so fast gives you the power to make a better investment next time. By demanding proper coastal-grade protective coatings and adhering to a tailored upkeep schedule, you can ensure your next HVAC system survives the Biscayne Bay winds and keeps your home comfortable for years to come.

How Long Does It Take to Become a Lead Service Technician in Miami? placeholder-image  | Air On Demand
5 min read

How Long Does It Take to Become a Lead Service Technician in Miami?

Navigating Florida's apprenticeship hours and EPA certification requirements can feel overwhelming. Get a clear timeline of the field experience needed to run your own service truck.

Are You Ready to Navigate the Timeline to Become a Lead Technician in Miami?

Are you looking at the path ahead and wondering exactly how long does it take to become a lead service technician in Miami? At Air On Demand, we have mentored countless apprentices, and we know firsthand that navigating Florida's specific apprenticeship hours and certification timeline can feel overwhelming when you are just starting out. You might be asking yourself if trade school is enough, or if you need to log thousands of hours in the field before you can run your own service truck. The transition from an entry-level helper to a fully independent lead technician is a challenging, highly rewarding journey that requires far more than just passing a multiple-choice test.

If you are serious about building a long-term future in the trades, exploring the right HVAC careers is your crucial first step. Achieving lead status means mastering high-stress field conditions, understanding complex electrical diagnostics, and earning your mandatory EPA Section 608 Certification. Drawing from our years of experience serving Miami-Dade County, this guide provides a realistic, step-by-step roadmap for dedicated professionals who want to know exactly what it takes to succeed in the South Florida market.

The 3 to 5-Year Roadmap: From Entry-Level to Lead Diagnostic Tech

The journey to the top of the HVAC field is not an overnight process. For most dedicated professionals we train, the timeline spans three to five years of continuous learning, hands-on application, and rigorous testing. This progression ensures that by the time you are running diagnostic calls during the peak of August late-summer cooling demand, you have the field-tested experience to handle any system failure safely and accurately.

The standard progression timeline our team typically sees:

1. Year 1: Foundation and Federal Requirements. You will enter the field as a helper, focusing heavily on safety protocols, basic preventative maintenance, and securing your required federal certifications.

2. Years 2-3: Core Apprenticeship and Supervised Repairs. During this phase, you will log thousands of required on-the-job training hours, transitioning from simple maintenance tasks to performing basic component replacements under the supervision of a senior technician.

3. Years 4-5: Advanced Diagnostics and Lead Status. This is where you make the leap from replacing parts to true system diagnostics, mastering complex failures, and eventually earning the right to run a dedicated service truck independently.

Year 1: Foundation and Federal Requirements

Your first twelve months are all about building a rock-solid foundation. As a helper, you will assist senior technicians with heavy lifting, equipment staging, and basic maintenance tasks like coil cleaning and filter replacements. More importantly, our service managers always emphasize that this year is dedicated to studying for and passing the EPA Section 608 Certification, which is legally required to handle refrigerants. You will learn how to safely recover, recycle, and charge refrigerants without violating federal environmental laws.

Years 2-3: Core Apprenticeship and Supervised Repairs

Once you have your federal credentials, you move into the core apprenticeship phase. This period is defined by repetition and exposure. You will start handling supervised repairs, such as swapping out failed capacitors, replacing contactors, and wiring in new blower motors. You will also begin to understand the critical soft skills required in this industry. A pattern we see often is that learning how to communicate effectively with homeowners and explain basic mechanical issues clearly is just as critical as turning a wrench.

Years 4-5: Advanced Diagnostics and Lead Status

The final phase of your training separates the entry-level workers from the true career professionals. Advanced diagnostics require a deep understanding of thermodynamics, electrical theory, and airflow dynamics. You will learn how to troubleshoot complex communicating systems, variable-speed compressors, and intricate heat pump reversing valves. By the end of year five, you should possess the technical mastery and the problem-solving confidence to operate as a lead diagnostic technician.

The 3 to 5-Year HVAC Technician Career Timeline in Florida

Year 1: Securing Your EPA Credentials and Starting as a Helper

Before you can hook up a set of gauges to an air conditioning system, you must meet federal standards. The EPA Section 608 Certification is a non-negotiable federal mandate for anyone who maintains, services, repairs, or disposes of equipment that could release refrigerants into the atmosphere. Studying for this exam is typically your primary academic goal during your first year in the field.

The exam is broken down into four parts:

• Core: Covers general safety, environmental impacts of refrigerants, and basic regulations.

• Type I: Covers servicing small appliances like window units and domestic refrigerators.

• Type II: Covers servicing high-pressure systems, which includes residential split-system air conditioners and heat pumps.

• Type III: Covers servicing low-pressure systems, typically found in large commercial chillers.

We highly recommend residential technicians aim for Universal Certification, which means passing all four sections. While you are studying for these exams, your day-to-day reality involves working as an HVAC Apprentice or helper. This role is physically demanding but incredibly educational. You will learn how to properly navigate attics, safely handle heavy equipment, and identify every component of an HVAC system by sight. This first year is about building a reputation for reliability, punctuality, and basic mechanical aptitude. When we bring on new helpers, our service managers are watching closely to see if they possess the work ethic required to survive in this trade.

Years 2-3: Accumulating 2,000 Annual Apprenticeship Hours

Once you have proven your reliability and secured your EPA credentials, the real hands-on training begins. The Florida Department of Education guidelines for apprenticeship programs emphasize sheer volume of experience. To progress, you need to log approximately 2,000 hours of on-the-job training per year. If you work a standard 40-hour week for 50 weeks out of the year, you will hit this target, but our team typically sees apprentices logging these hours quickly due to the reality of longer shifts during Miami's peak cooling seasons.

What does logging 2,000 hours actually look like in the field? It means you are no longer just carrying tools; you are using them. Under the watchful eye of a senior technician, you will transition from performing basic tune-ups to executing supervised repairs. You will learn the correct techniques for brazing copper lines with nitrogen, pulling a proper deep vacuum to remove moisture from a system, and safely discharging and replacing dual-run capacitors.

Key skills developed during the core apprenticeship phase:

• Electrical safety and multimeter usage: Learning how to read voltage, amperage, and resistance accurately without putting yourself at risk.

• Refrigerant cycle mastery: Understanding exactly how superheat and subcooling measurements indicate the health of a system.

• Component replacement: Swapping out contactors, condenser fan motors, and indoor blower motors efficiently.

• Customer communication: Learning how to speak with homeowners respectfully, explaining what went wrong with their system without using overwhelming technical jargon.

By the time you face your second or third August late-summer cooling demand, you will have seen hundreds of different failure scenarios, building the mental database required to eventually diagnose these issues on your own.

Years 4-5: Mastering High-Pressure Diagnostics in Florida's Climate

The final hurdle separating a junior technician from a true lead technician is diagnostic mastery. Anyone can be taught to swap out a broken part, but our decades of experience running service calls across Miami have taught us that a lead technician knows exactly why that part failed in the first place. This shift from being a "parts-replacer" to a diagnostician is what takes years to develop. At Air On Demand, our commitment to high standards, rigorous apprenticeship, and continuous EPA and brand-specific training ensures that our lead technicians are equipped to handle the most complex challenges in the industry.

When you are part of our team of HVAC professionals, you are expected to understand the intricate details of modern, high-efficiency systems. This includes troubleshooting variable-speed compressors that operate on direct current, diagnosing electronic expansion valves (EEVs), and understanding the specific wiring of communicating thermostats. You must also master heat pump reversing valves, which are notorious for presenting tricky diagnostic symptoms when they fail to shift properly.

Local service managers expect independent problem-solving at this stage. When you are running a dedicated service truck, you are the final line of defense for a homeowner whose system has failed during an August late-summer cooling demand spike. You must be able to arrive on site, systematically rule out potential issues using your multimeter and gauges, and pinpoint the exact point of failure quickly and accurately. This level of confidence only comes from years of supervised repetition and a commitment to ongoing, brand-specific training as technology evolves.

Florida Licensing vs. Employer-Sponsored Technician Status

One of the most common points of confusion we hear from aspiring technicians is the legal and licensing framework in Florida. Many people mistakenly believe they need a state contractor's license just to turn a wrench or run a service call. The short answer is: you do not.

In Florida, individual service technicians do not require a state-level license to perform repairs or installations, provided they are working as a W-2 employee under the umbrella of a licensed Certified Air-Conditioning Contractor (CAC), just as our technicians do at Air On Demand. The licensed contractor holds the legal responsibility, pulls the necessary permits, and ensures that all work meets local building codes. Your job as a lead technician is to execute the work to the exact standards set by your employer and the state.

However, while a state license isn't required to be a technician, holding specific credentials heavily impacts your career trajectory. Securing your EPA Section 608 Certification is federally mandated. Beyond that, we always advise our technicians to pursue local county options, such as the Miami-Dade Journeyman exam. Passing a journeyman exam proves to your employer and your customers that you have mastered the trade code and logged the requisite thousands of hours of supervised work. It is a badge of honor that separates a seasoned professional from an entry-level worker.

Ultimately, you only need to pursue a state contractor license if your goal is to eventually open your own independent HVAC business, hire other technicians, and pull your own permits. If your goal is to be a highly respected, well-compensated lead technician running a truck for an established company, your focus should remain on field hours, EPA certifications, and diagnostic mastery.

How Miami's Subtropical Climate Accelerates Hands-On Learning

The timeline to become a lead technician can actually vary depending on where you live. In Miami, the subtropical climate acts as an accelerator for hands-on learning. Unlike northern climates where technicians might spend half the year working on gas furnaces and boilers, working in Miami heat is something our Air On Demand crews know intimately. The lack of a true off-season means you are constantly working on high-demand cooling systems and heat pumps.

This year-round extreme heat, combined with high humidity and heavy AC usage cycles, requires lead techs to master high-pressure diagnostics and constant-run system wear. Systems in South Florida run thousands of hours more per year than systems in cooler regions. This constant-run wear and tear provides technicians with non-stop diagnostic opportunities. In our daily operations, we see premature capacitor failures, stressed compressor windings, and heavily taxed condenser fan motors on a regular basis.

Furthermore, extreme humidity requires specialized knowledge. Managing condensate is a massive part of a day in the life of a Miami HVAC technician. You must understand how to properly pitch drain lines, clear stubborn algae clogs, and calculate proper airflow to ensure a system is removing enough latent heat (humidity) from the home, not just dropping the temperature. Surviving the peak cooling season, especially the brutal August late-summer cooling demand, is the ultimate proving ground. If you can accurately diagnose and repair systems in a 130-degree Miami attic in the middle of summer, you have earned the title of lead technician.

Frequently Asked Questions About Miami HVAC Career Timelines

How long is HVAC school in Florida?

Trade school programs in Florida typically range from 6 to 12 months, depending on whether you attend full-time or part-time. Our team considers these programs excellent for learning electrical theory, basic thermodynamics, and preparing for your EPA exams in a controlled environment. However, it is important to understand that schooling only provides foundational knowledge; you will still need to log several years of field apprenticeship hours to reach lead technician status.

What certifications do I need to be an HVAC tech in Florida?

The only legally mandated certification for a technician is the federal EPA Section 608 Certification, which is required to handle, recover, and charge refrigerants. Without this, you cannot legally connect gauges to an air conditioner. While not legally required, we highly recommend obtaining a NATE (North American Technician Excellence) certification for career advancement, as it proves your diagnostic expertise to employers and customers alike.

How do I become an HVAC technician in Miami?

We recommend starting by obtaining basic foundational knowledge, either through a local trade school program or by studying independently for your EPA exams. Once you have a basic understanding, your next step is to secure a helper or apprentice position with a licensed local HVAC contractor like Air On Demand. This allows you to begin logging the mandatory field hours required to learn the trade hands-on under the supervision of experienced professionals.

How many years does it take to become a journeyman HVAC tech?

In our experience, it generally takes 3 to 5 years of documented, full-time field experience to reach the level of a journeyman or lead diagnostic technician. During this time, you will log roughly 2,000 hours per year of on-the-job training. If you plan to take local county exams, such as the Miami-Dade Journeyman test, you will be required to provide verified proof of these thousands of hours of supervised work.

Do I need a state contractor license to work as a lead technician?

No, lead technicians work legally under the umbrella of their employer's state Certified Air-Conditioning Contractor (CAC) license. You do not need your own state license to perform repairs, run a service truck, or diagnose systems as an employee. A state contractor license is only legally required if you intend to pull permits, operate your own independent HVAC business, and hire your own employees.

Take the Next Step Toward Your Lead Technician Career

The path to becoming a lead technician is built on a realistic, clear timeline of logging apprenticeship hours, passing required federal testing, and gaining specific, hands-on field experience. Mastering the trade in Florida takes intense dedication, especially when you are tasked with solving complex electrical failures during peak August late-summer cooling demand. It requires patience, a willingness to learn from senior mechanics, and a commitment to doing the job right every single time.

If you are ready to put in the work and build a rewarding, long-term career in a high-demand industry, it is time to take action. Explore local opportunities, commit to the learning process, and take the next step by learning more about becoming an HVAC Service Technician with a team that values your growth today. Your future as an independent diagnostic professional starts with the decision to begin.

The Danger of Bypassing a Tripped Float Switch to Force Your AC to Run placeholder-image  | Air On Demand
5 min read

The Danger of Bypassing a Tripped Float Switch to Force Your AC to Run

When your AC shuts off on a sweltering weekend, wiring around the safety switch for immediate relief is tempting. See why this quick fix often leads to catastrophic water damage instead.

When Your AC Quits on a Sweltering Weekend: The Float Switch Dilemma

The house is heating up rapidly on a hot August weekend, your thermostat is blank or unresponsive, and you suddenly realize the air conditioning has stopped completely. Understanding the danger of bypassing a tripped float switch to force your AC to run is the most critical thing you can do in this exact moment, because that overwhelming temptation to rig the system for temporary relief usually leads to massive property damage. When our Air On Demand technicians respond to these late-summer emergency calls, we almost always find a drain pan full to the brim with water and a small mechanical switch that has deliberately shut your entire system down.

The immediate frustration is completely understandable. The late-summer heat is oppressive, your family is uncomfortable, and the thought of waiting for a technician feels unbearable. Many homeowners look at that small, simple switch and think about just wiring around it to get the cold air flowing again. However, temporarily bypassing this switch disables a critical fail-safe mechanism. Instead of risking severe property damage with a DIY workaround, reaching out for professional AC repair services or emergency AC repair in Miami is the only responsible way to restore your comfort safely.

Understanding the Float Switch: Your HVAC System's Ultimate Fail-Safe

To understand why bypassing this component is so hazardous, you first have to understand what it does. A condensate float switch is a small, specialized safety device typically installed in the primary or secondary drain pan of your indoor air handlers. Its sole purpose is to monitor the water level inside that pan. Under normal operating conditions, the water extracted from your home's air drains safely outside. But if that water stops draining and begins to pool, the switch activates.

The mechanics are simple but highly effective. Inside the switch is a small float—much like the one inside a toilet tank, but on a miniature scale. As the water level rises in the drain pan, the float lifts. Once it reaches a predetermined height, it breaks the low-voltage electrical circuit that communicates with your thermostat and compressor. The moment that circuit is broken, the air conditioning system shuts down instantly.

The sheer volume of water: We find that most homeowners do not realize just how much water a central air conditioner produces. In highly humid environments like our Miami FL service area, an air conditioner does not just cool the air; it dehumidifies it. During a typical summer day, a residential AC unit can extract anywhere from 5 to 20 gallons of condensation. That is the equivalent of leaving a garden hose trickling inside your attic or utility closet.

When you view it through this lens, a tripped float switch is not an annoyance. It is a highly successful intervention. That small plastic device just saved your home from tens of gallons of water pouring through your ceilings or across your floors.

Why the Safety Switch Tripped in the First Place

Float switches are simple, reliable devices that rarely fail on their own. If your switch has tripped, it is almost certainly because the water in your drain pan literally has nowhere else to go. Bypassing the switch does not fix the underlying problem; it simply ignores an active, worsening plumbing issue inside your HVAC system.

In our years of servicing Miami HVAC systems, we've found that the most common culprit behind a tripped float switch is a clogged condensate drain line. This line is usually a white PVC pipe that carries the extracted water from your indoor unit to the exterior of your home. Over time, this pipe becomes the perfect breeding ground for biological growth. Continuous late-summer operation accelerates this process, pushing constant moisture through a dark, warm environment.

Ignoring this root cause by forcing the system to run guarantees that the water will overflow the pan. The system will continue pulling moisture from the hot August weekend air, and without a clear exit path, that moisture will spill directly into your home. The only way to permanently resolve the issue is through routine AC maintenance and professional drain clearing.

The Anatomy of a Clogged Condensate Line

Our team sees the same patterns every August. Understanding how clogs form helps illustrate why they are so stubborn. The blockage is rarely a single object; rather, it is a slow accumulation of several factors:

• Airborne particulates: Even with a good air filter, microscopic dust, pet dander, and dirt bypass the filter and stick to the wet evaporator coil. This debris washes down into the drain pan.

• Biological sludge: When dust mixes with standing water in a warm environment, it creates a thick, jelly-like sludge. Algae, mold, and mildew thrive in these dark, damp PVC pipes.

• Calcification and scale: Over time, minerals from the condensation can build up along the walls of the pipe, narrowing the passage and making it easier for sludge to form a complete blockage.

The Catastrophic Water Damage Cascade

If you choose to bypass the float switch, the timeline to disaster is shockingly rapid. Because an air conditioner running continuously in high humidity extracts gallons of water a day, an already-full drain pan will begin overflowing within hours—sometimes even minutes—of the system being forced back on.

The cascading damage affects almost every layer of your home's construction. If your air handler is located in the attic, the overflowing water first saturates the attic insulation, rendering it useless. From there, the water pools on the top side of your ceiling drywall. Drywall acts like a giant sponge, absorbing the moisture until it loses its structural integrity. Eventually, the saturated ceiling will collapse under the weight of the water, destroying everything in the room below.

If your unit is located in an interior closet, we have witnessed firsthand how the overflow immediately attacks your flooring. Hardwood floors will warp, cup, and buckle as the wood fibers absorb the moisture. Carpets and their underlying padding will become soaked, creating an instant breeding ground for mold. Water damage from plumbing and HVAC failures is consistently one of the leading causes of severe home insurance claims, and the disruption of remediating this damage far outweighs the temporary discomfort of a warm house.

The Catastrophic Cascade of a Bypassed Float Switch

Hidden Structural Risks

The visible damage is often just the beginning. The hidden structural risks of an HVAC overflow event can haunt a home for years if not properly mitigated:

• Trapped moisture inside walls: Water travels along the path of least resistance, often running down the inside of wall cavities where it cannot be seen or easily dried.

• Rapid mold growth: In the warm climate of Miami FL, mold can begin colonizing soaked building materials in as little as 24 to 48 hours.

• Compromised indoor air quality: Once mold establishes itself inside ductwork or wall cavities, the HVAC system can inadvertently circulate those spores throughout the entire house.

Hidden Electrical Hazards of HVAC Wiring Modifications

Beyond the severe risk of water damage, bypassing a float switch introduces significant electrical hazards. The float switch is wired directly into the system's low-voltage control circuit. Altering these wires is not a simple plug-and-play operation; it requires modifying the electrical pathways that govern the entire HVAC system.

Improper wire splicing or jumping circuits can easily cause electrical shorts. If the low-voltage wires are crossed incorrectly or left exposed, they can send a surge of electricity back to the control board or the thermostat, instantly frying those delicate electronic components. Our repair crews frequently have to replace fried circuit boards precisely because a homeowner attempted a quick wiring fix.

Furthermore, introducing unapproved electrical modifications near a known water source—an overflowing drain pan—is a severe fire and safety hazard. Water and exposed wiring are a disastrous combination. Finally, it is important to note that unauthorized modifications to safety mechanisms will instantly void your manufacturer warranties. If the manufacturer or your insurance company discovers that a safety switch was deliberately bypassed, you will likely be held entirely responsible for all resulting damage and equipment failures.

The False Economy of a Temporary Weekend Fix

We understand that the psychological temptation to perform a DIY bypass is strong, especially as kids head back to school and the late-summer heat makes the house sweltering. The thought process is usually: "I just need it to run until Monday when I can call someone without paying weekend rates." However, logically dismantling this idea reveals why it is a terrible choice.

You are trading a perceived short-term benefit against a guaranteed catastrophic outcome. The financial burden of replacing ruined ceilings, ripping up warped hardwood floors, and paying for professional mold remediation is entirely preventable. Leaving the system off is the only responsible action until our technicians can clear the drain line.

• Provides a few hours of immediate cooling relief. — The Responsible Action (Leave Off): House remains warm temporarily while awaiting a professional.

• Guarantees the drain pan will overflow into the home. — The Responsible Action (Leave Off): Keeps all condensation contained safely within the pan.

• Creates major electrical short and fire hazards. — The Responsible Action (Leave Off): Protects the system's control board and thermostat.

• Results in massive remediation bills for floors and ceilings. — The Responsible Action (Leave Off): Results only in the standard cost of clearing a drain line.

• Voids manufacturer equipment warranties instantly. — The Responsible Action (Leave Off): Maintains full warranty coverage and compliance.

Safe Alternatives When Your AC Float Switch Trips

Instead of modifying your system's wiring, there are safe, actionable steps we recommend taking to assess the situation while waiting for our professionals to arrive. If you are wondering why your AC is blowing warm air or has shut down completely, follow these safe diagnostic steps:

1. Turn the thermostat to OFF: Do this immediately. This prevents the system from attempting to cycle on and off, which can cause further strain on the electrical components and prevent any additional condensation from forming.

2. Inspect the outdoor drain line exit: Walk outside to where your AC condenser is located and find the white PVC pipe that drips water. Look for any obvious, accessible blockages right at the exit point, such as mud, overgrown grass, or insect nests.

3. Use a wet/dry vacuum on the exterior pipe: If you have a shop vacuum, you can safely attempt to pull the clog out from the outside. Place the vacuum hose over the end of the PVC pipe (you can use your hands or a rag to create a tighter seal) and run the vacuum for a few minutes. This can sometimes dislodge the algae sludge safely without touching the indoor wiring.

4. Call a licensed professional: If the vacuum trick does not work, the pan remains full, or the system will not reset, do not attempt to open the indoor air handler or modify the switch. Call our emergency technicians to clear the line with specialized equipment and verify the system is safe to operate.

Frequently Asked Questions About AC Float Switches

Can I temporarily bypass my AC float switch?

No, you should never temporarily bypass your AC float switch under any circumstances. Bypassing this switch removes the only safety mechanism preventing your air conditioner from overflowing. Because a running AC produces gallons of water a day, a bypassed switch will almost certainly result in severe water damage to your ceilings, walls, or floors within hours.

What happens if my AC float switch fails?

If an AC float switch fails mechanically and does not trip when the water level rises, the system will continue to run and produce condensation. The water will eventually crest the edges of the drain pan and spill directly into your home. This is why routine maintenance includes testing the float switch to ensure it is fully operational.

How do you know if your AC float switch is bad?

You can usually tell a float switch is bad if the drain pan is completely overflowing with water, yet the air conditioner is still running. Conversely, a bad switch might also get stuck in the "up" position, keeping your AC turned off even when the drain pan is completely bone dry. A licensed technician can test the continuity of the switch to confirm if it has failed.

Why does my AC float switch keep tripping?

If your AC float switch keeps tripping, it means the water is not draining out of your system fast enough. The most common reason for this is a persistent clog in the condensate drain line caused by algae, mold, or mineral buildup. Until the physical blockage in the pipe is thoroughly cleared, the switch will continue doing its job by shutting the system down.

Will bypassing my float switch void my AC warranty?

Yes, deliberately bypassing a safety switch or altering the factory low-voltage wiring will void your manufacturer's warranty. Manufacturers explicitly state that safety mechanisms must remain intact. If an unauthorized modification leads to a fried control board or a flooded home, you will bear the full financial responsibility for the repairs.

How much water does an AC produce in high humidity?

In hot, highly humid climates like Miami FL, a central air conditioning system can easily produce between 5 and 20 gallons of condensation in a single day. The system acts as a massive dehumidifier, pulling moisture out of the indoor air. This massive volume of water is exactly why a functioning float switch and a clear drain line are so critical.

Protect Your Home and Restore Your Comfort Safely

Ultimately, a tripped float switch is a clear sign that your HVAC system is actively working to protect your home. While losing air conditioning on a hot August weekend is incredibly frustrating, the switch is preventing a much larger disaster. Ignoring these warning signs and forcing the system to run against its own safety protocols is a guaranteed recipe for flooded floors, collapsed ceilings, and dangerous electrical shorts.

When you are facing a full drain pan and a sweltering house, do not take matters into your own hands. Rely on Air On Demand's licensed emergency technicians to safely resolve AC drainage issues rather than risking severe property damage or electrical hazards with a DIY bypass. Professional intervention ensures the clog is completely removed, the switch is functioning correctly, and your home remains cool, dry, and secure.

Late Summer Humidity Surges: Adjusting Your AC Dehumidification Settings placeholder-image  | Air On Demand
5 min read

Late Summer Humidity Surges: Adjusting Your AC Dehumidification Settings

When August heat makes your home feel like a swamp, lowering the thermostat isn't the answer. Changing your AC's fan speeds and utilizing dry mode will effectively pull dense moisture from the air.

The Stifling Reality of Late Summer Moisture

Here at Air On Demand, our technicians know the reality of late summer humidity surges: adjusting your AC dehumidification settings is often the only way to stop your house from feeling like a swamp. After countless AC installations and repairs across Miami, we can tell you that late August in South Florida brings a very specific, oppressive kind of heat. The ambient temperature might begin to dip ever so slightly as the season progresses, but the moisture in the air remains heavy, stagnant, and completely overwhelming. You walk into your living room, hear the air conditioner running constantly, yet your skin still feels clammy and the air feels thick enough to cut with a knife.

Most homeowners react to this sticky discomfort with a single, frantic reflex: they walk over to the thermostat and drop the temperature down another three or four degrees. While this seems logical, it rarely solves the underlying problem of indoor moisture. Instead of forcing your equipment to work harder at cooling, the actual solution lies in utilizing specific dehumidification settings and making smart fan adjustments to pull that dense water vapor out of your living space.

Whether you are researching ways to upgrade your air conditioning systems or you need to schedule professional AC maintenance in Miami, mastering your thermostat is the first critical step to achieving true indoor comfort.

Why Dropping the Temperature Worsens Indoor Humidity

The problem: You feel hot and sticky, so you lower the thermostat to 68 degrees. The system blasts freezing air into the room, but within twenty minutes, the house feels like a cold, damp cave instead of a comfortable sanctuary.

The cause: Air conditioners in tropical monsoon climates face a unique challenge. In places like Miami FL, latent heat removal (extracting moisture) is often far more critical than sensible heat removal (dropping the temperature). When you lower the thermostat drastically, you force the system to rapidly hit that temperature goal and shut off before it has time to wring the moisture out of the air.

The solution: Stop focusing on the number on the screen and start focusing on the duration of your cooling cycles. Allowing the system to run longer, slower cycles is the only way to effectively combat severe moisture loads.

The Trap of Short-Cycling

Short-cycling occurs when an air conditioner turns on, runs for a brief period, and shuts down rapidly, only to turn back on a few minutes later. This often happens because the unit is oversized for the home, or because the homeowner has set the temperature artificially low in a panic. When the system short-cycles, it successfully cools the air (sensible heat), but it completely fails to dehumidify it. The direct correlation between short run times and high indoor humidity cannot be overstated. Dehumidification is a slow, methodical process. If your system blasts cold air and shuts off in ten minutes, that heavy moisture remains suspended in your living room, leading to a clammy environment and massive amounts of wasted energy from the constant starting and stopping.

Sensible vs. Latent Heat Explained

To understand why dropping the temperature fails, you have to understand the difference between sensible heat and latent heat. Sensible heat is the temperature you can feel and measure with a standard thermometer. Latent heat is the energy absorbed or released during a change in state—in this case, the heavy moisture suspended in the air. The thermometer reading on your wall does not account for latent heat, which is why a 75-degree room at 40% humidity feels perfectly comfortable, while a 75-degree room at 80% humidity feels miserable. The physics of moisture removal require extended operational cycles. Your system must run long enough to pull that latent heat out of the air, converting it from a vapor back into a liquid that can be drained away.

The Physics of AC Dehumidification

Your air conditioner does not actually "create" cold air. Instead, it removes heat and moisture from the existing air inside your home. This mechanical process is entirely dependent on the physical interaction between warm indoor air and the freezing cold components hidden inside your air handler. During late August in South Florida, understanding this process is the key to finally getting your indoor climate under control.

Evaporator Coils and Condensation

The primary defense against indoor stickiness is a component called the evaporator coil. Here is the step-by-step process of how it extracts moisture:

1. Air intake: The blower motor pulls warm, humid air from your hallways and living spaces through the return vents.

2. Heat absorption: This sticky air is forced over the evaporator coil, which is filled with highly pressurized, freezing-cold liquid refrigerant.

3. Condensation: Because the coil is drastically colder than the surrounding air, the moisture in the air condenses upon contact. Think of a glass of ice water sitting on a patio table in the middle of summer—water beads form on the outside of the glass. The exact same scientific process happens on your evaporator coil.

4. Drainage: The extracted water drips off the coil into a condensate drain pan, where it is safely funneled outside your home through a dedicated PVC drain line.

5. Redistribution: The newly cooled, dried air is pushed back through your ductwork and out of your supply vents.

The Importance of Air Contact Time

For the condensation process to work effectively, the humid air must spend an adequate amount of time touching the cold evaporator coil. This is known as air contact time. If the blower fan pushes the air across the coil too quickly, the system will cool the air down, but the water vapor will not have enough time to condense into liquid. Rushing the cooling process leaves the air damp. By slowing down the airflow and extending the cooling cycle, you maximize the volume of moisture extracted. Continuous, uninterrupted cycles are absolutely essential to winning the battle against heavy coastal humidity surges.

Fan Settings: The Hidden Culprit Behind Sticky Rooms

In our years of providing AC maintenance across Miami, one pattern our Air On Demand team sees often is homeowners unintentionally sabotaging their own comfort by using the wrong fan setting on their thermostat. Generic national advice sometimes suggests running your fan constantly to filter the air, but in our extreme coastal environment, this is a recipe for disaster. We always tell our customers that the difference between the "ON" setting and the "AUTO" setting is the difference between a dry home and a damp one.

• ON — How It Operates: The blower fan runs 24/7, continuously circulating air even when the outdoor compressor is off. — Impact on Indoor Humidity: Severe increase in humidity. Re-evaporates moisture off the wet coil and blows it back inside.

• AUTO — How It Operates: The blower fan only runs when the compressor is actively cooling the home. — Impact on Indoor Humidity: Maximum dehumidification. Allows moisture to drain outside while the fan rests between cycles.

The 'ON' Setting and Moisture Blow-Back

When you set your thermostat fan to "ON," the indoor blower motor runs continuously, regardless of whether the outdoor unit is actually cooling. During a cooling cycle, the evaporator coil gets dripping wet with condensed moisture. When the cooling cycle ends and the compressor shuts off, that coil needs time to drain into the pan. If the fan keeps blowing air over that wet, warming coil, it acts like a giant humidifier. This phenomenon is called moisture blow-back. The running fan literally re-evaporates the water sitting on the coil and blows it right back into your living space. A single incorrect setting can undo hours of hard-fought dehumidification in a matter of minutes.

Why 'AUTO' is the Only Choice for Humidity

During high-humidity periods in Miami FL, you must always keep your thermostat fan set to "AUTO." This setting synchronizes the indoor blower fan with the outdoor compressor cycle. When the compressor shuts off to end a cooling cycle, the indoor fan shuts off immediately alongside it. This critical pause allows the condensed moisture to safely drip off the coil, into the pan, and down the drain line without being disturbed by moving air. By simply switching your fan to "AUTO," you prevent gallons of water from re-entering your living space each week.

The Hidden Danger of the 'ON' Fan Setting

Unlocking 'Dry Mode' on Your Thermostat

If you have a modern thermostat, you might have noticed a setting indicated by a small water drop icon. This is dry mode, and it is arguably the most powerful tool at your disposal for combating extreme seasonal moisture. While standard cooling mode focuses entirely on dropping the ambient temperature, dry mode shifts the system's priority toward latent heat removal.

What Dry Mode Actually Does

When you activate dry mode, the thermostat communicates with your HVAC system to change how it operates. First, it significantly lowers the indoor fan speed. As we discussed earlier, slowing down the airflow maximizes the time the air spends touching the freezing evaporator coil. Second, it runs the compressor in shorter, highly specific bursts designed to keep the coil as cold as possible without unnecessarily dropping the room temperature. By focusing the system's energy on condensation rather than temperature drops, dry mode effectively wrings out the air like a wet sponge.

Best Times to Utilize This Feature

Dry mode is not meant to be a permanent, year-round setting. It is the perfect antidote to late-summer days when the ambient heat drops slightly, but the dew point remains aggressively high. The best times to utilize this feature are during rainy, muggy afternoons or those transitional end-of-season weeks in late August in South Florida when standard cooling would overchill the house. If the temperature outside is a mild 78 degrees but it is pouring rain, standard cooling mode won't run long enough to remove the moisture. Switching to dry mode solves this problem by pulling the humidity out without freezing you out of your living room.

Enhancing System Control for Extreme Climates

While basic thermostat adjustments can make a massive difference, extreme coastal climates sometimes require a more robust approach to system control. Upgrading the technology that commands your HVAC equipment allows for precise humidity tracking alongside standard temperature management.

Automating Comfort with Advanced Controls

The days of constantly walking back and forth to manually adjust your settings are over. Upgrading to a modern smart thermostat allows you to automate your comfort completely. These advanced controls feature built-in indoor humidity sensors that constantly monitor the moisture levels in your home. You can program the system to automatically toggle into dry mode or adjust fan speeds the moment indoor humidity creeps past 50%. You can also set specific schedules that align with peak coastal moisture hours, ensuring your system is proactively fighting the humidity before you even feel it.

Supporting Airflow and Purity

Proper airflow is required for any dehumidification setting to work effectively. If the air cannot reach the evaporator coil, the moisture cannot be extracted. This is where the physical cleanliness of your system becomes paramount.

1. Check your filters: Clogged, dirty air filters severely restrict airflow. This mimics the exact symptoms of poor dehumidification, causing the coil to freeze and the home to feel sticky.

2. Protect the coil: Integrating whole-home air filtration systems protects the delicate evaporator coil from dust buildup. Even a thin layer of dust acts as insulation, preventing the humid air from touching the cold metal and halting the condensation process.

3. Keep hands off the mechanics: While adjusting your thermostat settings and changing filters are safe homeowner tasks, you should never attempt internal mechanical adjustments. Do not open the air handler or attempt to modify blower motor speeds manually.

Recognizing When Settings Aren't Enough

There comes a point where pressing buttons on a screen simply won't fix the problem. If you have set your fan to AUTO, activated dry mode, and changed your filters, but your home still feels like a tropical rainforest during late August in South Florida, you are likely dealing with a systemic mechanical failure. Recognizing the signs of a larger issue can save your equipment from a catastrophic breakdown.

Signs of Refrigerant Issues

The dehumidification process relies entirely on the evaporator coil remaining freezing cold. If your system is low on refrigerant due to a leak, the coil cannot reach the proper temperature to cause condensation. In severe cases, low refrigerant causes the coil to literally freeze solid into a block of ice, halting the dehumidification process entirely. Look out for these warning signs:

• Persistent stickiness: The AC runs all day, but the humidity never drops.

• Strange noises: Hissing or bubbling sounds coming from the indoor unit.

• Visible ice: Frost or ice buildup on the copper refrigerant lines or the indoor coil.

• Extended run times: The system operates for hours with zero impact on your indoor comfort.

The Oversized AC Dilemma

One of the most frustrating realities our team uncovers during routine HVAC inspections in humid climates is discovering that a homeowner's AC unit is simply too large for their home. Bigger is not better when it comes to HVAC systems. An oversized unit will blast the home with massive amounts of cold air, dropping the temperature in minutes. However, because it reaches the target temperature so quickly, it inevitably short-cycles. It will never run long enough to pull the latent heat out of the air. Proper load calculations—something we prioritize on every AC installation—are an absolute necessity for latent heat removal. If your system is grossly oversized, no amount of thermostat tweaking will permanently solve the problem, and you may need to consult a professional for a long-term strategy. For more regional insights, check out our Humidity Control Tips for South Florida Homeowners.

Frequently Asked Questions About HVAC Humidity Control

Does fan ON or AUTO reduce humidity?

The AUTO setting is the only choice for reducing indoor humidity. When you set the fan to AUTO, it shuts off alongside the compressor, allowing the condensed moisture on the coil to drain away safely. The ON setting keeps the fan blowing constantly, which re-evaporates the water on the coil and blows it right back into your living space, making your home significantly more humid.

What is dry mode on my AC?

Dry mode is a specialized thermostat setting designed specifically to prioritize moisture removal over rapid cooling. It typically lowers the blower fan speed and runs the compressor in highly controlled cycles to maximize the amount of time humid air spends touching the cold evaporator coil. This effectively wrings the moisture out of the air without turning your living room into an icebox.

Why is my house so humid with the AC running?

If your AC is running but the house remains humid, your system is likely short-cycling or suffering from restricted airflow. When a unit is oversized, has a clogged filter, or is set to a drastically low temperature, it cools the air too quickly and shuts off before it can extract the latent heat. It can also indicate a refrigerant leak preventing the coil from getting cold enough to cause condensation.

What is the best AC setting for high humidity?

The best setting for high humidity is utilizing "dry mode" (if your thermostat has it) and ensuring your fan is strictly set to "AUTO." If you do not have dry mode, keep the fan on AUTO and set the temperature to a moderate, comfortable level (like 74-76 degrees) rather than dropping it drastically, which encourages longer, steadier cycles that pull more moisture from the air.

Can a smart thermostat automatically manage indoor humidity?

Yes, modern smart thermostats are equipped with advanced indoor humidity sensors that monitor moisture levels in real-time. You can program these devices to automatically activate dehumidification protocols, adjust fan speeds, or alert you when indoor humidity exceeds your preferred threshold, taking the guesswork out of climate control.

How does short-cycling affect my home's moisture levels?

Short-cycling destroys your system's ability to remove moisture. Because dehumidification is a slow process that requires sustained air contact with the cold coil, a system that turns on and off every ten minutes never gets the chance to wring the water out of the air. This leaves the heavy moisture suspended in your rooms, leading to a cold, clammy environment.

Reclaim Your Comfort Before the Season Ends

True indoor comfort comes from mastering both sensible temperature control and latent moisture removal. By switching your fan to AUTO, utilizing dry mode, and resisting the urge to drastically drop the temperature, you can force your system to extract that heavy, stagnant air. However, if you have made these thermostat adjustments and your home still feels unbearably sticky, professional diagnostics are the next logical step. Our team at Air On Demand has helped countless families achieve true climate control. Do not suffer through a damp, uncomfortable house as the kids head back to school; schedule an inspection for your AC maintenance in Miami today to ensure your system is operating at peak efficiency and effectively removing humidity before the season ends.

Replacing a Condenser Out of Warranty: OEM Match vs. Universal Replacements placeholder-image  | Air On Demand
5 min read

Replacing a Condenser Out of Warranty: OEM Match vs. Universal Replacements

When your AC condenser dies during the brutal late-summer heat, you need cooling fast. Explore the risks and benefits of mixing brands versus waiting for an exact manufacturer match.

Facing a Dead Condenser During the Late-Summer Heat?

Are you staring at a completely unresponsive outdoor AC unit, wondering how your household will survive the rest of the week? When you are suddenly faced with replacing a condenser out of warranty: OEM match vs. universal replacements is one of the most critical decisions you will have to make. A sudden equipment failure forces homeowners into a difficult position, especially when the breakdown occurs right in the middle of brutal August late-summer heat and humidity. Here in Miami, our team at Air On Demand sees this exact panic every back-to-school season. The immediate instinct is to find the fastest possible fix to restore comfort to your living space.

This urgency introduces a major dilemma: do you secure immediate cooling with a readily available third-party unit, or do you wait for an exact Original Equipment Manufacturer (OEM) match? While an off-the-shelf universal unit might seem like the perfect quick fix, this decision impacts far more than just your immediate comfort. It directly affects your long-term energy efficiency, your monthly utility bills, and the overall health of your entire HVAC system. Before committing to a major AC installation and replacement, it is essential to understand how these two distinct paths will perform over the next decade.

Can You Replace Just the Outside AC Unit?

The short answer is yes, physically connecting a new outdoor unit to an existing indoor setup is possible, but the technical reality is much more complicated. Homeowners frequently ask our technicians, "Can you replace just the outside AC unit?" without realizing that a central air conditioning system is not a single appliance. It is a split system consisting of two highly interdependent halves: the outdoor condenser (which releases heat) and the indoor evaporator coil (which absorbs heat). When you pair a universal third-party condenser vs. existing OEM indoor coil, you are forcing two distinct pieces of engineering to work together.

A universal replacement refers to an off-brand or generic outdoor unit designed to be broadly compatible with various indoor setups. An OEM match, on the other hand, is an outdoor unit manufactured by the exact same brand, engineered specifically to communicate and cycle perfectly with your indoor equipment. While a technician can weld the copper lines and connect the electrical wiring between mismatched units, the internal components—such as the refrigerants, compressors, and metering devices—must communicate seamlessly to perform efficiently. When they do not, the entire system struggles.

The Mechanics of Component Matching

To understand why mixing equipment is risky, you have to look at how these systems are designed. Indoor and outdoor units are engineered at the factory to share the exact same cooling load. The volume of refrigerant pumped by the outdoor compressor must perfectly match the expansion capacity of the indoor coil's metering device.

When you pair new, high-efficiency outdoor technology with an older, out-of-warranty indoor coil, the components often operate at different pressures and speeds. In our daily field experience across Miami, we frequently encounter the fallout from these mismatched setups. Furthermore, mismatched systems almost never achieve an AHRI (Air-Conditioning, Heating, and Refrigeration Institute) certification. Without this certification, there is no verified guarantee that the system will deliver the cooling capacity or energy efficiency promised on the box. Before deciding on this route, we highly recommend weighing the long-term impacts of an AC repair vs. replacement strategy that includes the entire system.

The Appeal and Risks of Universal Third-Party Condensers

There is a reason why universal condensers remain a popular topic of discussion: availability. When an AC unit fails in the middle of a late-summer heatwave, waiting days or weeks for a specific OEM part to ship from a factory is incredibly frustrating. Universal units are often stocked locally in abundance, offering incredibly fast relief when a catastrophic breakdown occurs. However, prioritizing speed over compatibility introduces several significant risks that homeowners in Miami FL must carefully evaluate.

The primary risks of installing a universal third-party condenser include:

• Severe Efficiency Drops: According to data from the Department of Energy, improper component matching can reduce a system's overall efficiency by up to 30 percent. You might pay for a high-efficiency outdoor unit, but you will not reap the benefits.

• The "Lowest Common Denominator" Effect: When you pair a brand-new 15-SEER2 condenser with an older 10-SEER indoor coil, the system does not average the two ratings out. Instead, the system defaults to the lowest efficiency component, forcing your new equipment to underperform.

• Refrigerant Incompatibility: Older indoor coils were often designed to handle specific refrigerants and operating pressures. Forcing a modern condenser to pump newer refrigerants through an outdated, mismatched coil can lead to chronic freezing, poor cooling, or catastrophic compressor failure.

• Communication Failures: Modern HVAC systems use complex digital control boards to optimize cooling cycles. A universal outdoor unit lacks the proprietary software to "talk" to an existing OEM indoor air handler, resulting in basic, inefficient on/off cycling rather than nuanced climate control.

Why an Exact OEM Match Maximizes Efficiency

Choosing to install an exact OEM match is an investment in long-term performance, stability, and regulatory compliance. OEM components are engineered with proprietary communication protocols designed to optimize every single cooling cycle. When the outdoor compressor and the indoor air handler speak the same digital language, they can make micro-adjustments to airflow and refrigerant pressure in real time, drastically reducing energy consumption while maximizing comfort.

Regulatory Compliance and SEER2 Standards:
In 2023, the Department of Energy rolled out strict new regulations requiring a minimum efficiency rating of 14.3 SEER2 for any new air conditioning system installed in the southern United States. When you mix a universal third-party condenser vs. existing OEM indoor coil, it is practically impossible to verify that the hybrid system meets this mandatory federal standard. An exact OEM match guarantees that your system is AHRI-certified and fully compliant with regional energy codes.

Advanced Features Require Exact Matching:
Modern cooling technology relies heavily on advanced features like variable-speed compressors and multi-stage blowers. These features cannot function correctly if the outdoor unit is generic. As experts in top-tier cooling solutions, our team at Air On Demand understands that high-performance equipment—such as Daikin Fit systems—requires precise, uncompromising load-matching. By committing to an exact OEM match, you ensure that these premium systems can utilize their proprietary communication technology to deliver the exact efficiency and whisper-quiet operation they were designed for.

The Hidden Climate Factor: Dehumidification Challenges

One of the most critical, yet frequently overlooked, aspects of HVAC performance is latent heat removal. Sensible cooling refers to simply lowering the temperature of the air (what you read on the thermostat). Latent cooling refers to the removal of moisture from the air (dehumidification). In a climate like ours, managing latent heat is just as important as dropping the temperature.

The Threat of the "Cold but Clammy" Home:
During peak August late-summer heat and humidity, extreme tropical moisture places maximum strain on an HVAC system's latent cooling capacity. When our technicians get called to homes that feel "cold but clammy," a mismatched universal condenser paired with an older indoor coil is often the culprit. The powerful new outdoor unit drops the indoor temperature rapidly, satisfying the thermostat in just a few minutes. Because the cycle shuts off so quickly, the indoor coil never has enough time to extract the heavy moisture from the air.

The Solution is Proper Load-Matching:
The result of a short-cycling mismatched system is a home that feels cold but incredibly clammy. High indoor humidity makes the air feel heavier, forces you to lower the thermostat even further, and creates an environment highly susceptible to indoor air quality issues. Proper OEM load-matching is the only way to ensure the system runs long enough, at the correct variable speeds, to pull that heavy tropical moisture out of your living space effectively.

Warranty Protections and Long-Term System Lifespan

Beyond daily performance and humidity control, mixing HVAC brands introduces significant secondary risks regarding manufacturer warranties and the overall longevity of your equipment. HVAC systems are significant investments, and protecting that investment should be a top priority for any homeowner in Miami FL.

Voided Existing Warranties:
If your indoor coil or air handler happens to have any remaining warranty coverage, installing a third-party universal condenser will almost certainly void it. We constantly remind our customers that manufacturers stipulate their equipment must be used with approved, matching components. If an older indoor coil fails after a universal outdoor unit is attached, the original manufacturer will likely deny the claim, citing improper installation and unauthorized equipment pairing.

Compromised New Warranties:
Furthermore, the manufacturer of the new universal condenser may not honor a full warranty if they determine the unit was installed with an incompatible or restrictive indoor coil. Mismatched systems inherently work harder to cool the home. The irregular refrigerant pressures and constant short-cycling lead to accelerated wear and tear on the new compressor. This added strain significantly reduces the overall lifespan of the equipment, turning a seemingly cheap, immediate fix into a costly long-term liability.

Making Your Final Decision: Which Replacement Path Wins?

When synthesizing the core trade-offs, the decision ultimately comes down to short-term convenience versus long-term reliability. A universal unit offers the undeniable benefit of speed and immediate availability, which is highly tempting during a severe heatwave. However, the associated drops in efficiency, the loss of AHRI certification, the severe dehumidification issues, and the warranty complications often outweigh that initial convenience.

If you are evaluating a universal third-party condenser vs. existing OEM indoor coil, we highly advise consulting with our load-matching experts to evaluate the exact condition and specifications of your current setup before making a final call. Professional AC replacement services in Miami can provide an objective assessment of what your home truly needs to stay comfortable and efficient for the next ten to fifteen years.

OEM vs. Universal Replacement Summary

• Efficiency Retention — Exact OEM Match: Operates at maximum advertised SEER2 rating. — Universal Third-Party Condenser: Defaults to the lowest efficiency of the older component (up to 30% loss).

• Dehumidification Capability — Exact OEM Match: Excellent; properly cycles to remove heavy moisture. — Universal Third-Party Condenser: Poor; prone to short-cycling, leaving the home cold and clammy.

• Warranty Preservation — Exact OEM Match: Fully protects new equipment warranties. — Universal Third-Party Condenser: Often voids remaining indoor warranties and limits new outdoor coverage.

• AHRI Certification Status — Exact OEM Match: Guaranteed certified and compliant with DOE regional standards. — Universal Third-Party Condenser: Cannot be certified; compliance with southern SEER2 minimums is unverified.

OEM vs. Universal Condenser Replacements

Secure Your Home's Comfort with Expert Load-Matching

Making the right component match is absolutely critical for your long-term comfort, your monthly energy expenses, and the overall health of your HVAC system. While the panic of a sudden breakdown might push you toward the fastest available option, taking the time to ensure proper system compatibility will save you from years of high humidity, excessive energy bills, and premature equipment failure. Do not settle for a universal third-party condenser vs. existing OEM indoor coil without understanding the full scope of the risks involved.

If your outdoor unit has failed and you need objective, professional guidance, our team is here to help you navigate your options. We encourage you to reach out for a comprehensive evaluation of your current setup, including the intricacies of matching indoor air handlers with new Daikin condensers. Schedule an assessment today to ensure your home remains perfectly cooled and dehumidified for years to come.

Frequently Asked Questions

Can I replace just my AC condenser?
Yes, it is physically possible to replace just the outdoor AC condenser while leaving the indoor coil in place. However, doing so requires absolute certainty that the new outdoor unit is fully compatible with the older indoor components in terms of refrigerant type, operating pressure, and capacity. Without an exact match, the system will suffer from reduced efficiency and potential mechanical failures.

Can you replace just the outside AC unit?
While you can replace just the outside AC unit, HVAC professionals strongly advise against mixing different brands or vastly different generations of equipment. The outside unit and inside coil are designed to work as a unified pair. Replacing only the outside unit often leads to a mismatched system that cannot achieve its advertised energy efficiency and may struggle to properly dehumidify your home.

Do I need to replace my indoor coil when I replace my condenser?
It is highly recommended to replace your indoor coil at the same time you replace your condenser. If your current indoor coil is out of warranty, older, or designed for a phased-out refrigerant, pairing it with a modern, high-efficiency condenser will severely limit the new unit's performance. Replacing both simultaneously guarantees AHRI certification and maximum energy savings.

What happens if you mix AC brands?
Mixing AC brands typically results in a loss of AHRI certification, meaning the system's efficiency and capacity can no longer be officially verified. Additionally, proprietary communication protocols between the thermostat, indoor air handler, and outdoor compressor will fail to sync. This lack of communication forces the system to operate poorly, often voiding manufacturer warranties in the process.

Will a mismatched AC system still cool my house?
A mismatched AC system will likely still blow cold air and lower the temperature in your house, but it will do so inefficiently. Because the components are not optimized to work together, the system will consume significantly more electricity to achieve the desired temperature. Over time, the added strain of this inefficiency will lead to accelerated wear and tear on the compressor.

How does an unmatched AC condenser affect indoor humidity?
An unmatched AC condenser often cools the indoor air much faster than the older indoor coil can process, leading to a phenomenon known as short-cycling. Because the system turns on and off so rapidly, the indoor coil does not have enough time to extract latent heat (moisture) from the air. This leaves the home feeling cold but uncomfortably clammy and humid.

Internal Pressure Equalization: Why Your AC Hisses Briefly at Startup placeholder-image  | Air On Demand
5 min read

Internal Pressure Equalization: Why Your AC Hisses Briefly at Startup

Hearing a sudden 5-second hiss when your compressor kicks on during heavy summer cooling can be alarming. Determine if this noise is normal pressure equalization or a true emergency.

The Startling Sound of a Cooling Cycle Initiating

You are relaxing in your living room, trying to beat the heat, when your outdoor compressor kicks on. Instead of the familiar, smooth hum you expect, you hear a sharp, sudden hiss. You immediately wonder if something is broken. Understanding Internal Pressure Equalization: Why Your AC Hisses Briefly at Startup is the key to knowing whether you have an emergency or a perfectly functioning unit.

During heavy August late-summer cooling, this sound becomes much more frequent as your system works overtime. At Air On Demand, our team fields countless calls this time of year from Miami homeowners worried about this exact noise. When that unexpected noise happens, you face a direct decision point: do you shut the system down and call for emergency repair, or do you let it run? The sudden hiss of escaping air or gas naturally puts any homeowner on high alert. We rely heavily on our cooling equipment to keep our homes safe and comfortable, and any disruption feels like an immediate threat to that comfort.

Before you rush to turn off the thermostat, it helps to look at the mechanics of what is actually happening inside the metal cabinet outside your home. Whether you need extensive knowledge about air conditioning systems or reliable AC repair in Miami, understanding the physics behind your cooling equipment provides profound peace of mind and prevents unnecessary panic.

The 5-Second Rule: When an AC Making Hissing Noise is Normal

If you search online for "ac making hissing noise," you will often find dire warnings about catastrophic refrigerant leaks. The internet is full of worst-case scenarios that can make any homeowner incredibly anxious. It is easy to assume that any hissing sound means expensive chemicals are venting into your backyard.

However, the critical differentiator between a normal operational function and a severe system failure comes down to time. When our technicians arrive at a home, the first thing we teach our customers is the 5-second rule. A normal operational hiss lasts exactly that—a brief 5-second duration. This specific sound occurs at the exact moment the compressor engages, not continuously while the fan runs. It is a temporary mechanical reaction to the system waking up and moving fluids.

Once the 5-second duration passes, the sound should transition smoothly into the steady, familiar hum of standard operation. If your system follows this exact pattern, it is operating exactly as the manufacturer intended.

Why Timing is the Ultimate Diagnostic Tool

Monitoring the exact length of the sound is the easiest way to diagnose the severity of the situation from your own property. If the hiss stops within five seconds, the system has successfully balanced its internal pressures and is ready to cool your home. If the noise continues for ten, twenty, or sixty seconds, the system is no longer balancing pressure. In our experience servicing Miami's diverse AC and heat pump installations, a prolonged hiss means the system is likely losing refrigerant through a physical hole or struggling with a blocked internal valve. By simply counting to five when the unit kicks on, you can confidently rule out most major emergencies.

Understanding the Physics: What is Internal Pressure Equalization?

To understand the noise, you have to understand how the machine actually works. Air conditioners do not "create" cold air out of nothing. Instead, they move heat out of your home by manipulating refrigerant pressure. The system is divided into two distinct halves: a high-pressure side (the condenser located outside) and a low-pressure side (the evaporator coil located inside).

These two sides are separated by a critical component called the metering device, often referred to as a thermal expansion valve (TXV) or a fixed orifice. When the unit is off, the pressure naturally attempts to balance out across this valve, setting the stage for the next startup cycle. In a demanding environment like Miami FL, where units work incredibly hard for months on end, our installation crews see firsthand how this balancing act is a constant, daily occurrence.

The Role of the Metering Device

The metering device acts as a deliberate bottleneck to control the flow of liquid refrigerant. It creates the massive pressure drop necessary for the refrigerant to absorb heat from your home's indoor air. Think of it like placing your thumb tightly over the end of a flowing garden hose. The water—or in this case, the chemical refrigerant—builds up intense high pressure behind your thumb and sprays out at a much lower pressure on the other side.

When the system shuts down, the high pressure behind that "thumb" slowly bleeds through the tiny opening to the low-pressure side until both sides are completely equal. This equalization must happen so the compressor does not have to fight against a massive wall of pressure the next time it tries to start. The hissing sound is simply the physical evidence of this necessary pressure transfer.

Why an Air Conditioner Making Hissing Noise Happens at Startup

The exact moment the compressor turns on is a violent mechanical event. Refrigerant is suddenly forced through the system at high velocity. The physical rush of gas and liquid is exactly why an air conditioner making hissing noise occurs momentarily. It is the audible evidence of internal pressure equalization successfully taking place.

Here is the step-by-step breakdown of exactly what happens during that brief 5-second duration:

1. The Thermostat Calls for Cooling: The indoor temperature rises above your set preference, and your thermostat sends an electrical signal to the outdoor compressor to begin the cooling cycle.

2. The Compressor Engages: The compressor violently re-pressurizes the refrigerant. It acts as a massive vapor pump that pushes the chemical compound through the copper lines toward your home.

3. Refrigerant Hits the Bottleneck: The newly pressurized liquid refrigerant rushes toward the narrow metering device at a very high velocity, looking for a way into the indoor coil.

4. Pressure Equalizes: The sudden surge of gas and liquid squeezing through the tiny opening of the metering device creates an audible hiss. If the system has been off for only a short time, the pressure differential between the two sides is much higher, making the resulting hiss significantly louder.

5. Normal Operation Resumes: After the initial 5-second duration, the pressure stabilizes across the valve, the hiss fades completely, and the system settles into a steady hum.

If this sequence does not resolve smoothly, or if the unit struggles to turn over entirely, scheduling a professional AC inspection is the safest next step to protect your equipment from permanent damage.

Normal Equalization vs. Refrigerant Leaks: Spotting the Difference

A common query we get from worried homeowners is why an AC makes a hissing noise when turned on versus when it is actively running. A normal pressure equalization hiss stops completely after the initial 5-second duration. Conversely, a true refrigerant leak produces a continuous, high-pitched hissing or bubbling sound that persists as long as the system is pressurized.

Refrigerant leaks are serious issues that are often accompanied by warm air blowing from your indoor vents and solid ice forming on your evaporator coils. Our highly trained technicians at Air On Demand possess the technical expertise to accurately diagnose normal operational sounds versus failing components, ensuring homeowners never pay for unnecessary repairs when a sound is perfectly normal. If you hear a noise that doesn't stop, you might be dealing with a situation that requires diagnosing high-pressure hissing sounds.

• Duration of the Sound — Normal Pressure Equalization: Brief 5-second duration only. — Dangerous Refrigerant Leak: Continuous hissing while running or off.

• Timing of the Noise — Normal Pressure Equalization: Only at the exact moment of startup. — Dangerous Refrigerant Leak: Anytime the system is pressurized.

• Cooling Performance — Normal Pressure Equalization: System cools the home normally. — Dangerous Refrigerant Leak: Warm, humid air blows from vents.

• Accompanying Warning Signs — Normal Pressure Equalization: None; smooth transition to a steady hum. — Dangerous Refrigerant Leak: Frozen evaporator coils or bubbling sounds.

Normal Pressure Equalization vs. Refrigerant Leaks

How Heavy Cycling Impacts Startup Sounds in Extreme Heat

During August late-summer cooling, as kids head back to school and the heat lingers, systems operate under maximum load with very short off-cycles. When the temperature outside refuses to drop, your thermostat constantly demands more cold air. Because the off-cycle is so incredibly brief, the internal pressure simply does not have enough time to fully equalize while the unit is resting.

In Miami's extreme heat and humidity, AC units cycle on and off frequently throughout the day. This regional climate reality makes homeowners highly attuned to startup noises. When the compressor kicks back on after only a few minutes of rest, it hits a much higher pressure wall, making the resulting hiss much more noticeable, sharp, and aggressive.

Homeowners may hear this specific noise dozens of times a day simply because the system is cycling frequently to combat the intense, relentless heat. The more often the system cycles, the more frequently you will hear that sudden rush of refrigerant. Understanding this environmental factor helps explain why the noise might seem louder or more frequent at the end of the summer compared to the cooler spring months. In fact, our service boards are typically packed in August specifically because these amplified sounds make homeowners suspect a breakdown.

When to Request a Professional Assessment for AC Noises

While a brief startup hiss is a normal function of thermodynamics, other sounds are clear warning signs of mechanical trouble. It is vital to outline the specific scenarios where a hissing noise transitions from normal physics to requiring professional intervention. In a demanding climate like Miami FL, we always stress to our customers that staying ahead of mechanical stress is crucial to extending the lifespan of your unit.

Here is what to look for when evaluating your system's sounds:

• Extended sound duration: If the hissing lasts longer than the standard 5-second duration, it warrants immediate investigation. The system is failing to balance pressure.

• Accompanying mechanical noises: Listen closely for accompanying sounds like grinding, squealing, clanking, or bubbling. These sounds indicate severe mechanical stress, failing compressor valves, or a dying fan motor.

• Decreased cooling performance: Pay close attention to your indoor comfort. If the hiss is accompanied by rising indoor temperatures or high humidity levels, the system is struggling to remove heat and may lack the necessary refrigerant charge.

• Visible ice accumulation: Check the outdoor refrigerant lines and the indoor evaporator coil. If you see ice forming alongside a continuous hissing sound, you likely have a significant refrigerant leak causing a pressure drop.

• Frequent short cycling: If the unit turns on, hisses loudly, and shuts off repeatedly within a span of minutes, the system is short-cycling. This points to an electrical failure or a tripped safety switch.

Regular check-ups and routine AC maintenance ensure that all internal valves and metering devices are operating at the correct pressures, preventing minor pressure issues from becoming catastrophic major breakdowns.

Secure Your Peace of Mind This Cooling Season

Understanding that a brief hiss is just internal pressure equalization can save you incredible amounts of unnecessary worry during heavy August late-summer cooling. You do not need to panic every time the compressor kicks on and makes a brief noise. The physics of your system require that pressure transfer to keep your home comfortable.

However, if you are ever in doubt about the sounds your system is making, professional guidance is always available. Ensure your system is running safely and efficiently by having a qualified technician evaluate any continuous or concerning noises. For reliable, expert AC repair in Miami, trust a team that understands the exact physics of your cooling equipment and delivers the peace of mind you deserve.

Frequently Asked Questions

Why does my ac make a hissing noise when turned on?

A hissing noise at startup is typically the sound of normal internal pressure equalization. When the compressor kicks on, it forces high-pressure refrigerant through a narrow metering device, creating a brief, audible rush of gas and liquid. This is a completely normal physical reaction that allows the system to begin absorbing heat from your home. The sound should only last for a few seconds before fading away.

What is AC pressure equalization?

AC pressure equalization is the process of balancing refrigerant pressure between the high-pressure condenser outside and the low-pressure evaporator inside. When the system is off, the pressure naturally tries to level out across the metering device. When the unit turns back on, the sudden surge of refrigerant being pumped through the system causes a temporary pressure differential that often results in a brief hissing sound.

How can you tell if an AC hiss is a leak or normal?

The easiest way to tell the difference is by timing the duration of the sound. A normal pressure equalization hiss lasts for about five seconds right at startup and then fades into a smooth hum. A true refrigerant leak produces a continuous hissing or bubbling sound that persists the entire time the system is running, and often continues even when the thermostat is turned off.

Is it normal for an air conditioner to hiss?

Yes, a brief hiss lasting only a few seconds at startup is completely normal. However, if the hissing is continuous, overly loud, or accompanied by warm air blowing from your vents, it is no longer a normal operational sound. Continuous hissing usually points to a refrigerant leak or a failing internal valve that requires professional attention to resolve.

How long should an AC hiss at startup?

A normal startup hiss should last for a brief 5-second duration. Once those five seconds have passed, the internal pressures have equalized enough for the sound to stop entirely. If the noise continues for ten seconds, a full minute, or the entire cooling cycle, you should turn off the system at the thermostat and request a professional inspection.

What does a refrigerant leak sound like?

A refrigerant leak typically sounds like a continuous, high-pitched hissing, whistling, or bubbling noise coming directly from the copper refrigerant lines or the indoor coil. Unlike a normal startup hiss, this sound does not stop after a few seconds. It is also frequently accompanied by a noticeable drop in cooling performance and potential ice buildup on the coils.

Does Skipping Annual Maintenance Void Your Daikin Mini Split Warranty? placeholder-image  | Air On Demand
5 min read

Does Skipping Annual Maintenance Void Your Daikin Mini Split Warranty?

Miami's late-summer heat forces ductless systems to work overtime. Find out if missing a tune-up gives the manufacturer grounds to deny a claim, and how to restore compliance.

Are You Risking Your Coverage During Peak Summer Heat?

Does skipping annual maintenance void your Daikin mini split warranty? It is a question our team at Air On Demand hears frequently when Miami homeowners realize their system has been running non-stop to combat the relentless late-summer heat and humidity, yet they haven't scheduled a tune-up this year. You rely on your ductless system to keep your home comfortable, but what happens if a critical component breaks down late in the season and you do not have proof of professional upkeep? The fear of an unexpected, out-of-pocket repair bill for a system that should theoretically be covered under warranty is a valid concern.

Understanding the fine print of your manufacturer agreement before a failure occurs is essential. Warranties are designed to protect you against factory defects, not against wear and tear caused by neglect. To protect your investment in your Daikin equipment, scheduling professional AC maintenance in Miami is the most reliable step you can take to ensure your coverage remains fully intact.

The Short Answer: What Daikin's Warranty Terms Actually Say

The short answer is that neglecting professional upkeep gives the manufacturer clear grounds to deny claims for components that fail due to a lack of care. Daikin's standard warranty terms explicitly require that the equipment be maintained according to the guidelines set forth in the operation manual. This is not merely a suggestion; it is a condition of the agreement. If a part fails and the root cause is determined to be dirt, debris, or lack of standard servicing, the replacement part will not be covered.

However, a single missed tune-up does not automatically void the entire warranty forever. If you skip a year, Daikin does not instantly cancel your registration. Instead, it jeopardizes your coverage for specific, maintenance-related failures. For instance, if your compressor fails due to a factory defect that has nothing to do with maintenance, that specific claim might still be honored. But if it fails because a dirty coil caused it to overheat, the claim will likely be rejected.

Covered Defects vs. Excluded Neglect

• Defective control board from factory — Likely Warranty Status: Covered — Reasoning Based on Terms: Failure is unrelated to routine maintenance or airflow.

• Blower motor burnout due to clogged filter — Likely Warranty Status: Denied — Reasoning Based on Terms: Homeowner failed to maintain proper airflow per the manual.

• Refrigerant leak at factory weld — Likely Warranty Status: Covered — Reasoning Based on Terms: Manufacturing defect, not caused by environmental neglect.

• Compressor failure from dirty condenser — Likely Warranty Status: Denied — Reasoning Based on Terms: Lack of coil cleaning forced the compressor to overwork.

One critical detail homeowners often overlook is that maintenance must be performed by a qualified HVAC professional. Attempting DIY deep cleaning on your Daikin mini split does not fulfill the manufacturer's requirement for professional upkeep, as you cannot generate the necessary diagnostic reports or official service records.

How South Florida's Climate Accelerates Wear (And Why Manufacturers Care)

Manufacturers enforce strict maintenance rules because they understand that environmental stress drastically affects the lifespan of HVAC components. Over our years providing AC installation and repair across Miami, we have seen exactly how the relentless moisture and high temperatures of coastal and inland areas put maximum stress on cooling equipment. A system operating in a mild, dry climate might survive a missed tune-up with minimal consequences, but a system battling extreme subtropical conditions will not.

The Coastal Moisture Factor

High ambient moisture and coastal salt air take a heavy toll on electrical components and aluminum coils. When a mini split operates continuously, it extracts gallons of water from the indoor air. This moisture creates a damp environment inside the indoor air handler. If the system is not professionally cleaned, this dampness mixes with airborne dust to create a thick sludge that coats the blower wheel and clogs the condensate drain. Furthermore, coastal air can accelerate galvanic corrosion on the outdoor condenser coils if they are not routinely washed with specialized, manufacturer-approved solutions.

The Heat Load Factor

During the intense summer months, your system rarely gets a break. Continuous operation in extreme heat accelerates standard wear and tear on moving parts. Rapid coil fouling from humidity-driven dust restricts airflow, forcing the variable-speed inverter compressor to ramp up to its maximum capacity just to maintain the thermostat setting. Manufacturers like Daikin cannot guarantee parts that are subjected to this level of extreme environmental stress without proper professional upkeep. They require maintenance because it resets the system's efficiency and removes the environmental burdens that lead to premature mechanical death.

Common Maintenance-Related Failures Excluded from Coverage

When our technicians at Air On Demand respond to an end-of-season AC repair call for a broken Daikin mini split, the first thing we must do is diagnose the root cause of the failure. If we submit a warranty claim to the manufacturer and note that the system was severely neglected, the manufacturer will deny the part. Based on our extensive field experience, here are the most common breakdowns we see that are excluded from coverage when maintenance records are missing.

• Blower motor failures: The indoor blower motor is designed to push air through a clean filter and a clean evaporator coil. When these components are choked with dust, the motor has to work twice as hard to move the same amount of air. This excessive strain causes the motor to overheat and eventually short out. Because this is entirely preventable, it is not covered.

• Condensate drain line lockouts: Mini splits remove humidity, which drips into a drain pan and flows outside. Without professional flushing, algae and sludge build up in this line. When the line clogs, water backs up, potentially causing property damage or triggering a safety switch that locks the system down. This is strictly a maintenance issue, not a factory defect.

• Compressor overheating: The outdoor unit must reject the heat it absorbs from your home. If the outdoor condenser coil is blanketed in dirt, pollen, or lawn clippings, the heat cannot escape. Head pressure rises, and the compressor draws excessive electrical current until it fails.

• Sensor malfunctions: Thermistors and temperature sensors rely on accurate readings of the air passing over them. If they are coated in grime, they send false signals to the control board, causing the system to short-cycle or freeze up.

If our licensed technicians determine the root cause of any of these failures is neglect, the manufacturer parts warranty will not cover the replacement component, leaving you responsible for the full cost of the repair.

The Exact Documentation You Need to Keep on File

Keeping your warranty intact requires more than just good intentions; it requires precise documentation. If a major component fails, the manufacturer may request proof that the system has been serviced regularly since the date of installation. Living in Miami coastal and inland areas means your system works harder than most, making these records even more critical during the claims process.

What a Valid Invoice Looks Like

A vague, handwritten receipt that simply says "AC Check" is insufficient for a manufacturer claim. Daikin and other major brands require detailed proof of professional service. Your documentation must contain specific information to be considered valid.

• Date of service: Clearly indicating when the maintenance was performed.

• Technician notes: Detailed observations about the system's condition, including refrigerant pressures, electrical amp draws, and temperature splits.

• Specific tasks performed: Itemized notes showing that the coils were cleaned, the drain was flushed, and the blower was inspected.

• Company credentials: The HVAC company's name, contact information, and state license number.

DIY filter purchase receipts from a hardware store do not count as proof of maintenance. You must keep a dedicated folder or digital file for all service visits starting from the day your system is installed. Working with a professional, manufacturer-aligned local expert like Air On Demand ensures you have exactly what you need. We provide comprehensive, Daikin-compliant digital service records and handle the documentation on your behalf, so you never have to worry about proving your compliance to the manufacturer.

Daikin Warranty Compliance Checklist

Manufacturer Parts Warranty vs. Local Labor Coverage

One of the most common points of confusion for homeowners is the difference between what the manufacturer covers and what the local contractor covers. Understanding this distinction is vital for setting realistic expectations when a repair is needed on your Daikin mini split.

The Manufacturer Parts Warranty

The standard Daikin parts warranty covers the cost of the physical replacement component if it fails due to a manufacturing defect. If you register your equipment within 60 days of installation, this coverage typically extends to 10 or 12 years, depending on the specific model. However, if the product remains unregistered, the warranty usually defaults to a much shorter period, often just five years. It is important to note that this warranty covers the part itself, nothing more.

The Local Labor Warranty

Manufacturer warranties rarely cover the labor required to diagnose the issue, remove the broken part, and install the new one. For example, if your compressor fails, Daikin may provide a new compressor for free, but the process of recovering the old refrigerant, unbrazing the old unit, brazing in the new one, pulling a vacuum, and recharging the system takes several hours of highly skilled labor.

Labor costs are typically covered by a separate warranty provided by the installing contractor, or through an extended labor plan. Just like the parts warranty, these labor agreements strictly require annual maintenance to remain valid. If you want a deeper dive into how this works, we highly recommend understanding Daikin extended labor warranties for ductless mini splits so you are fully prepared.

Can You Restore Warranty Compliance If You Missed a Tune-Up?

If you are reading this during the back-to-school transition and realizing you have skipped a year or two of maintenance, do not panic. A missed tune-up is not a permanent death sentence for your warranty, provided your system is still currently functioning. As Miami's trusted HVAC experts, we help homeowners take immediate steps to get back on track and protect their coverage before the end-of-season cooling demands cause a catastrophic failure.

Scheduling a comprehensive professional inspection immediately establishes a new baseline of compliance. When a technician arrives to service your mini split AC systems, they will perform a deep clean and a full diagnostic evaluation. This visit accomplishes two critical things:

1. It corrects minor wear and tear: The technician will clean the coils, clear the drain line, and tighten electrical connections, eliminating the environmental stressors that cause warranty-voiding breakdowns.

2. It creates a documented record of health: You will receive a detailed invoice proving that, as of today, the system is clean, operating within factory specifications, and being cared for by a licensed professional.

If a factory defect occurs later, you now have recent, valid proof of maintenance to support your claim. The key is to urge action before the end of the cooling season. Waiting until the system is already making strange noises or blowing warm air means the damage is already done, and restoring compliance after a failure is significantly more difficult.

Frequently Asked Questions About Daikin Warranty and Maintenance

If you own a ductless mini split, you likely have specific questions about keeping your coverage intact. Navigating the fine print can be confusing, so we have compiled the most common inquiries regarding Daikin warranty terms to give you clear, authoritative answers.

What specifically voids a Daikin warranty?

Improper installation by an unlicensed contractor is the fastest way to void a Daikin warranty. Additionally, the use of unapproved third-party replacement parts or failing to perform routine maintenance that leads directly to a preventable breakdown will give the manufacturer grounds to deny a claim. Always ensure your system is serviced and repaired by certified professionals using OEM parts.

Does skipping maintenance void my AC warranty entirely?

It doesn't void the entire warranty instantly, but it gives the manufacturer the right to deny claims for parts that failed due to neglect. If your Daikin mini split has a dirty coil that causes the compressor to fail, that compressor claim will be denied. However, unrelated factory defects, such as a faulty control board, may still be covered subject to factory inspection.

How often should a Daikin mini split be serviced?

Your system should be serviced at least once a year by a licensed HVAC professional. However, in high-use climates with extreme heat and humidity, bi-annual service (spring and fall) is highly recommended for optimal performance. Frequent use accelerates dust buildup and drain line clogging, making regular check-ups vital for efficiency.

Does Daikin warranty cover labor?

Standard manufacturer warranties cover replacement parts only, not the labor to install them. Labor costs are typically covered by a separate warranty provided by your local installing contractor or through an extended labor plan purchased separately at the time of installation. Always check your original installation paperwork to confirm your specific labor coverage.

What proof of maintenance does Daikin require for a claim?

Daikin requires professional invoices detailing the date, the specific tasks performed, and the service company's license information. Handwritten, vague receipts or DIY filter purchase receipts are not accepted as valid proof of maintenance. You must retain detailed digital or physical records from a licensed HVAC contractor.

How do I check if my Daikin system is registered?

Homeowners can verify their registration status directly on the Daikin Comfort website. You will need the equipment's serial number, model number, and the original date of installation to look up your profile. If you are unsure of these details, the contractor who installed your Daikin mini split can usually look them up in their records.

Secure Your Coverage Before the Next Breakdown

Keeping your warranty intact requires professional documentation, not just good intentions. As we have seen, the manufacturer's terms are clear: professional upkeep is mandatory to protect against claims denied due to neglect. The relentless late-summer heat and humidity represent the most likely time for a stressed, unmaintained system to finally fail, making proactive care absolutely essential.

Do not wait for a breakdown to find out your coverage has been compromised. Get your maintenance back on track with our manufacturer-aligned local experts at Air On Demand, who understand exactly what documentation is required. Schedule your comprehensive inspection and tune-up today to secure your comfort, restore your compliance, and gain the peace of mind that your investment is fully protected.

Do Health Smart Filters Restrict Airflow on Variable-Speed Blowers? placeholder-image  | Air On Demand
5 min read

Do Health Smart Filters Restrict Airflow on Variable-Speed Blowers?

High-efficiency filters can cause variable-speed blowers to ramp up aggressively to overcome static pressure. See how to balance indoor air quality without straining your modern HVAC system.

Why High-Efficiency Filters Prompt Valid Airflow Concerns

Do Health Smart filters restrict airflow on variable-speed blowers? Yes, Health Smart and high-MERV filters can restrict airflow, causing variable-speed (ECM) blowers to ramp up their RPMs to compensate. This creates a very common dilemma for homeowners: deciding whether the indoor air quality benefits of upgrading to hospital-grade filtration outweigh the risks of increased noise and potential wear on a modern HVAC system.

When you install a dense, high-efficiency filter in a standard one-inch slot, you are placing a significant roadblock in front of your system's air supply. A Communicating ECM (Electronically Commutated Motor) is incredibly smart. It will sense this restriction and automatically compensate to maintain the required airflow. However, this mechanical effort comes at the cost of increased operational noise, higher energy consumption, and added strain on the motor if the filter isn't properly sized for your ductwork.

For professional guidance on integrating high-efficiency air filtration systems without damaging your equipment, upgrading your air conditioner filters in Miami requires expert air balancing.

The Mechanics: How Communicating ECM Blowers React to Restriction

To understand why your system gets louder when you use a dense filter, you have to look at how modern blower motors are engineered. A Communicating ECM (Electronically Commutated Motor) is essentially a programmable, intelligent fan. It is designed to deliver a very specific volume of air, measured in Cubic Feet per Minute (CFM), regardless of the conditions inside your ductwork.

When you slide a restrictive filter into the return grille or air handler, the motor immediately detects a drop in airflow. Because its primary directive is to maintain that programmed CFM, the ECM responds by increasing its RPMs (Revolutions Per Minute) and pulling more electrical wattage to force air through the dense media. This mechanical compensation is exactly why homeowners notice a sudden, distinct increase in operational noise—often described as a loud rushing or whistling sound—right after installing a new high-efficiency filter.

ECM vs. Standard PSC Motors

Older, standard blower motors—known as Permanent Split Capacitor (PSC) motors—react very differently to restrictive filters. Comparing the two highlights why variable-speed systems require much more careful filter selection.

• Standard PSC Motor — Reaction to Restrictive Filters: Loses power and simply blows less air through the vents. — Noticeable Symptoms: Weak airflow at the registers, longer cooling cycles, uneven room temperatures.

• Communicating ECM — Reaction to Restrictive Filters: Ramps up RPMs and wattage to overcome the restriction. — Noticeable Symptoms: Loud rushing noises, whistling return grilles, higher energy bills.

The bottom line: While older motors just give up and blow weaker air, an ECM will fight the restriction. If you have modern variable-speed air handlers, they will work themselves to the point of exhaustion trying to pull air through a suffocating filter.

ECM Motor Reaction to High Static Pressure

Understanding Static Pressure and Filter MERV Ratings

The core issue with high-efficiency filters comes down to a physics concept called static pressure. In simple terms, static pressure is the resistance to airflow within your HVAC system. Think of it like blood pressure for your air conditioner: if the resistance is too high, the heart (the blower motor) has to work dangerously hard to keep things circulating.

Most residential HVAC systems are designed to operate at a Total External Static Pressure (TESP) of about 0.5 inches of water column (w.c.). When you install a dense, 1-inch high-efficiency filter, that single component can create a massive initial pressure drop—often between 0.2 and 0.3 inches w.c. right out of the package. This consumes up to 60% of the system's total allowable resistance before the air even travels through the ductwork, the cooling coil, or the supply registers.

Why High MERV Ratings Cause High Static Pressure / MERV 13+ Restriction

Filters are graded on the Minimum Efficiency Reporting Value (MERV) scale. Standard fiberglass filters are usually MERV 1 to 4, designed only to protect the equipment from large dust bunnies. "Health Smart" or hospital-grade filters typically boast a MERV 13+ rating.

To achieve a MERV 13 rating, the filter media must be woven from incredibly dense fibers packed tightly together to trap microscopic particles like pollen, pet dander, and smoke. The issue isn't the filtration quality itself; the problem is trying to force a massive volume of air through a narrow 1-inch depth of this dense material. When evaluating Health Smart filters for South Florida, it becomes clear that a standard 1-inch slot simply does not provide enough surface area for air to pass through a MERV 13 media without severe restriction.

Signs your filter is causing high static pressure:

• Whistling noises: Air squeezing through tiny gaps around the filter frame.

• Bowed filter frames: The blower is pulling so hard it physically bends the cardboard filter frame inward.

• Excessive heat: The blower motor housing feels unusually hot to the touch due to overexertion.

• Frequent cycling: The system overheats and shuts down prematurely on its internal safety limits.

If you are evaluating Health Smart filters for South Florida, understanding this static pressure drop is the first step to protecting your equipment.

Climate Risks: Humidity Control and Evaporator Coil Health

Airflow restriction does more than just strain the blower motor; it directly impacts the air conditioner's ability to cool and dehumidify your home. This is especially critical in regional climates that experience extreme moisture loads. Proper volumetric airflow over the indoor evaporator coil is absolutely essential for the air conditioner to extract moisture from the indoor air.

In Miami's extreme relative humidity, unhindered airflow is mandatory to properly dehumidify the home without freezing the coil. The cooling process works by passing warm, humid indoor air over a freezing-cold evaporator coil. The heat is absorbed by the refrigerant, and the moisture condenses into water droplets that drain away. However, this delicate heat exchange requires a very specific volume of air moving at a very specific speed.

The Danger of a Frozen Evaporator Coil

When a restrictive Health Smart filter slows down the airflow, there is not enough warm air passing over the evaporator coil to keep it above freezing. As a result, the temperature of the coil plummets. The condensation that normally drips down the drain pan begins to freeze directly onto the metal fins.

Once a thin layer of ice forms, it creates an insulating barrier that further blocks airflow, causing the ice to grow rapidly until the entire coil is encased in a solid block of ice. A frozen coil completely halts the cooling process. Even worse, because the refrigerant is no longer absorbing heat, it can travel back to the outdoor compressor in a liquid state rather than a gas. This is called "liquid slugging," and it can instantly destroy the compressor—the most expensive component in your entire system.

Late-Summer Strain: Why Timing Matters for Filter Upgrades

The stress placed on a variable-speed blower motor by a restrictive filter is not static; it compounds over time. Introducing a high-static-pressure variable into your system is risky at any time, but doing it during periods of extreme weather amplifies the danger significantly.

Consider the cumulative thermal stress on HVAC components after months of heavy operation. By the time August / late-summer peak AC usage arrives, your system has likely been running for hundreds of hours. Electrical components like capacitors, contactors, and the ECM control module have been subjected to constant heat and vibration. The motor is already operating at its maximum thermal capacity just dealing with the ambient heat load of the home.

When an ECM motor is forced to work against a restrictive filter during this late-summer peak AC usage, it is at its highest risk for premature failure. The motor is running longer cycles to combat the extreme heat, and it is ramping up to higher RPMs to fight the filter restriction. This double-duty creates excessive heat within the motor housing, degrading the electrical insulation and shortening the lifespan of the bearings.

Because of this cumulative stress, it is highly unadvisable to upgrade to dense, high-MERV filters during the hottest, most demanding months without a professional assessment. If you are scheduling routine AC maintenance, that is the perfect time to have a technician measure your airflow before changing filter types.

Professional Solutions for Balancing IAQ and Airflow

The good news is that homeowners do not have to choose between breathing clean air and maintaining a quiet, healthy HVAC system. You can achieve hospital-grade indoor air quality without suffocating your variable-speed blower, provided the system is modified correctly.

The primary solution is modifying the filter depth. If a 1-inch MERV 13 filter creates too much resistance, the answer is to increase the surface area of the filter media. This is achieved by upgrading to a 4-inch or 5-inch media cabinet installed directly into the ductwork next to the air handler.

1-Inch Filters vs. 4-Inch Media Cabinets

• 1-Inch Health Smart (MERV 13) — Surface Area: Very low (tightly packed pleats). — Static Pressure Impact: High restriction; forces ECM to ramp up. — Replacement Frequency: Every 30 to 60 days.

• 4-Inch Media Cabinet (MERV 13) — Surface Area: Very high (deep, wide pleats). — Static Pressure Impact: Low restriction; allows ECM to run quietly. — Replacement Frequency: Every 6 to 12 months.

A 4-inch filter has deep pleats that unfold to reveal massive amounts of surface area. This allows the filter to trap microscopic particles just as effectively as a 1-inch filter, but with plenty of room for the air to flow freely around the captured debris. The static pressure drops significantly, allowing the Communicating ECM (Electronically Commutated Motor) to operate at a lower, quieter RPM.

However, modifying ductwork and installing media cabinets requires precision. Air On Demand's technical expertise with advanced Daikin systems and precise air balancing ensures that any filtration upgrade is perfectly matched to your equipment's capabilities. A licensed professional must measure the Total External Static Pressure (TESP) with a digital manometer before and after any filter changes. This scientific measurement is the only way to guarantee that the ECM motor is operating within safe parameters and that your indoor air quality upgrade won't result in a system breakdown.

Frequently Asked Questions About High-MERV Filters and Variable-Speed Blowers

Do high MERV filters damage variable speed blowers?

Yes, if the filter creates too much static pressure for the ductwork design, it can cause severe wear on the motor. The ECM blower is programmed to maintain a specific airflow, so it will overwork itself to pull air through the dense material. Over time, this constant overexertion leads to overheating, degraded bearings, and premature failure of the motor module.

Why does my AC get loud when I change the filter?

The ECM blower is ramping up its RPMs to pull air through a more restrictive material. When you install a dense filter, you are effectively choking the system's air supply. Compare it to breathing through a straw—the system has to work much harder, and significantly louder, to get the same amount of air it was getting before.

What filter is best for a variable speed air handler?

A filter that balances high particle capture with low static pressure drop is always the best choice. For variable-speed systems, deep-pleated media cabinets (4 to 5 inches thick) are generally best because they offer massive surface area. This allows them to capture fine dust and allergens without suffocating the blower motor.

Does a MERV 13 filter restrict airflow too much?

In a standard 1-inch filter slot, a MERV 13 filter often restricts airflow significantly and pushes the static pressure beyond safe limits. The dense fibers required to achieve that rating leave very little room for air to pass. However, MERV 13 filtration is easily achievable and safe if the filter surface area is expanded via a thicker, multi-inch media cabinet.

Can I use a 4-inch media filter instead of a 1-inch Health Smart filter?

Yes, and it is highly recommended if your ductwork can accommodate the modification. A 4-inch filter has exponentially more pleated surface area than a standard 1-inch filter. This structural advantage allows it to trap microscopic particles efficiently without choking the blower, keeping your system quiet and efficient.

How do I know if my static pressure is too high?

Symptoms include increased blower noise, whistling return grilles, hot motor housings, and frozen evaporator coils. While these signs point to an airflow restriction, the only definitive way to know your exact static pressure is by having an HVAC technician measure it. A professional will use a tool called a manometer to test the pressure before and after the filter to ensure safe operation.

Protect Your Variable-Speed System Without Sacrificing Air Quality

Achieving hospital-grade air quality shouldn't come at the expense of a noisy, overworked blower motor. While it is true that dense filters can restrict airflow on variable-speed blowers, the issue is almost always a matter of sizing and surface area rather than the filtration quality itself. Your Communicating ECM (Electronically Commutated Motor) is a highly efficient piece of technology, but it needs room to breathe to operate quietly and reliably.

Before you introduce a high-restriction variable into your HVAC system—especially during the heat of the summer—we highly encourage you to seek a professional static pressure measurement. By upgrading to a properly sized media cabinet, you can enjoy pristine indoor air without putting your equipment at risk. Contact a local indoor air quality expert today to schedule an inspection and find out the safest way to upgrade your home's filtration.

Phasing Out R-410A: What the Refrigerant Transition Means for August Replacements placeholder-image  | Air On Demand
5 min read

Phasing Out R-410A: What the Refrigerant Transition Means for August Replacements

The HVAC industry is shifting away from R-410A, making late-summer AC breakdowns more complicated. Find out whether patching a leak or upgrading your unit makes the most sense.

Facing an AC Leak During the R-410A Phase-Out

Your air conditioner is running nonstop, but the vents are only blowing lukewarm air, and a slow drip is forming near the indoor air handler. Dealing with a sudden breakdown brings up a critical question regarding phasing out R-410A: what the refrigerant transition means for August replacements in your home. Here at Air On Demand, our technicians see this exact scenario play out every late summer. When your system loses its cooling capacity right as the back-to-school season heat peaks, you are faced with a time-sensitive choice. Do you patch the leak and recharge an aging system, or is it time to upgrade your equipment entirely?

If you are weighing your options, exploring new AC units can help clarify the AC repair vs replace decision.

The HVAC industry is currently undergoing a massive shift that fundamentally changes the traditional calculus for repairing older air conditioners. For decades, R-410A was the gold standard for residential cooling. Today, that standard is being retired to make way for more environmentally friendly alternatives. Acknowledging the immediate discomfort of an AC breakdown in Miami FL is only the first step. You also need to understand how this regulatory shift impacts the long-term reliability of your home comfort system. Making an informed decision now prevents repeated service calls and ensures your home remains consistently cool for the next decade.

The EPA AIM Act and the R-410A Phase-Out Explained

The Problem: We frequently speak with homeowners who are suddenly discovering that the refrigerant powering their current air conditioner is being targeted for a nationwide phase-down. This creates uncertainty about the future viability and maintenance of systems installed over the past ten to fifteen years.

The Cause: The shift is driven by the Environmental Protection Agency's American Innovation and Manufacturing (AIM) Act. This legislation mandates a strict, phased reduction in the production and consumption of hydrofluorocarbons (HFCs) that possess a high Global Warming Potential (GWP). R-410A falls directly into this category. While the refrigerant is not instantly banned from being used in existing systems, the chemical manufacturing quotas are being drastically reduced year over year. Historically, when the supply of a legacy refrigerant is choked off, the availability for future maintenance becomes highly constrained.

The Solution: The HVAC industry has developed next-generation alternatives, leading to the R-410A to R-454B equipment transition. R-454B is the newly adopted industry standard for residential cooling, offering a vastly lower environmental impact while maintaining exceptional cooling performance.

What the Phase-Down Timeline Looks Like

The AIM Act outlines a gradual reduction rather than an abrupt cutoff. The production of high-GWP refrigerants faces steep quota drops over the next decade. By 2036, the production of these chemicals is scheduled to be reduced by 85 percent compared to historical baselines. For existing systems, this means that while you can legally continue operating an R-410A air conditioner, sourcing the necessary refrigerant to fix future leaks will become increasingly difficult as the available supply dwindles.

Introducing A2L Refrigerants

To meet the new federal mandates, manufacturers have transitioned to a class of refrigerants known as A2Ls. R-454B is the prominent A2L chosen to replace R-410A. These new refrigerants are classified as mildly flammable but are heavily engineered with integrated safety sensors and mitigation protocols, making them exceptionally safe for residential use. Beyond meeting environmental regulations, R-454B offers excellent thermodynamic properties, which translates to efficient, reliable cooling for your home.

R-410A vs. R-454B: Understanding the Transition

How Extreme Heat and Coastal Air Accelerate System Wear

Understanding the broad industry transition is important, but applying it to your local environment is critical. In our decades of keeping Miami FL cool, the Air On Demand team has seen firsthand how operating an air conditioner here presents unique challenges you simply will not find in milder, inland climates. Here, systems run nearly year-round, putting immense, continuous strain on aging compressors and mechanical components. This relentless workload means that an air conditioner reaches the end of its operational lifespan much faster.

Furthermore, coastal humidity and salt air act as aggressive catalysts for systemic wear. The salt-laden air constantly interacts with the copper and aluminum components of your outdoor condenser coil. Over time, this exposure leads to galvanic corrosion. The metal literally pits and weakens, creating microscopic vulnerabilities across the entire surface of the coil. When a refrigerant leak occurs in this environment, our technicians rarely find it to be an isolated incident. Instead, it is typically a glaring symptom of broader systemic deterioration.

Because the environment accelerates this breakdown, older systems become highly susceptible to catastrophic refrigerant leaks. A coil that has begun to rot from salt air exposure cannot simply be welded back to factory condition. The structural integrity of the metal is compromised. When you factor in the intense workload required to combat the humidity, these weakened coils are under constant high pressure, making subsequent leaks almost inevitable.

The Repair vs. Replace Dilemma for Leaky R-410A Units

When faced with a leaking unit during the August late-summer peak heat, deciding your next step requires careful evaluation. Finding and patching a leak on a corroded coil is a labor-intensive process. A technician must locate the microscopic hole, attempt to braze the weakened metal, pressure-test the repair, and then recharge the system with R-410A. Because the underlying issue is often widespread corrosion, fixing one weak spot frequently causes the pressurized refrigerant to simply find the next weakest point on the coil. Our repair crews see this frustrating pattern constantly.

This creates a cycle of diminishing returns. You are continually investing in recharging a system with a legacy refrigerant that is actively being phased out. The short-term relief of a patch job is often overshadowed by the likelihood that the system will fail again when pushed to its limits during the hottest weeks of the year. We consistently recommend that for many homeowners, a complete AC replacement offers a more definitive, reliable solution.

The Risks of Patching Aging Coils

Patching a significantly aged coil is a temporary measure. As the metal degrades, the entire surface area becomes a liability. In harsh coastal climates, relying on a patched R-410A system means risking another total loss of cooling right when you need it most. Evaluating the age, repair history, and overall condition of your unit is essential before committing to a costly repair on obsolete equipment.

• Reliability — Patching R-410A System: Temporary fix; high risk of subsequent leaks on corroded coils. — Upgrading to R-454B System: Long-term stability with brand-new, factory-sealed components.

• Refrigerant Supply — Patching R-410A System: Subject to strict EPA phasedown quotas and availability constraints. — Upgrading to R-454B System: The new industry standard, ensuring abundant supply for decades.

• Performance — Patching R-410A System: Struggles to maintain efficiency due to wear and tear. — Upgrading to R-454B System: Optimized thermodynamics for superior cooling and humidity control.

Environmental and Efficiency Benefits of R-454B

The R-410A to R-454B equipment transition is not just a regulatory hurdle; it represents a significant leap forward in cooling technology. The new refrigerant benefits the homeowner directly through improved performance, better efficiency, and a substantially lower environmental footprint.

1. Massive Reduction in Global Warming Potential (GWP): The primary driver behind the AIM Act is lowering greenhouse gas emissions. R-454B has a GWP that is nearly 78 percent lower than R-410A. This means that in the unlikely event of a leak, the environmental impact is drastically minimized.

2. Enhanced Thermodynamic Properties: R-454B is incredibly efficient at absorbing and releasing heat. This optimized heat transfer allows the compressor to operate with less effort, reducing the overall electrical draw required to cool your home.

3. Superior Cooling Performance: Because the refrigerant absorbs heat more effectively, systems utilizing R-454B can provide faster, more consistent cooling. This translates to better comfort during the hottest parts of the year, quickly pulling down indoor temperatures and managing heavy humidity loads.

4. Potential for Energy Rebates: Upgrading to high-efficiency equipment often qualifies homeowners for various incentives. Generally applicable energy rebates, federal tax credits, or local utility incentive programs may apply to qualifying installations. It is always recommended to verify current programs with your utility provider or a tax professional to see how high-efficiency upgrades can benefit you.

Future-Proofing Your Home with Next-Generation Equipment

Positioning a system upgrade as a strategic investment rather than a forced expense changes how you approach your home comfort. Future-proofing your home means installing equipment that is fully aligned with the EPA AIM Act and the R-410A to R-454B equipment transition. By adopting the new standard now, you bypass the uncertainty of legacy refrigerant shortages and secure reliable cooling for the next ten to fifteen years.

New equipment is engineered specifically from the ground up to maximize the benefits of R-454B. These are not just older units with a different chemical inside; they feature redesigned compressors, optimized coil surfaces, and advanced sensors. When paired with modern variable-speed technology, these next-generation systems offer unprecedented control over indoor humidity—a crucial factor for coastal living. As a premier installer of advanced Daikin equipment, our team at Air On Demand ensures your home is equipped with reliable, cutting-edge technology that meets all upcoming environmental standards while delivering premium comfort.

Why Equipment Matching Matters

It is critical to understand that R-454B cannot simply be dropped into an older R-410A system. The two refrigerants operate at different pressures and require entirely different internal lubrication oils. Furthermore, A2L systems require specific safety mitigation sensors built directly into the air handler. Attempting to retrofit an old system is both unsafe and mechanically impossible. A complete system match—replacing both the indoor and outdoor units—is absolutely necessary to ensure safety, efficiency, and warranty compliance.

Strategic Upgrade Planning Before the Off-Season

Waiting for an aging system to completely fail during the August late-summer peak heat severely limits your options. When your AC dies on the hottest day of the year, the urgency to restore cooling often forces rushed decisions. By taking a proactive approach, you maintain control over the process, ensuring you select the right equipment for your home rather than settling for whatever is immediately available in the warehouse.

Scheduling an upgrade proactively allows you to navigate the current inventory transitions smoothly. As manufacturers ramp down R-410A production and ramp up R-454B units, working with our professional team early ensures you get the exact specifications your home requires. Plus, upgrading before the season ends means you get to enjoy immediate efficiency gains and reliable, uninterrupted cooling for the remainder of the hot season.

Before consulting a professional for tips for replacing a central air conditioner, gather a few key details to streamline the process:

• System Age: Locate the manufacturing date on your outdoor condenser's data plate. If the unit is over 10 years old, replacement is highly recommended.

• Repair History: Note any recent service calls, especially previous refrigerant recharges or motor replacements.

• Energy Bills: Check your summer utility bills for unexplained spikes, which indicate your system is losing efficiency.

• Warranty Status: Verify if your current equipment still has an active parts warranty, though labor and refrigerant are rarely covered on older units.

Make a Confident Choice for Your Home's Cooling Future

Navigating the phase-out of legacy refrigerants does not have to be overwhelming. The reality of operating an air conditioner in Miami FL means that your equipment works incredibly hard, and patching a leaky, corroded R-410A unit often leads to repeated frustrations. The R-410A phase-out makes upgrading to a modern, high-efficiency R-454B system a smarter, long-term choice than pouring resources into obsolete technology.

Understanding the toll that harsh coastal climates take on aging equipment helps clarify why a proactive replacement is the most reliable path forward. We encourage you to consult with our local professionals to evaluate the specific condition of your current unit. By exploring phasing out R-410A: what the refrigerant transition means for August replacements, you can confidently secure your home's comfort, efficiency, and peace of mind for the decade ahead.

Frequently Asked Questions

Will R-410A be completely banned?
No, the EPA is not banning the use of R-410A in existing systems. You can legally continue to operate your current air conditioner. However, the AIM Act mandates a severe phase-down in the production of the refrigerant, which will significantly restrict future supply and make maintenance more difficult over time.

Can I still buy a new R-410A air conditioner today?
Yes, while inventory lasts, you can still purchase a new R-410A system during the transition period. Manufacturers are allowed to sell through their existing stock of legacy equipment. However, investing in an older standard means you may face challenges sourcing refrigerant for future repairs.

What is replacing R-410A in residential systems?
R-454B is the primary refrigerant replacing R-410A in residential air conditioning systems. It belongs to a class of mildly flammable A2L refrigerants that offer a vastly lower Global Warming Potential (GWP). This new standard provides excellent energy efficiency and cooling performance.

Should I wait to buy a new AC with the new refrigerant?
If your current system is failing or requires a major repair like a leak patch, waiting is not advisable. Upgrading to a new R-454B system now prevents you from sinking resources into obsolete equipment. Proactive replacement ensures reliable cooling and immediate efficiency gains.

Can I put R-454B refrigerant into my old R-410A system?
No, R-454B cannot be used in a system designed for R-410A. The two refrigerants operate at different pressures, use different lubrication oils, and require specific internal components. Upgrading to R-454B requires a complete replacement of both the indoor and outdoor units.

How does the AIM Act affect my current air conditioner's warranty?
The AIM Act does not void your existing manufacturer warranty. If a covered part fails, the manufacturer will still honor the parts warranty based on their terms. However, warranties typically do not cover the cost of the replacement refrigerant itself, which may become harder to source as production decreases.

Upgrading Undersized Ductwork in Older Kendall Ranch Homes placeholder-image  | Air On Demand
5 min read

Upgrading Undersized Ductwork in Older Kendall Ranch Homes

Slapping a modern variable-speed AC onto 1970s ducts often creates severe static pressure. Understand why modifying your original cooling infrastructure is the safest route.

The Hidden Cooling Crisis in Older Florida Homes

Your air conditioner is finally giving out, and you are ready to invest in a modern, high-efficiency replacement. However, upgrading undersized ductwork in older Kendall Ranch homes is often the unexpected hurdle standing between you and reliable indoor comfort. A typical pattern we see is a homeowner purchasing a premium AC unit, only to discover that the home's original 1970s ductwork is fundamentally incompatible with modern technology.

Slapping a modern high-efficiency variable-speed unit onto old, restrictive ducts degrades performance rather than improving it. The new system attempts to push a specific volume of air through narrow channels, creating severe resistance. This leaves you at a critical decision point: risking immense system strain and poor cooling with your current setup, or investing in a proper ductwork modification to match your new equipment.

For comprehensive solutions that address the entire system, trust our Miami air conditioning services to evaluate your home's complete cooling infrastructure before installation day.

Why Architectural Quirks Complicate Modern HVAC Upgrades

Homes built decades ago were designed around the building standards and equipment sizes of their era. In Kendall Ranch Homes, specific architectural features make modern HVAC retrofits particularly challenging. The defining characteristic of these properties is their low-slope rooflines, which create extremely tight attic spaces. When the original cooling systems were installed, the standard practice was to use smaller, rigid metal ducts or undersized flexible ducting that easily fit into these cramped overhead areas.

Today's high-efficiency air conditioners require significantly more breathing room. The physical dimensions of modern, larger-diameter ductwork simply do not slide easily into spaces designed for older, smaller materials. Air On Demand brings extensive local experience diagnosing and retrofitting the specific architectural quirks of these low-pitch roof homes, ensuring that new ducting is routed efficiently without compromising the structural integrity of your attic.

The Challenge of Low-Pitch Roofs

A standard low-pitch roof—often featuring a 3:12 or 4:12 slope—leaves very little vertical clearance near the eaves. This physical space limitation restricts where new, wider ducts can be safely routed. Standard duct replacement techniques often fail here because a straight swap is physically impossible.

Instead, retrofitting requires careful adaptation. Professionals must calculate the exact pathways available, sometimes transitioning between different shapes of ductwork (such as moving from round to rectangular profiles) to maintain the necessary interior volume while squeezing through tight clearances. This careful planning ensures the new system receives the airflow it needs without crushing the ducts against roof trusses or burying them improperly in insulation.

The Physics of Static Pressure and Variable-Speed Air Handlers

To understand why old ducts ruin new air conditioners, you have to look at the physics of airflow. Static pressure is the resistance to airflow within your HVAC system. Think of it like blood pressure for your house: if the arteries (ducts) are too narrow, the heart (the blower motor) has to work dangerously hard to pump air through the home.

Older 1970s systems featured single-stage blowers that simply turned on at full blast and turned off when the thermostat clicked. Modern units use ECM (Electronically Commutated Motor) variable-speed blowers. These advanced motors are designed to ramp up and down, providing precise climate control. However, they are highly sensitive to resistance. If the static pressure exceeds 0.5 inches of water column—a common occurrence when forcing air through original, undersized ducts—the ECM motor will overwork itself, leading to overheating and premature failure.

This is why upgrading to variable-speed air handlers requires a complete assessment of your delivery system, not just an equipment swap.

• Blower Operation — 1970s Single-Stage HVAC: On (100% capacity) or Off — Modern Variable-Speed (ECM) HVAC: Ramps up and down based on cooling demand

• Airflow Tolerance — 1970s Single-Stage HVAC: Pushes through restrictive ducts (with reduced output) — Modern Variable-Speed (ECM) HVAC: Requires precise, unrestricted airflow to function correctly

• Static Pressure Limit — 1970s Single-Stage HVAC: Often pushed past limits without immediate failure — Modern Variable-Speed (ECM) HVAC: Motors fail prematurely if resistance exceeds 0.5 inches WC

• Duct Size Requirement — 1970s Single-Stage HVAC: Smaller diameters were standard practice — Modern Variable-Speed (ECM) HVAC: Requires larger diameters to handle specific CFM profiles

Understanding CFM and Airflow Profiles

Modern high-efficiency systems require a specific CFM (Cubic Feet per Minute) airflow profile to operate correctly. Variable-speed systems adjust this airflow constantly. When undersized ducts choke this process, the system cannot move enough air over the indoor coil. This mismatch directly impacts performance, making it completely impossible to achieve the SEER2 efficiency rating printed on the side of your new unit.

The Impact of Static Pressure on Variable-Speed Air Handlers

Combating Severe Humidity with Unrestricted Airflow

Airflow restrictions do more than just strain your equipment; they severely degrade your indoor comfort, particularly when it comes to moisture control. The intense late-summer heat and high year-round humidity of South Florida require robust airflow to properly dehumidify a living space. During late summer (August) in Miami, removing moisture from the air is just as important as lowering the temperature.

Unrestricted airflow is critical to a variable-speed system's ability to remove this moisture. Your air conditioner dehumidifies by passing warm, moist indoor air over the freezing cold evaporator coil. Condensation forms on the coil and drains away outside. However, if choked airflow prevents enough air from crossing that coil, the moisture extraction process stalls. The system may run endlessly without actually pulling the humidity out of the air.

The result is a home that feels cold but incredibly clammy. You might lower the thermostat to 70 degrees, but because the humidity remains high, the air feels heavy and uncomfortable. Addressing the ductwork alongside professional air balancing ensures the air moves at the exact speed required to maximize dehumidification.

Warning Signs Your Existing Ductwork is Choking Your System

Homeowners living in Kendall Ranch Homes often experience specific symptoms when their original ductwork is actively choking a newer AC unit. Recognizing these warning signs early can save your expensive equipment from catastrophic failure.

• Unusually loud air vents: If your vents sound like a jet engine taking off or produce a high-pitched whistling noise, the air is being forced through an opening that is much too small.

• Freezing evaporator coils: When airflow is severely restricted, the cold air stays trapped inside the air handler. This causes the evaporator coil to literally freeze over into a block of ice, shutting down the cooling process entirely.

• Short cycling: This occurs when the system turns on and off rapidly. High static pressure can cause the unit to overheat and shut down via safety switches before it has adequately cooled the space.

• Uneven temperatures: If your living room is freezing but the back bedrooms are hot and stagnant, the undersized ducts are failing to distribute the conditioned air evenly throughout the floor plan.

If you notice any of these symptoms after a recent equipment upgrade, the root cause is almost certainly an infrastructure mismatch rather than a defective air conditioner.

Navigating ACCA Manual D Standards in Tight Attic Spaces

Guessing at duct sizes is a recipe for disaster. The HVAC industry relies on a strict set of calculations known as the ACCA Manual D standard to determine the exact ductwork requirements for any given home. This professional sizing process is the only way to ensure your new system receives the precise volume of air it needs to function.

Professionals use these standards to account for the specific friction loss of different duct materials. For example, air moves differently through smooth sheet metal than it does through corrugated flexible ducting. When dealing with the tight attics of 1970s builds, technicians must carefully plan the layout to retrofit larger ducts without crushing them, which would immediately ruin the airflow calculations.

Proper AC installation in Kendall, FL requires mapping out these restrictive low-slope attics in advance, ensuring the new ductwork meets Manual D standards while respecting the physical boundaries of the property.

The Importance of Friction Loss Calculations

Friction loss refers to the drag created as air travels along the inside walls of the ductwork. The texture of the material, the number of sharp turns, and the total length of the run all impact this resistance.

1. Assess the material: Flexible ducts have higher friction loss than rigid metal and require slightly larger diameters to deliver the same CFM.

2. Count the turns: Every 90-degree elbow adds significant resistance, meaning a winding duct path requires careful up-sizing.

3. Calculate the total length: The further the air has to travel to the furthest bedroom, the more pressure is lost along the way.

Proper friction loss calculations prevent the new system from working against itself, ensuring smooth, quiet, and efficient operation.

Protecting Your High-Efficiency Cooling Investment

Upgrading your air conditioner is a major investment in your property's comfort and value. However, proper ductwork is the absolute only way to realize the energy savings promised by high SEER2 ratings. A 16-SEER2 system hooked up to undersized, leaky ducts will operate with the efficiency of a 10-SEER system, wasting electricity every time it cycles on.

By reducing static pressure to acceptable levels, you directly extend the lifespan of the costly variable-speed ECM motor. When the motor doesn't have to fight against extreme resistance, it runs cooler, draws less amperage, and lasts years longer. Furthermore, properly sized ducts drastically improve your indoor air quality and provide consistent comfort, even during the brutal heat of late summer (August) in Miami.

If you are unsure whether your current setup is holding your system back, learning When Do I Need Duct Replacement? is the best next step toward protecting your investment.

Frequently Asked Questions About Duct Sizing and AC Upgrades

What happens if ductwork is too small for a new AC?

Undersized ductwork restricts airflow, causing static pressure to spike inside the system. This forces the blower motor to work significantly harder, leading to overheating, loud whistling noises at the vents, and potential evaporator coil freezing. Ultimately, the new AC will consume more electricity while providing less cooling power to the home.

Do I automatically need new ductwork for a variable-speed air handler?

Not always, but it is highly likely if your home still has its original 1970s infrastructure. Variable-speed air handlers require precise airflow to function correctly, and older ducts were typically sized much smaller for basic single-stage systems. A professional static pressure test will determine if your current ducts can handle the new technology.

Can undersized ducts permanently damage my air conditioner?

Yes, running a modern system on severely undersized ducts can cause permanent damage. The excessive resistance causes the blower motor to draw higher electrical currents, which can burn out the ECM motor prematurely. It also puts undue stress on the compressor due to repeated short cycling and poor heat exchange.

How do you fix undersized ductwork in an older home with a tight attic?

Fixing the issue requires a custom retrofit based on ACCA Manual D calculations. Professionals map out the tight attic space and design a layout that maximizes airflow within the physical constraints, often utilizing a mix of rigid metal plenums and carefully routed flexible ducts to navigate low-pitch rooflines without crushing the materials.

Why does my new AC struggle to remove humidity?

Proper dehumidification requires a specific volume of air to pass steadily over the cold evaporator coil. If undersized ducts choke the airflow, the system cannot process enough indoor air to extract the moisture effectively. This leaves the home feeling cold but uncomfortably clammy, regardless of the thermostat setting.

Securing Reliable Comfort for Your Property

Addressing the root cause of airflow issues is the only way to guarantee long-term comfort in older properties. Upgrading undersized ductwork in older Kendall Ranch homes ensures that your high-efficiency equipment can finally operate exactly as the manufacturer intended. Rather than simply swapping boxes and hoping for the best, a technically accurate diagnosis of your home's infrastructure provides lasting peace of mind.

You do not have to settle for loud vents, clammy rooms, or skyrocketing energy bills. We encourage you to schedule an expert evaluation to ensure your home's entire cooling infrastructure is fully compatible, securing reliable and efficient comfort for years to come.

Managing Condensation Overflows in Miami High-Rise Condos placeholder-image  | Air On Demand
5 min read

Managing Condensation Overflows in Miami High-Rise Condos

A standard wet-vac won't clear a clogged AC drain line in a multi-story building. Understand how shared plumbing stacks complicate drainage and when to call a pro.

The Hidden Threat of AC Condensation in Multi-Story Buildings

A central air conditioner working through a typical South Florida summer day can produce anywhere from 5 to 20 gallons of condensation, making managing condensation overflows in Miami high-rise condos a critical priority for property owners. At Air On Demand, our technicians see the aftermath of these issues every summer, and we know firsthand that this is a massive volume of water moving through your system on a daily basis. When you live in a multi-story building, handling this relentless moisture extraction becomes a complex mechanical challenge. If the primary drain line clogs, those 20 gallons have nowhere to go but out of the drain pan and directly into your living space, threatening drywall, flooring, and electrical systems.

The core problem lies in the interconnected nature of high-rise infrastructure. A standard wet-vac extraction might clear a blockage in a single-family home, but applying that same DIY approach to a multi-story building often fails—or worse, pushes the problem into a neighbor's unit. Knowing exactly why these standard fixes fall short and recognizing when professional intervention is required is the only way to prevent severe structural water damage in shared living spaces.

If you are dealing with a backed-up system right now, reach out for professional Miami AC repair services to resolve the issue safely.

How Peak Summer Humidity Overwhelms AC Drain Systems

Miami's intense, year-round humidity forces air conditioners to extract massive amounts of moisture daily, creating unique strain on condensate lines. During the hottest months, your cooling system acts as a heavy-duty dehumidifier, pulling water vapor out of the indoor air before circulating the cooled breeze back into your rooms.

Understanding Daily Condensation Volume

Modern high-efficiency HVAC systems are incredibly effective at removing moisture, but that efficiency comes with a byproduct: a constant stream of water. In our years of providing cooling solutions across South Florida, our team has found that as families transition back to school during the thick of the late-summer August peak cooling season, relative humidity frequently exceeds 70%. This extreme moisture level maximizes daily condensation output. Because the system runs continuously to combat the heat, the drain lines never have a chance to dry out.

The impact of humidity on condensation:

• Low (Below 40%) — System Runtime: Intermittent — Estimated Daily Condensation Volume: 2 to 5 gallons

• Moderate (40% - 60%) — System Runtime: Frequent — Estimated Daily Condensation Volume: 5 to 10 gallons

• High (Above 70% - Miami Peak) — System Runtime: Continuous — Estimated Daily Condensation Volume: 15 to 20+ gallons

This sheer volume turns what might be a slow, minor drain issue in a drier climate into a rapid, severe flooding hazard in South Florida. Furthermore, the constantly damp, dark environment inside these condensate lines creates the perfect breeding ground for biological growth. Algae and mold thrive in these conditions, quickly building up into thick, gelatinous blockages that choke the pipe.

The Strain on Aging High-Rise Infrastructure

Across the Miami area, our Air On Demand installation crews frequently encounter older multi-story buildings that feature aging infrastructure with narrow or partially scaled pipes. Over decades of use, mineral deposits and hardened debris reduce the internal diameter of the plumbing. These older pipes simply struggle to handle the massive condensation volumes produced by today's powerful, high-efficiency air conditioners, making clogs far more frequent and severe.

The Complex Mechanics of Shared Plumbing Drain Stacks

To understand why condo drainage is so difficult to manage, you have to look at the architecture of the building. Multi-family drainage networks operate on completely different mechanical principles than standalone residential homes.

Single-Family vs. Multi-Family Drainage Layouts

In a typical single-family home, the AC condensate line follows a short, direct path. The PVC pipe runs from the indoor air handler, through an exterior wall, and drips harmlessly onto the ground or into a garden bed. If it clogs, the blockage is isolated to that specific pipe.

In contrast, condo buildings utilize shared plumbing drain stacks. Your individual unit has a lateral branch line that runs horizontally before tying into a massive central vertical pipe—the stack. This vertical stack collects condensation from every unit positioned above and below you in that specific column of the building.

• Branch lines: The horizontal pipes connecting your specific AC unit to the main building drain.

• The vertical stack: The central gravity-fed pipe shared by multiple apartments in a vertical line.

• Tie-in points: The junctions where individual branch lines meet the main stack, which frequently become choke points for debris.

How Interconnected Lines Compound Blockages

Because these systems are interconnected, treating a single unit's clog without accounting for the entire system is a fundamentally flawed approach. Sediment, algae, and debris from multiple units wash down the stack and accumulate at central choke points—often where the pipe bends or narrows. A blockage that forms on the fourth floor can easily cause water to back up and overflow into units on the fifth and sixth floors.

Single-Family vs. Multi-Family AC Drain Line Anatomy

Why Traditional Wet-Vac Extraction Fails in Condo Buildings

We often receive emergency calls from condo owners who followed common internet advice to attach a standard wet-vac to the outside cleanout pipe and suck the blockage out. While this works well for a single-family home with a direct line, applying standard suction to shared plumbing drain stacks is often impossible and highly ineffective.

The Limitations of Standard Suction

The physics of suction loss make standard shop vacuums useless in a high-rise environment. When you attach a vacuum to your local access port, you are not just pulling against the clog in your branch line; you are pulling against the ambient air pressure of the entire vertical stack and every other unit connected to it. The suction simply dissipates across hundreds of feet of shared piping. Standard shop vacuums lack the specialized high-static attachments and heavy-duty power required to isolate and clear high-rise plumbing.

The Risk of Shifting the Clog to a Neighbor's Unit

When suction fails, some people attempt to use pressurized air or chemical gases to force the clog down the pipe. This is incredibly dangerous in a condo setting. Because the water and debris will always take the path of least resistance, forcing pressurized air down your branch line can easily blow the clog—and gallons of stagnant water—backward up the stack and directly into an adjacent apartment.

Early warning signs of a struggling drain line:

• Gurgling sounds: Hearing a bubbling noise near your indoor unit indicates air struggling to pass through standing water.

• Musty odors: A damp, mildew smell coming from your vents often points to stagnant water in the drain pan.

• System hissing: If you are diagnosing unusual sounds from your AC unit, a hiss can sometimes indicate pressure imbalances related to drainage or refrigerant issues.

• Frequent cycling: The system turning on and off rapidly as water sloshes against safety sensors.

Navigating HOA Compliance and Water Damage Liability

When an AC system overflows in a multi-story building, the consequences extend far beyond a wet carpet in a single room. The legal and financial stakes of improper AC maintenance in these environments are exceptionally high.

Understanding Multi-Family Insurance Risks

Water damage is consistently one of the most frequent and costly insurance claims in multi-family buildings. A single overflow from a clogged AC pan can seep through the floorboards, destroying the drywall, custom flooring, and electrical wiring of the unit below yours. If your DIY clearing attempt pushes a clog into a neighbor's line and causes their system to overflow, you could be held liable for the resulting secondary flooding.

Building Code Mandates for High-Rise Drainage

Homeowner Association (HOA) regulations generally draw a strict line regarding plumbing responsibility. In most Miami high-rise condos, the unit owner is responsible for maintaining the lateral branch line that serves their specific AC unit, while the HOA is responsible for the main vertical stack. However, general Miami-Dade County building codes mandate specific drainage infrastructure and require that modifications or heavy clearings be performed by licensed professionals.

Working with a local team like ours at Air On Demand—bringing specialized experience navigating Miami high-rise condo infrastructure, shared plumbing stacks, and strict HOA compliance protocols—ensures that any maintenance performed adheres to building rules and protects you from liability disputes.

Protecting Indoor Components from Catastrophic Overflows

Because emergency extraction is so difficult in a condo setting, preventing the clog from forming in the first place is the only reliable strategy. Modern HVAC systems include built-in safeguards, but they require proper care to function correctly.

The Role of Float Switches and Shutoff Mechanisms

One of the most important components of your AC drainage system is the float switch. Located inside or attached to the primary drain pan, this small device features a sensor or a buoyant cork. If the drain line clogs and water begins to fill the pan, the float rises. Once it reaches a certain level, it triggers a safety mechanism that cuts the low-voltage power to your thermostat, shutting down the entire AC system.

Why the float switch matters:

1. It acts as the final line of defense against overflowing water.

2. It prevents the system from generating more condensation when the exit path is blocked.

3. A triggered switch is a safety feature doing its job, not a mechanical malfunction.

If your AC suddenly turns off and the thermostat goes blank during a hot afternoon, a tripped float switch is the most likely culprit. Never attempt to bypass this switch to force the system back on.

Why Proactive Maintenance Outperforms Emergency Extraction

Based on our extensive track record with Miami condos, we always recommend routine AC maintenance as the only proven way to keep shared plumbing drain stacks flowing freely. This involves inspecting and servicing the indoor air handlers where the primary drain pan is located. Professional technicians use specialized solutions to safely dissolve biological growth and flush the branch lines before the peak cooling season begins, ensuring that your system never reaches the point of an emergency shutoff.

Frequently Asked Questions About Condo AC Leaks

Before you schedule your next round of routine AC maintenance, review these common questions regarding high-rise drainage issues to better understand how your condo's system operates.

Why is my AC leaking water inside my condo?

Your AC is leaking inside because the primary condensate drain line is blocked, forcing the water to back up and overflow the interior drain pan. In Miami high-rise condos, this blockage is usually caused by a buildup of algae, mold, and dust that thrives in the humid, dark environment of the PVC piping. If the safety float switch fails to activate, the water spills over the edges of the pan and into your living space.

Who is responsible for AC water damage in a condo?

Responsibility typically depends on where the blockage originated and your specific HOA bylaws. Generally, unit owners are responsible for damage caused by a failure in their individual AC unit or lateral branch drain line. If the blockage occurred in the main vertical shared stack, the HOA might bear responsibility, but determining the exact origin point requires a professional inspection to satisfy insurance requirements.

How do you unclog an AC drain line in a high-rise?

Unclogging a line in a high-rise requires professional tools that can isolate the specific branch line without affecting the rest of the building. Technicians use specialized nitrogen clearing tools or high-static industrial vacuums with precise attachments to safely break up the algae and mineral deposits. It requires carefully managing the pressure so that debris is removed entirely rather than pushed further into the shared stack.

What happens if a shared AC drain line is clogged?

If the main shared vertical stack becomes clogged, water will back up and seek the lowest possible exit point above the blockage. This often results in the AC drain pans of multiple lower-level units overflowing simultaneously, even if those specific units have clean branch lines. A shared stack clog is a building-wide emergency that requires immediate coordination with property management.

Can I use a wet-vac on a condo AC drain line?

Using a standard wet-vac on a condo drain line is highly discouraged and rarely effective. Because the plumbing is interconnected with other units, a standard shop vacuum cannot generate enough isolated suction to pull a clog out of a long branch line. Furthermore, DIY attempts risk pushing air and water backward into adjacent apartments, creating secondary water damage and severe liability issues.

Partnering with High-Rise HVAC Experts to Protect Your Property

High-rise drain lines are uniquely complex ecosystems. The combination of gravity-fed shared stacks, lateral branch lines, and the extreme moisture generated during the August peak cooling season creates a drainage environment that single-family home solutions simply cannot handle. Attempting to clear a blockage with standard DIY methods often wastes time and risks pushing stagnant water into your neighbor's property.

Our team at Air On Demand provides the professional high-rise HVAC expertise necessary to safely isolate your branch line, clear the biological buildup, and ensure the water flows freely into the main stack without endangering adjacent units. If you are experiencing persistent drainage issues, gurgling sounds, or unexplained system shutoffs, do not wait for an overflow to occur. Schedule professional AC repair to safely evaluate your system, clear the lines, and protect your condo from catastrophic water damage.

Assessing the Value of Daikin Extended Labor Warranties for Ductless Mini Splits placeholder-image  | Air On Demand
5 min read

Assessing the Value of Daikin Extended Labor Warranties for Ductless Mini Splits

When finalizing your ductless system, standard parts coverage often falls short. Understand the complex labor required to repair wall cassettes and decide if extended protection is right for you.

Evaluating Warranty Options for Your Ductless System

Assessing the Value of Daikin Extended Labor Warranties for Ductless Mini Splits is one of the most crucial steps homeowners in Miami FL must take to ensure their new climate control system is fully protected when something goes wrong. After finalizing the installation of a high-efficiency climate control system, many face a critical decision during the paperwork phase: determining whether standard coverage is enough, or if an extended labor plan is necessary. Modern inverter technology is incredibly reliable, but the physical reality of continuous operation under peak summer heat creates inevitable wear and tear. You have invested in superior comfort, but protecting that investment requires a thorough understanding of the fine print within your coverage documents.

The choice between a standard parts-only policy and comprehensive labor protection is frequently misunderstood. In our years of experience at Air On Demand installing and maintaining these units, our team frequently sees homeowners assume that a long-term manufacturer guarantee shields them from all future repair bills. However, the advanced mechanical complexity of ductless mini split systems makes extended labor coverage a necessity rather than a luxury for many households. The compact, dense nature of these modern units requires specialized diagnostic procedures and meticulous disassembly time. As we explore the technical realities of servicing these systems, you will see why evaluating your warranty options is one of the most important steps in securing your long-term home comfort. The decision ultimately comes down to understanding the difference between receiving a free replacement part and paying for the highly skilled labor required to install it.

The Baseline: Understanding Daikin's Standard Parts Coverage

To make an informed decision about extended coverage, you must first establish a baseline knowledge of what the manufacturer provides right out of the box. The standard factory protection is designed to shield you from manufacturing defects, but it has specific boundaries regarding how that protection is applied to your Daikin equipment.

What the 12-Year Parts Warranty Includes

When you purchase a new system, it typically comes with a robust standard parts warranty. Upon proper system registration, this coverage often extends to 10 or 12 years, depending on the specific model and tier of the equipment. This baseline policy is highly valuable because it protects against premature failure in major, highly engineered components. If your system experiences a manufacturer defect in the outdoor inverter compressor, the sophisticated electronic expansion valves, or the primary control boards, the hardware itself is covered. For owners of Daikin multi-zone wall cassettes, knowing that the internal mechanical parts and complex inverter boards are guaranteed provides significant peace of mind regarding the hardware's longevity.

The Gap Between Parts and Labor

The critical gap in standard coverage lies in the execution of the repair. Standard warranties typically offer very limited or zero long-term coverage for the specialized labor required to actually diagnose the issue, remove the broken part, and install the new one. Free parts do not equate to a free repair. When a component fails, a licensed technician must travel to your home, utilize advanced diagnostic tools to pinpoint the electrical or mechanical failure, safely dismantle the unit, integrate the new component, and recalibrate the system. The technician's time, expertise, and specialized tools are entirely separate from the hardware itself. If you rely solely on the standard parts policy, you remain fully responsible for the labor costs associated with every repair call over the next decade.

The Mechanical Reality: Why Mini-Split Repairs Are Labor-Intensive

The Problem: Many homeowners do not realize just how densely engineered indoor ductless units are until a repair is necessary. Unlike traditional central air handlers that reside in spacious garages or large utility closets, ductless systems must fit complex mechanical processes into a highly compact, aesthetically pleasing footprint on your wall.

The Cause: To achieve this space-saving design, engineers tightly pack the blower wheels, condensate management systems, thermistors, and delicate electrical boards into a very small chassis. When a component deep inside the unit requires attention, a technician cannot simply pop off a large metal access panel and reach inside. Instead, they must carefully navigate a maze of tightly woven wiring harnesses and interlocking plastic housing components.

The Solution: Our technicians at Air On Demand know firsthand that completing a mini split repair in Miami requires a methodical, step-by-step disassembly process. This intricate work drastically increases the labor time compared to traditional central AC repairs. Because the mechanical reality of these systems demands more hands-on technician time, having labor coverage becomes incredibly valuable.

Accessing Internal Cassette Components

Consider the process of replacing a blower wheel motor inside Daikin multi-zone wall cassettes. The technician must first safely disconnect the power, then carefully remove the outer chassis covers. Next, they must unclip the automated louvers, taking care not to snap the fragile plastic retention tabs. The primary electrical control board often sits directly in the path of the mechanical components, meaning it must be carefully unscrewed and gently moved aside without stressing the delicate wiring harnesses. Finally, the condensate drain pan must be lowered to access the blower assembly. This precision work requires patience and expertise to avoid damaging adjacent parts. The time required to safely disassemble and reassemble a compact unit significantly increases the labor investment for even minor component swaps.

Multi-Zone Configurations: Multiplying the Labor Equation

Ductless technology offers incredible flexibility, allowing you to customize the temperature in different areas of your home independently. However, homes with multiple indoor units inherently carry a higher probability of labor needs over a 12-year lifespan. Understanding how this architecture impacts your long-term maintenance is crucial when evaluating warranty options.

A multi-zone setup connects several independent indoor units to a single outdoor condenser. While this is fantastic for energy efficiency and personalized comfort, it changes the math on potential repairs. In a traditional central system, you have one indoor air handler containing one blower motor, one primary coil, and one condensate drain system. In a four-zone ductless application, you have four separate indoor blower motors, four distinct electronic control boards, four sets of automated louvers, and four individual condensate management systems.

Each individual indoor unit contains its own motors, sensors, and moving parts. This architecture effectively multiplies the potential labor points across your home. If a power surge affects the electronics, or if standard wear and tear eventually catches up with the blower motors, you have multiple units that may require specialized teardowns. When you are matching indoor air handlers with new Daikin condensers, you are building a highly sophisticated, decentralized climate network. Because the number of mechanical components is multiplied by the number of zones installed, the value of an extended labor warranty scales directly with the size of your multi-zone system. Protecting four highly intricate wall cassettes with comprehensive labor coverage ensures that the multiplied complexity does not result in multiplied out-of-pocket labor expenses.

Accelerated Wear: The Impact of Continuous Operation

The environment in which your HVAC system operates plays a massive role in its overall lifespan and the frequency of required maintenance. Equipment installed in mild, temperate regions experiences far less mechanical stress than equipment tasked with battling extreme subtropical environments.

HVAC systems in our specific subtropical environment lack a true off-season. While systems in northern states might sit dormant for months at a time, local units run nearly year-round to maintain indoor comfort. This continuous operational load accelerates the standard wear-and-tear timeline. Parts that might last 15 years in a mild climate may reach the end of their mechanical lifespan much sooner when subjected to constant, heavy use. Because the probability of needing a repair over a decade is higher in this environment, labor-backed repair coverage transitions from a cautious luxury to a highly practical necessity.

Inverter Compressors Under Maximum Load

Variable-speed inverter technology is brilliant because it adjusts its output to match the exact cooling demand of the home, running at lower speeds to save energy. However, during the July peak summer heat, these inverter compressors must sustain maximum high-capacity output levels to manage the extreme external temperatures. Weaving through consecutive weeks of blistering heat forces the compressor and the outdoor fan motor to work relentlessly. This sustained high-capacity operation places immense long-term stress on the outdoor unit's mechanical and electrical components.

Condensate Strain in High Humidity

It is not just the heat that challenges the equipment; it is the sheer volume of moisture extracted from the air daily. High humidity forces the indoor units to pull gallons of water out of your living space continuously. This places a constant, heavy strain on the condensate drain lines, internal drip pans, and any integrated condensate pumps. Managing this massive amount of water day after day means these drainage components require frequent professional attention to prevent clogs and water backups. The continuous battle against humidity ensures your system is always working hard, further validating the need for comprehensive protection.

Side-by-Side Comparison: Standard Parts vs. Extended Labor

To facilitate your final decision, it helps to view the core differences between standard and extended coverage in a clear, side-by-side format. Understanding exactly where your responsibility begins and ends is the key to avoiding surprises during a service call. The value of extended coverage is found not just in the frequency of repairs, but in the complexity of the labor required for those repairs.

• Manufacturer Defects — Standard Parts Warranty: Hardware replacement covered — Extended Labor Warranty (e.g., Daikin Asure): Hardware replacement covered

• Diagnostic Fees — Standard Parts Warranty: Homeowner responsibility — Extended Labor Warranty (e.g., Daikin Asure): Covered under policy terms

• Disassembly Time — Standard Parts Warranty: Homeowner pays hourly labor rate — Extended Labor Warranty (e.g., Daikin Asure): Covered under policy terms

• Reassembly & Testing — Standard Parts Warranty: Homeowner pays hourly labor rate — Extended Labor Warranty (e.g., Daikin Asure): Covered under policy terms

• Term Length — Standard Parts Warranty: Up to 12 years (with registration) — Extended Labor Warranty (e.g., Daikin Asure): Matches extended term (often 10-12 years)

• Unexpected Bills — Standard Parts Warranty: High risk for complex cassette teardowns — Extended Labor Warranty (e.g., Daikin Asure): Shields homeowner from complex labor costs

The Standard Path: Relying solely on the standard parts guarantee covers the physical hardware but leaves you entirely responsible for the diagnostic fees, the meticulous disassembly time, and the physical repair labor. If a repair takes three hours due to the tight clearances of a wall cassette in Miami FL, you are responsible for those three hours of highly specialized labor.

The Extended Path: Opting for an extended labor plan, such as Daikin Asure, covers the technician's time and expertise. This path effectively shields you from unexpected repair bills for complex cassette teardowns, ensuring that a covered hardware failure does not result in a significant out-of-pocket labor expense.

Daikin Parts vs. Extended Labor Coverage Comparison

Protecting Your Daikin Mini Split Warranty: Registration and Compliance

Regardless of whether you choose the standard parts route or upgrade to extended labor coverage, you must adhere to strict manufacturer requirements to maintain your warranty status. Failing to follow these guidelines can accidentally void your coverage, leaving you entirely responsible for both parts and labor.

• Strict Registration Windows: Most manufacturers enforce a strict 60-day window for registering new equipment. If you fail to register the system within this timeframe, the standard 12-year parts term often drops significantly, sometimes reverting to a mere 5-year baseline.

• Professional Installation: Warranties mandate professional installation by certified technicians. Utilizing specialized Daikin installers like Air On Demand ensures all warranty guidelines are strictly followed from day one, protecting your investment from the start.

• No DIY Repairs: Attempting to fix a complex inverter system yourself, or hiring an unlicensed handyman, will instantly void manufacturer protections. These systems require specialized tools and training.

• Routine Maintenance: Neglecting annual professional maintenance can also jeopardize your coverage. Manufacturers require proof that the system has been reasonably maintained to honor claims on failed components.

• Transferability Rules: If you plan to sell your property, check the transferability rules. Some policies allow you to transfer the remaining coverage to the new homeowner, adding excellent resale value to the home, provided you file the correct transfer paperwork within the required timeframe.

By understanding these compliance rules, you ensure that your Daikin multi-zone wall cassettes remain fully protected throughout their intended lifespan. Your mini split installation is a major upgrade to your home; treating the warranty paperwork with the same level of care ensures lasting peace of mind.

Frequently Asked Questions

Does a standard Daikin warranty cover labor costs?
The standard factory warranty primarily covers the cost of replacement parts, not the labor required to install them. While there may be a very brief initial labor coverage period immediately following installation, long-term labor costs are generally the homeowner's responsibility unless an extended labor plan is purchased.

Is an extended labor warranty worth it for a multi-zone mini split?
Yes, an extended labor warranty is highly recommended for multi-zone configurations. Because each indoor unit contains its own motors, sensors, and control boards, a multi-zone setup multiplies the potential labor points in your home. Extended coverage protects you from the specialized labor costs required to dismantle and repair these compact individual units.

What is the difference between a parts and labor warranty for Daikin?
A parts warranty guarantees that the manufacturer will provide a free replacement component if a part fails due to a defect. A labor warranty covers the cost of the licensed technician's time, expertise, and diagnostic work required to safely remove the broken component and install the new one.

What specific actions will void a Daikin mini split warranty?
Attempting do-it-yourself repairs, hiring unlicensed individuals for service, or failing to perform regular professional maintenance can instantly void your coverage. Additionally, using unapproved third-party replacement parts or failing to register the equipment within the required timeframe can severely limit or cancel your protections.

How long do I have to register my new Daikin system for full coverage?
Homeowners typically have a strict 60-day window from the date of installation to register their new equipment with the manufacturer. Completing this registration on time is critical, as it usually extends the baseline parts coverage to the full 10- or 12-year term.

Secure Your Comfort for the Long Haul

Securing the right Daikin mini split warranty ensures your home remains comfortable without the stress of unexpected repair labor. By understanding the mechanical reality of your ductless system, you can make an informed choice that truly protects your investment. If you need expert guidance on choosing the right coverage or require a professional tune-up to maintain your current warranty compliance, reach out to our team today for a comprehensive evaluation.

Standard Service Calls vs. Deep Chemical Coil Cleaning for Chronic Airflow Issues placeholder-image  | Air On Demand
5 min read

Standard Service Calls vs. Deep Chemical Coil Cleaning for Chronic Airflow Issues

If your AC is running constantly but barely blowing air, a basic wipe-down might not be enough. Find out if embedded biological growth requires a full chemical extraction to restore cooling power.

Why Your AC Struggles With Weak Airflow When You Need It Most

Why is your air conditioning system running constantly, yet barely pushing a breeze through the vents? Choosing between standard service calls vs. deep chemical coil cleaning for chronic airflow issues is a critical decision when your home feels uncomfortably warm. During the peak July summer heat, your cooling system works overtime. If the air coming from your registers feels weak, our team at Air On Demand frequently finds that the culprit is rarely a failing fan motor. Most often, the problem lies hidden inside the air handler: an evaporator coil choked by thick biological growth.

If you are dealing with severely restricted airflow right now, you might need more than a basic wipe-down. Learn more about our deep chemical coil cleaning services to restore your system's performance.

Many homeowners assume a standard tune-up will instantly fix weak airflow. While regular maintenance is highly effective for general upkeep, it has physical limitations. When extreme humidity causes wet, biological slime to embed deep within the microscopic gaps of your cooling coil, a basic brush cannot reach the root of the blockage. Understanding exactly what is happening inside your system is the first step toward getting your home comfortable again.

The Physical Reality of Evaporator Coils and Biological Growth

To understand why airflow drops so dramatically, you have to look at how an evaporator coil is built. These coils are not solid blocks of metal. They are made of copper or aluminum tubing surrounded by thousands of incredibly thin aluminum fins. Most modern cooling systems feature between 14 and 20 tightly packed fins per inch. These microscopic gaps maximize the surface area for heat transfer, but they also create the perfect trap for debris.

Living in Miami FL means your air conditioner handles a uniquely massive latent heat load. Latent heat refers to the energy required to remove moisture from the air. In our years of servicing local HVAC systems, we've seen firsthand how our subtropical climate's year-round high humidity leaves your evaporator coil constantly dripping with condensation. This relentless moisture turns the dark, enclosed space of your air handler into an ideal breeding ground for biological slime.

The embedding process: As airborne dust, pet dander, and microscopic organic matter bypass your air filter, they stick to the wet coil. Over time, this mixture forms a thick, wet sludge. This biological matter does not just sit on the outer surface of the coil. The constant pull of the blower fan draws the slime deep into the tight spaces between the 14 to 20 fins per inch.

The impact on your energy bills and comfort is immediate. According to Department of Energy (DOE) data, dirty evaporator coils can reduce a cooling system's energy efficiency by up to 30% to 40%. The system has to run much longer to remove the same amount of heat, driving up your utility costs while failing to keep the house cool.

What to Expect During a Standard Maintenance Visit

A standard maintenance visit is designed to keep a relatively clean system running at peak efficiency. It is a preventative measure, not a deep restorative procedure. When an Air On Demand technician performs a routine tune-up in Miami FL, coil cleaning is usually part of the checklist, but the methodology is strictly surface-level.

Here is exactly what our professionals do during a standard surface cleaning:

1. System Shutdown and Access: The technician turns off the power and removes the access panel on the indoor air handler to expose the A-coil or slab coil.

2. Visual Inspection: The technician checks the outer surface of the fins for visible dust blankets, pet hair, and light debris.

3. Soft-Bristle Brushing: Using a specialized soft brush, the technician gently sweeps the outer surface of the fins, always moving in the direction of the grain to avoid bending the delicate aluminum.

4. Light Vacuuming: A shop vacuum with a brush attachment pulls away the loosened dry debris from the surface and the drain pan.

This method is highly effective for removing dry dust and light surface accumulation. If you are diligent about keeping your air conditioner clean with regular filter changes, a standard wipe-down is usually all your system needs to maintain strong airflow. However, it is explicitly not designed to extract deeply embedded, wet biological matter.

Why Surface Cleaning Fails Against Chronic Airflow Issues

Applying the wrong cleaning method to a heavily choked coil can actually make your airflow problems worse. Misdiagnosing deep biological embedding is a common issue that leads to recurring service calls and ongoing frustration.

The Problem: When an evaporator coil is packed with wet biological slime, the restricted airflow forces the blower motor to work harder. The system runs continuously during the peak July summer heat, but the house stays warm. A pattern we see often is homeowners requesting a standard tune-up, hoping a quick brush will solve the issue.

The Cause: Using a standard maintenance brush on thick, wet biological growth is physically counterproductive. Because the fins are packed 14 to 20 per inch, brushing the surface often pushes the wet matter deeper into the microscopic gaps. Instead of removing the blockage, the brush acts like a trowel, packing the slime tightly into the center of the coil. This creates a solid plug that completely chokes off the air supply.

The Solution: Once biological growth has embedded beyond the outer surface, mechanical brushing is physically incapable of reaching it. Pushing the system to operate with a plugged coil increases internal wear and tear, often leading to frozen lines, overheated compressors, and unexpected breakdowns. If your system reaches this point, you will likely need professional AC repair to resolve the underlying restriction through specialized chemical extraction.

Deep Chemical Coil Cleaning: Extracting Embedded Contaminants

When our technicians encounter a severely plugged coil, a chemical pull-and-clean is the definitive technical solution we recommend. This is a major restorative procedure designed to return a heavily neglected coil to factory airflow specifications. Because this process involves handling high-pressure refrigerants, it must only be performed by a licensed professional.

The "Pull" Process: Unlike a standard wipe-down, a deep chemical clean usually requires safely removing the entire evaporator coil from the indoor air handler. A technician must safely recover the system's refrigerant using specialized, EPA-approved equipment. Once the refrigerant is secured, the copper lines are cut, and the heavily soiled coil is physically pulled out of the unit and taken outside.

The Chemical Extraction: Once outside, the technician applies specialized, heavy-duty foaming chemicals directly to the aluminum fins. These chemicals are specifically formulated to break down biological growth and heavy grime. As the chemical reacts, it creates a thick foam that expands outward. This expansion physically pushes the deeply embedded slime out from between the tight 14-20 fins per inch.

Neutralization and Reinstallation: After the foaming action extracts the debris, the coil is thoroughly rinsed with water to neutralize the chemicals and wash away the sludge. The newly cleaned coil is then reinstalled in the air handler in Miami FL. The technician brazes the copper lines back together, pulls a deep vacuum to remove any moisture from the refrigerant lines, and recharges the system to the exact factory specifications. The result is a total restoration of airflow and cooling capacity.

Side-by-Side: Standard Tune-Up vs. Chemical Pull-and-Clean

To help you understand exactly what each service provides during the peak July summer heat, here is a direct comparison of the two approaches.

• Target Contaminants — Standard Maintenance Wipe-Down: Dry dust, pet hair, and light surface debris. — Deep Chemical Pull-and-Clean: Deeply embedded biological slime and heavy grime.

• Methodology — Standard Maintenance Wipe-Down: In-place brushing and light vacuuming. — Deep Chemical Pull-and-Clean: Complete coil removal and expanding chemical foaming.

• Primary Goal — Standard Maintenance Wipe-Down: Preventative upkeep and efficiency maintenance. — Deep Chemical Pull-and-Clean: Restorative airflow recovery and deep sanitization.

• Airflow Impact — Standard Maintenance Wipe-Down: Maintains current factory efficiency. — Deep Chemical Pull-and-Clean: Restores severely restricted airflow to factory specs.

• Time Required — Standard Maintenance Wipe-Down: Typically completed within a standard 1-2 hour visit. — Deep Chemical Pull-and-Clean: Requires several hours of intensive technical labor.

Standard Tune-Up vs. Chemical Pull-and-Clean

Professional Diagnostics: Determining Which Service Your System Needs

You should never have to guess which cleaning method your system requires. At Air On Demand, our decades of hands-on technical expertise allow us to accurately diagnose when an AC system requires a comprehensive chemical pull-and-clean versus a basic tune-up. We position ourselves as honest diagnostic experts because we believe in solving the root cause—a philosophy we've maintained through countless Miami summers.

Static Pressure Testing: Professionals do not just look at a coil; they measure the airflow resistance. By performing a static pressure test, a technician can determine exactly how hard the blower motor is working to push air through the system in Miami FL. If the static pressure drop across the evaporator coil is significantly higher than the manufacturer's specifications, it indicates a severe internal blockage.

Temperature Drop Measurements: Technicians also measure the Delta T—the temperature difference between the air entering the system and the air leaving it. If the airflow is weak but the temperature drop is unusually high, it confirms that the air is moving too slowly across the coil due to a restriction.

Visual Borescope Inspections: Because the human eye cannot see deep into the center of a dense coil block, professionals often use digital borescopes. These tiny cameras slide between the fins to reveal hidden biological embedding that a surface inspection would miss.

Honest diagnostics prevent you from paying for a wipe-down that won't work, or a chemical clean you don't actually need. If biological growth is a recurring issue in your home, our technicians may also recommend integrating specialized air cleaners and purifiers to neutralize organic matter before it ever reaches the coil.

Frequently Asked Questions About AC Coil Cleaning

Does my AC need a chemical clean or just a regular service?

It depends entirely on the depth and type of the debris restricting your airflow. If your coil only has a light blanket of dry surface dust, a regular service wipe-down is sufficient to keep it running smoothly. However, if your system has embedded biological growth trapped deep between the fins, a chemical cleaning is required. A professional static pressure test will definitively reveal which service you need.

Why is my AC airflow still weak after a tune-up?

In our experience, if your airflow remains weak after a standard maintenance visit, the technician likely misdiagnosed deep biological embedding. A standard brush can only clean the outer edges of the fins. If the coil was packed with wet slime, the brushing motion may have actually pushed the debris further into the microscopic gaps, creating a tighter plug that further restricts the air.

Can you clean evaporator coils without removing them?

Light surface cleaning can easily be done while the coil remains in place inside the air handler. However, deep chemical cleaning requires safely removing the coil to protect the rest of the system. Applying heavy-duty expanding foams and high-volume water rinses inside your home could flood the air handler, damage electrical components, and cause water damage to your property.

How often should AC coils be chemically cleaned?

There is no set schedule for a chemical pull-and-clean, as it is a restorative procedure rather than routine maintenance. It varies based on usage, indoor air quality, and local humidity levels. Typically, a chemical clean is only performed when diagnostics show severe embedded restriction. If you keep up with regular preventative maintenance and frequent filter changes in Miami FL, you may rarely or never need a full chemical extraction.

What are the signs of biological growth on AC coils?

The most obvious sign is a musty, dirty-sock odor coming from your vents when the air conditioner kicks on. You will also notice weak airflow, longer cooling cycles, and higher energy bills as the system struggles to breathe. Visually, you may see a dark, wet sludge accumulating on the outer fins or inside the condensate drain pan.

Make an Informed Decision to Restore Your Cooling Performance

Understanding the physical difference between dry surface dirt and deeply embedded biological growth is the key to solving chronic airflow issues. A standard brush-and-wipe is excellent for preventative care, but it simply cannot fix a coil that has been choked by the relentless humidity of the peak July summer heat.

If your system is running constantly but failing to keep you comfortable, a proper technical diagnosis will provide the exact solution you need. Do not settle for a temporary fix that leaves you sweating in your own home. Schedule your routine AC maintenance or diagnostic inspection today, and let our experts restore your system's cooling power to exactly where it should be.

Is That Hissing Sound a Refrigerant Leak or a Stuck Reversing Valve? placeholder-image  | Air On Demand
5 min read

Is That Hissing Sound a Refrigerant Leak or a Stuck Reversing Valve?

A sudden hissing noise from your heat pump during peak summer operation can cause immediate panic. Use this acoustic guide to distinguish a normal valve shift from a critical R-410A leak.

Hearing a Hiss? How to Identify the Source of the Sound

Is your heat pump making a sudden, aggressive hissing noise that has you worried about a catastrophic failure? When you are standing next to your outdoor unit during a July peak summer cooling load, hearing a loud swoosh or continuous hiss can cause immediate panic. You rely on your system to keep your home comfortable, and any strange noise feels like a ticking clock toward a complete breakdown. The immediate challenge is determining whether that sound is a normal, brief pressure equalization or a critical escaping gas leak that requires emergency intervention.

Making the right call quickly can save your system from severe damage. Fortunately, careful listening is the first and most effective step in diagnosing the issue before you reach for the phone. By paying attention to the duration, tone, and timing of the sound, you can confidently determine your next move.

If you need immediate assistance with your air conditioning systems, reaching out for professional AC repair in Miami is the safest next step.

Acoustic Diagnostics: Duration, Tone, and Timing

The easiest way to differentiate between a harmless mechanical shift and a dangerous chemical leak is by analyzing the acoustic signature of the noise. Because these two events originate from entirely different physical processes, they sound distinctly different if you know what to listen for.

• Duration — Normal Reversing Valve Swoosh: Brief; lasts only 3 to 5 seconds before fading out completely. — Refrigerant Leak Hiss: Continuous and unrelenting; persists as long as there is pressure in the system.

• Tone — Normal Reversing Valve Swoosh: A sudden, deep release of air, similar to a heavy sigh or a pneumatic burst. — Refrigerant Leak Hiss: High-pitched, sharp hissing or bubbling, similar to a punctured tire.

• Timing — Normal Reversing Valve Swoosh: Typically occurs at the very end of a cooling cycle or when modes shift. — Refrigerant Leak Hiss: Occurs while the compressor is actively running and often continues after it shuts off.

• System Impact — Normal Reversing Valve Swoosh: None. The system will resume normal operation or power down smoothly. — Refrigerant Leak Hiss: Immediate and noticeable drop in cooling power and dehumidification capability.

The core difference comes down to a brief pressure equalization versus a continuous escape of gas. A reversing valve is simply moving pressure from one side of the system to the other within a closed loop. A leak, on the other hand, is a breach in that closed loop, allowing high-pressure gas to vent into the atmosphere until the system is entirely empty.

Refrigerant Leak vs. Reversing Valve Sound Comparison

Decoding the 5-Second Swoosh: Normal Reversing Valve Operation

To understand why your system occasionally sounds like it is releasing a massive burst of air, it helps to understand the role of the reversing valve. In R-410A heat pump systems, the reversing valve is the crucial component that dictates the direction of refrigerant flow. By shifting an internal slide, this valve changes the system from heating to cooling, or vice versa.

Even if you are strictly using the cooling mode during the summer months, the reversing valve can still generate a swooshing sound. This typically happens when the system completes a cooling cycle and the compressor shuts down. The high-pressure and low-pressure sides of the system need to equalize, and the valve facilitates this rapid transfer of pressure.

The Mechanics of Pressure Equalization

When the compressor turns off, the refrigerant is no longer being actively pumped through the lines. However, the pressure difference between the indoor coil and the outdoor coil is still immense. As the system rests, that pressure naturally seeks balance. The reversing valve allows this high-pressure gas to bleed over to the low-pressure side.

Because modern refrigerants operate under significant force, moving that volume of gas through a narrow internal valve creates a distinct acoustic effect. It sounds exactly like a large volume of air being quickly released from a compressor tank. The key takeaway for homeowners is that this sound is a sign of the system resetting properly, not a malfunction. The noise is brief, entirely contained within the copper lines, and the system will resume normal operation shortly after.

The Continuous Hiss: Identifying an Escaping Gas Leak

While a 5-second swoosh is normal, a continuous, unrelenting hiss is a massive red flag. Modern HVAC equipment operates at significantly higher pressures than older units. When a copper line, evaporator coil, or condenser coil develops a crack or pinhole leak, the escaping gas is forced out under immense pressure, making leaks noticeably louder than they were in older generations of equipment.

If you hear a high-pitched hissing or bubbling sound that does not stop after a few seconds, you are likely listening to a breached line. This sound indicates that the chemical compound responsible for moving heat out of your home is actively venting into the atmosphere. The noise will persist whether the system is running or not, only stopping once the pressure drops so low that the system is completely empty.

The Physical Dangers of Escaping Refrigerant

When diagnosing high-pressure hissing sounds, safety must be your top priority. Escaping refrigerant is not just compressed air; it is a specialized chemical compound that transitions rapidly between a liquid and a gas.

Never attempt to touch the area where the hissing is coming from, and do not try to place tape or a rag over the leak. As the refrigerant escapes and depressurizes, it drops to sub-zero temperatures almost instantly. Exposing your skin to this rapidly expanding gas can cause severe chemical burns and instant frostbite. Furthermore, inhaling the concentrated gas in an enclosed space displaces oxygen and poses serious health risks. If you identify this continuous sound, back away from the unit and prepare to shut the system down at the thermostat.

Secondary Symptoms: What Else Happens When Refrigerant Escapes?

A continuous hiss is rarely the only sign of a breached system. Because the entire cooling process relies on a precise volume of refrigerant, losing even a small amount immediately throws the system's thermodynamics out of balance. If you hear a hissing noise and notice any of the following secondary symptoms, you can confidently confirm a leak.

1. Loss of latent heat removal capacity: In Miami FL, managing coastal humidity is just as important as lowering the temperature. Optimal refrigerant charge is critical for managing the latent heat load. A leak drastically reduces the evaporator coil's ability to pull moisture from the air, causing your indoor environment to feel sticky, heavy, and uncomfortably humid almost immediately.

2. Continuous system operation: As the refrigerant level drops, the system loses its ability to absorb heat effectively. The thermostat recognizes that the target temperature is not being met, forcing the compressor to run continuously in a futile attempt to cool the house.

3. Ice formation on the coils or lines: It may seem counterintuitive for ice to form during a sweltering summer day, but a leak causes a drastic drop in pressure within the evaporator coil. This pressure drop forces the remaining refrigerant to run far below freezing. The ambient humidity in the air then freezes on contact with the coil, creating a thick block of ice that further chokes off airflow.

4. Unusually high energy bills: Because the system is running non-stop without actually satisfying the thermostat, your electrical consumption will skyrocket. The compressor is pulling maximum amperage for hours on end, resulting in an immediate spike in your monthly utility costs.

Why Extreme Summer Heat Makes Immediate Action Critical

Addressing a continuous hiss is not something that can wait until the weekend. During a July peak summer cooling load, your heat pump is already operating near its maximum capacity. The ambient outdoor temperatures put immense strain on the compressor, and the system relies entirely on the returning flow of cool refrigerant gas to keep its internal motor from overheating.

When an undercharged system is forced to run continuously during high ambient temperatures, that critical cooling flow is lost. The compressor motor begins to run hotter and hotter, eventually breaking down the internal lubricating oils. Operating a system without adequate refrigerant is the fastest way to destroy the most expensive component in your entire HVAC setup.

Preventing Catastrophic Compressor Failure

The difference between a manageable repair bill and a total system replacement often comes down to how quickly you react to the hissing sound. Fixing a leak involves locating the breach, repairing the copper, pressure-testing the system, and recharging the refrigerant. While highly technical, it is a standard procedure for a licensed professional.

However, if you allow the system to run while hissing until the compressor seizes from thermal overload, you are no longer just fixing a leak—you are replacing the heart of the system. Turning the system off immediately prevents a minor repair from becoming a catastrophic failure. If you suspect your compressor is overheating due to a leak, scheduling emergency AC repair is the only way to protect your equipment.

Immediate Steps: When to Turn Off the Thermostat

When you hear a suspicious noise coming from your heat pump, having a clear, safe action plan prevents unnecessary damage and keeps your family safe. Follow these immediate steps based on your acoustic diagnosis:

• Monitor the 5-second swoosh: If the sound is a brief, deep release of air that stops completely after a few seconds, do not panic. Leave the thermostat alone and monitor the indoor vents to ensure the system is still blowing cold air.

• Switch the thermostat to OFF for a continuous hiss: If the sound is high-pitched, continuous, and accompanied by warm air blowing from your indoor vents, immediately walk to your thermostat and switch the system to the "OFF" position. Do not simply raise the temperature; shut the system down completely.

• Do not attempt DIY patches: Never try to patch the leak with epoxy, tape, or sealants. The internal pressure of the system will immediately blow out any surface-level patch, and you risk severe frostbite by putting your hands near escaping gas.

• Do not dismantle the outdoor unit: Keep the exterior panels secured. Removing panels to get a better look exposes you to high-voltage electrical components and moving fan blades.

• Contact a licensed professional: Call a certified HVAC technician to perform a nitrogen pressure test. This is the only safe and accurate way to locate the exact source of the leak and determine the necessary repair protocol.

Frequently Asked Questions About Heat Pump and AC Noises

What does a reversing valve sound like?

A reversing valve sounds like a brief, 3 to 5-second swooshing or a sudden release of compressed air. You will usually hear this deep, pneumatic sigh when the system finishes a cycle or transitions between heating and cooling modes. It is a completely normal sound that indicates the internal system pressures are equalizing, and it should stop entirely after a few seconds.

How to tell if AC is leaking freon or just equalizing pressure?

The easiest way to tell the difference is by timing the sound. Equalizing pressure is brief, lasting only a few seconds before stopping completely, and the system continues to cool normally. A refrigerant leak creates a continuous hiss that persists as long as there is pressure in the lines, and it is almost always accompanied by a sudden drop in cooling performance and warm air blowing from your vents.

Can a heat pump hiss in cooling mode?

Yes, a heat pump can hiss in cooling mode, but a continuous hiss is never a good sign. While you might hear a brief swoosh at the end of a cooling cycle, a continuous hiss in cooling mode almost always indicates a refrigerant leak or a severe internal valve malfunction that requires immediate professional diagnostics.

Why is my AC making a hissing sound?

Common causes for a hissing sound include active refrigerant leaks, excessively high internal compressor pressure, or leaky ductwork pulling in unconditioned air. The duration and exact location of the sound dictate the cause. A hiss at the outdoor unit points to refrigerant or compressor issues, while a hiss near your indoor vents usually points to a ductwork breach.

Is a hissing air conditioner dangerous?

A continuously hissing air conditioner is dangerous to both your physical safety and the health of the equipment. Escaping refrigerant poses environmental risks and physical dangers, including severe frostbite or chemical exposure if touched. Mechanically, it is highly dangerous to the health of the compressor, which will likely overheat and fail if left running without proper refrigerant levels.

How quickly will a leak impact cooling performance?

Depending on the size and location of the leak, cooling performance can drop within a matter of hours. A large high-pressure leak will vent the entire refrigerant charge rapidly, leading to a completely warm and humid house by the end of the day. Even a small pinhole leak will cause the system to struggle, run continuously, and eventually freeze over within a few days.

Get a Definitive Answer from Miami's AC Experts

While listening closely to the duration and tone of the sound can guide your initial reaction, only a professional diagnostic can confirm the exact issue and safely restore your system. Guessing whether your heat pump is safe to run during the hottest part of the year is a risk you do not need to take. Prioritize your system's safety and your family's comfort by shutting down a continuously hissing unit and scheduling a prompt, thorough inspection.

As a homeowner, you deserve a clear path to turning a moment of panic into a controlled, professional solution. Rely on Air On Demand's expertise in accurate diagnostics and rapid emergency repair services for Miami homeowners. We have the specialized tools and training required to pinpoint high-pressure leaks, repair the damage, and recharge your system safely, ensuring your home stays perfectly cooled all summer long.

A Day in the Life of a Miami HVAC Technician During Extreme Heat Alerts placeholder-image  | Air On Demand
5 min read

A Day in the Life of a Miami HVAC Technician During Extreme Heat Alerts

When summer temperatures peak, repairing an AC unit becomes a grueling battle against the heat. Explore how our team navigates 100-degree attics to safely restore your comfort.

The Brutal Reality of Summer AC Failures in Miami

It is 2:00 PM on a sweltering Tuesday afternoon, the local meteorologist has just extended the July extreme heat alerts, and the thermostat inside a stifling Kendall home is stubbornly stuck at 88 degrees. For the homeowner, it is a miserable waiting game, but for our crew, experiencing a day in the life of a Miami HVAC technician during extreme heat alerts is just hitting its peak intensity. In our years of keeping South Florida cool, we know the real challenge is not just diagnosing the failing equipment; it is navigating the delicate balance between executing rapid, urgent technical fixes and maintaining strict safety protocols to prevent heat stroke in a brutally hot environment.

When your system fails, you need reliable air conditioning services to restore your comfort, which is why our professional AC repair in Miami is so critical during these demanding summer months.

The continuous cycle of heat stress: Unlike other regions where the sun goes down and the air cools off, Miami's subtropical climate prevents significant overnight cooling. The concrete, asphalt, and building materials retain the day's thermal energy, meaning the heat stress on your home and your air conditioning equipment is continuous. Your AC unit rarely gets a chance to rest, and neither do the technicians tasked with keeping those units running. By the time a system breaks down in the middle of a July heatwave, we typically see equipment that is already pushed to its absolute limits, and the environment our technicians must enter to fix it is dangerously hot.

For the homeowner, a broken AC is an emergency. For our technicians, fixing it is a high-stakes physical and mental marathon. They must arrive with a clear head, diagnose complex electrical and mechanical failures, and perform precise repairs while enduring conditions that would send most people running for the nearest cold shower.

Morning Briefings: Prepping for Miami's Hottest Days

Long before the sun reaches its punishing afternoon peak, our day begins at the shop. Prepping for a full schedule of emergency calls requires intense coordination. Technicians cannot simply grab their tool bags and drive off; survival and success on these days require meticulous preparation.

At Air On Demand, we implement rigorous morning training and strict safety protocols to ensure our technicians are physically and mentally prepared for the day. This preparation is what separates a chaotic response from a precise, professional resolution.

Stocking for Heat-Stressed Equipment

Extreme heat changes the way mechanical components behave. Parts that might last years in a mild climate can degrade rapidly under the constant strain of a Miami summer. Before leaving our lot, our technicians run through a strict inventory checklist:

1. Capacitor verification: Capacitors are the batteries that jump-start your compressor and fan motors. Heat is their number one enemy, causing the internal oils to expand and the part to bulge and fail. We heavily stock our trucks with dual-run capacitors of every size.

2. Contactor replacements: The electrical switches that pull power to the outdoor unit take a massive beating when the system cycles on and off hundreds of times a day. We consider extra contactors a mandatory stock item.

3. Refrigerant reserves: While an AC shouldn't "use up" refrigerant, extreme heat makes existing micro-leaks more apparent as the system struggles to absorb heat.

4. Motor and blade checks: Condenser fan motors are subjected to ambient outdoor heat plus the heat they pull out of the house. Our team loads extra universal motors to ensure rapid replacements.

Hydration and Safety Protocols

The most important asset on our trucks isn't a tool; it is the technician. Before dispatching, our crews load heavy-duty coolers with ice, water, and electrolyte replacement drinks. Our dispatch managers review the latest OSHA heat illness prevention guidelines, reminding the team of the warning signs of heat exhaustion. When the July extreme heat alerts are active, our morning briefing sets the tone: safety first, precision second, speed third.

Stepping Into the Oven: The Attic Environment

While the outdoor condensing unit sits in the blazing sun, the most grueling part of the job happens inside the house—specifically, above it. In our experience servicing homes throughout Miami-Dade, the indoor air handler is often located in the attic, a space that transforms into a literal oven by mid-morning.

The compounding effect of Miami's high humidity makes 100+ degree attic temperatures feel significantly more oppressive. Humidity severely limits sweat evaporation, which is the human body's primary mechanism for cooling itself. When sweat cannot evaporate, the technician's core temperature rises rapidly.

The Heat Index Multiplier

The physics of trapped heat: Radiant heat from the sun beats down on the roof shingles, transferring thermal energy through the roof deck and into the attic space. Because older Miami homes often suffer from poor ventilation, that heat gets trapped. When the outdoor temperature is 95 degrees, our technicians regularly record attic temperatures soaring past 130 or 140 degrees.

• Living Room (No AC) — Typical July Temperature: 85°F - 90°F — Humidity Impact: High (Stagnant air) — Working Condition: Uncomfortable, sweating

• Outdoor Condenser — Typical July Temperature: 95°F - 100°F — Humidity Impact: High (Direct sun) — Working Condition: Harsh, requires frequent water breaks

• Attic Space — Typical July Temperature: 130°F - 150°F — Humidity Impact: Extreme (No evaporation) — Working Condition: Dangerous, strict time limits required

Navigating Tight Spaces

Reaching the air handler isn't as simple as walking into a room. Our technicians must wear protective gear—including long pants, gloves, and sometimes respirators to protect against fiberglass insulation—while army-crawling over wooden joists. One slip of the foot means falling through the customer's drywall ceiling. Maneuvering around thick ductwork, balancing on narrow beams, and hauling heavy tools into this stifling darkness requires immense physical endurance before the actual repair even begins.

The Reality of Attic Temperatures vs. Outdoor Heat in Miami

Precision Under Pressure: Diagnosing Heat-Stressed AC Units

Once in the attic or kneeling beside the outdoor unit, our technicians must transition from physical endurance to sharp mental focus. Troubleshooting complex mechanical and high-voltage electrical systems requires a steady hand and a clear mind, both of which are difficult to maintain when sweat is stinging your eyes.

When a homeowner calls us for emergency AC repair, they expect an accurate diagnosis. We never rush the process because of the heat, as that leads to misdiagnoses, callbacks, and further frustration. Therefore, our technicians execute a systematic problem-cause-solution workflow under extreme pressure.

Electrical Diagnostics in the Heat

• The Problem: The system is humming loudly, but the fan blade isn't spinning, and the house is getting hotter.

• The Cause: A pattern we see often is the dual-run capacitor swelling and failing due to prolonged heat exposure, preventing the required voltage from reaching the motors. Furthermore, neighborhood grid strain during heatwaves can cause voltage drops that put extra wear on these components.

• The Solution: The technician must safely isolate the power, discharge the stored high voltage in the failed capacitor (a critical safety step), test the surrounding wires for heat damage, and install a properly rated replacement.

Mechanical Troubleshooting

• The Problem: The system is running constantly, but airflow from the vents is incredibly weak and barely cool.

• The Cause: The evaporator coil inside the attic air handler has frozen over, or the blower motor is failing under the heavy static pressure load.

• The Solution: The technician must evaluate the blower motor's amp draw, check the coil for ice buildup, and ensure proper airflow. If the coil is frozen, they must find the root cause—whether it is a severely clogged filter, a collapsed return duct, or a refrigerant issue—without compromising the system's integrity.

Mandatory Safety Protocols and Work-Rest Cycles

Homeowners waiting in a hot house are understandably anxious for the repair to be finished. Sometimes, they might look out the window and see our technician sitting in the driver's seat of the service van with the engine running. It is vital to understand that this is not a break; it is a mandatory, life-saving safety protocol.

The physical resilience of our Air On Demand technicians is directly connected to our company's commitment to safety. Ensuring that no technician is pushed past safe physiological limits results in better, more accurate service for our customers.

The 15-Minute Rule

Protecting the core temperature: When working in 100+ degree attic temperatures, the human body absorbs heat faster than it can expel it. OSHA guidelines strongly recommend strict work-rest cycles for these extreme environments. We mandate that a technician can safely remain in a 140-degree attic for roughly 15 to 20 minutes before their core body temperature reaches a dangerous threshold.

They must exit the attic, climb down the ladder, and spend 10 to 15 minutes in an air-conditioned vehicle drinking electrolytes to bring their core temperature back to a safe baseline. Skipping this step leads to heat cramps, dizziness, confusion, and eventually heat stroke—which can be fatal in an attic.

Hydration and Heat Illness Prevention

The buddy system and dispatch monitoring: Throughout the day, our dispatchers monitor the technicians. If a technician is on an attic call for too long without checking in, dispatch will call to verify their safety. Our technicians are trained to recognize the early signs of heat exhaustion in themselves, such as heavy sweating suddenly stopping, nausea, or a rapid pulse. Managing these risks takes time, which is why emergency repairs during a heatwave simply cannot be rushed.

Navigating the Peak-Hour Emergency Rush

As the clock strikes 4:00 PM, the ambient outdoor temperature is peaking, and our dispatch board lights up. This is the time of day when struggling AC units finally give up. The surge of service requests between 2:00 PM and 6:00 PM requires immense logistical coordination and mental stamina from our entire team.

Triaging the Backlog

Prioritizing vulnerability: Our dispatchers and technicians communicate constantly to triage calls based on severity. A home with elderly residents, infants, or a completely dead system takes priority over a home where the AC is running but struggling to keep the temperature below 75 degrees. This triage process is similar to an emergency room.

For more insight on how our team handles off-hours emergencies, you can learn about triaging midnight AC failures during peak heat waves. Routing technicians efficiently is paramount; minimizing "windshield time" (time spent driving) means more time spent fixing systems. Managing customer expectations when the schedule is backed up requires a calm, professional, and empathetic demeanor, even when our technicians are physically exhausted and soaked in sweat.

The Final Call: Restoring Home Comfort When It Matters Most

By the time the sun finally begins to set, our technicians may have crawled through half a dozen attics and revived several completely dead systems. Despite the intense physical exhaustion, the final call of the day brings a unique sense of accomplishment.

The payoff: For our crew, there is a distinct, satisfying moment when the multimeter confirms the voltage is correct, the disconnect switch is flipped, the compressor roars to life, and cold air begins blasting through the vents. Seeing the immediate relief on a homeowner's face makes the brutal conditions worthwhile.

However, many of these emergency breakdowns are entirely preventable. We always remind homeowners that they can drastically reduce their risk of a mid-July failure by investing in preventative AC maintenance. Having our professionals clean the coils, check the electrical connections, and measure the refrigerant levels before the extreme heat arrives ensures the system can handle the load, keeping both your family comfortable and our technicians out of a dangerous emergency scenario.

Common Questions About Summer AC Repairs in Miami

How hot does a Miami attic get in the summer?

In our daily service calls, we find that a Miami attic can easily exceed 140 to 150 degrees during peak summer heat. Because the sun's radiant heat bakes the roof and poor ventilation traps that air inside, the attic is usually 40 to 50 degrees hotter than the outdoor temperature. This creates a highly dangerous environment for any work or storage.

Why is my AC repair taking so long during a heatwave?

AC repairs take longer during a heatwave due to mandatory safety breaks, high call volumes, and the time required to accurately diagnose heat-stressed parts. Technicians working in extreme attic heat must exit every 15 to 20 minutes to cool down and hydrate to prevent heat stroke. This work-rest cycle is critical for their survival and ensures they have the mental clarity to fix your system correctly.

Is being an HVAC technician hard on your body?

Yes, being an HVAC technician requires immense physical endurance and mobility. Our technicians must regularly carry heavy equipment up ladders, navigate very tight, dark spaces, and endure extreme heat stress. The physical toll of working in 100+ degree environments day after day requires strict hydration and safety habits.

What can I do to prepare my AC for extreme heat?

We recommend scheduling preventative maintenance before the summer peaks. Additionally, you should change your air filters regularly to ensure maximum airflow and keep the outdoor condensing unit clear of weeds, debris, and lawn furniture. Proper airflow is the most critical factor we see in preventing your system from overheating.

Should I turn off my AC if it stops cooling during a heatwave?

Yes, you should turn the system off at the thermostat immediately if it stops producing cold air. Leaving a malfunctioning system running can cause the compressor to overheat and fail entirely, or cause the indoor coil to freeze into a solid block of ice. Turning it off prevents further mechanical damage while you wait for one of our professional technicians to arrive.

Trusting Your Local Experts Through the Heatwave

For our team at Air On Demand, a day in the life of a Miami HVAC technician during extreme heat alerts is a testament to the dedication required to keep this city livable during the summer. Navigating 100+ degree attic temperatures, troubleshooting complex electrical systems under pressure, and prioritizing safety over speed are all part of our daily routine.

Understanding the physical reality of this work highlights exactly why proactive care is so valuable. Don't wait for your system to fail on the hottest day of the year. Take control of your home's comfort and protect your equipment from the brutal summer strain. Reach out to us today to schedule a comprehensive system evaluation or maintenance check, and ensure your home remains a cool, safe refuge all season long.

Compressor Humming but Fan Dead: Recognizing a Bad Dual Run Capacitor placeholder-image  | Air On Demand
5 min read

Compressor Humming but Fan Dead: Recognizing a Bad Dual Run Capacitor

A loud buzzing from your outdoor AC unit while the fan blades sit perfectly still is a major cooling emergency. Shut off the power immediately to prevent catastrophic compressor failure.

Why Is My AC Unit Fan Not Spinning but the Compressor Is Running?

Are you standing outside right now, listening to a loud buzzing noise and searching for answers about a compressor humming but fan dead: recognizing a bad dual run capacitor before it causes permanent damage? At Air On Demand, our dispatchers take countless calls during Miami's peak summer months from homeowners who hear a loud, strained noise coming from the metal cabinet of their outdoor condenser, but notice the fan blades at the top are completely stationary. This is one of the most common—and most urgent—cooling emergencies our technicians face. If your system is exhibiting these exact symptoms, you need to take immediate action to protect your equipment from catastrophic failure.

If you need immediate professional assistance, reach out to our team for expert AC repair or schedule emergency AC repair in Miami right now.

The loud humming noise from your outside condenser while the fan blades remain completely stationary usually points to one specific culprit: the fan side of your dual run capacitor has likely failed. When our technicians arrive on-site and notice a compressor humming but fan dead, this is our textbook mechanical diagnosis. Your air conditioning system is receiving electrical power, the contactor has pulled in to send voltage to the unit, and the compressor is actively trying to circulate refrigerant. However, the fan motor lacks the stored electrical torque required to start spinning.

The immediate directive: Do not wait to see if the fan will start on its own. Immediately go to your indoor thermostat and switch the system to the "off" position. If the thermostat is unresponsive, locate your electrical panel and flip the dedicated breaker for the air conditioner to the "off" position. Leaving the system running in this state will rapidly lead to severe, irreversible damage to the most critical component of your cooling system.

Here is what our experts know is happening inside the cabinet when you notice these symptoms:

• The humming sound: This is the sound of the compressor motor receiving high voltage and attempting to run under extreme strain without proper cooling airflow.

• The dead fan: The motor itself may be perfectly fine, but it has been deprived of the initial electrical "jolt" it needs from the capacitor to overcome inertia and begin spinning.

• The rising heat: Without the fan pulling air through the condenser coils, the heat extracted from your home has nowhere to go, causing the internal temperature of the unit to skyrocket in a matter of minutes.

The Hidden Danger: Why You Must Shut Off Your Thermostat Immediately

In our years of providing cooling solutions in Miami, FL, we've seen firsthand why understanding the severe mechanical risks of ignoring a humming condenser is crucial for any homeowner. The humming noise you hear is not a benign electrical buzz; it is the sound of your compressor actively working to pump refrigerant through the system. The compressor is the heart of your air conditioner, and it operates under immense pressure and heat even under normal conditions.

Your outdoor unit relies entirely on the large condenser fan to dissipate that intense heat. As the compressor pressurizes the warm refrigerant gas coming from inside your house, that gas travels through the metal coils wrapping around the outside of the unit. The fan's sole job is to pull cooler outside air through those coils, extracting the heat and blowing it out the top of the cabinet. When the fan is dead, that heat transfer completely stops. The compressor continues to generate friction and heat, but the system is entirely suffocated.

Without the fan operating, the compressor will rapidly overheat. While modern systems have internal thermal overload switches designed to shut the compressor down if it gets too hot, relying on this safety mechanism is a massive gamble. Repeatedly tripping the thermal overload can cause it to fail, leading directly to a burned-out compressor.

The Cost of Waiting

A burned-out compressor is one of the most highly expensive HVAC failures a homeowner can experience. In many cases, especially with older systems, a dead compressor means replacing the entire outdoor condenser unit. Turning off the breaker or thermostat immediately is the absolute only way to protect the system and keep a relatively minor electrical repair from turning into a massive system replacement.

We know that turning off your air conditioning is the last thing you want to do during a July heatwave. However, protecting your equipment is paramount. Because our team at Air On Demand is known for fast emergency response times in Miami, shutting off your AC to save the compressor doesn't mean you will be left suffering for days in the heat. Our technicians prioritize these types of critical failures so you can get cooling restored safely and quickly. If you are experiencing this issue, turn the system off and schedule emergency AC repair right away.

• Bad Dual Run Capacitor — System Impact: Fan fails to start; compressor hums and overheats if left running. — Repair Complexity & Severity: Straightforward electrical replacement by a licensed professional. Prevents further damage if caught early.

• Burned-Out Compressor — System Impact: Entire system fails to cool; unit may trip breakers instantly upon startup. — Repair Complexity & Severity: Extremely severe. Requires major refrigerant evacuation, brazing, or full system replacement.

• Failed Fan Motor — System Impact: Fan blades will not turn even if the capacitor is functioning perfectly. — Repair Complexity & Severity: Moderate severity. Requires motor replacement and system balancing.

Understanding the Dual Run Capacitor's Role in Your AC Unit

To fully grasp why you are experiencing a compressor humming but fan dead scenario, you need to understand the technical function of the dual run capacitor. For many homeowners, this small component is a mystery, yet in our experience, it is responsible for the vast majority of sudden summer cooling failures.

A dual run capacitor is a small, cylindrical metal component located inside the electrical access panel of your outdoor condenser unit. It acts very much like a powerful, rechargeable battery. While your home's electrical grid provides a steady stream of voltage to the air conditioner, the heavy-duty motors inside the unit require a massive, instantaneous burst of energy to start moving. The capacitor stores electrical energy and delivers that high-voltage jolt to overcome the physical inertia of the motors.

The term "dual" refers to the fact that this single metal cylinder actually houses two separate capacitors in one casing. It sends two distinct electrical charges to two different components:

1. The Hermetic (Herm) Side: This side stores and delivers the electrical torque required to start and run the compressor (the hermetically sealed motor).

2. The Fan Side: This side stores and delivers the specific electrical charge needed to start and run the condenser fan motor.

Because these two sides operate independently within the same housing, our technicians frequently see situations where only one side fails while the other continues to function. In the classic "compressor humming but fan dead" situation, the fan side of the capacitor has lost its ability to hold a charge, while the compressor side is still successfully delivering voltage. This perfectly explains why your AC unit fan is not spinning even though the rest of the system is desperately trying to run.

The Physics of Failure: How Extreme Weather Destroys Capacitors

Capacitors do not last forever, and their lifespan is heavily dictated by the environment in which they operate. The primary enemy of a dual run capacitor is thermal stress, and understanding the environmental causes of failure helps explain why our dispatch board lights up with these breakdowns almost always on the hottest days of the year.

Inside the metal casing of a dual run capacitor is a specialized dielectric fluid or oil. This fluid is designed to insulate the tightly wound layers of metallic foil inside and help dissipate the heat generated by the continuous storing and releasing of high-voltage electricity. Under normal operating conditions, the fluid handles this thermal load perfectly well.

However, Miami's continuous extreme July heat forces AC systems to run almost non-stop, drastically accelerating wear and thermal stress on dual run capacitors. When the ambient outdoor temperature is scorching, the condenser unit struggles to shed heat. The internal temperature of the electrical panel rises significantly. As the system runs for hours on end to combat the July peak summer heat, the capacitor never gets a chance to cool down.

This continuous thermal stress causes a physical reaction inside the component. The extreme heat causes the internal dielectric fluid to literally boil and expand. Because the fluid is sealed inside a metal cylinder, the expanding gases have nowhere to go. The pressure builds until it physically deforms the metal casing. The flat top of the capacitor will bulge outward, pushing the electrical terminals up. A swollen, mushroom-shaped top on the capacitor is a definitive, visual sign that the component has failed and must be replaced.

The Anatomy of a Dual Run Capacitor Failure

Bridging the Gap: Diagnosing the Humming Noise

Connecting the auditory symptom you hear to the mechanical reality inside the cabinet is the first step in properly handling a cooling emergency. When you search for information on a compressor humming but fan dead, you are trying to understand what your equipment is telling you through sound.

The distinct, loud humming or buzzing noise coming from the outdoor unit is unmistakable once you know what to listen for. A healthy air conditioner produces a steady, rhythmic whirring sound—a combination of the fan blades slicing through the air and the smooth operation of the compressor motor. When the fan side of the capacitor fails, that smooth sound is replaced by a harsh, strained 60-hertz electrical hum. This is the sound of a heavy-duty motor locked in place, receiving voltage but unable to dissipate the resulting heat.

Differentiating between normal operational hums and the strained hum of an overheating compressor is critical. If you hear this noise and the fan is not spinning, the diagnosis is clear. However, capacitors rarely fail instantly without warning. They usually degrade slowly over time, losing their ability to store a full electrical charge (measured in microfarads) before they finally swell and fail completely.

This is exactly why regular inspections are so vital. During routine AC maintenance, our licensed technicians use a specialized multimeter to measure the exact microfarad reading of your dual run capacitor. If the reading drops below the manufacturer's specified tolerance range, we can replace the weakening component proactively. Catching a weak capacitor early completely prevents the stressful "dead fan" scenario and protects your compressor from ever experiencing that dangerous overheating cycle.

The High-Voltage Risk: Why Capacitor Replacement Is Never a DIY Job

When researching a compressor humming but fan dead, you may come across online videos or articles suggesting that replacing a dual run capacitor is a simple, inexpensive DIY fix. Based on our extensive field experience, we must provide a strict, authoritative safety warning: attempting to test or replace an air conditioning capacitor without a professional license is incredibly dangerous and potentially lethal.

HVAC industry electrical safety guidelines strictly classify dual run capacitors as high-voltage hazards. The very nature of a capacitor is to store electrical energy. This means that even long after you have pulled the main disconnect block or turned off the breaker to the condenser unit, the capacitor can still hold a massive, potentially lethal electrical charge. The power does not simply drain away when the system is turned off.

Critical Safety Warnings:

• Never use screwdrivers to discharge: Amateurs often attempt to "short out" or discharge a capacitor by laying a screwdriver across the terminals. This can cause a violent electrical arc, severe burns, eye injury from molten metal, and permanent damage to the surrounding electrical components.

• Never attempt to bypass the component: Trying to wire the system to run without the capacitor will instantly damage the motors and create a severe fire hazard.

• Never assume the power is completely off: Only a licensed professional with a calibrated multimeter can verify that a capacitor has been safely discharged.

Only licensed HVAC professionals, like our team here in Miami, FL, have the specialized diagnostic tools, insulated equipment, and proper electrical training to safely discharge, test, and replace a dual run capacitor. Risking your life, or risking thousands of dollars in damage to your compressor, is never worth attempting a DIY electrical repair.

Frequently Asked Questions About Dead AC Fans and Humming Compressors

Why is my AC fan not spinning but the compressor is running?

Your AC fan is not spinning while the compressor runs because the fan side of your dual run capacitor has likely failed. The capacitor acts as a battery that provides the initial high-voltage jolt needed to start the fan motor. When this specific side of the component loses its charge or swells from heat damage, the fan remains stationary while the compressor continues to receive power and hum.

Can I run my AC if the fan is not spinning?

No, you absolutely cannot run your AC if the condenser fan is not spinning. Running the system without the fan will cause the compressor to rapidly overheat and sustain permanent, irreversible damage. The fan is required to pull air across the coils and dissipate the intense heat generated by the compressor; without it, the system will suffocate and burn out.

How do I know if my AC capacitor is bad?

Signs of a bad AC capacitor include a humming outdoor unit with a dead fan, a visibly swollen or bulging metal casing, and the system struggling to start or constantly tripping the breaker. If you look at the capacitor (without touching it) and notice the flat top has pushed upward into a mushroom shape, the internal dielectric fluid has boiled and the component has definitively failed.

What does a humming AC compressor mean?

A humming AC compressor means the motor is receiving high-voltage electrical power and is actively trying to pump refrigerant, but it lacks the necessary cooling airflow from the condenser fan. This strained buzzing sound is a distress signal indicating that the compressor is working under extreme thermal stress and is at immediate risk of overheating if the system is not shut off.

Is it safe to push the fan blades with a stick to jumpstart it?

No, it is never safe to push the fan blades with a stick to jumpstart the motor. While this dangerous trick sometimes forces a motor to start if the capacitor is weak, it completely avoids fixing the root electrical problem and forces the system to run on compromised components. Doing this risks further electrical damage, physical injury, and eventual compressor failure.

How quickly can a humming compressor burn out?

Compressor damage can begin within minutes to hours of running without a functioning fan, especially under heavy thermal loads during peak summer heat. The internal temperature rises so rapidly without airflow that the internal wiring insulation can melt, leading to a catastrophic electrical short and a highly expensive total compressor failure.

Don't Risk Your Compressor: Get Fast Diagnostic Help Today

If you are dealing with a compressor humming but fan dead: recognizing a bad dual run capacitor is only the first step; taking immediate action is what saves your system. We cannot overstate the importance of your immediate response: keep the thermostat set to the "off" position until a professional arrives. Do not turn the system back on to test it or see if the fan magically starts spinning again.

Remind yourself that a simple, straightforward capacitor replacement by a licensed professional is vastly preferable to paying for a ruined, burned-out compressor. By keeping the power off, you are protecting the most valuable part of your air conditioning system. When you need to restore cooling safely and swiftly in Miami, FL, reach out to our local experts at Air On Demand. We have the specialized tools, the exact replacement parts, and the safety training required to get your fan spinning and your home comfortable again without putting your equipment at risk.

Triaging Midnight AC Failures in Kendall During Peak July Heat Waves placeholder-image  | Air On Demand
5 min read

Triaging Midnight AC Failures in Kendall During Peak July Heat Waves

Waking up sweating at 2 AM forces a tough choice: request an immediate emergency dispatch or wait until morning. Use this triage framework to protect your compressor from irreversible damage.

Waking Up to a Sweltering House: The 2 AM Cooling Crisis

Triaging midnight AC failures in Kendall during peak July heat waves is a nightmare no homeowner wants to face, but it happens all too often. At Air On Demand, our team typically fields dozens of these frantic early-morning calls every summer. You wake up at 2 AM covered in sweat, only to realize the familiar, steady hum of your cooling system is completely gone. The house already feels heavy with the stagnant, oppressive overnight humidity that defines our inland Florida summers. Your immediate thought is panic, followed closely by a stressful decision. Do you need to request a late-night emergency dispatch right this second, or is it safe to wait until the sun comes up? Making the wrong choice here doesn't just cost you sleep—it can cause irreversible damage to your expensive cooling equipment.

If you are dealing with a sudden cooling loss, scheduling proper AC repair as soon as possible is the safest way to restore your comfort and protect your home.

Assessing the Immediate Threat to Your HVAC Compressor

A sudden midnight AC failure rarely happens out of nowhere. In our years of servicing Miami-Dade systems, we find that the AC has often been struggling against intense thermal loads for hours before you finally wake up to a hot house. The biggest mistake homeowners make in this situation is assuming that if the system is still making noise, it is still actively trying to cool the house. In reality, an air conditioner that has stopped dropping the temperature but continues to run is usually actively damaging itself.

Your air conditioner relies on a delicate balance of electrical and mechanical components. At the heart of the system is the compressor, the heavy-duty motor responsible for pumping pressurized refrigerant between the indoor evaporator coil and the outdoor condenser. When a supporting component fails—whether it is a blown dual-run capacitor, a severely clogged filter, or a slow refrigerant leak—the compressor has to work twice as hard to compensate for the loss in efficiency. This leads to a dangerous condition known as short-cycling, where the system rapidly turns on and off, creating massive electrical strain and overheating the motor.

The Hidden Cost of Ignoring Warning Signs

Data from the Department of Energy consistently shows that prompt, proper intervention prevents premature HVAC replacement. We always recommend shutting down a struggling system immediately, because if you let it grind away in the dark, you risk burning out the compressor entirely. A burned-out compressor is not a simple fix; it often means replacing the entire outdoor unit. That is why your absolute priority at 2 AM is triage and damage control. You do not necessarily need an instant fix in the middle of the night, but you do need to stop the bleeding. By securing professional AC service to properly diagnose the root cause in the morning, you protect the most expensive parts of your cooling system from catastrophic, irreversible failure.

The 2 AM Triage Checklist: Safe Troubleshooting Steps

When you are faced with a midnight AC failure, your first job is to act as a first responder for your HVAC system. Before you decide whether to call our team or go back to sleep, we recommend performing a basic, safe diagnostic check. This checklist targets the most common, easily solvable issues our Air On Demand technicians see causing systems to shut down unexpectedly in the middle of the night.

1. Check the thermostat settings: It sounds incredibly simple, but always start here. Verify that the thermostat has not been accidentally bumped to "Heat" or "Off" by someone walking past in the dark. Check the screen to see if the batteries are dead. A blank digital screen often means the thermostat has lost low-voltage power entirely, which could point to a tripped breaker, a tripped float switch in the drain pan, or a blown fuse inside the air handler.

2. Inspect the circuit breaker panel: Go to your main electrical panel and look for the heavy-duty breaker labeled for your air conditioner. During intense summer electrical storms or grid fluctuations, a power surge can easily trip the AC switch to protect the system. If the breaker is sitting in the middle (neutral) position, firmly push it all the way to "Off," wait thirty seconds, then snap it back to "On." If it trips again immediately, stop. Do not reset it a second time, as this indicates a serious electrical short that requires one of our professional technicians.

3. Look at the indoor air filter: A severely clogged air filter acts like a brick wall, choking the airflow your system desperately needs to operate. When warm air cannot flow over the indoor evaporator coil, the temperature of the refrigerant drops rapidly, causing the condensation on the coil to freeze solid. Pull the filter out and hold it up to a lightbulb. If you cannot see light through it because it is caked in thick, gray dust, leave it out for the rest of the night to allow the system to breathe.

4. Listen for unusual sounds: Step outside to your condenser unit with a flashlight. Listen closely without touching the equipment. Are you hearing a loud hissing sound? Is there a harsh, metal-on-metal grinding noise? Do you hear a loud humming or buzzing noise, but the large fan blade at the top is completely stationary? These auditory clues are critical warning signs of mechanical failure that you can report to your Air On Demand technician.

5. Switch the thermostat to 'OFF': If none of the basic checks resolve the issue, you must protect the equipment. Go to your thermostat and switch the system from "Cool" to "Off." Leaving it on while it struggles will only cause further electrical damage and drive up your utility bill for zero cooling return.

Midnight AC Failure Triage Checklist

Red Flag Symptoms: When to Flip the Breaker Off Immediately

Some symptoms go beyond a simple nuisance and require immediate action to prevent severe property damage or electrical hazards. A pattern we see often in Kendall homes is homeowners ignoring these warning signs in hopes the system will correct itself. If you notice any of the following red flags, do not just turn off the thermostat—go directly to your electrical panel and flip the dedicated AC breaker to the "Off" position to completely sever the power supply.

• Loud hissing noises: A distinct hissing or bubbling sound coming from the indoor air handler or the outdoor unit usually points to a severe refrigerant leak. Refrigerant operates under incredibly high pressure, and a sudden leak can quickly drain the system, causing the compressor to overheat and fail within minutes as it tries to pump a non-existent gas.

• A frozen evaporator coil: If you open the closet or garage door where your air handler lives and see a thick layer of white ice coating the copper pipes, your system is frozen solid. This ice acts as a powerful insulator, preventing the system from absorbing heat from your home. Continuing to run it will push liquid refrigerant backward into the compressor, which is designed only to pump gas. This will destroy the motor valves instantly.

• A humming outdoor unit with stationary blades: If you walk outside and hear a loud electrical hum, but the AC unit fan not spinning, you likely have a failed dual-run capacitor or a seized fan motor bearing. The humming sound is the compressor trying to run without the fan to exhaust the heat it generates. Left unchecked, the compressor will rapidly overheat and trip its internal thermal overload switch.

• Burning electrical smells: The unmistakable scent of burning plastic, melting wire insulation, or ozone is an immediate safety hazard. This indicates a failing blower motor, a melting contactor switch, or a dangerous electrical short in the wiring harness. Shut the power off at the breaker immediately to eliminate the risk of an electrical fire spreading through your walls.

Why the 'Safe Shutoff' is Your Best Defense

Taking the proactive step to cut the power completely at the breaker is the smartest move a homeowner can make during a late-night breakdown. First, it stops all electrical strain on the system. Even if the thermostat is turned off, a failing high-voltage contactor switch outside can sometimes weld itself shut, sending continuous high voltage to the outdoor unit regardless of what the thermostat requests.

Second, if your system has a frozen evaporator coil, that ice has to melt entirely before any diagnostic work can begin. Our technicians cannot test refrigerant pressures, measure airflow, or inspect the aluminum fins while the coil is encased in a solid block of ice. By shutting the system down completely, you allow the warm ambient air to naturally thaw the coil overnight. By the time an Air On Demand professional arrives in the morning, the system will be ready for a proper, accurate repair, saving you hours of waiting.

Call Now vs. Wait Until Morning: Making the Right Call

Once you have triaged the immediate symptoms of a midnight AC failure, you face the main decision point: do you pick up the phone and request a 24-hour emergency dispatch, or do you wait for regular business hours? At Air On Demand, we believe in prioritizing what is best for your equipment. Our goal is to save your expensive compressor and help you avoid unnecessary after-hours service calls whenever possible, rather than making a quick dispatch at 2 AM.

Here is a reality of the HVAC industry we always share with our customers: supply houses are closed in the middle of the night. If your system requires a specialized OEM part, a technician will not be able to acquire it until 8 AM anyway. If you have safely powered down the system at the breaker and there is no immediate safety hazard, waiting until morning is almost always the smartest choice. Turning off the equipment protects the compressor, effectively turning what could have been a catastrophic replacement into a standard, routine repair.

To help you make the right call, use this comparison criteria to weigh your specific situation:

• Burning smells or visible sparks — Action Required: Call immediately (Emergency) — Why It Matters: Active electrical shorts pose a severe fire hazard to your home and family.

• Water leaking through ceiling/walls — Action Required: Call immediately (Emergency) — Why It Matters: A clogged drain line overflowing from the attic can cause extreme structural damage.

• System blowing warm, unconditioned air — Action Required: Shut off breaker, wait for morning — Why It Matters: Safely shutting it down prevents the compressor from overheating while you wait for regular hours.

• Frozen indoor/outdoor coils — Action Required: Shut off breaker, wait for morning — Why It Matters: The ice must melt completely before any technician can perform an accurate diagnostic or repair anyway.

If your situation falls into the "wait for morning" category, take a deep breath. You have done exactly what you need to do to protect your home and your investment. First thing in the morning, you can reach out for comprehensive Kendall AC repair services to get the system properly diagnosed by a fresh, fully equipped technician with full access to local supply houses.

Managing Indoor Temperatures While Waiting for Morning Dispatch

Deciding to wait until morning is the smart move, but it still leaves you with a practical problem: surviving the rest of the night in peak July heat. In our experience working through Miami's most oppressive heat waves, we know that without a functioning air conditioner to remove moisture (latent heat), the stagnant air inside your home will slowly begin to rise, making it difficult to sleep. Fortunately, there are actionable steps you can take to mitigate the heat and stay reasonably comfortable until our technicians arrive.

• Lock down the building envelope: Your instinct might be to open a window to catch a breeze, but in South Florida, this is usually a massive mistake. Opening windows invites heavy, moisture-laden air into the house, which makes the air feel much hotter than the actual temperature reading. Keep all windows and exterior doors tightly closed to trap whatever cooled, dehumidified air remains in the living space.

• Create a wind-chill effect: Stagnant air feels significantly hotter than moving air because it prevents sweat from evaporating off your skin. Turn on all ceiling fans in the bedrooms you are occupying, and set them to rotate counterclockwise (pushing air straight down). If you have portable oscillating or box fans, set them up to cross-ventilate the room. The moving air helps evaporate moisture, making you feel several degrees cooler even if the room temperature is slowly rising.

• Block the morning sun: As dawn approaches, solar heat gain becomes your biggest enemy. Before you go back to sleep, close all blinds, shades, and blackout curtains, particularly on the east-facing side of the house. Blocking the early morning sunlight prevents radiant heat from warming up the rooms before the dispatch team arrives to fix the system.

• Relocate to a lower floor: Basic physics dictates that heat rises. If you live in a multi-story home, the second floor will always heat up much faster than the ground floor. If possible, bring your pillows and blankets downstairs to the lowest level of the house. Staying hydrated with ice water will also help regulate your core body temperature through the night.

Frequently Asked Questions About After-Hours AC Failures

Should I turn off my AC if it stops cooling?

Yes, you should immediately turn off your AC if it stops blowing cold air. Allowing the system to run while it is struggling puts massive strain on the electrical components. Shutting it down prevents severe damage to the compressor and stops a minor issue from becoming a major repair.

Is a broken AC considered an emergency?

A broken AC is considered an emergency if it involves burning electrical smells, visible sparking, or severe water leaks that threaten your property. If the system simply stops cooling safely, it is usually best to turn off the power at the breaker and schedule a standard service call with our team for the next morning in Kendall.

Can AC repair wait until morning?

In most cases, AC repair can and should wait until morning. By turning off the system at the breaker, you protect the equipment from further damage overnight. Waiting for regular business hours helps you avoid premium after-hours dispatch calls while ensuring a fully equipped technician arrives to diagnose the problem.

What should I do if my AC breaks in extreme heat?

If your AC breaks during extreme heat, turn the system off immediately to prevent compressor burnout. Keep your windows and doors closed to trap the remaining cool air, turn on all ceiling fans to create a wind-chill effect, and stay hydrated while waiting for our professional repair team.

Will running a broken AC damage the compressor?

Running a broken AC will absolutely damage the compressor over time. When components like the fan motor or capacitor fail, the compressor works overtime to pump refrigerant, leading to overheating and short-cycling. A burned-out compressor is one of the most extensive repairs in HVAC, which is why a safe shutoff is critical.

Secure Your Morning Repair Slot and Protect Your Home

Navigating a midnight AC failure is stressful, but by safely shutting down the system at the breaker, you have already taken the most important step to protect your expensive equipment. You now have a clear, actionable checklist to prevent catastrophic compressor damage and the peace of mind knowing you can safely wait until morning. Do not let a late-night breakdown ruin your summer comfort. Reach out to the Air On Demand team as soon as the sun comes up to secure your spot on the schedule and get the reliable emergency AC repair in Kendall you need when triaging midnight AC failures in Kendall during peak July heat waves.

Evaluating Health Smart Filters for South Florida Humidity Management placeholder-image  | Air On Demand
5 min read

Evaluating Health Smart Filters for South Florida Humidity Management

The Myth of Thicker Filters: Why More Isn't Always Better for Your AC A common misconception among homeowners is that the thickest, most restrictive air filter available is the ultimate solution for a healthy home, but when evaluating Health Smart Filters for South Florida

The Myth of Thicker Filters: Why More Isn't Always Better for Your AC

A common misconception among homeowners is that the thickest, most restrictive air filter available is the ultimate solution for a healthy home, but when evaluating Health Smart Filters for South Florida humidity management, this assumption quickly falls apart. National hardware stores and online advice columns frequently push the idea that upgrading to a dense, heavily pleated filter will automatically purify your indoor air and eliminate dust. While these products are highly effective at capturing microscopic particles, our AC repair technicians at Air On Demand know firsthand that they introduce a significant, often hidden complication for your HVAC system's mechanical operation.

The concrete problem we see Miami homeowners face daily is that overly restrictive filters can severely choke off the return airflow to the air handler. When an air conditioner cannot pull enough air through the system, it fundamentally fails at its secondary, yet equally important job: dehumidifying the home. This leaves you at a difficult decision point. You must choose between the perceived indoor air quality benefits of a dense filter and maintaining the critical airflow required to protect your equipment and keep your living space comfortable.

The reality of high-MERV filtration:

• Airflow reduction: Thick filter media creates a physical wall that the blower motor must work harder to overcome.

• Moisture retention: Without adequate air passing over the cooling coils, humidity remains trapped in your living spaces.

• Equipment strain: The constant struggle to pull air through a dense barrier accelerates mechanical wear and tear.

For comprehensive guidance on keeping your home's air clean without damaging your equipment, exploring dedicated indoor air filtration solutions is a much safer path. Achieving excellent indoor air quality is entirely possible, but it requires understanding how your specific air conditioner interacts with the filter you place inside it.

Understanding Airflow Physics and Static Pressure

To understand why a seemingly harmless filter can cause so much trouble, you need to look at the physics of how air moves through a confined space. In the HVAC industry, resistance to airflow is measured as static pressure. You can think of static pressure much like human blood pressure; a certain amount is necessary for the system to function, but if the pressure climbs too high, the system is forced to overwork itself just to maintain basic circulation.

Standard fiberglass or basic pleated filters offer very little resistance, keeping static pressure low. However, when you install high-efficiency filters (typically rated MERV 13 or higher), the dense weave of synthetic fibers dramatically increases the resistance. This spike in static pressure can reduce the total system airflow by up to 20 percent. During July heavy cooling loads, when your system needs every cubic foot of air it can get to cool the house, this reduction forces the blower motor to strain continuously against a bottleneck of its own making. In our years of providing AC installation and repair, we've found this to be a leading cause of premature system failure.

How Your HVAC System Breathes

Your air conditioner operates on a closed loop of supply and return air. The volume of air pushed out of the supply vents must exactly match the volume of air pulled in through the return grilles. The blower motor sits in the middle of this process, acting as the heart of the system. It relies entirely on uninhibited airflow to function efficiently and keep its internal components cool.

When you place a restrictive barrier in the return duct, you starve the blower motor of the air it needs. The motor must either spin faster to compensate—drawing more electricity and generating excess heat—or it will fail to move enough air, causing a pressure imbalance throughout the ductwork. If you are interested in learning more about the specific ratings and materials that cause this resistance, understanding different types of air filters is a crucial next step.

The Impact of High-MERV Filters on HVAC Airflow

Why Extreme Humidity Changes the Rules for Filtration

Air conditioning performs two distinct functions simultaneously: sensible cooling and latent cooling. Sensible cooling is the process of dropping the actual temperature of the air, which is the number you see on your thermostat. Latent cooling is the process of removing moisture from the air. In dry climates, sensible cooling is the primary focus. However, the environmental reality of Miami FL / South Florida changes the rules entirely.

With South Florida's 80%+ average summer morning humidity, our team knows that latent cooling is arguably more important than sensible cooling. A properly functioning air conditioner processes gallons of water out of your indoor air every single day. As warm, humid air passes over the cold evaporator coil, the moisture condenses into water droplets and drains away. This process requires a constant, steady volume of air moving over the coil at a very specific speed.

The differences between cooling types:

• Sensible Cooling — Primary Function: Lowers the room temperature — Requirement for Success: Cold evaporator coil — Impact of Reduced Airflow: Rooms take longer to cool down, system runs longer.

• Latent Cooling — Primary Function: Removes airborne moisture — Requirement for Success: High volume of air passing over the coil — Impact of Reduced Airflow: Moisture remains in the air, creating a clammy, damp environment.

When a restrictive filter chokes the airflow, the air moves too slowly, or not enough air reaches the coil at all. The system might still drop the temperature (sensible cooling), but it loses its ability to extract large volumes of water (latent cooling). Paradoxically, trying to improve your air quality with a dense filter can actually worsen it by trapping moisture indoors, creating a damp environment where organic growth thrives. This is why generic, national filtration advice often fails spectacularly in extreme humidity environments like ours.

The Direct Danger to Your Blower Motor

The mechanical consequences of starving your HVAC system of air are severe, particularly during peak summer usage. The blower motor is designed to operate within a specific static pressure range. When a dense filter pushes the resistance beyond that designed capacity, the motor experiences immediate and continuous stress.

Modern variable-speed ECM (Electronically Commutated Motor) blowers are programmed to maintain a specific airflow volume regardless of resistance. If the filter restricts the air, the motor automatically ramps up its RPMs to pull harder. This increased exertion requires a higher electrical amp draw, which in turn generates significant excess heat within the motor housing. Because the motor relies on the very air it is pulling to cool itself, the reduced airflow creates a dangerous feedback loop of rising temperatures.

The progression of blower motor failure:

1. Initial restriction: The dense filter is installed, immediately reducing the volume of return air.

2. Compensation: The motor spins faster and works harder to overcome the new static pressure barrier.

3. Overheating: The combination of high amp draw and low cooling airflow causes the motor's internal temperature to spike.

4. Insulation degradation: The protective insulation around the motor's electrical windings begins to melt and break down.

5. Complete burnout: The motor shorts out and fails entirely, resulting in a costly replacement.

This process is vastly accelerated during July heavy cooling loads, where the system is already running near-constantly to combat the outside heat. Our AC repair team at Air On Demand regularly replaces burned-out motors that never got a chance to cool down between cycles. To prevent this type of catastrophic failure, keeping up with routine AC maintenance is vital, as a technician can measure your system's static pressure and ensure the motor is operating safely.

Frozen Evaporator Coils: A Surprising Side Effect of High-MERV Filters

One of the most alarming sights for a homeowner—and a frequent summer AC repair call we receive at Air On Demand—is finding their indoor air conditioning unit encased in a block of solid ice. While low refrigerant is a common culprit, restricted airflow caused by a high-MERV filter is an equally frequent cause of frozen evaporator coils. Understanding the chain reaction that leads to this freeze-up helps illustrate just how critical airflow is to your system's health.

The evaporator coil is filled with extremely cold liquid refrigerant. Its job is to absorb heat from the warm indoor air blowing across it. Under normal conditions, the constant flow of warm air keeps the coil's temperature just above the freezing point of water. However, when a thick filter chokes off that warm airflow, the refrigerant has no heat to absorb. As a result, the temperature of the evaporator coil plummets rapidly.

As the coil drops below 32 degrees Fahrenheit, the heavy South Florida condensation that normally forms and drips into the drain pan begins to freeze directly onto the metal fins. This creates a thin layer of frost. Ice acts as an insulator, further preventing the refrigerant from absorbing heat, which causes even more ice to form. Within a matter of hours, the entire coil becomes a solid block of ice, completely blocking whatever little airflow was left.

What to do if your system freezes:

• Turn the thermostat to OFF: Stop the cooling cycle immediately to prevent liquid refrigerant from flowing back to the compressor and destroying it.

• Turn the fan to ON: Force the blower motor to circulate unconditioned room air over the ice to help it melt faster.

• Check the filter: Remove the restrictive filter immediately. Often, simply swapping it for a standard flow filter resolves the underlying issue.

• Wait for a complete thaw: Never try to chip the ice away with a tool, as you will puncture the delicate refrigerant lines.

If you find yourself repeatedly dealing with airflow issues, consulting our professionals about the right air conditioner filters in Miami will save you from enduring a sweltering afternoon without cooling while you wait for the ice to melt.

Striking the Right Balance with Health Smart Filters

None of this means that you must abandon the goal of clean indoor air. Health Smart filters and other high-efficiency pleated options offer genuine, measurable benefits for capturing pet dander, pollen, mold spores, and fine particulate matter. The key is striking the right balance between filtration efficiency and mechanical safety.

Leveraging our local expertise at Air On Demand in balancing superior indoor air quality with safe, efficient HVAC airflow tailored for Miami's demanding climate means you don't have to guess which filter is safe. A professional evaluation of your ductwork and air handler by our team can determine the exact maximum MERV rating your specific system can handle without stressing the blower motor. Some modern systems are designed with oversized return ducts specifically to accommodate thicker filters, while older systems may only tolerate a MERV 8 rating.

Alternatives to Restrictive Return Filters

If your system cannot handle a dense 1-inch return filter, we typically recommend several highly effective alternatives that improve air quality without disrupting static pressure.

1. Media Filter Cabinets: These are installed directly into the ductwork next to the air handler. They use 4-inch or 5-inch thick filters. Because the surface area of the filter is massive, it can achieve a MERV 11 or 13 rating while actually offering less airflow resistance than a standard 1-inch pleated filter.

2. UV Germicidal Lights: Installed inside the coil cabinet, these lights neutralize mold spores, bacteria, and viruses without impeding airflow whatsoever.

3. Electronic Air Cleaners: These systems use an electrical charge to trap particles, providing excellent filtration with incredibly low static pressure drops.

For homes in Miami FL / South Florida where humidity control is non-negotiable, moving away from restrictive 1-inch filters and toward dedicated air cleaners and purifiers is our definitive recommendation for achieving pristine air without sacrificing comfort.

Frequently Asked Questions About Air Filters and Humidity

Do high MERV filters restrict airflow?

Yes, high-MERV filters significantly restrict airflow by creating a dense barrier of synthetic fibers that the HVAC blower motor must push through. While they are excellent at trapping microscopic particles, this resistance increases the system's static pressure. If the HVAC system is not designed to handle this increased pressure, total airflow can drop by up to 20 percent, leading to mechanical strain and poor cooling performance.

Can a thick filter freeze my AC?

A thick, restrictive filter is a leading cause of frozen air conditioning systems. By blocking the flow of warm return air, the filter prevents the evaporator coil from absorbing enough heat to stay above freezing. The coil's temperature plummets, causing the natural condensation from the humid air to freeze onto the metal fins, eventually encasing the entire unit in solid ice.

What is the best MERV rating for South Florida?

For most standard residential HVAC systems in South Florida, a MERV 8 filter offers the best balance between capturing common household dust and maintaining the critical airflow needed for dehumidification. Ratings of MERV 11 or 13 should generally only be used if the system features a 4-inch or 5-inch media cabinet designed to handle the increased resistance without choking the blower motor.

Do high MERV filters hurt your AC in humid climates?

High-MERV filters can severely hurt your AC in humid climates by crippling the system's latent cooling capacity. Because air conditioners require a steady, high volume of airflow to extract moisture from the air, the restriction caused by a high-MERV filter leaves humidity trapped indoors. Furthermore, the constant strain of pulling air through a dense filter during long summer cooling cycles frequently leads to premature blower motor burnout.

How does airflow impact indoor humidity levels?

Airflow directly dictates how much moisture your air conditioner can remove from your home. The system relies on a specific volume of warm, humid air passing over the cold evaporator coil to facilitate condensation. If airflow is too slow or restricted, the system will cool the room prematurely (satisfying the thermostat) before it has had enough time to extract the airborne moisture, resulting in a cold but clammy and damp indoor environment.

Optimizing Your Home's Air Quality and System Health

Ultimately, managing your indoor environment requires acknowledging the strict tradeoff between filter thickness and blower motor stress. While the appeal of hospital-grade air filtration is understandable, installing a highly restrictive filter without verifying your system's capabilities often leads to reduced dehumidification, frozen coils, and expensive motor failures.

For homeowners in Miami FL / South Florida, prioritizing unrestricted airflow is the most effective way to ensure your air conditioner can extract the heavy summer humidity. Before upgrading to a denser filter, we highly recommend scheduling a consultation with our Air On Demand experts. We can evaluate your system's static pressure and guide you toward AC installation and filtration solutions that clean your air without compromising your comfort or your equipment.

Matching Indoor Air Handlers with New Daikin Condensers: A Compatibility Breakdown placeholder-image  | Air On Demand
5 min read

Matching Indoor Air Handlers with New Daikin Condensers: A Compatibility Breakdown

Replacing just your outdoor AC unit might seem cost-effective, but mismatched equipment destroys humidity control. See why partial upgrades cause hidden performance bottlenecks.

The Temptation to Replace Just the Outside AC Unit

Is your outside unit completely dead, leaving you sweating out a brutal Miami summer afternoon while you wonder if you can just swap out the broken box in the yard? If you are researching matching indoor air handlers with new Daikin condensers: a compatibility breakdown is exactly what you need to make an informed, long-lasting decision. In the middle of a brutal July, homeowners want a fast fix. The immediate thought is often to upgrade the failed outdoor equipment while attempting to reuse the existing indoor unit to save on upfront costs.

For more details on complete air conditioning systems and professional AC replacement services, our team is ready to help you navigate these crucial upgrades.

At Air On Demand, the most common question our AC repair technicians hear during peak cooling season is whether it is possible to replace just the AC condenser. On paper, it seems like a straightforward swap. You have an older system inside, and you want to connect it to a brand-new, high-efficiency outdoor unit. However, the decision to pair new Daikin condensers vs. older R-410A air handlers creates a series of hidden performance bottlenecks.

While an installer might physically connect the two pieces of equipment, our team knows from years of field experience that the long-term climate demands of South Florida require a much more strategic approach. An air conditioning system is not a collection of independent parts; it is a synchronized cycle. Disrupting that cycle by mixing generations of technology forces the new equipment to work under immense strain, ultimately costing you more in energy bills and lost comfort than you saved on the initial AC installation.

The Physics of Mismatched HVAC Components

The Problem: When our AC installation team assesses these frankenstein systems, the core issue is clear: You have a brand-new, highly advanced outdoor condenser sitting in your yard, but inside your home, an older blower motor and evaporator coil are trying to keep up. This mismatch forces your new equipment to operate outside of its designed parameters.

The Cause: The indoor evaporator coil and the outdoor condenser are engineered to work as a perfectly synchronized pair. The outdoor unit compresses and pumps refrigerant, while the indoor unit absorbs heat and blows conditioned air through your ductwork. When you pair new Daikin condensers vs. older R-410A air handlers, the physical mechanics clash. Older, single-stage blower motors often fail to align with the precise cooling output of newer, variable-speed or multi-stage outdoor units. The older indoor coil simply cannot process the refrigerant at the speed and pressure the new outdoor unit demands.

The Solution: Installing a complete, matched system ensures that the indoor and outdoor components share the same communication protocols, refrigerant flow rates, and airflow capacities. Upgrading to matched Daikin equipment allows the entire system to run seamlessly, reducing wear and tear on the compressor.

Refrigerant Flow and Coil Sizing Limitations

In our daily AC repair calls across Miami, we see exactly what happens when the indoor and outdoor components do not match. To understand why this matters, we have to look closely at the indoor coil:

• Inadequate surface area: Older coils lack the physical surface area required for modern, high-efficiency heat transfer. The new condenser pumps refrigerant faster than the old coil can absorb the heat from your home.

• Restricted airflow: A mismatched metering device (the valve that controls refrigerant entering the indoor coil) can lead to severe pressure imbalances.

• Frozen coils: Because the old indoor unit cannot move air fast enough across the cold coil, condensation freezes. This ice buildup blocks airflow entirely and forces the system to shut down.

• Compressor strain: When the indoor unit bottlenecks the process, liquid refrigerant can flow backward into the outdoor compressor—a condition called "liquid slugging" that can destroy a new compressor in a matter of months.

Latent Cooling vs. Sensible Cooling in Extreme Humidity

As Miami locals, the Air On Demand team knows that the temperature on the thermostat is only half the story. The other half is the humidity. Miami averages over 70% relative humidity during the summer months. Because of this, an air conditioner or heat pump in our region acts primarily as a heavy-duty dehumidifier.

To understand how a mismatched system fails in this environment, you need to know the difference between two types of cooling:

• Sensible cooling: This is the process of dropping the actual temperature in the room. You set the thermostat to 72 degrees, and the system blows cold air until the room hits 72 degrees.

• Latent cooling: This is the process of removing moisture from the air. As warm, humid air passes over the cold indoor coil, the moisture condenses into water and drains away.

During Miami's brutal July heat and high humidity, we frequently see mismatched systems successfully drop the temperature (sensible cooling), but fail miserably at latent cooling. This creates what our technicians call the "cold but clammy" effect. The new outdoor unit is so powerful that it cools the house down rapidly. The thermostat registers the target temperature and shuts the system off before the indoor coil has had enough time to extract the humidity from the air.

Proper dehumidification requires perfectly matched blower speeds. A matched Daikin system will run longer, slower cycles, gently moving air across the coil to wring out the moisture without turning your living room into a freezing, damp cave. Keeping an old indoor unit guarantees short cycling, leaving your home feeling sticky even when the thermostat says it is cool.

The Hidden Cost of SEER Rating Drops

When you purchase a new air conditioner, you are likely paying attention to the SEER2 (Seasonal Energy Efficiency Ratio) rating. This number tells you how efficiently the unit uses electricity to cool your home. However, a pattern we see often is homeowners not realizing that the SEER rating printed on the outdoor unit is not guaranteed—it is entirely dependent on the indoor equipment it is paired with.

This is governed by the Air-Conditioning, Heating, and Refrigeration Institute (AHRI). AHRI certification requires matched indoor and outdoor units to achieve the stated SEER2 ratings. If you buy a premium 18-SEER Daikin condenser but connect it to a 10-year-old indoor unit, you are not getting 18-SEER performance.

In fact, pairing new Daikin condensers vs. older R-410A air handlers can reduce overall cooling efficiency by up to 30%. The mismatch forces the system into longer, harder cycles under heavy summer load to compensate for the poor airflow. The outdoor compressor has to push harder against the restrictive indoor coil, drawing significantly more amperage.

This efficiency loss translates directly into higher energy consumption during the peak cooling months. You might have saved money by skipping the replacement of your indoor air handlers, but you will pay that difference back to the utility company through inflated energy bills month after month. A high-efficiency outdoor unit is only as efficient as the indoor coil allows it to be.

Manufacturer Warranties and AHRI Compliance

Beyond comfort and energy bills, there is a critical administrative reason to avoid mixing and matching HVAC components: warranty protection. Modern air conditioning systems are significant investments, and manufacturers provide long-term warranties to protect that investment. However, those warranties come with strict conditions.

In our experience managing manufacturer warranties, here is how keeping an old indoor unit jeopardizes the protection on your new Daikin condenser:

1. The AHRI Match Requirement: Daikin's specific warranty stipulations often require the installation of a complete, AHRI-certified system. The manufacturer needs proof that the outdoor unit is operating under the exact conditions it was engineered for.

2. Registration Denials: When a contractor registers your new equipment, they must provide the model and serial numbers for both the indoor and outdoor units. If the system is not a recognized, certified match, the manufacturer may downgrade the premium 10-year or 12-year warranty to a basic 5-year parts warranty.

3. Premature Failure Investigations: If your new compressor fails after two years, the manufacturer will ask for diagnostic data. If they determine that the failure was caused by liquid slugging or high head pressure due to a restrictive, older indoor coil, they can deny the warranty claim entirely. You would be left covering the cost of a new compressor out of pocket.

4. The Value of Specialized Installation: As a specialized installer of Daikin equipment in Miami, Air On Demand ensures homeowners get perfectly matched systems. We handle the load calculations, the AHRI matching, and the warranty registration so you have total peace of mind knowing your investment is fully protected.

When you weigh the cost of a denied warranty claim against the cost of upgrading the indoor unit, the full system replacement is the safest financial choice.

Side-by-Side Comparison: Partial vs. Full System Replacement

To make the best decision for your home, it helps to look at the facts side by side. If you need more tips for replacing a central air conditioner, reviewing the direct tradeoffs is the best place to start.

• Upfront Investment — Partial Replacement (Condenser Only): Lower initial cost, as you are only paying for the outdoor unit and partial labor. — Full System Replacement (Matched System): Higher initial cost, covering both indoor and outdoor units, plus comprehensive installation.

• Energy Consumption — Partial Replacement (Condenser Only): High. Mismatched components reduce efficiency by up to 30%, causing spikes in utility bills. — Full System Replacement (Matched System): Low. The system operates exactly at its rated SEER2 efficiency, minimizing electrical draw.

• Dehumidification — Partial Replacement (Condenser Only): Poor. Fast, short cycles fail to remove moisture, leading to a "cold but clammy" home. — Full System Replacement (Matched System): Excellent. Synchronized blower speeds extract moisture efficiently during Miami's high-humidity summers.

• Warranty Validity — Partial Replacement (Condenser Only): At risk. Manufacturers may downgrade or void warranties if the system is not AHRI-certified. — Full System Replacement (Matched System): Fully protected. A matched system guarantees full manufacturer parts and compressor warranties.

• System Reliability — Partial Replacement (Condenser Only): Low. The new outdoor unit works against the old indoor coil, increasing wear and tear. — Full System Replacement (Matched System): High. Components are engineered to communicate and function together seamlessly.

The Hidden Costs of Mismatched AC Components

Frequently Asked Questions About AC Component Matching

Can I replace just my AC condenser?

Our team highly discourages replacing just the AC condenser while leaving an old indoor unit in place. While a technician might physically connect a new outdoor unit to an old indoor coil, the mismatch in technology and refrigerant flow will severely bottleneck the system. This leads to higher energy bills, poor humidity control, and a high risk of premature compressor failure.

Can you replace just the outside AC unit?

While you physically can replace just the outside AC unit, doing so usually voids the manufacturer's warranty and ruins the system's efficiency. The outdoor condenser and indoor evaporator coil are engineered to operate as a matched pair. Mixing a new outdoor unit with an old indoor unit forces the new equipment to work much harder to cool your home, drastically shortening its lifespan.

Do I have to replace my indoor unit when I replace my outside unit?

Yes, replacing the indoor unit at the same time as the outside unit is the only way to guarantee your system operates correctly. HVAC manufacturers design their equipment to meet specific AHRI efficiency ratings, which are only valid when the indoor and outdoor components match. Keeping an old indoor unit will cost you more in long-term repairs and inflated energy bills than a full system replacement would.

Will a new Daikin condenser work with an old R-410A air handler?

No, in our extensive experience with AC installations, pairing new Daikin condensers vs. older R-410A air handlers is a recipe for chronic performance issues. Even if both systems use R-410A refrigerant, the older indoor coil lacks the surface area and proper metering devices to handle the advanced refrigerant flow from a modern Daikin compressor. This mismatch often leads to frozen indoor coils and severe compressor strain.

How does a mismatched HVAC system affect humidity control in Miami?

A mismatched HVAC system ruins humidity control because it cannot properly balance sensible cooling (dropping the temperature) with latent cooling (removing moisture). The powerful new outdoor unit will cool the house too quickly, shutting off before the older indoor blower has had time to extract moisture from the air. This leaves your home feeling uncomfortably cold and sticky.

Does keeping an old air handler void my Daikin warranty?

Yes, keeping an old air handler can easily void or downgrade your Daikin warranty. Premium manufacturer warranties require the installation of a complete, AHRI-certified matched system. If your new condenser fails because it was strained by an incompatible, older indoor unit, the manufacturer will likely deny the warranty claim, leaving you responsible for expensive repairs.

Making the Right Upgrade Decision for Your Home

Navigating an unexpected air conditioning failure is stressful, especially during Miami's high-humidity summers. At Air On Demand, we understand the urge to cut corners by swapping only the outdoor unit, but the physics of HVAC technology tell a different story. A definitive, technically sound approach to HVAC replacement is the only way to save energy and prevent chronic humidity issues in your home.

The criteria for a full system replacement heavily outweigh the short-term appeal of a condenser-only swap. By matching your new outdoor unit with the correct indoor air handler, you protect your warranty, ensure maximum SEER efficiency, and guarantee that your home stays crisp and dry, no matter how brutal the July heat gets outside. If you are ready to explore AHRI-matched options that will keep your home comfortable for years to come, we are here to walk you through the best solutions for your specific needs.

Diagnosing High-Pressure Hissing Sounds in Peak Summer AC Operation placeholder-image  | Air On Demand
5 min read

Diagnosing High-Pressure Hissing Sounds in Peak Summer AC Operation

A loud hiss from your outdoor unit during extreme July heat forces a quick decision. Find out whether to hit the kill switch or let your system keep running.

Hearing an AC Hissing Sound? What to Do When Summer Heat Pushes Your System to the Limit

When your house is rapidly heating up in July, Diagnosing High-Pressure Hissing Sounds in Peak Summer AC Operation becomes an urgent priority, especially since that loud ac hissing sound coming from your outdoor unit is impossible to ignore. A strange noise from your cooling equipment is always stressful, but when the afternoon temperature climbs past 95 degrees, the stakes feel significantly higher. You are immediately faced with a critical decision point: do you shut the system down at the thermostat to prevent further mechanical damage, or do you let it continue running in hopes that the noise is just a minor operational quirk? While not every hiss means your system is doomed, the immense strain of extreme July heat drastically elevates the risk of high-pressure refrigerant blowouts.

For professional air conditioning services and reliable AC repair in Miami, our dedicated local team is ready to restore your comfort.

During the peak of summer, your air conditioner is working harder than at any other time of the year. In our years of keeping Miami homes cool, our team at Air On Demand has seen firsthand how extreme heat pushes physical components to their absolute engineering limits. The compressor runs for longer cycles, internal temperatures soar, and the system bears immense strain. Under these grueling conditions, a hissing noise is often the very first auditory warning sign that something within the pressurized refrigerant cycle has been compromised. Ignoring this symptom while the system continues to battle extreme ambient heat can quickly turn a repairable leak into a catastrophic total system failure.

Properly diagnosing the root cause of the sound requires a deep understanding of thermodynamics and high-pressure mechanics. Homeowners need to know how to identify the immediate danger signs so they can safely power down their equipment before the compressor burns out completely. Understanding the difference between normal pressure equalization and an active, dangerous leak is the first step in protecting your investment.

The Kill Switch Decision Matrix: Signs Your AC Hissing Sound is a Dangerous Leak

When you hear a loud hissing noise coming from your air conditioner, your first priority is determining if the system is actively venting refrigerant. Operating an air conditioner without the proper refrigerant charge will cause the compressor to overheat, seize, and permanently fail. To help you make an informed decision quickly, we use a specific diagnostic checklist. If you notice any of the following symptoms, treat the situation as an emergency, turn off your thermostat immediately, and contact a professional for emergency AC repair.

• The Post-Cycle Hiss Test: Pay close attention to what happens when the cooling cycle ends. If the hissing sound continues loudly for more than a few minutes after the outdoor unit completely shuts off, you are likely dealing with an active physical leak. The pressure is escaping through a crack or hole in the copper lines.

• Chemical or Sweet Odors: Refrigerant gas is mostly odorless, but the compressor oil that travels alongside it is not. If you detect a strangely sweet, chloroform-like, or harsh chemical smell near the outdoor condenser or blowing through your indoor vents, the system is actively venting its lifeblood into the air.

• Warm Air Blowing from Vents: Place your hand over a supply register while the system is running and hissing. If the air feels room temperature or distinctly warm, the system has already lost a significant portion of its high-pressure charge and can no longer absorb heat from your home.

• Visible Bubbling or Hissing at the Coil: If you safely look at the outdoor condenser coil and see bubbling, oily residue, or a localized spot where the hiss is originating, a brazed joint or copper tube has ruptured under the immense summer pressure.

• Ice Formation on the Refrigerant Lines: Counterintuitively, a lack of refrigerant causes the indoor evaporator coil to drop below freezing. If you see ice building up on the insulated copper line running outside, combined with a hissing sound, the system is starved for refrigerant.

The quick fix: If your system exhibits any of these critical warning signs, do not wait. Switch your thermostat to the "OFF" position immediately. Continuing to run the system will force the compressor to pull a vacuum, drawing in moisture and non-condensable gases that will destroy the internal valves.

The Kill Switch Decision Matrix: When to Turn Off a Hissing AC

Normal TXV Equalization vs. Active Refrigerant Venting

Not every hiss coming from your HVAC system is a cause for panic. In fact, certain types of hissing sounds are a perfectly normal part of the refrigeration cycle. The key is understanding the difference between the intentional movement of gas and an unintentional rupture. This distinction often centers around a critical component called the Thermostatic Expansion Valve, or TXV.

The Role of the Thermostatic Expansion Valve

The TXV is responsible for regulating the exact amount of liquid refrigerant that flows into your indoor evaporator coil. It acts as a strict gatekeeper, taking high-pressure, warm liquid from the outdoor unit and forcing it through a tiny microscopic orifice. As the liquid squeezes through this valve, it experiences a massive pressure drop, turning into a low-pressure, cold mist. This process is what allows the refrigerant to absorb heat from your indoor air.

When your air conditioner finishes a cooling cycle and shuts off, the high-pressure side of the system and the low-pressure side are temporarily unbalanced. The system naturally wants to equalize. As the remaining high-pressure refrigerant slowly bleeds through the TXV to balance the system, it creates a distinct, brief hissing or gurgling sound. This is known as pressure equalization.

When Equalization Turns into Venting

Normal equalization hissing is brief, predictable, and harmless. However, when a copper line or internal valve fails, the sound changes dramatically. Active refrigerant venting is forceful, continuous, and highly destructive. Knowing how to tell the difference is a crucial part of diagnosing unusual AC noise complaints.

• Duration of Sound — Normal TXV Equalization: Lasts 10 to 60 seconds after shutoff, then fades to silence. — Dangerous Refrigerant Leak: Continuous, lasting minutes or hours until the system is entirely empty.

• Volume Level — Normal TXV Equalization: Faint, subtle hiss or light gurgling sound near the indoor unit. — Dangerous Refrigerant Leak: Loud, aggressive hiss resembling a punctured car tire.

• Cooling Performance — Normal TXV Equalization: System cools the house perfectly to the thermostat set point. — Dangerous Refrigerant Leak: System struggles to cool, runs constantly, and blows warm air.

• Accompanying Odors — Normal TXV Equalization: Completely odorless operation. — Dangerous Refrigerant Leak: Noticeable sweet, oily, or chemical smell near the equipment.

If your system's sound aligns with the right column of the table above, the time for observation has passed. The system is actively losing its vital charge, and immediate professional intervention is required to locate and seal the breach.

How Extreme Heat Spikes Internal Refrigerant Pressures

To fully grasp why high-pressure blowouts happen, it is helpful to understand the basic physics of modern air conditioning systems under heavy load. The refrigerant flowing through your copper lines is highly reactive to temperature changes. In fact, temperature and pressure are directly linked in a closed refrigeration loop. When the temperature outside rises, the internal pressure of your system rises right along with it.

The Physics of R-410A Under Heavy Load

Modern residential air conditioners primarily use a refrigerant called R-410A (often recognized by the brand name Puron). While this refrigerant is vastly superior for the environment compared to older, phased-out chemicals like R-22, it operates at significantly higher baseline pressures. On a mild spring day, the high-pressure side of an R-410A system might sit comfortably around 250 to 300 pounds per square inch (psi).

However, during extreme July heat, the dynamic changes completely. When ambient temperatures reach 95 degrees or higher, the outdoor condenser coil struggles to reject the heat it absorbed from inside your house. Because the outside air is already so hot, the heat transfer process becomes highly inefficient. To compensate, the compressor must work harder, compressing the gas even tighter to raise its temperature above the outdoor ambient air.

The Breaking Point for Weakened Components

Under these grueling summer conditions, compressors run at 100% duty cycles, and internal high-side pressures can easily exceed 400 psi. At these extreme operational limits, the physical stress on the copper tubing, the brazed joints, and the internal valves is immense. A microscopic weakness in a copper elbow that held perfectly fine in April can suddenly rupture under the 400+ psi strain in July. When that pressurized gas violently escapes through the new rupture, it creates the loud hissing sound that catches your attention.

Running a compromised system under these conditions is incredibly dangerous for the equipment. As the refrigerant leaks out, the compressor loses its primary source of cooling. It will continue to pump frantically, overheating rapidly until the internal windings short out or the mechanical pistons seize entirely, turning a repairable leak into a total system replacement.

The Hidden Threat of Coastal Salt Air on Condenser Coils

While extreme heat provides the pressure necessary to cause a blowout, the underlying weakness in the copper lines is often caused by environmental factors specific to the local geography. In coastal regions like Miami FL, outdoor HVAC equipment faces an invisible, relentless enemy: salt air. The unique combination of high humidity, extreme summer heat, and continuous exposure to airborne salt creates the perfect storm for accelerated metal degradation.

The Mechanics of Salt Air Corrosion

When the ocean breeze carries microscopic salt particles inland, they inevitably settle on the aluminum fins and copper tubing of your outdoor condenser coil. In our decades of serving Miami FL, our team at Air On Demand has found that because salt is highly hygroscopic, it attracts and holds moisture from the humid air. When salt and water mix on the surface of dissimilar metals (like copper and aluminum), it triggers a rapid electrochemical reaction known as galvanic corrosion.

Over time, this corrosion literally eats away at the molecular structure of the copper tubing. It does not usually create large, obvious holes. Instead, it creates microscopic, labyrinth-like tunnels through the metal, commonly referred to as pinhole leaks. The copper wall becomes paper-thin in these specific spots. To the naked eye, the coil might just look a little dull or lightly oxidized, but structurally, it has been severely compromised.

Preventing Blowouts with Routine Care

When the extreme heat of summer arrives and internal pressures spike past 400 psi, those paper-thin, corroded spots simply cannot hold the force. They burst open, resulting in a sudden, loud hissing sound and a rapid loss of cooling capacity. Because coastal environments are so punishing on outdoor equipment, waiting for a breakdown is a costly strategy.

Consistent, professional routine AC maintenance is the only effective way to combat this hidden threat. During a proper maintenance visit, technicians apply specialized, non-acidic coil cleaners that neutralize salt deposits and wash away corrosive buildup. They also inspect the integrity of the copper lines, catching early signs of pitting and oxidation before the stress of summer heat turns a microscopic weak point into a catastrophic high-pressure blowout.

Why High-Pressure Diagnostics Require Licensed Professional Tools

When a homeowner hears a hissing noise and suspects a leak, the temptation to search for a quick DIY fix is strong. Hardware stores sell cheap cans of "refrigerant recharge" with attached gauges, promising an easy solution. However, attempting to diagnose or repair a high-pressure HVAC system without professional training and specialized tools is not just ineffective—it is highly dangerous and often illegal.

The Dangers of Handling High-Pressure Systems

Checking refrigerant levels and pinpointing high-pressure leaks requires the use of specialized manifold gauges. These precision instruments connect directly to the service valves on your outdoor unit. Connecting and disconnecting these hoses to a system operating at 400+ psi requires specific techniques to prevent a sudden release of liquid refrigerant. If high-pressure liquid R-410A contacts human skin, it instantly boils, drawing massive amounts of heat away from the tissue and causing severe, instantaneous frostbite.

Furthermore, simply dumping more refrigerant into a hissing system is a guaranteed recipe for disaster. If you overcharge the system, the liquid refrigerant can flow backward into the compressor (a condition known as liquid slugging), destroying the internal valves instantly. A hissing sound means there is a physical hole; adding more gas without finding and brazing the hole shut simply wastes money and vents more chemicals into the atmosphere.

Strict EPA Guidelines and Local Expertise

Because refrigerants have a significant impact on the environment, the federal government strictly regulates their use. Under EPA Section 608 guidelines, it is a violation of federal law for anyone other than a certified, licensed technician to handle, recover, or recharge regulated refrigerants. Professionals use electronic sniffer tools, ultrasonic leak detectors, and ultraviolet dye to safely isolate the exact location of the hiss without risking further damage to the compressor.

Relying on trusted local experts in Miami FL ensures that your system is diagnosed safely and legally. A certified technician will safely recover any remaining refrigerant, braze the leak shut with silver solder under a nitrogen purge, pressure-test the repair, and pull a deep vacuum to remove all moisture before carefully weighing in the exact factory-specified charge.

Frequently Asked Questions About AC Hissing Noises

When extreme heat pushes systems to their limits, homeowners frequently search for answers to understand what their equipment is doing. Below are the most common questions we receive regarding hissing noises, with direct answers to help you determine your next steps.

Why is my AC making a hissing noise?

It is usually either normal pressure equalization in the expansion valve or a physical leak in the refrigerant lines. If the sound is brief and happens right after the system turns off, it is likely just the internal pressures balancing out. However, if the hiss is loud, continuous, and accompanied by a loss of cooling power, you are almost certainly dealing with a ruptured copper line or failing valve.

Should I turn off my AC if it makes a hissing noise when turned on?

Yes, if the hiss is loud, continuous, or accompanied by warm air from your vents, turn it off immediately to protect the compressor. Continuing to run the system while it lacks refrigerant will cause the compressor motor to overheat and eventually seize. Shutting off the power at the thermostat is the safest way to prevent a relatively minor leak repair from turning into a total system replacement.

How can you tell if an AC hissing sound is a refrigerant leak?

A refrigerant leak will typically hiss continuously even after the system cycles off and may produce a sweet, chemical odor. You will also notice a rapid decline in cooling performance, with the air coming out of your vents feeling lukewarm rather than crisp and cold. In severe cases, you may even see bubbling oil or frost accumulating on the larger copper line outside.

Can a hissing AC unit explode?

While rare, extreme high pressure combined with a failing compressor can cause dangerous ruptures; professional diagnosis is mandatory. Modern systems have internal pressure relief valves designed to prevent catastrophic explosions, but if those safety mechanisms fail during extreme summer heat, the compressor casing can violently vent. Never approach a violently hissing, shaking outdoor unit—cut the power at the breaker panel instead.

Why does my AC hiss for a few seconds when it shuts off?

This is normal pressure equalization as the refrigerant balances between the high and low sides of the system. The thermostatic expansion valve (TXV) slowly allows the high-pressure liquid to bleed into the low-pressure evaporator coil until the system is at a state of rest. As long as the sound fades away within a minute and your home remains cool, this is a sign of normal, healthy operation.

Safely Resolve Your AC Hissing Sound Before the Compressor Fails

Dealing with a loud ac hissing sound during the peak of summer is undeniably stressful, but you now have the knowledge to assess the situation safely. By applying the kill switch decision matrix, you can confidently distinguish between the harmless sound of normal pressure equalization and the urgent warning signs of a dangerous refrigerant leak. Remember that ignoring a continuous hiss during severe heat will inevitably lead to an overheated, permanently damaged compressor.

When the temperature spikes and your system is pushed to its absolute limits, do not take chances with DIY fixes or wishful thinking. Protect your home's comfort and your equipment's lifespan by trusting licensed professionals to properly locate, isolate, and repair high-pressure leaks. If your system is struggling to keep up and making unusual noises, reach out to our team for expert AC repair in Miami today, and let us restore your peace of mind safely and efficiently.

Why Is My AC Blowing Warm Air? The Hidden Link Between High Humidity and Float Switches placeholder-image  | Air On Demand
5 min read

Why Is My AC Blowing Warm Air? The Hidden Link Between High Humidity and Float Switches

When your AC blows warm air, a tripped float switch is often to blame. Apply these home maintenance tips and troubleshooting to decide when to call a pro.

When Your Cooling System Suddenly Stops Working

You walk inside expecting relief from the heat, but instead, you realize the vents are blowing warm air, and your house is getting hotter by the minute. When you start searching for home maintenance tips and troubleshooting, our technicians at Air On Demand suggest the first step is figuring out if this unexpected shutdown is a minor hiccup or a major mechanical breakdown. The immediate discomfort is frustrating, but the underlying cause might not be as catastrophic as a failed compressor.

During peak summer humidity, air conditioning systems are pushed to their absolute limits. Most homeowners immediately assume their unit is out of refrigerant or that the motor has died. However, we consistently find that the true culprit is often a built-in safety mechanism reacting to a clogged drain line. Understanding this critical decision point—distinguishing between a simple water backup and a complex system failure—can save you time, money, and unnecessary stress.

If you need immediate help diagnosing the issue, professional AC repair can quickly identify the root cause and restore your home's comfort. For those who want to understand exactly what is happening behind the walls, the answer lies in how your cooling system manages moisture.

The Hidden Connection Between Condensation and Cooling Performance

To understand why your air conditioner is blowing warm air, you first have to understand what it actually does. Air conditioners do much more than just pump cold air into a room; they actively extract heat and moisture from your indoor environment. This dehumidification process is what makes your home feel crisp and comfortable rather than damp and sticky.

According to Department of Energy data, a standard residential air conditioning system can produce between 5 to 20 gallons of condensation per day, depending on the indoor humidity levels and the size of the unit. That is a massive volume of water that your system must safely channel out of your home every single day. As warm indoor air passes over the freezing cold evaporator coils, the moisture in the air condenses into water droplets, much like a cold glass of water sweating on a hot afternoon.

In our years of servicing Miami, we have seen firsthand how our extreme peak-summer heat and high relative humidity force AC units to extract significantly more moisture than in drier climates. This constant, heavy moisture removal heavily taxes the condensate drainage system. Managing this continuous flow of water is just as critical to the system's ability to cool your home as the refrigerant itself. When the system is running non-stop during peak summer humidity, the drain line is working at maximum capacity, creating the perfect storm for blockages.

How Algae and Debris Choke the Condensate Drain Line

When an air conditioner fails due to a drainage issue, it is rarely a sudden event. It is the result of a predictable biological and mechanical process. The condensate drain line is typically a narrow PVC pipe that carries water from the indoor unit to the outside of your home. Because this pipe is constantly wet, dark, and enclosed, it creates the ideal breeding ground for biological growth.

The Problem: Sludge Formation

As the air conditioner pulls moisture from the air, it also pulls in microscopic airborne dust, dirt, and biological particulates. Even with a high-quality air filter, some of these particles make it to the wet evaporator coil and wash down into the drain pan. When this organic debris mixes with constant moisture during peak summer humidity, algae begins to thrive inside the PVC pipe.

The Cause: A Narrowing Pathway

Over time, this combination of algae and dirt forms a thick, gelatinous sludge. The sludge clings to the inner walls of the drain line, slowly narrowing the pathway for the water to escape. You might not notice any issues while the line is only partially blocked. The system continues to drain, just at a slower rate. However, as the sludge accumulates, it eventually creates a complete bottleneck, stopping the flow of water entirely.

The Mechanical Reality

Our team regularly sees this progression from a slow-draining line to a complete blockage in high-moisture environments. It does not necessarily mean your air conditioner is broken or failing. It simply means the drainage system requires professional intervention to clear the biological buildup. Regular attention through routine AC maintenance is the most effective way to prevent this sludge from forming in the first place.

The Float Switch: Your Air Conditioner's Vital Safety Mechanism

When the condensate drain line becomes completely blocked, the 5 to 20 gallons of water your system produces daily has nowhere to go. It begins to back up into the indoor condensate drain pan. Without a failsafe, this water would quickly overflow, causing catastrophic water damage to your ceilings, floors, and drywall. This is where the float switch comes into play.

A float switch is a small, standard HVAC safety device located inside or attached to the side of the condensate drain pan. Its primary purpose is to monitor the water level. The mechanical trigger is simple but highly effective: as water backs up from the clogged drain, the rising water level lifts a small buoyant float. Once the float reaches a certain height, it breaks the low-voltage electrical circuit that powers the system.

If you are wondering what to do when your HVAC breaks down unexpectedly, our team's first piece of advice is to realize that a tripped float switch means your safety system is actually working exactly as designed. It is sacrificing your immediate comfort to protect your home from severe water damage.

Why the Vents Still Blow Warm Air

The most confusing part of a tripped float switch for many homeowners is that the system doesn't always shut down completely. To understand why the vents are blowing warm air, you have to look at how the switch is wired.

In most residential setups, the float switch is wired specifically to shut down the outdoor compressor—the part of the system responsible for cooling the refrigerant. However, it often leaves the indoor blower fan running. Because the compressor is off, no heat is being removed from the refrigerant. The indoor fan continues to circulate air over a warm coil, pulling unconditioned, humid air from your home and pushing it right back out through the vents. This exact mechanical relationship is why a water clog directly results in warm air blowing from your registers.

The AC Condensate Drain and Float Switch Mechanism

Distinguishing Between a Simple Clog and Complex Mechanical Failure

Navigating the decision point between a tripped safety switch and a major system failure requires knowing what symptoms to look for. While both issues result in a lack of cold air, the secondary signs are very different.

We advise homeowners to perform a basic visual inspection to help narrow down the cause. By carefully looking at the indoor unit (usually located in a closet, garage, or attic), you can check the drain pan. If the pan is full of standing water, a tripped float switch is the most likely culprit. However, we must stress the importance of never bypassing the float switch or attempting complex DIY electrical diagnostics. Bypassing a safety switch removes the only barrier protecting your home from a flood, and handling HVAC electrical components requires a licensed professional.

Comparing the Symptoms

• Onset of Problem — Tripped Float Switch (Drain Clog): Sudden shift from cold to warm air — Refrigerant Leak / Compressor Failure: Gradual loss of cooling capacity over days

• Indoor Drain Pan — Tripped Float Switch (Drain Clog): Full of standing water or overflowing — Refrigerant Leak / Compressor Failure: Dry, or containing normal moisture levels

• Unusual Sounds — Tripped Float Switch (Drain Clog): Gurgling noises near the indoor unit — Refrigerant Leak / Compressor Failure: Hissing, bubbling, or loud grinding noises

• Evaporator Coils — Tripped Float Switch (Drain Clog): Normal appearance, wet but not frozen — Refrigerant Leak / Compressor Failure: Encased in solid ice or thick frost

If you find that your system is constantly struggling to manage moisture, or if mechanical failures become a continuous pattern despite regular drain clearings, it may indicate that the system is undersized for your home's latent heat load or nearing the end of its lifespan. In these cases, exploring AC replacement services can provide a more permanent, efficient solution.

Why Fast Diagnostics Matter for System Longevity

When a drain line clogs and trips the float switch, the instinct is often to find a quick fix. However, simply vacuuming out the end of a drain line temporarily doesn't solve the recurring algae growth. The biological sludge will quickly return, especially during peak summer humidity, leading to another shutdown just days or weeks later.

This is why professional intervention is essential. The professional diagnostic and repair process goes far beyond a wet-dry vacuum. A licensed technician will use specialized equipment to apply pressurized clearing to the entire length of the line, ensuring the bottleneck is completely removed. Following the clearing, they will treat the line with specialized algaecides to inhibit future biological growth. Finally, they will test the electrical continuity of the float switch to ensure it resets properly and hasn't been damaged by the water exposure.

Ignoring a tripped switch or attempting to reset it without fixing the underlying clog can lead to severe water damage or put immense strain on the compressor as it short-cycles. At Air On Demand, our expert team provides fast, reliable diagnostics to accurately pinpoint whether the issue is a simple drain clog or an emergency repair, giving you peace of mind. Objective, technical diagnostics prevent unnecessary part replacements and ensure your system operates safely and efficiently for years to come.

Resolving Your Condensate and Cooling Issues

Finding warm air blowing from your vents is stressful, but it is often a symptom of a clogged drain triggering a vital safety shutoff rather than a catastrophic failure. Understanding this mechanical failsafe helps homeowners make informed, calm decisions when their comfort is interrupted. By recognizing the signs of a tripped float switch and respecting the massive amount of condensation your system processes daily, you can protect your home from water damage.

When the safety switch does its job and stops the compressor, the next step is safely clearing the blockage. Our team at Air On Demand encourages you to seek professional assistance to thoroughly clean the condensate line, treat the algae growth, and restore your home's cooling safely and effectively. For fast, professional help, schedule emergency AC repair in Miami to get your system back online.

Frequently Asked Questions

Why did my AC suddenly start blowing warm air?
A sudden shift to warm air often means a safety device has shut off your outdoor compressor. When the compressor loses power but the indoor fan keeps running, the system circulates uncooled air through your vents. This is frequently caused by a clogged condensate drain line tripping the float switch.

What happens when an AC float switch trips?
When the float switch trips, it breaks the low-voltage electrical circuit that powers your cooling system. The rising water in the drain pan lifts the float, triggering the shutoff to prevent the pan from overflowing. This immediately stops the cooling process to protect your home from severe water damage.

How does humidity affect my AC drain line?
High humidity forces your air conditioner to extract massive amounts of moisture from the indoor air. This constant flow of water keeps the drain line permanently wet, creating an ideal environment for algae and biological sludge to grow. Over time, this sludge builds up and chokes the narrow PVC pipe.

Can a clogged drain cause AC to blow warm air?
Yes, a clogged drain is one of the most common reasons an AC blows warm air. The clog causes water to back up, which triggers the float switch to shut down the compressor. Because the indoor blower fan often continues to run, it pushes unconditioned, warm air into your rooms.

Why is my AC running but blowing warm air?
If you hear the indoor unit running but feel warm air, it usually means the indoor blower fan is operating while the outdoor compressor is not. This mismatch can be caused by a tripped float switch, a blown capacitor on the outdoor unit, or a severe loss of refrigerant.

How do professionals safely unclog an AC condensate drain?
Professionals use specialized equipment to safely flush and clear the entire length of the condensate drain line. After removing the physical blockage, they treat the line with specific algaecides to prevent rapid regrowth. They also test the float switch and drain pan to ensure the safety mechanisms are functioning correctly.

Why Is My AC Unit Fan Not Spinning? Diagnosing Condenser Failures placeholder-image  | Air On Demand
5 min read

Why Is My AC Unit Fan Not Spinning? Diagnosing Condenser Failures

Is your AC fan not spinning? Get common homeowner questions answered about condenser failures. See why it happens and when to call a pro to prevent damage.

When the Heat Rises and the AC Fan Stops: Assessing the Situation

Summer heatwaves in our region are unforgiving, and a struggling air conditioner quickly turns a comfortable home into an unbearable environment. If you walk outside and notice your outdoor unit is humming but the fan blades are completely still, you are facing a critical system failure. One of the most common homeowner questions answered by our technicians is exactly how to handle this stressful scenario. In fact, when we compile the most frequently asked questions about local services, condenser fan failures consistently rank at the top of the list.

During peak summer heatwaves, the prolonged running times of AC units make this a highly common failure. Your air conditioning system works incredibly hard to maintain indoor comfort, and the outdoor condenser fan plays a vital, non-negotiable role in that process. Knowing how to assess the situation, understanding when to check a simple breaker, and recognizing when to call for immediate professional dispatch can save your equipment from permanent, catastrophic damage.

The Critical Role of the Condenser Fan

To understand why a dead fan is an emergency, you must understand how your air conditioner actually cools your home. Your AC does not "create" cold air; it removes heat from your indoor air and pumps it outside. The refrigerant absorbs heat inside your house, travels through copper lines to the outdoor unit (the condenser), and releases that heat into the outdoor air.

The condenser fan is responsible for pulling massive amounts of ambient air across the hot condenser coils to dissipate that collected heat. If the fan stops spinning, the heat has nowhere to go. The system becomes trapped in a dangerous cycle, continuously absorbing heat from inside your home but failing to release it outside.

Recognizing the Symptoms of Fan Failure

Identifying the problem early is your best defense against expensive secondary damage. Here is a breakdown of what normal operation looks like compared to a system suffering from fan failure:

• Fan Blades — Normal Operation: Spinning rapidly, blowing warm air upward — Fan Failure Symptoms: Completely stationary, or twitching slightly

• System Noise — Normal Operation: Steady, even mechanical drone — Fan Failure Symptoms: Loud buzzing, aggressive humming, or dead silence

• Air Temperature (Indoor) — Normal Operation: Cold air blowing from supply vents — Fan Failure Symptoms: Warm or room-temperature air blowing from vents

• Compressor Unit — Normal Operation: Warm to the touch, vibrating slightly — Fan Failure Symptoms: Excessively hot, potentially shutting off entirely

Immediate Action: Why You Must Turn Off Your System

The problem: You realize the outdoor fan is not spinning, but the indoor blower is still pushing air through your vents. Your first instinct might be to leave the system running in hopes that it will eventually cool the house down.

The cause: Running the air conditioner without a functioning condenser fan traps all the rejected heat inside the outdoor unit. Because the heat cannot escape the condenser coil, the pressure and temperature of the refrigerant skyrocket. This forces the compressor—the heart of your air conditioning system—to work against extreme resistance.

The solution: You must turn off your air conditioning system immediately at the thermostat. Do not switch it to "fan only" if you suspect an outdoor unit issue; turn the cooling mode completely off. Continuing to run the system will cause the compressor to overheat rapidly. Modern compressors have an internal thermal overload switch designed to shut them down when they get too hot, but relying on this safety mechanism is dangerous. Repeatedly tripping the thermal overload will eventually cause the compressor windings to melt and short out. Ignoring a broken fan can quickly turn a straightforward component repair into a full, expensive system replacement.

The High Cost of Waiting

Compressors are highly engineered, expensive components. When they overheat due to a lack of airflow, the internal lubricating oil begins to break down and turn acidic. This acid eats away at the electrical windings inside the compressor. By the time you notice a burning smell, the damage is already done. Shutting the system off the second you notice the fan is stationary is the single most important step a homeowner can take to protect their investment.

The First Check: Tripped Circuit Breakers and Power Issues

Before assuming a major component has failed, there is one safe, standard troubleshooting step every homeowner should perform. Sometimes, the issue is simply a loss of high-voltage power to the outdoor unit. Power surges, local grid fluctuations, or an overworked system can trip the dedicated AC circuit breaker.

Follow these exact steps to check your power supply safely:

1. Turn off the thermostat: Ensure the indoor control is set to the "Off" position so the system does not try to start while you are inspecting the panel.

2. Locate your main electrical panel: This is usually found in a garage, basement, utility room, or on the exterior of your home.

3. Identify the AC breaker: Look for a double-pole breaker (it will look like two switches tied together) labeled "AC," "Condenser," or "HVAC."

4. Check the breaker position: A tripped breaker does not always flip all the way to the "Off" position. It often rests in the middle, feeling slightly spongy if you push it.

5. Perform the "One-Reset Rule": Firmly push the breaker all the way to the "Off" position until it clicks, then firmly push it back to the "On" position.

The crucial warning: You may reset the breaker exactly once. If the breaker holds and the system turns on normally, monitor it closely. However, if the breaker trips again immediately, or trips a few minutes after the system starts, stop immediately. A repeatedly tripping breaker indicates a dead short to ground or a locked-up compressor. Continuing to reset the breaker forces high amperage through failing electrical components, which can cause electrical fires or permanent equipment destruction. At this point, professional diagnostics are required.

Top 4 Causes of an AC Fan Not Spinning

The Humming Noise: Dual Run Capacitor Failure

If your breaker is fine and the outdoor unit is receiving power, the number one most common reason an AC condenser fan stops spinning is a failed dual run capacitor. If you hear a distinct humming or buzzing noise coming from the outdoor unit but the fan blades are dead still, the capacitor is almost certainly the culprit.

What is a Dual Run Capacitor?

Think of a capacitor as a large, powerful battery that stores electrical energy. Air conditioning motors require a massive jolt of electricity to start spinning—much more power than your home's standard electrical wiring can provide all at once. The dual run capacitor stores this energy and releases it in a fraction of a second to jumpstart both the compressor and the condenser fan motor (hence the term "dual"). Once the motors are running, the capacitor provides a continuous, even supply of voltage to keep them spinning smoothly.

Climate Impact on Capacitors

In regions with intense heat and high humidity, the lack of system downtime prevents capacitors from cooling properly. Air conditioners run almost continuously during peak summer months. This constant electrical load generates immense internal heat within the capacitor. Over time, the dielectric fluid inside boils and expands, causing the top of the capacitor to bulge outward like a swollen tin can. This accelerated wear and tear means capacitors in hot climates fail much faster than those in milder regions.

Why the "Stick Test" is Dangerous

Many online forums suggest a DIY trick known as the "stick test." The theory is that if the capacitor is dead, you can push the fan blades with a long stick to manually jumpstart the motor. While this sometimes forces the fan to spin temporarily, it is highly dangerous and explicitly advised against.

First, sticking objects into a live, high-voltage machine is an obvious safety hazard. Second, running a motor on a dead capacitor forces the motor to pull excessive amperage to keep spinning. This causes the motor windings to overheat rapidly, practically guaranteeing that you will burn out the fan motor within a few hours. What could have been a simple capacitor replacement now requires a brand new motor as well.

Burnt-Out Fan Motors and Thermal Stress

If the capacitor is functioning normally, the next potential point of failure is the mechanical fan motor itself. Condenser fan motors endure brutal operating conditions. They sit outside in the extreme heat, completely exposed to rain, dust, and debris, while running for thousands of hours every season.

Continuous operation degrades the motor's internal bearings and electrical windings. As the bearings lose their lubrication, the motor has to work harder to turn the heavy fan blades. This increased friction generates excess heat, leading to severe thermal stress. Understanding why your AC fan motor stops working is critical for recognizing when a system has reached the end of its mechanical lifespan.

Secondary Burnouts

Fan motors rarely fail in a vacuum. Very often, a burnt-out motor is the direct result of a weak, failing capacitor that was ignored. When a capacitor begins to lose its microfarad rating (its ability to store energy), it supplies inconsistent voltage to the motor. The motor attempts to compensate by pulling more electrical current, which overheats the internal copper windings until they literally melt and break the circuit.

Signs of a Burnt Motor

• Excessive heat: The top of the condenser unit feels dangerously hot to the touch.

• Acrid smells: A distinct, harsh smell of burning plastic or ozone coming from the outdoor unit.

• Physical resistance: If the power is completely disconnected and a technician tries to spin the blades by hand, a seized motor will feel stiff or completely locked in place.

Bad Contactors: The Communication Breakdown

Sometimes, the issue is not the motor or the capacitor, but the component that tells them to turn on in the first place. The contactor is a high-voltage mechanical relay switch located inside the outdoor unit's electrical panel. When your indoor thermostat detects that the house is too warm, it sends a low-voltage signal outside to the contactor. This signal energizes a magnetic coil, which pulls a set of metal contacts closed. When these contacts touch, high-voltage electricity flows from your home's breaker panel into the AC unit.

Pitting, Arcing, and Wear

Every time the contactor slams shut, a small electrical arc jumps between the metal plates. Over years of operation, this continuous arcing causes the metal contacts to become pitted, scorched, and covered in carbon buildup. Eventually, the carbon creates an insulated barrier, and the electricity can no longer cross the bridge. The thermostat is calling for cooling, but the voltage never reaches the fan motor.

Pest Interference

Because contactors emit a low-level hum and generate warmth, they frequently attract insects. It is incredibly common for ants, spiders, or earwigs to crawl into the contactor housing. When the switch closes, the bugs are crushed between the metal plates, physically blocking the electrical connection. Whether the contactor is burnt out or blocked by debris, this communication breakdown requires professional replacement to restore power to the fan.

The Hidden Dangers of DIY Electrical Repairs

When researching AC repairs, homeowners often find videos detailing how to swap out capacitors or contactors. However, based on Department of Energy (DOE) and ASHRAE standard safety protocols, DIY high-voltage electrical repair is strictly warned against.

Lethal Voltage Remains

The most critical danger involves the dual run capacitor. By design, a capacitor stores a massive electrical charge. Standard AC capacitors hold a lethal high-voltage electrical charge even when the power is entirely disconnected at the breaker. Simply turning off the electricity to the house does not make the AC unit safe to touch. If a homeowner accidentally bridges the capacitor terminals with a screwdriver or their hand, the capacitor will discharge all of its stored energy instantly, resulting in severe electrical shock or worse.

The Need for Specialized Diagnostics

Diagnosing electrical failure requires specialized, calibrated multimeters and the training to read microfarads safely. A visual inspection is never enough; a capacitor can look perfectly normal on the outside but be completely dead on the inside. Furthermore, replacing internal electrical parts requires exact OEM part matching. Installing a capacitor with the wrong microfarad rating will destroy the fan motor and compressor within days. For these reasons, opening the electrical access panel on an outdoor condenser is strictly a job for licensed HVAC professionals.

Frequently Asked Questions About AC Fan Failures

When an air conditioning system breaks down, homeowners need fast, accurate answers. We have compiled the most common questions regarding AC fan failures to help you understand your system better.

Why is my AC outside fan not spinning but making a humming noise?

This symptom usually indicates a failed dual run capacitor. The humming noise means the system is receiving high-voltage power from the electrical panel, and the contactor has closed successfully. However, the motor lacks the stored energy required to overcome inertia and start spinning. The electrical current is bottlenecked at the motor, causing the audible vibration or buzzing sound. Immediate shutdown is required to prevent the motor from burning out.

Can I run my AC if the fan isn't spinning?

Absolutely not. Running the air conditioner without a functioning outdoor fan will cause the compressor to overheat rapidly and suffer catastrophic damage. The fan is required to reject the heat absorbed from your home. Without airflow, the refrigerant pressure spikes to dangerous levels. While internal safety switches may temporarily shut the compressor off, relying on them will eventually lead to a permanent, highly expensive compressor failure.

What causes an AC fan motor to burn out?

Fan motors burn out due to age, lack of maintenance, and extreme thermal stress. Operating in brutal summer conditions takes a toll on the internal bearings and electrical windings. This degradation is often accelerated by a weak capacitor forcing the motor to pull higher amperage and work much harder than designed. Lack of airflow from dirty condenser coils can also trap heat around the motor, speeding up the breakdown of internal components.

Is an AC fan motor easy to replace?

It requires handling high-voltage wiring, safely discharging capacitors, and ensuring exact OEM part matching. Fan motors must be balanced perfectly and wired correctly to ensure the blades spin in the right direction (pulling air through the side coils and exhausting it out the top). Because of the lethal voltage risks and precise mechanical requirements, it is not a safe DIY project and requires a licensed professional technician.

How long do AC capacitors typically last in extreme heat?

While standard capacitors are designed to last several years, constant summer operation can significantly reduce their lifespan. In regions with intense heat and high humidity, the continuous electrical load prevents the capacitor from cooling down, causing the internal fluids to expand and degrade. Routine seasonal maintenance is critical because it allows technicians to measure the microfarad output and catch weak capacitors before they fail completely and leave you without cooling.

Restoring Your Comfort: When to Call the Experts

A stationary condenser fan is a clear signal that your air conditioning system is in distress. If you have checked your electrical panel and the circuit breaker is not the issue, the system requires professional electrical diagnostics. Ignoring the problem, attempting dangerous DIY repairs, or hoping the system will fix itself will only lead to more extensive damage to your compressor and internal components.

When the summer heat is rising, resolving the issue quickly is vital to prevent your indoor temperatures from reaching unsafe levels. Our team provides prompt, reliable emergency repair services to diagnose the exact point of electrical or mechanical failure safely. By relying on licensed professionals, you ensure that the repair is done accurately, restoring your comfort quickly while protecting the long-term health of your HVAC investment.

Why Is My AC Unit Fan Not Spinning? Professional Diagnostics Explained placeholder-image  | Air On Demand
5 min read

Why Is My AC Unit Fan Not Spinning? Professional Diagnostics Explained

A stalled AC fan can ruin your compressor. Review these home maintenance tips and troubleshooting steps to safely power down and decide on the right repair.

The Immediate Threat of a Stalled AC Fan

Your air conditioner is running, and you can hear the familiar, heavy hum of the compressor, but the house is getting warmer by the minute. When you are looking for home maintenance tips and troubleshooting advice, discovering that your outdoor AC fan is completely still while the system runs is one of the most alarming situations you can face. The panic sets in quickly as you realize something is mechanically wrong, but the concrete problem for most homeowners is identifying the correct service approach without prior technical knowledge.

The immediate decision point you face is crucial: you must decide on the appropriate service intervention based on standard industry diagnostic steps rather than guessing at the cause. In regions like South Florida, where severe heat and high humidity push air conditioning systems to their absolute limits, a stalled fan is a critical comfort and safety issue. The extreme temperatures accelerate potential damage to the system, turning a minor component failure into a major system breakdown in a matter of hours.

The most critical immediate action: Turn your thermostat off right now. Allowing the compressor to run while the fan is stalled traps immense heat inside the unit, which can lead to irreversible compressor damage. Once the system is safely powered down, you can begin to understand the mechanics behind the failure and why professional diagnostics are the safest path forward.

Understanding the Role of the Condenser Fan

To understand why a stalled fan is an emergency, you have to understand the basic mechanics of the refrigeration cycle. Your air conditioning system does not actually create cold air; it removes heat from inside your home and transfers it outside. The outdoor unit, known as the condenser, is where that heat is finally released into the outdoor air.

The condenser fan is responsible for pulling cooler outside air through the hot condenser coils. As the air passes over the coils, it exhausts the heat absorbed from your home. Without this critical airflow, the refrigerant cannot cool down and condense back into a liquid state. Consequently, the heat stays trapped inside the system, causing the compressor to rapidly overheat.

Modern HVAC systems are equipped with internal safety mechanisms to prevent catastrophic failure. The most common is a thermal overload switch located on the compressor. When the compressor gets too hot due to a lack of airflow, this switch trips, shutting the system down. However, as the compressor cools, the switch resets, and the system tries to start again. This repeated cycle of overheating and shutting down causes permanent, cumulative damage to the compressor's internal windings.

• Normal Operation — Airflow Status: Steady airflow across coils — Compressor Temperature: Stable, within manufacturer limits — Long-Term Outcome: Efficient cooling and standard lifespan

• Stalled Fan (System Running) — Airflow Status: Zero airflow across coils — Compressor Temperature: Rapidly increasing, extreme heat — Long-Term Outcome: Thermal overload, potential compressor death

Leading Culprit: Capacitor Failure

When an outdoor fan stops spinning, the most common reason is a failed run capacitor. The run capacitor is a cylindrical component that stores electrical energy, acting much like a powerful battery. It provides the initial jolt of electricity needed to start the fan motor and supplies a continuous, regulated electrical current to keep the motor spinning at the correct speed.

Capacitors are highly sensitive to heat and electrical stress, meaning they naturally degrade over time. In climates like South Florida, the high humidity forces air conditioners to run extended cooling cycles just to dehumidify the air. This places continuous thermal stress on the capacitors, forcing them to work harder and longer than they would in milder climates. Over years of heavy use, the internal chemical components of the capacitor begin to break down.

Professionals look for specific visual signs of capacitor degradation during an inspection. A failing capacitor will often bulge at the top, resembling a swollen soda can. In severe cases, the casing may split, leaking an oily dielectric fluid, or develop heavy rust around the electrical terminals. If you want to understand more about why your AC fan motor stops working, the capacitor is almost always the first component a technician will test.

Professional Diagnostics: Why Your AC Fan Stopped Spinning

Burnt-Out Fan Motors and Electrical Faults

If the capacitor is functioning correctly, the next logical step in standard industry diagnostics is evaluating the fan motor itself and the electrical pathways feeding it. Fan motors endure immense wear and tear, spinning thousands of hours every cooling season while exposed to rain, heat, and dirt.

Over time, the sealed bearings inside the fan motor can lose their lubrication and seize up. When the bearings fail, the motor physically cannot turn, even if it is receiving the correct electrical voltage. Alternatively, the electrical windings inside the motor can short out or burn through entirely due to age or a lack of routine maintenance. When a motor burns out, it must be completely replaced.

The Anatomy of a Contactor Failure

Another frequent electrical fault lies in the contactor. The contactor is a heavy-duty mechanical switch controlled by your thermostat. When your home needs cooling, the thermostat sends a low-voltage signal to the contactor, which electromagnetically pulls a set of metal contacts closed. This allows high-voltage electricity to flow from your home's electrical panel to the compressor and the fan motor.

• Pitting and Arcing: Every time the contactor closes, a small electrical arc occurs. Over time, this arcing burns and pits the metal contacts, creating a blackened, uneven surface that blocks electricity from passing through.

• Physical Blockages: Because the contactor is located in the outdoor unit, insects or small debris can crawl between the contacts. When the switch closes, the bug is crushed, creating an insulated barrier that prevents the fan motor from receiving power.

Finally, a tripped circuit breaker can stop the fan. However, it is crucial to understand that a tripped breaker is a protective response, not the root problem. If a fan motor is overheating or a compressor is struggling, it will draw excessive electrical current, tripping the breaker to prevent an electrical fire.

Physical Obstructions and Debris

Not all fan failures are electrical; some are entirely mechanical. The outdoor condenser unit sits exposed to the elements, making it vulnerable to physical blockages. Sticks, heavy leaves, pine needles, or yard debris thrown by a lawnmower can easily fall through the top condenser grate and jam the fan blades.

When a blade is physically blocked, the motor still receives electricity and attempts to turn. This creates a state known as "locked rotor." The motor will draw a massive amount of electrical current, generating a loud, distinct humming or buzzing noise. If the system is left running in a locked rotor state, the intense heat generated will quickly burn out the motor windings, turning a simple debris removal job into an expensive motor replacement.

Warning: Never attempt to reach into the unit or poke objects through the grate to clear debris while the power is connected. The fan could start suddenly, causing severe injury, or you could strike high-voltage electrical components.

To prevent physical obstructions, follow these preventative checks while the system is completely powered off at the breaker:

1. Inspect the perimeter: Keep bushes, shrubs, and tall grass trimmed at least two feet away from all sides of the condenser unit.

2. Look through the top grate: Use a flashlight to visually inspect the bottom of the unit for accumulated leaves or large sticks.

3. Listen for abnormal humming: If you hear a loud buzz but see no movement, shut the system off immediately.

4. Schedule seasonal clearing: Have a professional open the unit and clean the interior cabinet during your annual maintenance visit.

Why the 'Stick Trick' is a Dangerous Myth

If you search for advice online, you will likely encounter a dangerous DIY workaround commonly referred to as the "stick trick." The premise suggests that if your fan is stalled, you can take a long stick, push it through the top grate, and manually spin the fan blades to jumpstart the motor.

The short answer is that you should never do this. Pushing the fan blades manually exposes you to severe safety risks, including electrical shock if the stick damages a wire, or physical injury if the heavy metal blades suddenly catch and spin at full speed. More importantly, this trick carries massive mechanical risks for your HVAC system.

Here is the mechanical reality: if a fan requires a manual push to start, it usually means the start capacitor has failed, but the run windings in the motor are still receiving power. By forcing the motor to spin, you are forcing it to run without its proper electrical phase shift. The motor will run excessively hot, drawing incorrect amperage. This immense strain can cause the motor to burn out entirely, and the resulting heat buildup can trigger a catastrophic compressor failure. Bypassing a failing component simply forces the rest of your system to carry a dangerous burden.

How Professionals Diagnose a Stalled AC Fan

A typical pattern we see in general educational service inquiries is homeowners asking exactly what a technician does to determine the cause of a stalled fan. Professionals follow a strict, logical, step-by-step breakdown to isolate the failure point safely. Relying on prompt, reliable local expertise to diagnose and resolve these specific failures safely ensures the problem is fixed before your home becomes uncomfortably hot.

Here is the standard industry procedure for diagnosing a stalled condenser fan:

1. Safety Disconnect: The technician begins by pulling the disconnect block near the outdoor unit and verifying with a voltage meter that all high-voltage power is entirely disconnected from the system.

2. Visual Inspection: They inspect the fan blades for physical damage, check the cabinet for debris, and examine the capacitor for obvious signs of bulging or leaking.

3. Electrical Testing: Using specialized diagnostic tools, they measure the precise electrical values of the internal components to find the exact point of failure.

4. Thermostat Communication Check: They verify that the low-voltage signal from the indoor thermostat is successfully reaching the outdoor contactor.

Testing Electrical Components Safely

Even with the main power disconnected, the run capacitor retains a high-voltage electrical charge that can cause severe injury. Technicians safely discharge this stored energy using a heavy-duty resistor. Once discharged, they use a multimeter set to measure capacitance (microfarads). If a capacitor is rated for 5.0 microfarads but reads 2.1 on the meter, it has fallen out of its acceptable tolerance range and must be replaced. This step is strictly for licensed technicians due to the retained voltage risks.

Evaluating Motor Health

If the capacitor tests within normal limits, the technician evaluates the motor. They will manually spin the fan blades (with power verified off) to feel for resistance, which indicates seized bearings. Next, they use a multimeter to measure the electrical resistance (ohms) across the motor's internal wire windings. If the meter reads "OL" (open line), it means the internal wires have burned through and snapped, dictating that a full motor replacement is necessary rather than a simple capacitor swap.

Securing Reliable Cooling and Peace of Mind

An AC fan that is not spinning is a clear, urgent signal to power down your system immediately. Leaving the system running without airflow traps extreme heat inside the condenser, putting your expensive compressor at immediate risk of permanent failure.

Understanding these standard diagnostic steps empowers you to make informed decisions about your home's maintenance. You now know that a stalled fan is rarely a simple glitch; it is usually a specific mechanical or electrical failure involving the capacitor, motor, or contactor. Instead of attempting dangerous workarounds, rely on professional diagnostics to protect your HVAC investment. A logical, step-by-step breakdown of how the service works and the standard criteria used to determine the best solution ensures your system is repaired safely, correctly, and efficiently.

Frequently Asked Questions

Can I run my AC if the fan is not spinning?
No, you should never run your air conditioner if the outdoor fan is not spinning. The fan is required to remove heat from the system, and without it, the compressor will rapidly overheat. Continuing to run the system in this state can cause irreversible damage to the compressor, leading to a complete system replacement.

Why is my AC fan not spinning but making a humming noise?
If your fan is making a humming noise but not moving, it is likely experiencing a locked rotor state or a capacitor failure. The humming indicates that the motor is receiving electrical power and trying to start, but either a physical obstruction or a lack of starting torque is holding it back. Turn the system off immediately to prevent the motor from burning out.

Is it bad if the AC fan doesn't spin?
Yes, it is extremely bad for the health of your cooling system. The condenser fan is a critical component of the refrigeration cycle, responsible for exhausting absorbed heat into the outdoor air. If the fan fails, the heat remains trapped in the refrigerant, causing internal pressures and temperatures to spike to dangerous levels.

How do professionals fix an AC fan that won't spin?
Professionals fix a stalled fan by first disconnecting all high-voltage power and safely discharging the electrical components. They then use specialized multimeters to test the run capacitor, the fan motor windings, and the contactor to isolate the exact point of failure. Once the faulty component is identified, they replace it with an OEM-approved part to restore proper operation.

What happens to the compressor if the condenser fan stops working?
If the condenser fan stops working, the compressor will overheat and trigger its internal thermal overload switch, shutting the system down. As the compressor cools, it will try to start again, creating a continuous cycle of overheating. Over time, this intense thermal stress breaks down the electrical insulation inside the compressor, eventually causing it to seize permanently.

Seasonal HVAC Preventative Maintenance: Addressing an AC Unit Fan That Stopped Spinning placeholder-image  | Air On Demand
5 min read

Seasonal HVAC Preventative Maintenance: Addressing an AC Unit Fan That Stopped Spinning

Prevent AC breakdowns before the heat hits by prioritizing your seasonal home maintenance checklist. See why early HVAC prep saves you from costly repairs.

Preparing Your HVAC System for the Upcoming Seasonal Transition

Summer weather is rapidly approaching, which means it is time to finalize your seasonal home maintenance checklist before the extreme heat arrives. Addressing preventative maintenance and system vulnerabilities prior to major weather shifts is the most effective way to prevent sudden, catastrophic equipment failures. As the outdoor temperatures begin to climb, your household HVAC system shifts from periods of relative dormancy into a heavy, continuous operational cycle. This upcoming seasonal transition places immense stress on aging mechanical and electrical components.

Early identification of system vulnerabilities is critical. When you catch a minor issue—like a slightly degraded electrical component or a dirty condenser coil—you prevent complete breakdowns during peak heat waves when repair schedules are often booked weeks in advance. The core decision point homeowners face during this time is determining which maintenance tasks require a licensed professional and what can be safely deferred or handled independently. Understanding how your system operates, what signs indicate impending failure, and where the safety boundaries lie will help you make informed decisions about your property.

How Preventative Maintenance Protects Against Humidity and Heat Spikes

Routine preventative HVAC maintenance is not just about keeping the air cold; it is about optimizing the entire refrigeration cycle. Data from the Department of Energy indicates that proper, routine maintenance can improve system efficiency by up to 15%. When your air conditioner operates efficiently, it draws less electricity, cycles more consistently, and maintains a stable indoor climate.

Positioning your AC maintenance as essential property protection is vital, particularly when dealing with rapid indoor humidity spikes. An air conditioner does not just cool the air; it removes moisture. If the system fails, indoor humidity can skyrocket within hours, potentially leading to warped wood, peeling paint, and poor indoor air quality. Increased cooling loads during seasonal shifts drastically increase the electrical draw on condenser units. In hot, humid tropical climates where AC units run for significantly more hours per year, this continuous operation accelerates wear on electrical components far faster than in temperate zones.

To understand the tangible benefits of seasonal preparation, consider the differences between a maintained and unmaintained system:

• Electrical Draw — Maintained HVAC System: Operates within manufacturer specifications, keeping utility costs stable. — Unmaintained HVAC System: Draws excessive amperage as components struggle, driving up utility bills.

• Humidity Control — Maintained HVAC System: Removes moisture efficiently, maintaining a comfortable 40-50% indoor humidity. — Unmaintained HVAC System: Short-cycles or struggles to cool, leaving indoor air feeling sticky and damp.

• Component Lifespan — Maintained HVAC System: Motors and compressors run cooler, extending the overall life of the equipment. — Unmaintained HVAC System: Overheating degrades wire insulation and internal fluids, leading to premature failure.

• Reliability — Maintained HVAC System: Prepared for the upcoming seasonal transition with minimal risk of sudden failure. — Unmaintained HVAC System: Highly vulnerable to breaking down during the first major heatwave of the year.

Visual Inspections: Assessing Your Outdoor AC Unit

Before the heavy heat sets in, evaluating the physical state of your outdoor condenser unit is a safe, top-of-funnel task you can perform without specialized tools. The outdoor unit (the condenser) requires unrestricted airflow to dissipate the heat removed from your home. If this airflow is choked, the system works harder, runs hotter, and risks catastrophic damage.

Follow these safe visual inspection steps to assess your exterior condenser unit:

1. Verify power status: Always ensure the thermostat is set to the "off" position before performing any visual inspection around the outdoor unit. Do not touch electrical panels or wiring.

2. Check the clearance zone: Inspect the perimeter of the heat pump or AC unit. You need a minimum of two feet of clear space on all sides. Overgrown shrubs, tall grass, and low-hanging branches must be trimmed back.

3. Remove physical obstructions: Clear away any accumulated debris, dead leaves, pine needles, or trash that has gathered against the delicate aluminum fins of the unit. These obstructions block airflow and insulate the coils, trapping heat inside.

4. Inspect the aluminum fins: Look closely at the thin metal fins wrapping the outside of the unit. If large sections are flattened, crushed by hail, or caked in thick mud, the system is not ready for heavier seasonal usage and requires professional cleaning and fin-combing.

5. Examine the refrigerant lines: Locate the two copper lines running from the house to the unit. The larger suction line should be wrapped in thick, black foam insulation. If this insulation is missing, severely cracked, or deteriorating, it indicates physical wear that should be addressed to maintain efficiency.

Troubleshooting a Critical Vulnerability: The AC Unit Fan Not Spinning

One of the most alarming issues you might encounter during an upcoming seasonal transition is walking outside to find the AC unit fan not spinning while the system is supposedly running. The mechanical function of the AC condenser fan is vital: it pulls outside air through the condenser coils to expel the heat absorbed from inside your home. Without this fan, the refrigeration cycle breaks down completely.

The immediate consequences of a fan that stops spinning are severe. Because the heat cannot be expelled, it remains trapped in the refrigerant. This causes the internal pressure and temperature of the compressor to skyrocket. Rapid system overheating occurs, and if the system's internal thermal overload switches fail to trip in time, the compressor—the most expensive component in the entire system—can suffer irreversible damage. In tropical climates, a broken AC fan is an immediate emergency due to the rapid rise in indoor temperatures and oppressive humidity that follows within minutes of a failure.

Initial signs of fan failure often present before the blade stops entirely. You might hear a loud, electrical buzzing noise coming from the outdoor unit, indicating that power is reaching the motor but it cannot turn. Alternatively, you might see the fan blades struggling to turn, spinning sluggishly, or operating with a severe wobble. When diagnosing condenser failures, recognizing these early symptoms is the difference between a minor part replacement and a major system overhaul.

Common Mechanical Reasons for Fan Failure

When the fan stops, the root cause is typically mechanical or electrical. On the mechanical side, burnt-out fan motors are a frequent culprit. Excessive continuous operation, especially during extreme heat waves, degrades the motor's internal windings. Over time, the bearings wear out, friction increases, and the motor simply burns itself up.

Another common mechanical issue involves physical debris blockages. Sticks, heavy accumulations of wet leaves, or even small rocks can fall through the top grate of the condenser unit. These obstructions can physically wedge against the fan blades, preventing them from turning. When the motor tries to spin against this locked rotor state, it overheats rapidly and can burn out if the system is not shut down immediately.

Understanding Component Failure: Capacitors and Contactors

Beyond mechanical blockages, the electrical components inside your outdoor unit are highly vulnerable to the extreme heat associated with the upcoming seasonal transition. The two most common points of electrical failure are the run capacitor and the contactor.

Capacitors are highly sensitive to extreme heat and are a leading cause of outdoor fan failure. A capacitor acts as a powerful, short-term battery that stores electricity. It delivers a massive jolt of energy to start the fan motor and the compressor, and then provides a continuous, steady electrical current to keep them running smoothly. Because they are filled with a dielectric fluid, prolonged exposure to high ambient temperatures and heavy operational loads causes that fluid to break down, expand, and eventually cause the capacitor to bulge or pop.

The contactor is equally critical. This component acts as the heavy-duty switch that supplies high-voltage electricity to the condenser unit. When your thermostat calls for cooling, it sends a low-voltage signal to the contactor, pulling a magnetic coil closed to bridge the high-voltage connection. Over time, the electrical arcing that occurs every time this switch closes causes the metal contacts to become pitted, burnt, and covered in carbon. Seasonal temperature spikes push these aging electrical components past their failure points, resulting in a system that either will not turn on or will not shut off.

Common Causes of AC Condenser Fan Failure

Professional Diagnostics vs. Unsafe DIY Interventions

While clearing leaves and changing indoor air filters are excellent homeowner tasks, there are strict safety boundaries when dealing with the internal components of an HVAC system. We issue clear warnings against DIY diagnostics for high-voltage HVAC electrical components. The outdoor condenser unit operates on 240 volts of electricity, which is more than enough to cause severe, life-threatening injuries if handled improperly.

Furthermore, the symptoms of different component failures often overlap. The risks of misdiagnosing a bad capacitor versus a burnt motor are substantial. If a homeowner assumes the capacitor is bad, replaces it improperly, and turns the power back on while the motor is actually shorted to ground, it can lead to catastrophic compressor damage. The compressor relies on the fan to keep it cool; if you force the system to run with a compromised electrical setup, you risk destroying the entire unit.

This is why specialized tools and extensive training are required to safely test electrical loads. Technicians use professional-grade multimeters to measure microfarads, check for continuity, and read the exact amperage draw of the motor under load. Professional, licensed diagnostics are the only way to ensure the correct component is identified and fixed safely without risking the compressor. A licensed expert knows how to safely discharge a capacitor, test the contactor for voltage drops, and verify that the motor windings are intact before restoring power to the system.

Objective Criteria for Immediate HVAC Professional Action

To navigate the upcoming seasonal transition successfully, you need a clear decision-making framework for when to handle maintenance yourself and when to call a professional. Preventative action is always more cost-effective than reactive emergency repairs, especially when dealing with expensive cooling equipment.

Here are the objective criteria to guide your maintenance strategy:

• Safe for homeowner deferment and action: Replacing indoor air filters every 30-90 days, gently washing the exterior condenser cabinet with a standard garden hose (never a pressure washer), and trimming back foliage to maintain the two-foot clearance zone.

• Immediate professional intervention required: Fan not spinning. If you hear the system running but the top fan is stationary, turn the system off immediately at the thermostat and call a licensed technician.

• Immediate professional intervention required: Electrical buzzing. A loud hum or buzz from the outdoor unit without the fan or compressor engaging indicates a locked rotor or failed electrical component.

• Immediate professional intervention required: Rapid cycling. If the system turns on and off every few minutes (short cycling), it is struggling with airflow, refrigerant levels, or electrical faults.

• Immediate professional intervention required: Warm air at the vents. If the system is running constantly but the air blowing inside is room temperature, the refrigeration cycle has failed and requires professional gauges to diagnose.

Frequently Asked Questions About Seasonal AC Readiness

What should be on a seasonal HVAC home maintenance checklist?

A comprehensive seasonal checklist should prioritize airflow and electrical safety. It must include replacing indoor air filters, clearing a two-foot perimeter around the outdoor unit, and scheduling a professional inspection of the electrical components. Additionally, checking the thermostat calibration and ensuring all indoor vents are open and unblocked are critical steps. Taking these actions before the heat arrives prevents unexpected breakdowns.

How do I effectively prepare my AC unit for summer?

Effective preparation starts with a visual inspection of the outdoor condenser to ensure no debris is blocking the delicate aluminum fins. Next, wash away dirt and pollen using a gentle stream from a garden hose, being careful not to bend the fins. Finally, the most effective step is booking a preventative maintenance tune-up with a licensed professional to test the capacitors, contactors, and refrigerant levels before the system faces heavy cooling loads.

Why is my AC unit fan not spinning, and is it dangerous?

The fan usually stops spinning due to a failed capacitor, a burnt-out fan motor, or physical debris blocking the blades. Yes, this is highly dangerous to the equipment. Without the fan expelling heat, the internal compressor rapidly overheats, which can cause catastrophic, irreversible damage to the most expensive part of your HVAC system if the power is not shut off immediately.

What happens to the compressor if you don't service your AC?

If you skip routine service, the compressor works significantly harder to pump refrigerant through dirty coils and failing electrical parts. This excessive strain causes the compressor to run hotter than its designed thermal limits. Over time, this heat breaks down the internal lubricating oils and wire insulation, leading to a seized compressor and a total system failure.

Which HVAC maintenance tasks require a licensed professional?

Any task involving the sealed refrigerant loop or high-voltage electrical components mandates a licensed professional. This includes testing or replacing capacitors, changing contactors, diagnosing motor failures, and checking refrigerant pressures. Homeowners should never attempt DIY diagnostics on these parts due to the severe risk of electrocution and the high probability of causing further damage to the system.

Ensuring System Reliability Before the Heat Arrives

A clear, well-structured technical approach to your seasonal home maintenance checklist prevents sudden, expensive failures when you need your cooling system the most. By understanding the mechanical functions of your equipment and respecting the dangers of high-voltage components, you protect your property from humidity spikes and catastrophic compressor damage. We encourage you to review your property's systems based on the objective criteria outlined above. If you notice any signs of electrical strain, or if your system has not been evaluated for the upcoming seasonal transition, schedule a consultation with a licensed professional to verify your system's readiness today.

Options Comparisons for Homeowners: Why Is My AC Unit Fan Not Spinning? placeholder-image  | Air On Demand
5 min read

Options Comparisons for Homeowners: Why Is My AC Unit Fan Not Spinning?

Outdoor AC fan stopped spinning? Use these options comparisons for homeowners to weigh repair vs. replacement paths. Decide with confidence before you call.

When the AC Fan Stops: Navigating Summer Cooling Emergencies

Summer in South Florida is relentless, and when your system breaks down, finding reliable options comparisons for homeowners is the first step toward restoring comfort. Peak summer temperatures place maximum thermal stress on outdoor cooling components. When the outdoor fan blades suddenly stop moving, the immediate heat and humidity inside the house can cause panic. However, not every silent condenser unit requires a complete system replacement.

Homeowners must quickly determine the most cost-effective and reliable service option to restore cooling without overspending or applying a temporary fix to a dying system. By utilizing a structured local service comparison framework, you can objectively weigh your repair versus replacement paths. This guide breaks down exactly what happens when the fan fails, what a professional will check, and how to evaluate your next steps based on objective equipment data.

Understanding the Danger: Why a Stopped Fan Threatens Your Compressor

The outdoor fan motor serves one primary, highly critical function: exhausting the dense heat removed from your home's interior. In coastal South Florida's extreme heat and humidity, the system works overtime to extract thermal energy from the indoor air. That heat travels through refrigerant lines to the outdoor condenser coil, where the fan blows ambient air over the fins to dissipate it.

When that fan stops spinning, the heat has nowhere to go. Without proper heat exhaust, the compressor—the expensive "heart" of your air conditioning system—suffers thermal overload within minutes. It continues attempting to pump high-pressure, high-temperature refrigerant, but because the heat cannot escape, the internal temperature and pressure spike dangerously high.

Here is exactly how a stopped fan triggers a cascading failure:

1. Loss of Heat Exhaust: The fan stops pulling air through the condenser fins, trapping heat inside the unit.

2. Thermal Overload: The compressor continues pumping refrigerant but rapidly overheats due to the lack of heat dissipation.

3. High-Pressure Trip: If equipped with safety switches, the system shuts down to protect itself; if not, the compressor windings can literally melt and short out.

4. Indoor Coil Freezing: The interrupted heat transfer process causes the indoor evaporator coil temperature to drop below freezing, encasing it in solid ice.

Utilizing a structured local service comparison framework early on is imperative. Acting quickly and understanding the mechanical stakes prevents a relatively straightforward fan repair from destroying the compressor entirely, which often forces a complete system replacement.

Diagnosing the Silence: Common Reasons Your AC Fan Won't Spin

When a technician arrives to inspect a silent outdoor unit, they are looking for a few specific points of failure. South Florida's coastal salt air and high humidity significantly accelerate corrosion on outdoor AC components, often shortening the lifespan of electrical connections, contactors, and motors compared to inland regions. Understanding what causes the failure helps you apply options comparisons for homeowners effectively.

The Warning Signs of a Failing Capacitor

Bad capacitors are the most frequent culprit behind a stationary fan. The dual run capacitor acts as a powerful battery that delivers the massive jolt of electricity required to jumpstart the compressor and the fan motor. Listen closely to the outdoor unit: if you hear a distinct buzzing or humming sound coming from the condenser but the fan blades are stationary, the capacitor is likely trying to send voltage to a motor that cannot start. Without this initial electrical push, the motor remains completely stationary, even though the system is calling for cooling.

Identifying Motor Burnout

If the capacitor is functioning properly, the fan motor itself may have failed. Burnt-out fan motors result from age, natural mechanical wear, or excessive thermal stress from running constantly during peak summer months. One of the primary symptoms of a burnt-out motor is the top of the condenser unit feeling excessively hot to the touch. It is important to note that most AC condenser fan motors have a finite operational lifespan of 10 to 12 years under normal conditions. Once the internal copper windings degrade or short out, the motor can no longer generate the magnetic field required to turn the blades.

Contactor Failures and Physical Blockages

Beyond the capacitor and motor, electrical failures at the contactor can prevent power from reaching the fan entirely. The contactor is a mechanical relay that clicks shut to allow high voltage into the outdoor unit. In coastal environments, the metal contacts often pit, burn, or corrode, blocking the electrical current. Finally, physical blockages can physically prevent the blades from turning. Severe dirt buildup, invasive vines, fallen branches, or debris wedged into the fan grille can lock the motor in place, causing it to overheat and fail if the system isn't shut down immediately.

Safe Troubleshooting: What to Check Before Calling a Professional

While diagnosing the exact electrical failure requires licensed expertise, there are safe, non-electrical troubleshooting steps you can take. These steps help you gather information so you can use the local service comparison framework effectively when speaking with a technician.

• Verify thermostat settings: Ensure the thermostat is set to "Cool" and the temperature is set at least five degrees below the current room temperature. Sometimes, a blank or malfunctioning thermostat is the actual reason the outdoor unit isn't receiving the signal to turn on.

• Check the electrical panel: Locate your home's main electrical panel and check for a tripped breaker dedicated to the outdoor AC unit. If the breaker is tripped, reset it once. If it trips again immediately, leave it off—this indicates a serious electrical short.

• Perform a visual-only inspection: Walk outside and look closely at the condenser unit without touching it or opening any access panels. Look for obvious physical obstructions, such as fallen branches, heavy leaf accumulation, or debris wedged between the fan blades and the metal grille.

The absolute most important rule: Never attempt the dangerous DIY "stick test." Many online forums suggest attempting to jumpstart a humming fan by pushing the blades with a stick. This is incredibly dangerous. Not only do you risk severe physical injury if the high-speed fan suddenly engages, but you also risk catastrophic electrical shock or causing permanent damage to the motor bearings and blades. Always leave internal electrical and mechanical diagnostics to a certified professional.

The Local Service Comparison Framework: Evaluating Your Repair Options — Options Comparisons for Homeowners

Once a professional diagnoses the specific cause of the fan failure, you face a critical decision. This is where options comparisons for homeowners become essential. Establishing a neutral, criteria-based breakdown helps confidently rule out the wrong options and removes the pressure often associated with emergency repairs.

The baseline criteria for your decision-making should always include the age of the system, the severity of the component failure, and the overall health of the remaining parts. By referencing objective data like Department of Energy (DOE) and ASHRAE equipment life expectancy charts, you establish an objective baseline. For example, ASHRAE guidelines suggest most outdoor condensing units last roughly 15 years, while the fan motors typically last 10 to 12 years.

Using this local service comparison framework allows you to view the repair as a mathematical equation rather than an emotional emergency. If a system is relatively new and in excellent condition, a localized repair makes perfect sense. If the system is far past its expected lifespan and showing signs of widespread wear, pouring resources into a dying unit is a poor investment. The following sections provide a side-by-side comparison of component repairs versus system upgrades so you can weigh these paths objectively.

When to Replace Capacitor vs. Motor vs. Condenser Unit

Component-Level Decisions: Capacitor Replacement vs. Fan Motor Replacement

When the failure is isolated to the electrical components that drive the fan, the two most common localized repairs are replacing the capacitor or replacing the motor itself. Understanding the scope of these two professional repairs helps clarify their long-term value when reviewing options comparisons for homeowners.

• Capacitor Replacement — Scope of Work: Swapping the small, cylindrical electrical component that stores voltage. — Expected Lifespan Extension: Restores full function immediately; does not reset motor lifespan. — Best Use Case: System is humming but not spinning; motor is still healthy.

• Fan Motor Replacement — Scope of Work: Removing the fan blades, unmounting the old motor, and hardwiring a new motor. — Expected Lifespan Extension: Provides 10-12 years of reliable fan operation. — Best Use Case: Motor windings are burnt out, but the compressor and condenser coil are under 10 years old.

A capacitor replacement is a swift, highly cost-effective repair that restores function immediately. Because the capacitor is a wear-and-tear item, replacing it does not mean the rest of the motor is failing. A motor replacement, however, is a much more intensive repair required when the internal copper windings have failed or the bearings have seized.

The long-term viability of a motor replacement depends heavily on the age of the equipment. Putting a brand-new capacitor on a 12-year-old motor is logical because the part is inexpensive and quickly swapped. Putting a brand-new, labor-intensive motor into a 12-year-old condenser unit carries significant risk, as the aging compressor could fail shortly after. The local service comparison framework helps you balance these technical realities.

Major System Choices: Motor Replacement vs. Upgrading the Condenser Unit

If the fan motor is completely burnt out, you must compare the value of fixing that specific component against replacing the aging outdoor unit entirely. This is the most important decision point in any options comparisons for homeowners.

Apply the 10-to-12-year lifespan rule: if the outdoor unit is older than a decade, investing in a major component like a new motor often yields diminishing returns.

Replacing the Fan Motor Only

• Pros: Addresses the immediate problem without the larger commitment of a full system changeout. Keeps the current system operational for a few more seasons if the compressor is still healthy.

• Cons: Does not reset the clock on the aging compressor or the corroded condenser coil. Offers no improvements in energy efficiency.

Upgrading the Condenser Unit

• Pros: Provides a brand-new warranty on all outdoor components, including the fan motor and compressor. Delivers significant efficiency gains, which lowers monthly energy consumption. Eliminates the risk of a cascading failure in the near future.

• Cons: Requires a larger upfront investment and more extensive installation time.

When making this choice, there is a technical necessity to consider: ensuring the indoor and outdoor components match. If you decide to upgrade the condenser, the new outdoor unit must be compatible with your existing indoor air handler and evaporator coil. If they use different refrigerants or operate at vastly different efficiency ratings, the system will not function properly. If you are wondering whether to replace only the outside unit or the entire system, a professional diagnostic can map out the exact compatibility of your current equipment. Weighing these options objectively based on your system's specific history is the best way to ensure long-term comfort.

Frequently Asked Questions About AC Fan Failures

Can I run my AC if the fan is not spinning?

Absolutely not. Running the AC without the exhaust fan will cause the compressor to overheat and potentially suffer catastrophic failure. The system relies on that fan to dissipate the thermal energy removed from your home. If you leave the system running while the fan is stationary, you risk turning a minor electrical repair into a complete system replacement due to thermal overload.

Why is my AC humming but the fan is not turning?

This is the classic symptom of a failed dual run capacitor attempting to send voltage to a motor that cannot start. The capacitor acts as a battery, providing the necessary torque to get the heavy fan blades moving. When it fails, the electrical current reaches the motor, creating a distinct humming noise, but the motor lacks the power to overcome inertia and spin.

Is it worth replacing an AC fan motor?

It depends entirely on the age and overall condition of the system. If the unit is under 10 years old and the compressor is healthy, a motor replacement is usually a worthwhile investment. For older units approaching or exceeding 12 years of age, upgrading the entire condenser is often more cost-effective long-term, as it prevents you from pouring money into a failing system.

How do professionals test an AC fan motor?

Technicians use specialized diagnostic tools like digital multimeters to check for proper voltage reaching the unit. They test the microfarad reading on the capacitor to ensure it is storing and releasing power correctly. Additionally, they measure the electrical resistance (ohms) in the motor windings to determine if the internal copper wires have shorted out or degraded.

Will a tripped breaker stop only the outdoor fan?

Yes, if the indoor air handler and outdoor condenser are on completely separate electrical circuits, which is standard in most homes. In this scenario, the indoor blower fan may continue running and circulating room-temperature air while the outdoor fan and compressor lose power entirely. This is why checking the electrical panel is a highly recommended first step in safe troubleshooting.

Making a Confident Repair Decision for Your Cooling System

Choosing the appropriate service tier relies on objective criteria: system age, failure severity, and overall condition. By applying the local service comparison framework, you can confidently navigate the stress of a sudden breakdown. Remember that shutting off the system immediately at the thermostat is the absolute best way to protect your expensive compressor from permanent heat damage.

When you schedule an expert diagnostic, use these options comparisons for homeowners to discuss the findings with your technician. Local expertise and fast emergency response are key to diagnosing the fan issue before it causes expensive compressor damage. Getting a professional on-site quickly ensures you get the objective data you need to definitively rule out the wrong option and confidently choose the right path to restore your home's cooling before the summer heat takes over.

Why Is Your AC Unit Fan Not Spinning? Symptoms, Causes, and Safe Next Steps placeholder-image  | Air On Demand
5 min read

Why Is Your AC Unit Fan Not Spinning? Symptoms, Causes, and Safe Next Steps

Outdoor AC fan stopped but the indoor unit runs? Avoid emergency fees. See when to call a pro using our local service expertise and area tips.

Is Your AC Running But the Outside Fan Has Stopped?

Is your indoor air handler blowing air, but the outdoor unit sits completely still? When you need local service expertise and area tips to handle a sudden breakdown, the very first step is understanding exactly what you are dealing with. In our years of providing dependable AC repair to the local area, our team has found that discovering your outdoor condenser fan is not spinning while the indoor system continues to run is an urgent situation. The outdoor fan plays a critical role in releasing the heat your system absorbs from inside your house. Without it, the entire cooling cycle collapses.

You are now at a critical decision point: deciding whether this specific symptom requires immediate professional intervention or if it falls under routine homeowner troubleshooting. Making the right call prevents you from paying unnecessary emergency fees while protecting your expensive equipment from catastrophic damage. Taking a neutral, step-by-step diagnostic approach empowers you with the objective information needed to assess the situation safely. When researching local service repair vs replace troubleshooting, you will quickly find that staying informed is your best defense against system failure.

Consistent AC and HVAC maintenance is the most effective way to prevent these sudden component failures. However, when the unexpected happens, knowing the basics helps you understand exactly when it is time to schedule air conditioning repair with a licensed professional.

Immediate Safe Actions to Protect Your Compressor

When the outdoor fan stops spinning, the clock starts ticking on your compressor's lifespan. The compressor is the heart of your cooling system, responsible for pumping refrigerant through the lines. The fan's job is to blow outside air over the condenser coils, carrying away the intense heat generated by the compression process. Without airflow, that heat has nowhere to go. The temperature and pressure inside the unit will skyrocket, leading to severe thermal overload and potential catastrophic failure of the compressor.

To protect your system and avoid massive replacement costs, take these immediate actions:

1. Turn off the AC at the thermostat immediately: Do not wait to see if the fan starts spinning on its own. Switch your thermostat from "Cool" to "Off." This stops the system from calling for cooling and cuts the signal to the outdoor unit, preventing the compressor from running without heat dissipation.

2. Check the main electrical panel: Locate your home's primary electrical breaker box. Look for the dedicated double-pole breaker labeled for the air conditioner or condenser. If it has tripped to the middle or "Off" position, firmly push it all the way off, then back to the "On" position. A tripped breaker is a common safety mechanism that cuts power during an electrical surge or overload.

3. Perform a visual inspection: Walk outside to the condenser unit. Without touching the equipment or opening any casings, look closely at the fan blades through the top grille. Look for obvious physical obstructions like fallen branches, heavy debris, or encroaching vegetation that might be physically wedging the blades in place.

4. Do not attempt to force the fan: If you see an obstruction, do not reach through the grille while the system has power. If the fan is simply stuck, attempting to spin it by hand can result in severe injury if the motor suddenly engages.

Safe Homeowner Troubleshooting Steps for a Stopped AC Fan

Initial Troubleshooting: What Homeowners Can Safely Check

Establishing clear boundaries between safe homeowner maintenance and dangerous professional diagnostics is vital for your physical safety and the longevity of your equipment. Once you have turned off the thermostat to protect the compressor, there are a few additional visual checks you can perform to gather information.

Safely Inspecting the Exterior

Begin by examining the immediate perimeter of the outdoor condenser. Over time, high winds and heavy storms can blow significant debris into the unit. Look for accumulations of wet leaves, pine needles, or small sticks that may have slipped through the protective grilles. Heavy vegetation, such as overgrown bushes or climbing vines, can also creep into the housing and bind the fan motor shaft. If you spot exterior debris that is easily accessible without tools, you can carefully clear it away—but only after confirming the power is completely disconnected.

Verifying the Outdoor Disconnect Switch

Every outdoor air conditioning unit is required to have a dedicated electrical disconnect switch mounted on the exterior wall of the house, usually within a few feet of the condenser. This box contains either a pull-out block or a physical switch that cuts high-voltage power to the unit. Ensure the switch is in the "ON" position, or that the pull-out block is properly seated. Sometimes, landscapers or utility workers may accidentally bump this switch or pull the block and forget to replace it.

Knowing Your Limits

In our years of performing AC installations and repairs, we have seen too many homeowners risk injury by pushing past safe boundaries. Any step that requires the removal of metal access panels, the handling of internal wiring, or the use of electrical testing meters is strictly off-limits for homeowners. Opening the electrical cabinet exposes you to raw, high-voltage electricity. If you have verified the breakers, checked the disconnect box, and ensured the fan is free of physical debris, your safe troubleshooting journey is complete. We always advise our customers that understanding exactly when your HVAC breaks down unexpectedly ensures you hand the diagnosis over to a professional before causing accidental harm.

The Most Common Culprit: A Failing Dual Run Capacitor

If the power is on and the fan path is clear, the most frequent cause of a stopped condenser fan is a failed dual run capacitor. Understanding how this component works helps demystify the repair process and explains why your system suddenly stopped cooling.

The Role of the Capacitor

Think of the dual run capacitor as a massive, high-powered battery that stores energy. Your AC fan motor and compressor require a massive jolt of electricity to overcome inertia and start spinning—often much more power than your home's standard electrical wiring can deliver instantly. The capacitor stores this energy and releases it in a fraction of a second to jumpstart the motors. Once the motors are running, the capacitor provides a continuous, steady supply of voltage to keep them spinning smoothly.

How Extreme Weather Destroys Capacitors

Capacitors are highly susceptible to heat. Our team typically sees a huge surge in these issues during the hottest months. The local area's extreme heat and continuous heavy strain on AC units make dual run capacitor failures the leading cause of sudden condenser fan stoppage. When the outdoor temperature soars, your air conditioner is forced into much longer cooling cycles. This relentless operation heats up the dielectric fluid inside the capacitor. Over time, this fluid begins to break down, expand, and lose its ability to hold an electrical charge. When the capacitor drops below its required microfarad rating, it can no longer start the fan motor.

The Dangers of Stored Voltage

Safety Warning: HVAC capacitors store lethal high-voltage electrical charges—often 240 volts or more. This charge remains actively stored in the component even after the main power is disconnected at the breaker and the disconnect box is pulled. Touching the terminals of a charged capacitor can result in severe electrical shock, burns, or death. This is why replacing a capacitor is never a DIY project.

When one of our technicians inspects the system, they look for specific visual signs of capacitor failure. A degraded capacitor will often bulge at the top, resembling a swollen soda can, or leak a viscous fluid from its casing. However, many capacitors fail internally while looking completely normal on the outside, which is why we must test them with specialized multimeters.

Corroded Contactors and Burnt-Out Fan Motors

When the capacitor is functioning properly but the fan still refuses to spin, the diagnosis usually moves to mechanical wear and tear or environmental degradation. Two primary components are typically at fault: the contactor and the fan motor itself.

Understanding the Contactor

The contactor is a heavy-duty magnetic switch located inside the outdoor unit's electrical panel. When your indoor thermostat calls for cooling, it sends a low-voltage signal (usually 24 volts) to the contactor. This signal energizes a magnetic coil, which violently pulls down a set of metal contacts. When these contacts touch, they bridge the gap and allow high-voltage electricity (240 volts) to flow from your home's electrical panel into the compressor and fan motor.

How Environmental Factors Accelerate Wear

Because the contactor relies on physical metal pads touching each other, it is highly vulnerable to the elements. As local HVAC experts, we frequently see how the local area's humidity and coastal elements can accelerate corrosion on outdoor unit electrical contacts, leading to abrupt fan failures. Furthermore, the constant arcing of electricity every time the switch engages causes tiny pits and carbon buildup on the metal pads. Eventually, this pitting becomes so severe that electricity can no longer pass through the switch, leaving the fan motor completely without power. Insects, such as ants and earwigs, are also notorious for crawling into the contactor and being crushed between the plates, creating an insulating barrier that blocks the electrical flow.

Fan Motor Burnout

If the contactor is sending power and the capacitor is providing the jumpstart, the fan motor itself may have failed. This often happens when a failing capacitor forces the motor to work harder than it was designed to, drawing excessive amperage and overheating the internal copper windings. Alternatively, the internal bearings of the motor can lose their lubrication over years of use, causing the shaft to seize up completely. When the motor burns out, you will often hear specific noises you don't want to hear from your AC, such as a loud, aggressive buzzing or a grinding sound as the system struggles to force a seized bearing to turn.

Decoding the Symptoms: Humming Noises vs. Complete Silence

Listening to your outdoor unit can provide vital clues about the state of your system. Identifying auditory symptoms helps you frame the component failures objectively and allows you to provide accurate information to our dispatchers over the phone. A neutral diagnostic approach prevents miscommunication and ensures our technician brings the right tools and replacement parts to the job.

• Loud Humming or Buzzing — What It Means: The system is receiving electrical power, but a component is physically unable to move. — Likely Component Failure: Failed dual run capacitor, seized motor bearings, or a physically blocked fan blade.

• Clicking Sound, Then Silence — What It Means: The contactor is engaging, but the high-voltage power is immediately cutting out or failing to reach the motor. — Likely Component Failure: Tripped breaker, severely pitted contactor pads, or a completely burnt-out motor winding.

• Complete Silence — What It Means: No power is reaching the outdoor unit, or the low-voltage signal from the thermostat is broken. — Likely Component Failure: Blown fuse in the disconnect box, failed thermostat wire, or a dead contactor coil.

• Grinding or Screeching — What It Means: Metal-on-metal friction inside the motor housing. — Likely Component Failure: Failing fan motor bearings that require immediate motor replacement.

If you hear a loud humming noise while the fan remains stationary, it typically points to a locked rotor scenario. The motor is trying to turn, drawing massive amounts of electricity, but cannot overcome the resistance. This is an urgent situation that will quickly destroy the motor if the power is not cut. Complete silence, on the other hand, often indicates a total loss of power or a communication failure between the indoor and outdoor units.

Professional Diagnostics: Knowing When to Call an Expert

Once you have exhausted the safe, visual checks, the next steps require specialized tools, deep electrical knowledge, and safety certifications. Rely on our licensed, professional HVAC experts for safe and accurate diagnostics rather than attempting risky DIY electrical repairs. Internet tutorials often downplay the lethal risks associated with high-voltage HVAC components.

The Tools of the Trade

Testing capacitance and motor windings requires a professional-grade multimeter. When our technicians arrive at your home, they will safely discharge the capacitor using a heavy-duty resistor before testing its microfarad rating. They will also test the fan motor by measuring the electrical resistance (ohms) between the internal copper windings and the metal casing of the motor. If the meter detects continuity between the windings and the ground, it means the internal insulation has melted away, and the motor is completely shorted out.

The Repair vs. Replace Framework

Our team provides an objective assessment of the motor's lifespan and the system's overall health. If the issue is simply a failed capacitor or a pitted contactor, these are relatively standard, cost-effective repairs that can be completed in a single visit. However, if the fan motor has burnt out, the conversation shifts.

You must weigh the costs of replacing a major component against the age and efficiency of the entire system. If your air conditioner is over ten years old and uses outdated refrigerant, investing heavily in a new fan motor might not make financial sense. Guiding you through the repair vs replace your HVAC decision requires looking at the total cost of ownership, the warranty status of the equipment, and the likelihood of other components, like the compressor, failing in the near future.

Frequently Asked Questions About AC Fan Failures

Why is my AC running but the outside fan is not spinning?

This usually means the compressor is still receiving power, but the fan motor has failed or the capacitor providing its startup energy has died. The indoor blower will continue to circulate air, but because the outdoor fan cannot remove the heat, the air coming from your vents will quickly turn warm. Turning the system off immediately is required to prevent the compressor from overheating.

Can I run my AC if the fan is not spinning?

No. Running the system without the condenser fan prevents heat from escaping, which will quickly overheat and destroy the compressor. The compressor relies on the fan to cool the refrigerant coils. Without this airflow, the internal pressure spikes rapidly, leading to a catastrophic and expensive system failure.

How do you fix an AC fan that won't spin?

Check for tripped breakers and clear exterior debris first. If the breaker is on and the area is clear, a licensed professional must test and replace the internal electrical components. Because the internal parts involve high voltage, attempting to fix the fan yourself without proper training is incredibly dangerous.

What causes an AC fan motor to burn out?

Overwork due to a failing capacitor, lack of maintenance, physical blockages, or age-related wear and tear on the internal bearings are the primary causes. When a motor is forced to push past heavy resistance or run without the proper electrical support from the capacitor, the internal copper windings overheat and melt, destroying the motor.

Is a bad AC capacitor dangerous to replace?

Yes. Capacitors store high-voltage charges that can cause severe injury or death even when the main power to the unit is turned off. Our professional technicians use specific tools to safely discharge the stored electricity before removing the component, ensuring the repair is handled without risk of electrocution.

Secure an Objective Diagnosis for Your AC System

Understanding the exact symptoms and potential causes of a stopped condenser fan empowers you to make informed, logical decisions about your home comfort system. By recognizing the difference between a simple tripped breaker and a complex electrical failure, you protect your equipment from further harm and avoid the trap of unnecessary panic.

Always remember that a clear sequence of actions—turning off the unit at the thermostat immediately, checking the basic electrical panel, and calling a professional—prevents minor component failures from cascading into major compressor damage. Do not let a silent outdoor unit ruin your comfort or compromise your safety. Schedule an inspection with our local experts to resolve the issue safely, efficiently, and effectively, ensuring you get a clear, structured explainer of exactly what went wrong and how to fix it.

Why Is My AC Unit Fan Not Spinning? Causes and Safe Next Steps placeholder-image  | Air On Demand
5 min read

Why Is My AC Unit Fan Not Spinning? Causes and Safe Next Steps

Outside AC unit buzzing but blades are still? Get common homeowner questions answered about condenser failures, safe next steps, and when to call a pro.

Diagnosing a Dead AC Fan: Immediate Steps and Critical Decisions

When your air conditioning system suddenly stops working properly in the middle of a hot afternoon, getting common homeowner questions answered quickly becomes your top priority. You walk outside expecting to hear the familiar hum of your cooling system, only to find the outside unit buzzing loudly while the fan blades sit completely still. Your house is getting warmer by the minute, and the sudden silence from your condenser fan is alarming. This specific malfunction is one of the most frequent issues our team at our business sees when homeowners call us for emergency AC repair in the local area.

Here is the thing: a stationary condenser fan is a serious mechanical issue, not just a minor glitch. The primary decision point you face right now is determining if this is a simple external obstruction you can safely clear, or a complex electrical failure requiring professional intervention. Continuing to run your air conditioner in this state is highly destructive. Your immediate priority is to stop the system from causing further damage to itself while you figure out the next steps.

In this guide, we will walk through exactly what is happening inside your unit, what components typically fail, and how to safely troubleshoot the problem without putting yourself at risk. By understanding the mechanics behind the failure, you can make an informed decision about when to call in a professional.

The Immediate Danger: Why You Must Shut Off the System

If you notice your AC fan is not spinning, the very first thing you must do is turn your thermostat to the "Off" position. When helping clients get common homeowner questions answered, our technicians constantly remind homeowners that ignoring a dead fan leads to catastrophic mechanical damage.

Your air conditioner does not actually create cold air; it removes heat from inside your home and pumps it outside. The outdoor fan is responsible for blowing that absorbed heat into the outdoor air. When the fan stops spinning, the heat has nowhere to go. This leads to a dangerous condition known as thermal overload. Without the fan expelling the heat, the compressor—the expensive "heart" of your air conditioning system—rapidly overheats.

During intense summer heatwaves, running an AC with a dead fan can permanently destroy the compressor within a matter of hours. The internal temperature of the unit spikes, and while modern compressors have thermal safety switches designed to shut them down when they get too hot, these switches can fail or wear out from repeated tripping.

Additionally, a dead outdoor fan stalls the entire refrigeration cycle. Because the heat is not being released outside, the cold refrigerant returning to your indoor unit drops below freezing. This causes the moisture in your indoor air to freeze directly onto your evaporator coil. With high relative humidity in areas like Miami, this process accelerates rapidly. The intense moisture in the air creates thick blocks of ice on the indoor coil. When that ice eventually thaws, it often overwhelms the drain pan, leading to severe water damage inside your home.

Understanding the Mechanics: What Does the Condenser Fan Do?

To understand why a stationary fan is such a critical emergency, it helps to know exactly what this component is designed to do. When getting common homeowner questions answered about heat pumps or AC units, we always start with the basic mechanics of heat transfer.

Your outdoor unit, known as the condenser, houses three main components: the compressor, the condenser coils, and the condenser fan. The compressor pressurizes warm refrigerant gas, sending it through the coils. The condenser fan pulls outdoor air through these coils to cool the refrigerant down, turning it back into a liquid so it can return indoors to absorb more heat.

According to Department of Energy (DOE) HVAC maintenance guidelines and ASHRAE standards for residential cooling systems, proper airflow is mandatory for this heat exchange process. Most residential HVAC fan motors operate between 850 and 1600 Revolutions Per Minute (RPM) to maintain the necessary heat dissipation.

• Indoor Blower Fan — Location: Inside (Attic/Closet) — Primary Function: Circulates conditioned air through the home's vents. — What Happens if it Fails?: Coils freeze, no air comes out of the vents.

• Outdoor Condenser Fan — Location: Outside Unit — Primary Function: Expels absorbed heat into the outdoor air. — What Happens if it Fails?: Compressor overheats, system trips on high pressure.

• Compressor — Location: Outside Unit — Primary Function: Pumps refrigerant through the entire system. — What Happens if it Fails?: Total system failure; no cooling occurs at all.

When the outdoor fan stops turning, the refrigerant stays hot. It travels back indoors as a warm gas instead of a cool liquid. The entire refrigeration cycle stalls objectively and completely. The system will continue to consume massive amounts of electricity while providing zero cooling to your home.

Primary Mechanical Culprits Behind Fan Failure

When getting common homeowner questions answered regarding a dead fan, we find the root cause usually boils down to a few specific electrical or mechanical failures. In our years of providing AC repair in the local area, we have seen that properly diagnosing condenser failures requires technical knowledge of these specific electrical pathways.

1. The Dual Run Capacitor has Failed: This is the most frequent issue.

2. The Fan Motor has Burned Out: A mechanical failure of the motor itself.

3. The Contactor is Faulty: The electrical bridge is broken.

Bad Dual Run Capacitors

The dual run capacitor acts like a large battery that provides the initial electrical jolt needed to jump-start the fan motor and the compressor. Because fan motors require significantly more energy to start spinning than they do to keep spinning, they rely heavily on this stored charge.

• Heat sensitivity: Capacitors are highly susceptible to heat damage and power surges.

• Visible symptoms: A bad capacitor often bulges at the top, resembling a swollen soda can, or leaks an oily fluid.

• Audible symptoms: This is the most common cause of an outdoor unit that hums loudly while the fan remains stationary. The motor is trying to start, but it lacks the necessary torque.

Burnt-Out Fan Motors

If the capacitor is functioning properly, the fan motor itself may have reached the end of its lifespan. This occurs when the internal motor windings short out or the bearings seize up from a lack of lubrication.

• Warning signs: Motor failure is often preceded by grinding noises, squealing, or excessive heat radiating from the top of the outdoor unit.

• Overworking: Motors frequently burn out when they are forced to run continuously during extreme heatwaves, or when they have to fight against thick dirt and debris blocking the unit.

Faulty Contactors

The contactor is an electronic switch controlled by your indoor thermostat. When the thermostat calls for cooling, it sends a low-voltage signal to the contactor, pulling a mechanical switch closed to deliver high-voltage power to the fan and compressor. Over time, the metal plates on the contactor can become pitted, burned, or covered in bugs and debris, failing to close the electrical circuit. If power cannot pass through the contactor, the fan will not spin.

External Obstructions and Electrical Interruptions

Not every fan failure is caused by a broken internal component. Sometimes, the issue is environmental. When helping customers get common homeowner questions answered, our team often finds that simple external factors are to blame.

Physical Debris and Blockages:
Your outdoor unit is exposed to the elements 24/7. Severe storms, heavy winds, or basic landscaping tasks can introduce physical debris into the system. Tree branches, large accumulations of wet leaves, or even thick vines can physically jam the fan blade, preventing it from turning freely. If the motor tries to spin against a physical blockage, it will quickly overheat and burn out.

Tripped Circuit Breakers:
Your air conditioner requires a significant amount of electricity, and it is protected by dedicated circuit breakers in your main electrical panel. If there is a power surge or an electrical anomaly, the breaker will trip to cut power to the unit and prevent a fire.

While a tripped breaker is a simple reset, it is important to understand the "why" behind the trip. If you reset the breaker and the system turns on normally, it may have been a fluke power surge. However, if the breaker immediately trips again, or trips repeatedly over a few days, you have a serious underlying electrical short. Never force a breaker to stay on, as this removes the safety mechanism protecting your home.

You can safely perform a visual inspection of your outdoor unit to check for these issues without ever opening an electrical panel or touching a wire.

Safe Homeowner Checks vs. Professional Boundaries

There is a distinct line between being a proactive homeowner and attempting dangerous electrical work. When we help get common homeowner questions answered, we clearly delineate safe basic troubleshooting from illegal or unsafe DIY repairs.

Safe Troubleshooting Steps You Can Take:

• Verify thermostat settings: Ensure the thermostat is set to "Cool" and the temperature is set several degrees below the current room temperature.

• Check the main breaker panel: Look for a tripped breaker labeled "AC" or "Condenser" and firmly reset it once.

• Visually inspect for debris: Look down into the top grille of the outdoor unit to see if sticks, leaves, or debris are physically blocking the fan blade.

• Listen to the unit: Note if the unit is completely silent, clicking, or humming loudly. This information is highly valuable to your technician.

Strict Professional Boundaries (What NOT to do):

• Never attempt DIY electrical repairs: The dual run capacitor stores a lethal amount of high-voltage electricity, even when the main power to the unit is completely shut off. Handling a capacitor without safely discharging it can cause severe injury or electrocution.

• Do not bypass safety switches: Never attempt to wire around a faulty contactor or pressure switch to force the system to run.

• Do not spin the blade with a stick: While some older guides suggest "jump-starting" a humming fan by pushing the blade with a stick, this is incredibly dangerous. If the motor starts, the stick can shatter and cause injury. Furthermore, forcing a bad motor to run will quickly destroy the compressor.

Professional diagnostics are ultimately safer and far more cost-effective than risking electrocution, causing severe mechanical damage, or voiding your manufacturer warranties. Replacing internal components requires specialized tools, multimeters, and a licensed professional.

Safe Troubleshooting Steps for a Dead AC Fan

Frequently Asked Questions About AC Fan Failures

When homeowners experience a cooling emergency, they need fast, factual information. Here are the most frequent inquiries we address when getting common homeowner questions answered for our local area customers.

Why is my AC running but the outside fan is not spinning?

The most likely cause is a failed dual run capacitor, which prevents the fan motor from getting the electrical boost it needs to start. It could also indicate a burnt-out fan motor, a faulty contactor, or physical debris jamming the fan blade. While the compressor may still be running (which is the noise you hear), the system cannot properly cool your home without the fan operating.

Can I run my AC if the fan is not spinning?

No, you should never run your air conditioner if the outside fan is not spinning. Doing so traps the heat inside the outdoor unit, causing the compressor to rapidly overheat and potentially fail completely. Turn the system off at the thermostat immediately to prevent catastrophic mechanical damage and expensive replacement costs.

How do you test an AC fan motor?

Testing an AC fan motor requires a digital multimeter to check for proper voltage, continuity, and resistance across the motor windings. Because this involves interacting with high-voltage electrical components and potentially dangerous capacitors, testing should only be performed by a licensed HVAC professional. Attempting this without proper training is highly unsafe.

Is a broken AC fan an emergency?

Yes, a broken AC fan is considered an HVAC emergency, especially during hot summer weather. Without the fan, your system cannot cool your home, and leaving the system running will destroy the compressor. You should shut the system down and request emergency diagnostic services to restore your cooling safely.

Why is my outside AC unit making a humming noise?

A loud humming noise usually indicates that the electrical components are trying to start the motor, but the motor lacks the power to turn. This is a classic symptom of a failed run capacitor or a seized fan motor bearing. The hum is the sound of electrical current meeting heavy mechanical resistance.

What causes an AC fan motor to burn out?

Fan motors burn out due to excessive strain, old age, or poor maintenance. If the outdoor unit is choked with dirt and debris, the motor has to work much harder to pull air through the coils, leading to overheating. A failing capacitor can also cause the motor to draw too much amperage, eventually melting the internal wire windings.

Next Steps for Restoring Your Cooling System

Dealing with a stationary air conditioner fan is stressful, but understanding the underlying mechanics helps you make informed, logical decisions. As we have covered in this guide to getting common homeowner questions answered, a dead fan is a serious issue that stalls the entire heat transfer process. While checking your breaker and looking for physical debris are great first steps, our repair experts at our business know that the vast majority of fan failures stem from high-voltage electrical components like capacitors, contactors, or the motor itself.

The most important action you can take is to keep the system turned off at the thermostat to protect your compressor from permanent thermal damage. Once the system is safely powered down, the next logical step is to reach out for a professional evaluation. Relying on fast, reliable emergency diagnostic services ensures that the exact electrical fault is identified and resolved safely. By bringing in a licensed expert for your AC repair, you can restore your home's comfort quickly and ensure your cooling system operates efficiently for the rest of the season.

Why Is My AC Unit Fan Not Spinning? A Diagnostic Guide to Repair Options placeholder-image  | Air On Demand
5 min read

Why Is My AC Unit Fan Not Spinning? A Diagnostic Guide to Repair Options

AC fan not spinning? Protect your compressor first. Get clear answers with our repair options comparisons for homeowners and compare your next steps today.

When the Heat Hits: Immediate Steps for a Stalled AC Fan

In our years of providing AC repair and AC installation across the local area, our team has seen firsthand how unrelenting summer in South Florida can be, making options comparisons for homeowners critical the moment you realize your AC unit fan has stopped spinning. The heat index climbs, the indoor vents start blowing lukewarm air, and outside, the condenser unit hums ominously while the fan blades sit completely still. This is an urgent mechanical failure that places maximum thermal stress on your entire cooling system. The longer the system runs in this compromised state, the closer it gets to catastrophic failure.

Evaluating local service options quickly and accurately is the only way to restore your home's comfort before minor component wear cascades into irreversible system damage. When faced with a stalled fan, you need an objective framework to understand the root cause of the failure, weigh your potential repair solutions, and make a value-driven decision for your property. This diagnostic guide strips away the technical jargon to provide a clear, criteria-based look at why your condenser fan has failed and how to navigate the available options comparisons for homeowners.

The Critical Warning: Protect Your Compressor First

If your outside AC fan is not spinning but you hear a humming or buzzing noise, our team strongly advises you to turn off your thermostat immediately. Leaving the system running without a functional fan can cause catastrophic, irreversible damage to the compressor.

Understanding the mechanical chain reaction of a stalled fan is the absolute first step in evaluating local service options effectively. The condenser fan plays a vital role in the refrigeration cycle. Its primary job is to pull ambient air across the condenser coils to dissipate the intense heat extracted from the inside of your home. When the fan stops spinning, that heat has nowhere to go. The system rapidly enters a dangerous state of thermal overload.

• Trapped Heat: Without airflow, the high-pressure refrigerant gas cannot condense back into a liquid, causing temperatures inside the outdoor unit to spike dramatically.

• Compressor Strain: The compressor, which acts as the heart of the HVAC system, continues to pump against extreme pressures and temperatures.

• Thermal Overload: Most modern compressors have an internal thermal overload switch that will trip to shut the system down. However, repeated cycling in this state will eventually cause the compressor windings to melt and short out.

• Complete Failure: A burnt-out compressor often requires a full system replacement, turning a manageable repair into a massive unexpected expense.

By shutting the system down at the thermostat the moment you notice the fan is stationary, you protect the compressor and preserve your ability to explore more affordable options comparisons for homeowners.

Common Causes Behind a Stalled Condenser Fan

Once the system is safely powered down, the next step is identifying the specific component failure. Understanding what went wrong mechanically is an essential part of evaluating local service options when your system breaks down. In our daily AC repair service calls, we find there are several distinct reasons why your AC fan motor stops working, ranging from simple electrical faults to complete mechanical seizure.

Failed Dual Run Capacitors

The dual run capacitor is the most common culprit behind a stalled condenser fan. This cylindrical component acts like a powerful battery, storing energy to send a high-voltage jolt that jump-starts both the fan motor and the compressor. Capacitors are highly susceptible to heat degradation. Over time, the internal chemical composition breaks down, causing the capacitor to swell, leak, or simply lose its ability to hold a charge. If you hear a distinct "humming" or "buzzing" sound coming from the outside unit while the fan remains still, it usually indicates that the motor is receiving power but lacks the initial torque provided by the capacitor to begin rotating.

Burnt-Out Fan Motors

If the capacitor is functioning correctly but the fan still refuses to spin, the fan motor itself may have burnt out. Continuous strain, lack of lubrication, or operating with a weak capacitor forces the motor to draw higher amperage than it was designed to handle. This excess electrical current generates extreme heat, which eventually melts the protective insulation around the copper motor windings. Unlike a failed capacitor, which produces a humming noise, a completely dead fan motor will often be entirely silent, or it may feel exceptionally hot to the touch. Mechanical seizure can also occur if the motor bearings fail, locking the shaft in place.

Electrical Breakers and Physical Blockages

Beyond the capacitor and the motor, other common issues include tripped circuit breakers and physical obstructions. A power surge or a locked rotor can cause the system to pull too much electricity, tripping the dedicated breaker at your electrical panel. Additionally, severe weather can blow twigs, dense leaves, or other debris into the condenser cabinet, physically jamming the fan blades and preventing rotation. Identifying these root causes is crucial for navigating options comparisons for homeowners effectively.

How Extreme Climate Accelerates HVAC Wear and Tear

The environment in which your HVAC system operates plays a massive role in component longevity. Evaluating local service options requires understanding these unique environmental stressors. In our experience serving the local area and South Florida coastal regions, the combination of extreme heat, relentless humidity, and salt-laden air creates a highly corrosive atmosphere for electrical components.

Standard HVAC parts are tested against national averages, but coastal climates demand continuous, high-capacity cooling. The delta-T—the difference between the outdoor temperature and your desired indoor temperature—remains consistently wide for most of the year. This means your condenser fan runs for far more hours annually than a comparable unit in a milder climate. The continuous run-times place maximum thermal stress on the dual run capacitor and the fan motor bearings.

Furthermore, coastal humidity and salt air accelerate the oxidation of electrical contacts and the degradation of motor housings. According to ASHRAE equipment life expectancy standards, systems operating in high-demand, high-corrosion coastal environments often see a reduction in the average lifespan of standard electrical components. A capacitor that might last eight years in the Midwest may fail in three years under continuous South Florida thermal loads. Recognizing this accelerated wear and tear is vital when analyzing options comparisons for homeowners, as it shifts the math on long-term reliability.

Navigating Options Comparisons for Homeowners: Repair vs. Replacement

When evaluating local service options, our team typically recommends determining whether a targeted component repair offers better long-term value than a broader system upgrade, such as a new AC installation or heat pump replacement. This objective, criteria-based evaluation framework strips away the marketing jargon to focus on core performance factors. Not every stalled fan requires a new air conditioner, but continually repairing an aging system can quickly become a bad investment.

Criteria for Component Repair

Targeted repairs make the most financial sense when the system is relatively new and the failure is isolated. If a diagnostic test reveals a swollen dual run capacitor but the fan motor windings are still intact, replacing the capacitor is a highly cost-effective solution. Repair is the optimal path when the overall system efficiency remains high, the unit uses modern refrigerant, and the equipment is still covered by a manufacturer warranty. In these scenarios, restoring the failed component returns the system to peak operational health without unnecessary expenditure.

Criteria for Motor or System Replacement

Conversely, replacing the motor or the entire condensing unit becomes necessary when you face repeated component failures indicating a deeper underlying issue. If a failing fan motor has been pulling excessive amperage for months, it may have already compromised the compressor. Furthermore, if the age of the system exceeds standard life expectancy in high-demand climates—typically beyond 10 to 12 years in coastal zones—investing heavily in a new fan motor yields diminishing returns. Upgrading the system provides a fresh warranty, significantly higher energy efficiency, and reliable performance during peak summer heat.

• Capacitor Replacement — Upfront Investment: Low — Long-Term Reliability: High (if motor is healthy) — Best Use Case: Isolated electrical failure on a relatively new, well-maintained system.

• Fan Motor Replacement — Upfront Investment: Moderate — Long-Term Reliability: Moderate to High — Best Use Case: Motor bearings have seized or windings burnt out, but the compressor and coils remain in excellent condition.

• Full Condenser Replacement — Upfront Investment: Higher — Long-Term Reliability: Maximum (New Warranty) — Best Use Case: System is over 10 years old, uses phased-out refrigerant, or has suffered secondary compressor damage.

Troubleshooting a Stalled AC Fan: Repair Options and Risks

The Hidden Dangers of DIY Electrical Troubleshooting

With a wealth of information available online, it can be tempting to attempt a quick fix when the house is heating up. However, evaluating local service options is always safer and more cost-effective than risking severe personal injury or further equipment damage through DIY electrical troubleshooting. HVAC systems operate on high-voltage electricity, and the outdoor condenser unit presents specific, lethal hazards.

One of the most dangerous myths circulating online is the "stick test." This involves using a wooden stick or a screwdriver to manually push the fan blades through the top grate while the system is turned on, attempting to jump-start the motor. Do not attempt this under any circumstances. If the fan starts spinning, it confirms the capacitor is dead, but it forces the motor to run on unbalanced voltage. This rapidly overheats the motor windings, practically guaranteeing that you will have to replace the motor in addition to the capacitor. More importantly, sticking objects into a live, high-voltage appliance can result in severe electrical shock or physical injury from the rapidly spinning metal blades.

Furthermore, HVAC capacitors are designed to store massive amounts of electrical energy. Even after you have turned off the power at the thermostat and pulled the disconnect block at the outdoor electrical panel, the dual run capacitor retains a potentially lethal high-voltage charge. Discharging a capacitor requires specific tools and technical knowledge. No step-by-step DIY electrical instructions should ever be followed without a proper license. Relying on professional options comparisons for homeowners ensures the diagnostic process is handled safely and correctly.

The Value of Professional Diagnostics for Long-Term Reliability

Accurate troubleshooting requires more than just looking at the fan blades; it requires precise electrical measurements. This is where prompt, professional diagnostic expertise becomes the cornerstone of evaluating local service options without relying on guesswork. When our business dispatches a technician, they utilize specialized diagnostic tools to determine exactly where the failure occurred and what secondary damage may have resulted.

During a professional diagnostic visit, technicians use digital multimeters to measure the exact microfarad reading of the dual run capacitor safely. They use megohmmeters to test the fan motor windings for microscopic shorts to ground, which indicate internal insulation failure. They also inspect the electrical contactor for pitting and measure the amperage draw of the compressor to ensure it hasn't been compromised by the heat buildup.

This level of prompt diagnostic expertise is the only safe way to resolve dangerous electrical and mechanical issues before they lead to costly, full-system failures. By accurately diagnosing whether the issue is a simple capacitor, a failing motor, or a complex electrical fault, a professional provides the concrete data you need. This data forms the baseline for accurate options comparisons for homeowners, allowing you to choose a repair path based on facts rather than assumptions.

Making an Informed Decision for Your Home's Comfort

When the peak summer heat hits and your AC fan stops spinning, the speed and accuracy of your response dictate the outcome. Summarizing the immediate steps: our team always reminds customers to turn off the thermostat first to protect your compressor from catastrophic thermal overload. Once the system is safe, understanding the root causes—from heat-degraded capacitors to burnt-out motors—helps you navigate the situation calmly.

Evaluating local service options objectively leads to better long-term value and reliability for your home cooling system. Whether the data points toward a simple component replacement or indicates that a broader system upgrade is the most financially sound choice, having a clear framework makes the decision straightforward. The most critical step in navigating options comparisons for homeowners is obtaining an accurate, professional assessment of your specific equipment.

Don't let a stalled fan compromise your entire HVAC system. Reach out to our local experts for a comprehensive, professional inspection to get concrete answers about your unit. By prioritizing safe diagnostics and clear options comparisons for homeowners, you can restore your home's comfort reliably and efficiently.

Frequently Asked Questions

Why is my AC running but the fan is not spinning?

The most common reason is a failed dual run capacitor or a burnt-out fan motor. The condenser unit may still hum because the compressor is receiving power and trying to operate, but the fan lacks the stored electrical energy to start turning. In other cases, a tripped breaker or physical debris blocking the blades can prevent rotation. It is critical to turn the system off immediately to prevent the compressor from overheating while you arrange for diagnostics.

Can I run my AC if the fan is not spinning?

Absolutely not; running the system without the fan will cause severe, irreversible damage to the compressor. The fan's job is to pull air across the coils to remove heat from the system. Without this airflow, the refrigerant cannot cool down, causing temperatures and pressures inside the compressor to spike dangerously high. Always shut the system off at the thermostat the moment you notice the fan has stopped.

How do you fix an AC fan that won't spin?

Fixing a stalled fan requires replacing the specific electrical or mechanical component that has failed. A licensed professional will use a multimeter to test the capacitor, the motor windings, and the electrical contactor to pinpoint the exact fault. Depending on the diagnosis, the fix usually involves safely discharging and replacing the dual run capacitor, swapping out a seized motor, or clearing internal blockages from the cabinet.

What does a bad AC capacitor sound like?

A failing or dead AC capacitor typically produces a distinct humming, buzzing, or clicking sound from the outdoor unit. This noise occurs because electrical current is still flowing to the motor, but the motor cannot start without the high-voltage boost the capacitor normally provides. If you hear this sound while the fan blades are stationary, it is a strong indicator of a capacitor failure and requires immediate attention.

How much does it cost to replace an AC fan motor versus a capacitor?

Replacing a dual run capacitor is generally a low-cost repair, whereas a fan motor replacement requires a more moderate investment. The exact difference depends on the specific make and model of your HVAC system, as well as the complexity of the motor (such as single-speed versus variable-speed ECM motors). Because capacitors are standard consumable electrical parts, they are faster and less complex to replace than an entire motor assembly.

Is it safe to jump-start an AC fan with a stick?

No, using a stick to push the fan blades is incredibly dangerous and can cause further damage to your system. While it might temporarily force a motor with a bad capacitor to start spinning, the motor will run on unbalanced voltage and rapidly overheat, likely destroying the windings. Furthermore, inserting objects into a live, high-voltage appliance presents a severe risk of electrical shock and physical injury.

A – Z Guide to AC Making Strange Noises placeholder-image  | Air On Demand
Air Conditioning Repair
5 min read

A – Z Guide to AC Making Strange Noises

Decode ac making strange noises what they mean with this Miami AC troubleshooting guide covering causes, DIY fixes, and when to call pros.

What Your AC's Strange Noises Are Trying to Tell You

AC making strange noises — and wondering what they mean? Here's a quick breakdown of the most common sounds and what they usually signal:

SoundMost Likely CauseUrgency
Banging or clankingLoose or broken internal partHigh — turn off now
HissingRefrigerant leak or high compressor pressureHigh — turn off now
BuzzingElectrical issue, loose wiring, or failing capacitorMedium to High
Clicking (constant)Failing relay or bad capacitorMedium
Screeching or grindingWorn motor bearings or fan beltHigh — turn off now
RattlingLoose panel, debris, or loose screwsLow to Medium
WhistlingClogged air filter or duct leakLow to Medium
Bubbling or gurglingRefrigerant leak or blocked drain lineMedium to High

Your air conditioner is not supposed to be silent — but it is supposed to be predictable. Modern AC systems typically run between 25 and 55 decibels, roughly the volume of a quiet conversation. When a new sound shows up out of nowhere, especially in the middle of a brutal South Florida summer, that's your system asking for attention.

In Miami-Dade, where air conditioners run harder and longer than almost anywhere else in the country, unusual noises are rarely random. They almost always point to something specific — a loose part, an electrical fault, a refrigerant issue, or worn components that have been working overtime in the heat. Catching these sounds early is often the difference between a simple repair and a full system replacement.

This guide walks you through every major AC noise, what it means, where it's coming from, and what to do next.

Ac making strange noises what they mean definitions:

Normal AC Sounds vs. Problematic Noises

Before you panic and assume your cooling system is on its deathbed, it helps to know what a healthy air conditioner actually sounds like. Modern high-efficiency systems, like the advanced Daikin units we specialize in, are engineered to run incredibly quietly. In fact, some premium variable-speed models operate as low as 19 decibels—which is quieter than a whisper in a library!

However, even the quietest systems make some operational noises. When your air conditioner cycles on, you should expect to hear:

  • A gentle whoosh of air: This is simply the sound of your indoor blower fan pushing cooled air through your supply vents and pulling warm air back into the return grilles.
  • A single, distinct click: This is the sound of your thermostat sending an electrical signal to the outdoor condenser unit, telling it to start cooling.
  • A steady, low hum: The outdoor compressor and condenser fan motor will produce a consistent, non-disruptive hum as they work to pump refrigerant and release heat.

These sounds are brief, light, and highly repeatable. They blend easily into the background of daily life in Coral Gables or Palmetto Bay.

Problematic noises, on the other hand, start suddenly, get progressively louder, or come paired with other system symptoms like weak airflow, warm air blowing from the vents, or ice forming on the copper lines. If your air conditioner deviates from its predictable, quiet baseline, it is trying to send you a warning signal. Recognizing the Sounds Your AC Should Not Be Making is the first step toward protecting your home’s comfort and avoiding a major breakdown during peak summer heat.

Decoding the AC Making Strange Noises What They Mean

When your cooling system begins acting up, diagnosing the issue requires a systematic approach. We like to look at three key factors: the type of sound, its location (indoor vs. outdoor), and its urgency level.

Ignoring a warning sound allows minor wear and tear to cascade into severe mechanical damage. For example, a loose fan blade that starts with a light rattle can quickly break free, tearing through your outdoor coil and turning a simple tightening job into a major system replacement.

Let's look at the diagnostic details of what your ac making strange noises what they mean when you hear specific sounds. For a deeper look at this diagnostic process, check out our guide on Odd Air Conditioning Noises and What They Mean.

Banging and Clanking: Loose Internal Components

If your air conditioner sounds like a dryer filled with tennis balls, you are likely dealing with loose or broken internal components.

Inside your indoor air handler, a loud banging or clanking usually points to an issue with the blower wheel. If the blower wheel becomes unbalanced, loose on its shaft, or clogged with heavy dirt, it will wobble violently and strike the surrounding metal housing.

If you hear this heavy metal-on-metal banging coming from your outdoor condenser unit, turn the system off immediately. This sound often indicates that a fan blade has bent or come loose, or that the internal support springs inside your compressor have failed. When compressor springs break, the motor inside the pressurized canister loose-mounts and bangs against the outer steel shell every time it cycles. This is a clear sign of compressor failure, requiring a professional intervention to determine if a replacement or a new unit is needed. To understand why these outdoor sounds are so critical, read more about AC Condenser Unit Loud Rattling Sounds.

Hissing and Bubbling: Refrigerant Leaks and Pressure Issues

Hissing and bubbling are almost always tied to the refrigerant that circulates through your system. Refrigerant is kept under high pressure; when a tiny pinhole leak develops in your copper coils or lines, the escaping gas creates a distinct, persistent hissing sound. As the refrigerant charge drops, you may also hear a bubbling or gurgling sound, which occurs when air pockets mix with the remaining liquid refrigerant.

Another, much more dangerous cause of hissing is high internal pressure within the compressor. If you hear a loud, high-pitched screaming or hissing noise that starts when the AC kicks on and lasts for 10 to 15 seconds, turn your thermostat off immediately. This indicates that your compressor is operating at dangerously high pressure levels, which can cause permanent damage or safety hazards if left running.

If you want to know more about these high-pressure warnings, take a look at our article on Why Is My Air Conditioner Screaming and Other Noise Complaints.

Buzzing and Clicking: Electrical Malfunctions

Your air conditioner relies on a complex network of electrical components to run safely. When these components begin to fail, they often let you know through buzzing or rapid clicking.

  • Loud Buzzing: This is a classic symptom of an electrical issue. It can be caused by a failing contactor relay switch (which connects power to your compressor), a weakening run capacitor, or loose wiring connections. Buzzing can also occur if the compressor itself is struggling to start up due to electrical resistance.
  • Constant Clicking: While a single click at startup is normal, rapid or continuous clicking is not. This usually means your electrical contactor is sticking, or your thermostat is struggling to communicate with the control board.

Don't let electrical issues linger. If you are hearing these sounds, our guide on Strange AC Noises Don’t Be Afraid explains how to handle these common electrical gremlins safely.

Screeching and Grinding: Motor and Bearing Wear

Screeching and grinding are high-urgency noises that indicate metal parts are rubbing together without proper lubrication.

  • Screeching: In older air conditioners, a high-pitched screech is usually the result of a slipping or worn fan belt. In modern units, which are mostly direct-drive and do not use belts, screeching points directly to failing bearings inside either the indoor blower motor or the outdoor condenser fan motor.
  • Grinding: A harsh grinding sound is the sound of metal-on-metal friction. This occurs when the sealed bearings inside your blower motor have completely worn down, dried out, or failed.

Running a motor that is actively screeching or grinding will quickly lead to motor burnout, which can leave you without any cooling in the middle of a hot Cutler Bay afternoon. Learn more about these fan-related issues in our breakdown of Common Air Conditioning Fan Noises in Miami FL.

Indoor vs. Outdoor Unit Noises: Why Location Matters

When you notice your ac making strange noises, identifying exactly where the sound is coming from is half the battle. Your split-system air conditioner consists of two distinct halves: the indoor air handler (usually located in a closet, garage, or attic) and the outdoor condenser unit. Because these units perform entirely different jobs, they produce different types of noises.

To safely isolate the source of the noise, you can perform a simple "fan-only" test:

  1. Go to your thermostat and switch the system setting from "Cool" to "Off."
  2. Switch the fan setting from "Auto" to "On."

This test runs your indoor blower motor and fan while keeping the outdoor compressor and condenser fan completely turned off.

If the strange noise continues while the fan is set to "On," the issue lies within your indoor unit (such as a loose blower wheel, dirty filter, or failing indoor motor bearings). If the noise stops completely during the fan-only test and only returns when you switch the system back to "Cool," the problem is located in your outdoor unit (such as compressor wear, a failing condenser fan, or outdoor electrical issues).

Pinpointing the location helps our technicians diagnose the issue much faster when we arrive at your home in Kendall or Pinecrest. For more tips on identifying the source of your system's sounds, check out AC Unit Makes Strange Noises.

Safe DIY Troubleshooting for Homeowners

While major mechanical and electrical repairs should always be left to certified professionals, there are a few safe, simple DIY checks you can perform when you first notice a new sound:

  1. Check and Change the Air Filter: A heavily clogged air filter restricts airflow, forcing your blower motor to work harder. This pressure drop can cause your ductwork to pop, whistle, or rattle. If you hear a whistling sound, replace your filter immediately.
  2. Clear Outdoor Debris: Turn off the power to your outdoor unit at the thermostat and the outdoor disconnect box. Inspect the top and sides of the condenser. Dried palm fronds, twigs, or loose leaves can fall through the top grille and strike the fan blades, creating a rapid clicking or rattling sound. Carefully remove any visible debris.
  3. Tighten Loose Panel Screws: Over time, the normal vibrations of your AC can loosen the screws on the metal cabinetry panels. If you hear a light, consistent rattle, grab a screwdriver and check the screws on your indoor and outdoor unit panels. A quick turn to tighten them can often restore peace and quiet.

What you should never do is attempt to open electrical panels, handle refrigerant lines, or spray harsh cleaning chemicals inside your unit. If a simple filter change or screw tightening doesn't resolve the sound, it's time to bring in the pros. For a list of sounds that require immediate professional attention, read The Noises You Don’t Want to Hear from Your AC.

Frequently Asked Questions About AC Noises

Is It Safe to Run an AC Making Strange Noises What They Mean?

Generally, no. If your system is making loud, metallic, or high-pitched noises like banging, grinding, screeching, or persistent hissing, you should turn the system off immediately at the thermostat. Running a damaged system can cause minor issues to cascade into catastrophic component failures, significantly increasing your repair needs.

Why Does My AC Making Strange Noises What They Mean Occur After Shutdown?

Some light sounds immediately after your system shuts down are completely normal. You may hear a soft hissing or whistling sound for a minute or two; this is simply the refrigerant pressure equalizing across the expansion valve. You might also hear occasional ticking or popping sounds as the metal ductwork and plastic casings cool down and contract.

Can a Dirty Air Filter Cause My AC to Whistle or Buzz?

Absolutely. A dirty air filter restricts the volume of air entering your system, creating a high-pressure drop. This forces air to squeeze through tiny gaps around the filter frame or within your ductwork, producing a distinct whistling or whistling-buzz sound. Replacing your air filter every 30 to 90 days is the easiest way to prevent this issue.

Conclusion

An air conditioner making strange noises is rarely a minor issue, but it doesn't have to be a stressful experience. Recognizing these auditory warning signs early allows you to address wear and tear before it leads to a complete system breakdown in the middle of summer.

As a Daikin Comfort Pro, Air On Demand is dedicated to keeping your home cool, quiet, and comfortable. We provide seamless residential HVAC solutions across South Florida, including Coconut Grove, Coral Gables, Country Walk, Cutler Bay, Homestead, Kendale Lakes, Kendall, Lakes By the Bay, Palmetto Bay, and Pinecrest. Our customers benefit from convenient online booking, fast response times, real-time service updates, and industry-leading Daikin warranties—including 12-year parts warranties and our Comfort Promise.

If your air conditioner is trying to tell you something, don't wait for the sound to get worse. Check out our AC Repair Miami Ultimate Guide for more local cooling tips, or Schedule professional AC repair with our friendly, expert team today to bring the sound of silence back to your South Florida home.

How to Diagnose AC Humidity Issues Fast placeholder-image  | Air On Demand
Air Conditioning
5 min read

How to Diagnose AC Humidity Issues Fast

Spot signs your ac is struggling with tropical humidity and restore indoor comfort fast in South Florida.

When Your AC Can't Keep Up: Recognizing the Warning Signs in South Florida

If you've noticed signs your ac is struggling with tropical humidity, you're not alone — this is one of the most common complaints from homeowners across Miami-Dade, from Coral Gables to Pinecrest.

Here's a quick look at the most common warning signs:

  • Sticky, clammy indoor air even when the thermostat reads a comfortable temperature
  • Short cooling cycles where the system kicks on and off frequently without ever feeling dry
  • Musty odors coming from vents, which point to mold or mildew buildup
  • Ice on the evaporator coil or refrigerant lines despite the heat outside
  • Water pooling near your indoor unit from an overloaded condensate drain
  • Rising energy consumption with no clear change in your usage habits
  • Windows fogging up indoors — a sign humidity is far too high

South Florida's climate is relentless. Outdoor humidity regularly sits between 70% and 90% from late spring through early fall, and your AC is fighting that moisture every single hour it runs. Unlike drier climates where an air conditioner mainly cools the air, here it has to do double duty — pulling heat and heavy moisture out of every cubic foot of air that passes through your home.

The problem is that most systems aren't getting the support they need to handle that workload. When maintenance slips, equipment is sized wrong, or components start to wear, humidity wins. Your home ends up feeling like a damp basement even when the thermostat says 74°F.

For South Florida homeowners, understanding these warning signs early is the difference between a simple service call and a major repair — or worse, a mold problem that spreads through your ductwork before you ever notice it.

For more on how humidity and your AC interact in this climate, see Humidity and Air Conditioning in Miami FL.

The Science of Cool: Sensible vs. Latent Cooling

To understand why your air conditioner struggles in places like Cutler Bay or Country Walk, we have to look at the physics of air conditioning. Your AC does not actually "create" cold air; instead, it removes heat and moisture from the warm indoor air and dumps it outside.

This process is split into two distinct thermodynamic workloads:

  • Sensible Cooling: This is the cooling you can easily measure with a thermometer. It refers to lowering the actual temperature of the air. When your thermostat drops from 78°F to 74°F, your system is performing sensible cooling.
  • Latent Cooling: This is the removal of hidden heat in the form of water vapor (humidity). Before your air conditioner can lower the sensible temperature of the air, it has to condense the moisture out of it.

In a dry climate, almost 100% of an AC's capacity goes toward sensible cooling. But in our tropical South Florida climate, high humidity can cause an air conditioner to use up to 30% of its total BTU capacity for dehumidification alone, leaving far less energy for actual sensible cooling.

When warm, humid air passes over the cold evaporator coil, the air temperature drops below its dew point. This causes the gaseous water vapor to liquefy and collect on the coil, much like condensation forms on a cold glass of sweet tea on a hot afternoon. If the air is too humid, the thermodynamic load on the system sky-rockets. The system has to run much longer just to squeeze the water out of the air before you ever feel a noticeable drop in temperature.

FeatureSensible CoolingLatent Cooling
Primary TargetAir TemperatureWater Vapor (Relative Humidity)
Measurement ToolStandard ThermometerHygrometer
Physical ProcessHeat transfer from indoor air to refrigerantCondensation of moisture on the cold evaporator coil
Impact of High HumidityRemains steady, but feels warmer due to lack of evaporationConsumes up to 30% of total system cooling capacity

If your system cannot balance these two loads, you get what technicians call the "meat locker" effect: the air is technically cold, but it remains damp, sticky, and incredibly uncomfortable. For a deeper look at this process, read How Your Air Conditioner Helps to Control the Humidity.

5 Clear Signs Your AC Is Struggling with Tropical Humidity

frozen evaporator coil in a residential AC unit

When the tropical moisture levels climb in South Florida, your AC is put to the ultimate test. It is easy to ignore minor changes in comfort, but your system will drop clear hints when it is losing the battle against high humidity. Ignoring these signs can lead to major system strain, increased energy consumption, and musty odors that ruin your indoor air quality.

To protect your home and keep your family comfortable, watch out for these five undeniable warning signs of a struggling system. If you notice any of these occurring in your home, it is a clear indicator that your system needs professional attention before a complete breakdown occurs. For more common issues, check out Common Summer AC Problems and explore Why Isn't My AC Cooling Like It Used To.

1. Sticky Indoor Air and High Relative Humidity

The most obvious sign of a struggling air conditioner is a home that constantly feels sticky or clammy. Ideally, your indoor relative humidity should sit comfortably between 45% and 55% during the cooling season. If you use a digital hygrometer to measure your indoor air and see readings consistently above 60% for more than a day or two with the AC running, you have a real moisture problem.

When humidity stays high, sweat cannot evaporate from your skin. This makes a 74°F room feel like 80°F, prompting many homeowners to repeatedly lower the thermostat. This only wastes energy and increases system wear without solving the root moisture issue.

You may also notice physical signs of excess humidity around the house, such as:

  • Condensation or "sweat" forming on the inside of your windows
  • Sticky wooden furniture or doors that swell and become hard to close
  • A damp feel on bedsheets, carpets, and upholstered furniture

2. Short-Cycling and Oversized Equipment

If your air conditioner turns on, runs for five to seven minutes, shuts off, and then turns back on a few minutes later, it is "short-cycling." While it might seem like the system is just doing its job quickly, short-cycling is actually a major problem for humidity control.

An AC coil needs at least 10 to 15 minutes of continuous run time to reach its optimal cold operating temperature and begin pulling moisture out of the air. If the system shuts off too quickly, the air is cooled, but the moisture is never removed.

An oversized AC unit is the second most common cause of humidity issues, accounting for approximately 25% of cases where the system cools the air but fails to dehumidify properly. Many contractors install oversized units to avoid "insufficient cooling" complaints, but in South Florida, a bigger unit often leads to a damp, short-cycling home. This rapid cycling also causes massive compressor wear, leading to premature system failure.

To learn more about how proper sizing prevents these issues, read The Importance of HVAC System Sizing Avoiding Common Mistakes.

3. Frozen Evaporator Coils and Restricted Airflow

It sounds counterintuitive, but a frozen evaporator coil is a very common side effect of high indoor humidity, especially when combined with restricted airflow. Your indoor evaporator coil is designed to stay cold, but if the airflow across it is restricted, the condensation on the coil can quickly turn to ice.

The most common culprit behind this is a dirty air filter. When a filter is clogged with dust and pet dander, it restricts the warm indoor air from passing over the coil. Without that warm air to transfer heat, the refrigerant inside the coil drops below freezing, turning the collected moisture into a solid block of ice.

A dirty evaporator coil itself is the single most common cause of humidity problems, accounting for approximately 40% of cases where an AC cools but does not remove humidity effectively. Dust and dirt act as an insulating blanket on the coil, preventing the refrigerant from absorbing heat and moisture from the air. Once ice begins to form, it completely blocks airflow, and your system will stop cooling your home altogether.

Why Tropical Moisture Accelerates Wear and Tear on Your System

Operating an air conditioner in South Florida is vastly different than operating one in a dry, moderate climate. The constant, heavy moisture levels in places like Lakes By the Bay and Kendale Lakes force your system to run longer, harder, and more frequently. This constant operational strain translates directly to accelerated wear and tear on critical mechanical parts.

In moderate climates, a well-maintained AC system can easily last 12 to 15 years. However, in South Florida’s relentless humidity, that lifespan is often cut short due to constant moisture exposure and physical strain.

The components that pay the highest price for this heavy workload include:

  • The Compressor: The heart of your AC system must pump refrigerant constantly. Long run times under high latent heat loads cause compressor strain, leading to overheating and eventual burnout.
  • Fan Motors: The indoor blower motor and outdoor condenser fan run almost continuously, accelerating bearing wear and motor fatigue.
  • Capacitors: These electrical components store and release energy to start your motors. The extreme heat and humidity of South Florida cause capacitors to degrade much faster, often failing within 3 to 5 years compared to 5 to 10 years in drier climates.

To understand why your system runs so frequently and how to protect it, read Why Your AC Runs Constantly in South Florida and What Shortens Your AC Lifespan in Heat, Humidity and Salt Air.

Clogged Condensate Drains and Water Leaks

Because your AC acts as a giant dehumidifier, it pulls gallons of water out of your indoor air every single day. All of this water collects in a drain pan beneath the evaporator coil and flows out of your home through a condensate drain line.

However, high humidity combined with warm indoor temperatures creates the perfect breeding ground for algae, mold, and slime inside that drain line. Over time, this biological growth builds up and completely clogs the line.

When a clog occurs, the water has nowhere to go. It will quickly overflow the drain pan, leading to water damage on your ceilings, walls, or floors. Fortunately, most modern systems are equipped with a safety float switch. When water rises in the pan, the float switch activates and automatically shuts down the system to prevent flooding. If your AC suddenly shuts off and refuses to turn back on, a clogged condensate drain is a highly likely culprit.

Coil Corrosion and Salt Air Damage

For homeowners living in coastal communities like Palmetto Bay, Homestead, and Coconut Grove, humidity carries another hidden danger: salt air. The moisture in our coastal breeze is loaded with microscopic salt particles, which are highly corrosive to metal.

When this salty moisture constantly passes through your outdoor condenser coil and indoor evaporator coil, it triggers a process called pitting corrosion. This corrosion slowly eats away at the copper tubing and aluminum fins of your coils.

Over time, pitting corrosion creates microscopic holes in the coils, leading to refrigerant leaks. Because refrigerant is the lifeblood of your cooling system, even a tiny leak will lower your system's pressure, drastically reducing its ability to cool and dehumidify your home. Once coils are heavily corroded, they must be replaced, which is a major and complex repair.

How to Reduce the Strain on Your AC During Peak Humidity Seasons

While South Florida’s climate is tough, you don't have to let the humidity destroy your air conditioner. By adopting smart homeowner habits and investing in the right technology, you can drastically reduce the strain on your system, lower your monthly energy usage, and keep your indoor air clean and dry.

If you suspect your system has been struggling for a while, it may also be time to inspect your ductwork. Leaky ducts can pull humid air from your attic directly into your living spaces. To see if this is affecting your home, check out the Signs It's Time for Duct Cleaning.

Simple Homeowner Habits to Prevent Signs Your AC Is Struggling with Tropical Humidity

Taking care of your AC doesn't always require a technician. There are several simple, highly effective habits you can practice at home to keep your system running smoothly:

  1. Replace Your Air Filter Regularly: While filter packaging often suggests replacing them every 90 days, the reality of a South Florida summer is closer to 30 to 45 days. High humidity makes airborne dust sticky, causing filters to clog much faster.
  2. Set Your Thermostat Fan to "AUTO" Not "ON": This is a critical mistake that accounts for a massive amount of indoor humidity issues. When set to "ON," the blower fan runs continuously, even when the system isn't actively cooling. This blows air over the wet evaporator coil, re-evaporating all the collected moisture right back into your home. Always keep it on "AUTO."
  3. Use Thermostat Setbacks Wisely: Never turn your AC completely off when you leave for work. This allows humidity to saturate your drywall, furniture, and carpet, forcing your system to work twice as hard to dry the house out when you return. Instead, raise the thermostat by 5 to 7 degrees while you are away.
  4. Use Exhaust Fans: Always run your kitchen and bathroom exhaust fans when cooking or showering to vent excess moisture directly outside before it can spread through your home.
  5. Seal Air Leaks: Inspect the weatherstripping around your doors and windows. Sealing small gaps prevents hot, humid outdoor air from sneaking into your air-conditioned spaces.

Professional Maintenance and Smart Upgrades to Stop Signs Your AC Is Struggling with Tropical Humidity

While daily habits help, the ultimate defense against tropical humidity is professional maintenance and modern HVAC technology. Scheduling professional tune-ups twice a year — once in the spring and once in the fall — ensures that your coils are clean, your refrigerant levels are correct, and your condensate lines are completely clear of algae.

If your current system is over 10 to 12 years old and constantly struggling, it may be time to consider an upgrade. Modern variable-speed systems, such as the Daikin FIT, are specifically designed to conquer high-humidity climates. Unlike traditional single-stage systems that blast on and off at 100% capacity, variable-speed systems run continuously at lower, highly efficient speeds. This allows for longer, gentler cooling cycles that pull up to 30% to 50% more moisture out of the air per kilowatt-hour of electricity used.

Additionally, installing a whole-home dehumidifier directly into your existing ductwork can take the entire latent load off your AC. This allows your air conditioner to focus solely on sensible cooling, resulting in shorter run times, less mechanical wear, and a much longer system lifespan.

Frequently Asked Questions About AC Humidity Control

Managing indoor comfort in a tropical climate can be confusing. Here are answers to some of the most common questions South Florida homeowners ask about keeping their homes dry and comfortable.

What is the ideal indoor humidity level for a South Florida home?

The ideal indoor relative humidity range for a home in South Florida is between 45% and 55%. Keeping your humidity within this range ensures optimal comfort, as it allows your body’s natural cooling mechanism (sweat evaporation) to work efficiently.

Maintaining humidity below 55% is also critical for mold prevention. Mold spores thrive and begin to multiply rapidly on drywall, wood, and carpet when relative humidity levels stay above 60% for more than 48 hours.

Why is my house humid even when the AC is running?

If your home feels sticky despite the AC running constantly, several issues could be at play:

  • An Oversized AC Unit: The system is cooling the air too quickly and shutting off before it can complete a proper dehumidification cycle.
  • A Dirty Evaporator Coil: Dust buildup is insulating the coil, preventing it from effectively condensing water vapor out of the air.
  • Incorrect Fan Setting: Your thermostat fan is set to "ON" instead of "AUTO," which is actively re-evaporating moisture off the wet coil and blowing it back into your rooms.
  • Low Refrigerant: A leak has lowered your system's refrigerant charge, preventing the coil from getting cold enough to reach the dew point.

Can a dirty air filter cause high indoor humidity?

Yes, a dirty air filter is a major contributor to high indoor humidity. When a filter is clogged, it restricts the volume of air passing over the evaporator coil. This lack of airflow prevents the system from pulling moisture out of the air efficiently and can cause the coil to freeze, completely halting the dehumidification process.

Conclusion

Living in South Florida means dealing with beautiful beaches, warm sunshine, and some of the most intense humidity in the country. When your air conditioner begins to struggle under the weight of this tropical moisture, it is crucial to act quickly before minor issues turn into major breakdowns or indoor mold hazards.

At Air On Demand, we specialize in helping homeowners across Coconut Grove, Coral Gables, Country Walk, Cutler Bay, Homestead, Kendale Lakes, Kendall, Lakes By the Bay, Palmetto Bay, and Pinecrest stay cool and dry. As local indoor comfort experts, we specialize in high-efficiency Daikin products, offering seamless HVAC solutions tailored to our unique coastal climate.

When you partner with us, you enjoy the peace of mind that comes with convenient online booking, fast service, real-time updates, and the industry-leading Daikin Comfort Promise, backed by outstanding 12-year parts warranties.

Don't let the sticky summer air ruin your indoor comfort. Contact us today to schedule your professional system evaluation and keep your home dry all year long. Visit our Air Conditioning Services page to book your appointment online fast!

How to Fix Warm AC Air in 5 Simple Steps placeholder-image  | Air On Demand
Air Conditioning Repair
5 min read

How to Fix Warm AC Air in 5 Simple Steps

Is your AC blowing warm air? Follow these why is my ac blowing warm air troubleshooting steps to restore cool comfort fast.

What to Do When Your AC Is Blowing Warm Air in South Florida

If you're searching for why is my ac blowing warm air troubleshooting steps, here's a quick answer before we dive deeper:

  1. Check your thermostat - Make sure it's set to "Cool" mode and the fan is set to "Auto," not "On."
  2. Inspect your air filter - A clogged filter is the leading cause of AC cooling problems. Replace it if it blocks light.
  3. Check your circuit breakers - A tripped breaker to the outdoor unit can cause warm air while the indoor fan keeps running.
  4. Clear the outdoor condenser unit - Remove debris, vegetation, or anything blocking airflow around the unit.
  5. Check the condensate drain line - A clog can trigger a safety shutoff that stops your system from cooling.

You walk through your front door expecting a cool escape from the South Florida heat — and instead, warm air hits you from every vent. Your AC is running. The thermostat is on. But something is clearly wrong.

This is one of the most common calls Air On Demand receives from homeowners across Kendall, Coral Gables, Homestead, and beyond. And while the problem is frustrating, the good news is that many causes are simple enough to identify in just a few minutes — no tools required.

In this guide, we'll walk you through exactly what to check, what it means, and when it's time to call in a professional.

How a Central Air Conditioner Works

central air conditioning system diagram showing heat transfer and refrigeration cycle

Before we start troubleshooting, it helps to understand what your air conditioner is actually doing when it's working properly. A common misconception is that air conditioners "create" cold air. In reality, your AC is a heat mover. It works by absorbing heat from inside your home and dumping it outdoors.

This magic happens through a continuous four-step refrigeration cycle:

  1. Absorption: The indoor blower fan pulls warm, humid air from your living spaces through the return vents. This air passes over the cold evaporator coil. The refrigerant flowing inside the coil absorbs the heat from the indoor air.
  2. Compression: The now-warm, gaseous refrigerant travels outdoors to the compressor (the heart of the system). The compressor squeezes the refrigerant gas, raising its temperature and pressure.
  3. Release: The high-pressure gas flows into the outdoor condenser coils. A large fan blows outdoor air across these coils, carrying the heat away from your home and releasing it into the South Florida air.
  4. Expansion: As the refrigerant loses heat, it condenses back into a liquid. It passes through an expansion valve, which cools it down dramatically before it heads back to the indoor evaporator coil to repeat the process.

When something disrupts this cycle, the indoor fan will continue to blow air through your ductwork, but because no heat is being removed, the air coming out of your vents will feel warm or even hot. If you notice your unit running but failing to lower the indoor temperature, check out our guide on AC Not Cooling Properly: What to Check to understand how these components interact.

Why Is My AC Blowing Warm Air Troubleshooting Steps: The 5-Step DIY Checklist

When your home is heating up, you don't want to waste time. We recommend following a logical, technician-style diagnostic sequence to rule out the easiest and most common issues first.

Did you know that approximately 60% of all cooling issues can be traced back to simple, homeowner-fixable problems? Before calling for a professional repair, walk through these five steps. If you want a broader look at this issue, you can also read our companion article on AC Blowing Hot Air.

Step 1: Verify Thermostat Settings and Why Is My AC Blowing Warm Air Troubleshooting Steps

It sounds incredibly simple, but you would be amazed at how many service calls are resolved just by adjusting the thermostat. In fact, about 10% of summer service calls are due to incorrect thermostat settings.

  • Check the Mode: Ensure your thermostat is set to COOL. During seasonal transitions, or if you have guests or children in the house, the system can easily be bumped to "Heat" or "Off."
  • Check the Fan Setting: This is a major culprit. If your fan is set to ON, the indoor blower motor runs continuously, even when the AC compressor is resting. When the compressor is off, the fan simply recirculates room-temperature air, which can feel warm and humid. Switch the fan setting to AUTO so it only runs when the system is actively cooling.
  • Inspect the Batteries: If your thermostat screen is blank or flashing a low-battery warning, replace the batteries immediately. A weak battery can prevent the thermostat from sending the signal to start the outdoor unit.

Step 2: Inspect and Replace the Air Filter

A dirty, clogged air filter is the single leading cause of residential HVAC performance issues, accounting for roughly 40% of all service calls.

When your air filter is packed with dust, pet dander, and South Florida pollen, it severely restricts airflow. Without enough warm air passing over the cold indoor evaporator coil, the refrigerant inside the coil gets too cold. This causes the moisture in the air to freeze on the coil, turning it into a block of ice. Once the coil freezes, it blocks all airflow, and your system will start blowing warm air.

Pull your filter out and hold it up to a light bulb. If you cannot see light passing through it, it is choked and needs to be replaced immediately. To prevent this from happening in the future, check your filter every 30 days and replace it every 1 to 3 months. For a deeper look at how this simple maintenance task keeps your system running, read about How Dirty Air Filters Impact AC Performance.

Step 3: Check the Circuit Breakers and Power Supply

Your central air conditioning system relies on two separate electrical circuits: one for the indoor air handler and one for the outdoor condenser unit.

If a power surge or electrical overload trips the breaker for the outdoor unit, your indoor fan will continue to run and blow air, but because the outdoor compressor and fan have no power, no heat is being removed from your home. The result? Warm air blowing from your vents.

Go to your home’s main electrical panel and look for the breakers labeled "AC" or "Condenser." If a breaker is tripped, it will be resting in the middle position. Push it firmly to the OFF position first, then flip it back to ON. Note: If the breaker trips again immediately or within a short period, do not reset it a second time. This indicates a serious electrical fault, and repeatedly resetting it can cause severe damage or pose a fire hazard.

Step 4: Clear the Outdoor Condenser Unit

Your outdoor unit needs plenty of breathing room to release the heat it gathered from inside your home. If the condenser coils are caked in dirt, dust, or grass clippings, or if the unit is buried under overgrown tropical landscaping, the heat cannot escape. This causes the system to overheat and lose its cooling efficiency.

Take a walk outside and inspect your condenser unit.

  • Maintain at least 2 feet of clear space around all sides of the unit, and 5 feet of clearance above it.
  • Trim back any palm fronds, bushes, or weeds.
  • Turn off the power to the unit and gently wash away dirt and debris from the metal fins using a garden hose. Never use a pressure washer, as the high pressure can easily bend and damage the delicate aluminum fins.

For more details on keeping your outdoor unit in top shape, check out our guide on what to do when you have an AC Unit Not Cooling.

Step 5: Inspect the Condensate Drain Line

As your AC cools your home, it also dehumidifies the air. The moisture collected from your indoor air drips into a drain pan and flows outside through a PVC condensate drain line.

In South Florida's warm, humid climate, algae, mold, and mildew can quickly grow inside this drain line, creating a thick clog. When the line clogs, water backs up into the drain pan. Modern AC systems are equipped with a safety float switch. When the water level rises too high, this switch trips and shuts down the outdoor unit to prevent water damage to your home, while keeping the indoor fan running.

If you suspect a clog:

  1. Locate your indoor air handler and check the drain pan for standing water.
  2. If you see water, you can use a wet/dry vacuum on the outdoor end of the PVC pipe to suck out the algae clog.
  3. Once the water drains, the float switch will reset, and your cooling should restore.

Deeper Mechanical Issues Causing Warm Air

If you have completed the five DIY troubleshooting steps and your vents are still breathing warm air, the problem is likely a deeper mechanical or electrical failure. These issues require specialized tools, diagnostic training, and, in some cases, federal certifications to resolve. If your system is running but failing to cool, read more about Air Conditioning Repair: AC Runs But No Cold Air.

Frozen Evaporator Coils and Restricted Airflow

As mentioned earlier, frozen evaporator coils are a major roadblock to cooling. When ice forms on the indoor coils, it acts as an insulator, preventing the refrigerant from absorbing heat from your indoor air.

If you notice ice forming on the brass valves or copper lines of your outdoor unit, or if you see frost on the indoor cabinet, your system is frozen.

  • The Fix: Turn your AC off at the thermostat immediately. Switch the fan setting to ON (not Auto). This runs the indoor blower motor without running the cooling cycle, allowing the warm indoor air to melt the ice safely over the course of 2 to 6 hours. Do not turn the cooling back on until the ice has completely melted.

If the coils freeze up again shortly after restarting, you are dealing with a deeper airflow restriction or a refrigerant issue. Continuing to run a frozen system can destroy your compressor. Learn more about why your AC Runs Constantly Without Cooling.

Low Refrigerant Levels and System Leaks

Refrigerant is the lifeblood of your air conditioner. It circulates in a closed loop, absorbing and releasing heat. A common myth is that air conditioners "use up" refrigerant over time. In reality, a properly operating system should never lose refrigerant.

If your refrigerant level is low, it means you have a leak. When refrigerant levels drop, the system cannot absorb heat efficiently, leading to warm air output and frozen coils.

  • Signs of a Leak: Hissing or bubbling noises near the indoor or outdoor unit, ice buildup on the copper refrigerant lines, and a system that runs constantly without lowering the temperature.
  • Why You Need a Pro: Refrigerant handling is strictly regulated under Section 608 of the EPA's Clean Air Act. Only licensed, certified HVAC technicians are legally permitted to locate leaks, repair them, and recharge the system with refrigerant. Running a system low on refrigerant will quickly burn out your compressor and ruin system efficiency. To understand how leaks destroy your system's performance, read Why Is My Air Conditioner So Inefficient.

Electrical Component Failures and Bad Capacitors

Your outdoor unit relies on several electrical components to start and run. The most common point of failure is the run capacitor. Think of the capacitor as a temporary battery that provides the high-voltage electrical jolt needed to start the compressor and the outdoor fan motor.

Due to the intense heat and constant cycling of South Florida summers, capacitors are highly prone to wearing out, bulging, or failing entirely.

  • Signs of a Bad Capacitor: You hear a loud humming or buzzing sound coming from the outdoor unit, but the fan blades aren't spinning and the compressor won't start.
  • Other Electrical Culprits: A failed contactor (the electrical switch that sends power to the compressor) or damaged wiring can also cut power to critical components. If you hear unusual noises from your system, it is a clear warning sign. Read more on Do You Hear That? You May Need AC Repairs.

When to Stop Why Is My AC Blowing Warm Air Troubleshooting Steps and Call a Professional

While we encourage homeowners to handle basic troubleshooting like filter changes and thermostat checks, it is vital to know when to step back for your own safety and the health of your system.

Stop DIY troubleshooting and call Air On Demand immediately if:

  • The circuit breaker trips a second time after being reset.
  • You smell burning plastic, electrical odors, or sulfur.
  • You hear loud grinding, clattering, or shrieking noises.
  • You suspect a refrigerant leak or see physical ice forming on the unit.
  • You are dealing with complex wiring or high-voltage components.

Attempting to repair electrical issues or refrigerant lines without proper training can result in severe electrical shocks, chemical burns, or permanent damage to your air conditioner. For a broader look at common seasonal failures, read about Common Summer AC Problems.

Frequently Asked Questions About AC Troubleshooting

To help you decide on your next steps, we have put together a quick comparison of common causes, whether you can handle them yourself, and what is involved in the fix.

Cause of Warm AirDIY or Pro?Action Required
Incorrect Thermostat SettingsDIYSwitch mode to "Cool" and fan to "Auto"
Clogged Air FilterDIYReplace with a fresh, clean filter
Tripped Circuit BreakerDIY (Once)Reset breaker once; call pro if it trips again
Blocked Outdoor CondenserDIYClear vegetation and hose off dirt gently
Clogged Condensate DrainDIY / ProClear with a wet/dry vac or call for a flush
Frozen Evaporator CoilsDIY / ProTurn system off to thaw; call pro to find root cause
Low Refrigerant / LeakProEPA-certified repair and system recharge
Failed Capacitor or ContactorProElectrical testing and component replacement
Failing CompressorProProfessional system diagnostic or unit replacement

Should I turn off my AC if it is blowing warm air?

Yes! If your air conditioner is blowing warm air, you should shut it down at the thermostat immediately.

If the system is blowing warm air due to a frozen coil, low refrigerant, or a failing motor, continuing to run it forces the compressor to work under extreme stress. The compressor is the most critical component in your air conditioning system. Running a malfunctioning unit can easily cause the compressor to overheat and burn out, turning a simple repair into a complete system replacement.

Why is my AC running but not lowering the temperature?

If your system is running constantly but the temperature inside your home isn't dropping, it usually indicates that the heat transfer process has broken down.

This is often caused by a slow refrigerant leak, heavily soiled condenser coils, or restricted ductwork. When the system can only remove a fraction of the heat from your home, it will run endlessly trying to satisfy the thermostat, wasting energy and driving up your utility bills. To learn why this happens and how to address it, read our guide on Why Does My Air Conditioner Take So Long to Cool.

Can a dirty air filter cause my AC to blow warm air?

Absolutely. A dirty air filter restricts the volume of air flowing across your indoor evaporator coil. Without enough warm indoor air to keep the coil warm, the moisture on the coil freezes. This ice buildup acts as a barrier, preventing any cool air from reaching your home and causing the system to blow warm, unconditioned air. Changing your filter regularly is the easiest way to prevent this entire chain reaction.

Conclusion

Dealing with an air conditioner that blows warm air is never convenient, especially in the midst of a South Florida summer. By walking through our simple 5-step DIY checklist, you can easily rule out the minor issues and potentially save yourself a service call.

However, if your system requires a professional touch, the team at Air On Demand is here to help. We proudly serve homeowners throughout Coconut Grove, Coral Gables, Country Walk, Cutler Bay, Homestead, Kendale Lakes, Kendall, Lakes By the Bay, Palmetto Bay, and Pinecrest.

As indoor comfort specialists, we provide seamless residential HVAC solutions and specialize in top-tier Daikin products. When you choose us, you benefit from:

  • Convenient Online Booking: Schedule your service in just a few clicks.
  • Fast Service & Real-Time Updates: Know exactly when your technician will arrive.
  • Industry-Leading Warranties: Enjoy peace of mind with robust protections like the Daikin 12-year parts warranty and Comfort Promise.

Don't let a warm house ruin your comfort. Schedule professional AC maintenance today with Air On Demand and let us restore the cool, refreshing comfort your family deserves!

R410A vs R454B Refrigerant: A–Z Guide placeholder-image  | Air On Demand
Air Conditioning
5 min read

R410A vs R454B Refrigerant: A–Z Guide

Learn r410a vs r454b refrigerant what you need to know before your next AC upgrade in South Florida.

Why the HVAC Industry is Transitioning to R-454B

If you want to know r410a vs r454b refrigerant what you need to know before buying or servicing an AC system in South Florida, here is the short version:

• Global Warming Potential (GWP) — R-410A: 2,088 — R-454B: 466 (78% lower)

• Safety Classification — R-410A: A1 (non-flammable) — R-454B: A2L (mildly flammable)

• EPA Status (June 2026) — R-410A: Banned in new equipment since Jan 1, 2025 — R-454B: Required in all new residential systems

• Drop-in Replacement? — R-410A: - — R-454B: No — requires purpose-built equipment

• Energy Efficiency — R-410A: Baseline — R-454B: ~3–5% higher COP

• Operating Pressure — R-410A: Baseline (~274 psig at 90°F) — R-454B: ~5% higher (~288 psig at 90°F)

• Existing Systems — R-410A: Can still be serviced with reclaimed R-410A — R-454B: New installations only

The HVAC industry just went through one of its biggest shifts in decades. Starting January 1, 2025, manufacturers could no longer produce new residential AC equipment using R-410A — the refrigerant that has powered most home cooling systems for over 20 years. If you are shopping for a new AC system in Kendall, Pinecrest, Coral Gables, or anywhere else in South Florida right now, you are almost certainly looking at R-454B equipment whether you realize it or not.

This guide breaks down exactly what changed, what it means for your existing system, and what to look for when choosing a new one — so you can make a confident, informed decision without getting lost in the technical jargon.

The transition away from R-410A is not a sudden whim of AC manufacturers. It is part of a structured, global environmental initiative designed to reduce greenhouse gas emissions. The primary driver behind this shift is the Environmental Protection Agency (EPA) AIM (American Innovation and Manufacturing) Act of 2020.

Under the AIM Act, the EPA is phasing down the production and import of hydrofluorocarbons (HFCs) — high-GWP chemicals commonly used in refrigeration and air conditioning. In our industry, we have seen similar phase-outs before. For instance, R-410A was originally introduced to replace R-22 (Freon) because R-22 contained chlorine, which actively depleted the earth's protective ozone layer.

While R-410A successfully solved the ozone depletion problem (having an Ozone Depletion Potential of zero), it still carried a massive environmental drawback: an exceptionally high Global Warming Potential. To understand how these changes impact your home comfort decisions, check out our guide on 3 Things You Should Know About Refrigerant.

To put this in perspective, the transition to R-454B is a crucial step in modern HVAC decarbonization. For a deeper look into the history of these transitions, read our A Brief Guide on Air Conditioner Refrigerant and its environmental impacts.

Environmental Benefits of R-454B

The primary environmental benefit of R-454B is its incredibly low Global Warming Potential. R-454B has a GWP of 466, which is approximately 78% lower than R-410A’s GWP of 2,088. This means that if any refrigerant does happen to escape from a system, its potential impact on global warming is less than a quarter of what R-410A's would be.

Additionally, R-454B boasts a much shorter atmospheric lifetime. While R-410A can persist in the atmosphere for nearly 17 years, R-454B breaks down in about 3 to 5.5 years. Like its predecessor, R-454B has a zero ozone depletion potential (ODP), making it a highly sustainable solution for the long-term future of residential cooling in South Florida.

r410a vs r454b refrigerant what you need to know About the EPA Mandate

The EPA mandate established a strict timeline for this transition. As of January 1, 2025, the manufacturing and import of new residential air conditioning systems utilizing R-410A was officially prohibited.

Now that we are in June 2026, the transition is fully in place. If you are replacing an old cooling unit in your Cutler Bay or Palmetto Bay home today, the new equipment installed will utilize a low-GWP refrigerant like R-454B.

However, this does not mean your existing R-410A system is obsolete or illegal. You are perfectly permitted to continue running and servicing your current R-410A system. Reclaimed and recycled R-410A will remain available for repairs and recharges for many years to come, though the supply of virgin R-410A will continue to decrease as the EPA phasedown progresses.

r410a vs r454b refrigerant what you need to know: Key Differences

Technician checking residential AC refrigerant levels with gauges

Understanding the physical and chemical differences between these two refrigerants helps explain why they cannot simply be swapped. R-410A is a near-azeotropic blend composed of 50% R-32 and 50% R-125. Because it is near-azeotropic, it behaves almost like a single-component fluid, evaporating and condensing at a constant temperature with minimal "glide."

R-454B, on the other hand, is a zeotropic blend consisting of 68.9% R-32 and 31.1% R-1234yf (a hydrofluoroolefin, or HFO). Because it is a zeotropic blend, it has a temperature glide of approximately 1.5°F. This glide means that as the refrigerant evaporates or condenses, the different components change state at slightly different temperatures.

This behavior is critical to understand during system service, as R-454B must always be charged into the system as a liquid to prevent "fractionation" (where one component of the blend escapes faster than the other during a leak). To see how these fluids move heat through your home, read more about How the Refrigeration Cycle Cools Your Home.

• Chemical Type — R-410A: HFC Blend — R-454B: HFC/HFO Blend

• Composition — R-410A: 50% R-32 / 50% R-125 — R-454B: 68.9% R-32 / 31.1% R-1234yf

• Temperature Glide — R-410A: Minimal (~0.2°F) — R-454B: Approx. 1.5°F

• Critical Temperature — R-410A: 160.3°F (71.3°C) — R-454B: 170.8°F (77.1°C)

• Latent Heat Capacity — R-410A: 256 kJ/kg — R-454B: 273 kJ/kg (7% higher)

Operating Pressures and Performance

A major concern for homeowners in hot areas like Homestead and Country Walk is whether the new refrigerant can handle the brutal South Florida heat. Fortunately, R-454B is an exceptional performer.

In terms of operating pressures, R-454B runs slightly higher than R-410A — roughly 5% higher pressure at the same saturation temperature. For example, at a 90°F saturation temperature, R-410A operates at about 274 psig, while R-454B operates at approximately 288 psig. This minor difference means manufacturers did not have to completely reinvent AC system designs, but they did have to optimize compressors and coils to handle the unique flow characteristics.

When it comes to efficiency, R-454B actually outperforms R-410A:

• Higher COP: R-454B offers a 3% to 5% higher Coefficient of Performance (COP) under standard operating conditions.

• Better High-Ambient Efficiency: At extreme outdoor temperatures above 95°F, R-454B systems can achieve a 5% to 7% better Energy Efficiency Ratio (EER) than equivalent R-410A designs.

• Superior Latent Heat: With a 7% higher latent heat capacity, R-454B carries heat more efficiently per pound, allowing the compressor to work less to achieve the same amount of cooling.

You can learn more about how these components work together in our detailed article on How the Compressor Evaporator and Condenser Function.

Safety Classifications: A1 vs A2L

The most talked-about change in the transition to R-454B is its safety classification. ASHRAE rates refrigerants based on toxicity and flammability:

• R-410A is classified as A1: "A" stands for low toxicity, and "1" means no flame propagation under test conditions (non-flammable).

• R-454B is classified as A2L: "A" stands for low toxicity, and "2L" indicates mild flammability with a slow burning velocity.

While "mildly flammable" might sound intimidating at first, R-454B is incredibly difficult to ignite. It has a high Lower Flammability Limit (LFL) of about 11.3% to 12.4% by volume, meaning a massive amount of refrigerant would have to leak into a very confined space to even reach a flammable concentration.

Furthermore, its minimum ignition energy is extremely high (greater than 1,000 mJ). It cannot be ignited by a static spark or a hot surface; it requires a persistent, high-energy open flame to burn, and even then, it burns at a incredibly slow velocity (only 5.2 cm/s). To manage this safely, modern R-454B air conditioners are built with active safety sensors and mitigation systems that automatically run the indoor blower fan to safely disperse the refrigerant if a leak is ever detected.

Can You Retrofit an Existing R-410A System to R-454B?

If you currently have an older R-410A system in your Lakes By the Bay or Kendale Lakes home, you might wonder if you can simply drain the old refrigerant and refill it with the new, eco-friendly R-454B.

The short answer is: No, absolutely not. R-454B is not a direct drop-in replacement for R-410A systems.

Because R-454B has a different pressure-temperature curve, a 1.5°F temperature glide, and different lubricant requirements (it uses specialized synthetic Polyolester, or POE, oil formulations), putting it into an older system will cause immediate compressor damage and system failure. Furthermore, because R-454B is an A2L refrigerant, it legally requires systems that are factory-certified with specific electrical shielding, spark-proof contactors, and leak-mitigation controls. For more context on refrigerant management, read why Your AC System Should Not Run Out of Refrigerant.

Why Mixing Refrigerants is Prohibited

Mixing different types of refrigerants in the same system is strictly prohibited by federal law and is incredibly destructive to your air conditioner. If R-410A and R-454B are mixed, they will form an unpredictable chemical blend with highly erratic operating pressures.

This chemical contamination will:

1. Cause the compressor to overheat and fail prematurely.

2. Completely void any manufacturer warranties on your equipment.

3. Prevent technicians from being able to properly read system pressures, making future troubleshooting impossible.

4. Create potential safety hazards due to altered flammability limits.

If your system is losing charge, mixing gases is never the answer. Discover why a Leaky Refrigerant is a Bigger Problem Than You Might Think.

When to Repair vs. Replace Your AC System

If you are dealing with a refrigerant leak on an older R-410A system, you are faced with a classic homeowner dilemma: do you patch it up or replace the whole unit?

Because the production of R-410A is phasing down, acquiring this refrigerant for repairs will naturally become more difficult over time. If your system is over 10 to 12 years old and has a leak in the evaporator coil, opting for a complex repair and a full R-410A recharge may not be the most sensible long-term choice.

If you suspect your system is low on charge, look out for the Signs of Low Refrigerant Levels in Your Air Conditioner. If you indeed have a leak, you can read our guide on Resolving Low Refrigerant Issues to help weigh your options.

What Homeowners Need to Know About AC Installation in South Florida

Installing a new air conditioning system in South Florida requires careful attention to detail, especially with the introduction of R-454B. Because R-454B has slightly different thermodynamic properties, systems designed for it require approximately 10% to 20% additional heat transfer surface area (larger or more dense coils) to achieve the exact same cooling capacity as older R-410A models.

This means the physical outdoor condenser unit or the indoor air handler cabinet might be slightly larger than the one you are replacing. Proper load calculations and expert sizing are more critical than ever to ensure your new system can handle the high humidity of Coral Gables and Coconut Grove.

To understand why professional design matters so much, check out Air Conditioning Installation in Miami FL Why Si and learn about The Importance of Proper AC Installation.

r410a vs r454b refrigerant what you need to know for New AC Purchases

When you buy a new R-454B system, you are future-proofing your home. You are choosing a system that complies with all modern environmental regulations, ensuring that replacement parts, manufacturer support, and refrigerant will be readily available for the next 15 to 20 years.

Furthermore, the increased energy efficiency of R-454B means reduced energy consumption during our long, hot South Florida summers. For a complete strategy on choosing the right system for our local climate, read our Miami AC Guide Optimal Air Conditioning Installa.

Frequently Asked Questions About R-410A and R-454B

Is R-454B safe to use in my home?

Yes, R-454B is extremely safe for residential use. While it carries an A2L "mildly flammable" rating, it is incredibly difficult to ignite under real-world conditions. Additionally, new air conditioners designed for R-454B are factory-equipped with advanced sensors that actively monitor for leaks. If a leak is detected, the system automatically shuts down the compressor and engages the indoor fan to safely disperse the refrigerant long before it can reach a flammable concentration.

Can I still get my existing R-410A system serviced?

Absolutely. The EPA mandate only restricts the manufacture and import of new R-410A equipment. It does not prevent you from maintaining, repairing, or recharging your existing system. Reclaimed and recycled R-410A will remain available for service work for many years. However, if you suspect your system has a leak, you should address it promptly. Read more to find out Are You Leaking Refrigerant and understand The Problem with a Refrigerant Leak.

How does R-454B improve energy efficiency?

R-454B has superior thermodynamic properties compared to R-410A, including a 7% higher latent heat capacity. This allows it to absorb and reject heat more efficiently as it cycles through your system. In practical terms, this leads to a 3% to 5% increase in energy efficiency under normal conditions, and up to a 7% improvement during extreme high-temperature days. Keeping your refrigerant lines sealed and leak-free is key to maintaining this efficiency; learn How Leaky Refrigerant Affects Your Air Condition to see why.

Conclusion

The transition from R-410A to R-454B is a major win for both South Florida homeowners and the environment. By choosing a modern, low-GWP system, you enjoy superior cooling performance, higher energy efficiency, and the peace of mind that comes with future-proof technology.

At Air On Demand, we specialize in high-quality Daikin cooling systems designed to deliver maximum comfort in our intense South Florida climate. Whether you live in Pinecrest, Palmetto Bay, Kendall, or Coral Gables, we make the transition seamless with our convenient online booking, fast local service, and real-time updates. Plus, you can rest easy knowing our installations are backed by Daikin's outstanding warranties, including a 12-year parts warranty and their trusted Comfort Promise.

Ready to upgrade your home comfort or need expert advice on your existing system? Schedule professional AC installation in Miami with our friendly, local team today!

How to Optimize AC Airflow Efficiency for Peak Performance placeholder-image  | Air On Demand
Air Conditioning
5 min read

How to Optimize AC Airflow Efficiency for Peak Performance

Discover how airflow affects your air conditioners performance and learn practical steps to boost cooling efficiency and comfort in South Florida homes.

How to Optimize AC Airflow Efficiency for Peak Performance

How to Optimize AC Airflow Efficiency for Peak Performance

Why Airflow Is the Real Secret Behind Your AC's Cooling Power

Understanding how airflow affects your air conditioners performance is the fastest way to figure out why your home feels stuffy, humid, or unevenly cooled — even when your system is running constantly.

Here's a quick summary:

How airflow affects AC performance:

• Cooling efficiency — Proper airflow allows the evaporator coil to absorb heat effectively. Restrict it, and your system loses its ability to cool.

• Energy consumption — Poor airflow forces your AC to run longer and work harder, driving up electricity bills. Replacing a dirty filter alone can cut energy use by 5–15%.

• Humidity control — Correct airflow is what removes moisture from the air. Without it, rooms feel clammy even at the right temperature.

• Equipment lifespan — Restricted airflow strains the blower motor and compressor, leading to premature wear and unexpected breakdowns.

• Even temperature distribution — Balanced airflow prevents hot and cold spots from forming in different rooms.

For South Florida homeowners in Kendall, Coral Gables, Pinecrest, and surrounding communities, this issue hits especially hard. The heat and humidity here are relentless, and your AC system is working at full capacity for most of the year. When airflow is compromised — whether from a clogged filter, a leaky duct, or a blocked return vent — your system doesn't just underperform. It struggles to keep up with conditions that demand its absolute best.

The good news? Most airflow problems are fixable, and many can be prevented with simple, consistent maintenance.

Simple guide to how airflow affects your air conditioners performance terms:

• how the compressor evaporator and condenser function

• how the refrigeration cycle cools your home

• how your air conditioner works

The Science of Cool: How Airflow Affects Your Air Conditioners Performance

air flowing through home vents heat transfer cooling capacity

When we think about air conditioning, we usually focus on the temperature setting on our thermostat. But temperature is only half of the story. The true medium of comfort in your home is the air itself. Without proper air circulation, even the most advanced cooling system becomes completely ineffective.

To truly understand why your system struggles when circulation drops, we have to look at Why Is Low Air Flow a Problem With Air Condition. Air conditioning is not actually the process of "creating cold air." Instead, it is the process of removing heat and moisture from your indoor air and relocating it outside. If the air in your home cannot reach the cooling components of your AC, that heat transfer simply cannot happen.

Heat Transfer and the Evaporator Coil

At the heart of this thermal exchange is the indoor evaporator coil. Cold, liquid refrigerant flows through this copper or aluminum tubing. As the blower motor pushes warm, humid indoor air across the cold outer surface of the coil, the refrigerant inside absorbs the heat from the air. This process provides "sensible cooling" (dropping the temperature) and "latent cooling" (condensing moisture out of the air, much like water droplets forming on a cold glass of sweet tea on a hot Homestead afternoon).

If the airflow across this coil is restricted, there isn't enough heat passing over it to keep the refrigerant warm. The temperature of the coil drops below freezing, turning any condensed moisture into ice. Once ice forms, it acts as an insulating barrier, further blocking heat absorption and completely stalling the refrigeration cycle.

The Balance of Supply and Return Air

Your air conditioning system is a closed-loop breathing system. It must inhale just as much air as it exhales. The air it "inhales" comes through the return grilles, while the air it "exhales" is pushed out through the supply vents.

This balance is measured in Cubic Feet per Minute (CFM). In our hot and humid South Florida climate, achieving the right CFM is critical. While dry, high-altitude climates might target a higher airflow of 450 to 550 CFM per ton of cooling capacity to maximize sensible cooling, our humid coastal environment typically requires a nominal target of 400 CFM per ton, or sometimes slightly lower (around 350 CFM per ton) during high-humidity periods to allow for maximum moisture removal.

When this balance is disrupted, you run into the 3 Causes of Low Air Flow. If the return side is restricted, the blower motor has to work against high "static pressure" — essentially, it is trying to pull air out of a vacuum. This strains the motor, increases your energy bills, and starves the supply vents, leaving your family sweating in Coral Gables.

Common Culprits Behind Restricted Airflow in South Florida Homes

If you are noticing weak air currents coming out of your registers, you are likely asking yourself, "Why Am I Getting Low Air Flow From My AC?" In South Florida, our systems run almost continuously, making them highly susceptible to mechanical and environmental blockages. Let's look at the 3 Reasons for Low Airflow From Your Vents and how they manifest in local homes.

How Airflow Affects Your Air Conditioners Performance When Filters Are Clogged

The single most common cause of poor airflow is a neglected air filter. Your filter's job is to catch dust, pet dander, and airborne debris before they can settle on your delicate indoor coil. However, as the filter does its job, it naturally becomes loaded with particles.

A heavily clogged filter acts like a solid wall in your ductwork. It increases the static pressure dramatically, forcing the blower motor to consume significantly more electricity. According to the Department of Energy, replacing a dirty, clogged filter with a clean one can reduce your air conditioner's energy consumption by 5% to 15%.

To understand the full scope of this issue, read about How Dirty Air Filters Impact AC Performance and learn exactly How a Dirty Air Filter Affects Your Air Conditio. While it might be tempting to buy the highest-efficiency MERV 13+ pleated filter on the market to improve indoor air quality, these dense filters can actually restrict airflow as much as a dirty filter if your system's blower motor was not designed to handle that level of resistance.

Leaky, Blocked, or Poorly Designed Ductwork

Your ductwork is the highway system for your conditioned air. Unfortunately, many homes in Cutler Bay and Palmetto Bay suffer from duct systems that are deteriorating, poorly sealed, or improperly sized.

Are your ducts messing with your comfort? Absolutely. If you want to know more, explore Are Your Ducts Messing With Your Comfort. When ducts have holes or disconnected joints, a massive portion of your cooled air escapes into your hot, dusty attic instead of reaching your living spaces. This creates a pressure imbalance, often pulling hot, humid attic air or garage fumes back into your home through negative pressure leaks.

Proper sealing and maintenance of ductwork can improve cooling efficiency by as much as 20%. To understand why this is a safety and efficiency priority, check out Why You Should Be Concerned About Leaky Ducts.

Dirty Coils and Bent Fins

Even if your air filter is clean, microscopic dust particles can bypass it over time and settle on the wet surface of your evaporator coil. This forms a grimy layer that restricts the air trying to pass between the delicate aluminum fins.

Similarly, your outdoor condenser unit relies on unrestricted airflow to dump the heat it gathered from inside your home. If the outdoor coil is caked with grass clippings, dirt, or salt spray from the ocean, or if the thin aluminum coil fins are bent and crushed, the heat cannot escape. The compressor has to work much harder and run much hotter to achieve the same amount of cooling. You can read more about this in our guide on How Dirty Coils Affect Your Air Conditioner.

The Consequences of Poor Airflow on Efficiency and Comfort

Ignoring airflow issues doesn't just result in a slightly warmer living room; it triggers a cascade of mechanical and operational problems. The physical strain placed on your system when it cannot "breathe" has direct consequences on your comfort and your peace of mind. To see how these issues compound, read about The Impact of AC Problems on Energy Efficiency S.

Frozen Evaporator Coils and Short Cycling

When airflow is severely restricted, the temperature of the indoor evaporator coil quickly drops below 32°F. The moisture condensing on the coil freezes instantly. As the ice builds up, it completely blocks what little airflow was left, causing the system's cooling capacity to drop to zero.

This lack of heat transfer causes the refrigerant returning to the outdoor compressor to remain in a liquid state rather than gas. Compressors are designed to compress gas, not liquid; trying to compress liquid refrigerant can destroy the compressor's internal valves, leading to a catastrophic system failure.

Additionally, the system may begin "short cycling" — turning on and off rapidly. Because the thermostat is never satisfied, but internal safety sensors are shutting the system down to prevent freezing, the constant starting and stopping places immense wear on the electrical contacts, capacitor, and fan motors, drastically shortening the lifespan of your system.

How Airflow Affects Your Air Conditioners Performance Regarding Humidity Control

In South Florida, comfort is defined by humidity control. High relative humidity makes the air feel much hotter than it actually is because it prevents our sweat from evaporating.

Your air conditioner is your home's primary dehumidifier. However, dehumidification requires a balanced, steady flow of air across the evaporator coil. If the air is moving too fast because of an oversized blower motor or incorrect settings, it doesn't spend enough time on the cold coil to drop its moisture. If the air is moving too slowly or is restricted, the coil freezes, halting dehumidification entirely.

The result? A "clammy" home where the thermostat reads 72°F, but you still feel sticky, uncomfortable, and prone to mold growth in hidden areas like closets and behind furniture.

Practical Steps to Improve and Maintain Proper AC Airflow

Optimizing your system's airflow is a joint effort between simple homeowner habits and professional diagnostic tools. The table below outlines the key differences between what you can do yourself and what requires our specialized training.

• Replace Air Filter — DIY Friendly?: Yes — Frequency: Every 1–3 months — Impact on Performance: Reduces energy use by 5–15%; prevents coil freezing

• Clear Vent Obstructions — DIY Friendly?: Yes — Frequency: Monthly — Impact on Performance: Eliminates hot spots; balances room pressure

• Trim Outdoor Foliage — DIY Friendly?: Yes — Frequency: Every 3 months — Impact on Performance: Maintains outdoor heat rejection; protects compressor

• Gently Wash Outdoor Coil — DIY Friendly?: Yes — Frequency: Annually — Impact on Performance: Improves outdoor heat transfer; lowers head pressure

• Straighten Bent Coil Fins — DIY Friendly?: No (Requires specialized tools) — Frequency: As needed — Impact on Performance: Restores blocked airflow paths across coils

• Static Pressure Testing — DIY Friendly?: No (Requires manometer) — Frequency: During annual service — Impact on Performance: Diagnoses hidden duct restrictions and blower health

• Duct Sealing & Balancing — DIY Friendly?: No (Requires specialized equipment) — Frequency: Every 3–5 years — Impact on Performance: Boosts cooling efficiency by up to 20%; balances comfort

Routine Homeowner Maintenance Tasks

To keep your system running smoothly between professional tune-ups, establish these simple habits:

1. Check your filter monthly: Especially if you have pets or live near dusty construction areas in Homestead or Cutler Bay. Replace it as soon as you see a gray layer of dust.

2. Clear the area around vents: Ensure that curtains, couches, rugs, or large furniture pieces are not blocking your return or supply grilles. Your system needs at least 6 to 12 inches of clear space around every vent.

3. Maintain outdoor clearances: Keep plants, shrubs, and weeds trimmed back at least 2 feet from your outdoor condenser unit, and ensure there is at least 5 feet of clear space above it to allow hot air to escape freely.

4. Keep all vents open: Avoid the temptation to close vents in unused guest rooms. Your residential AC system was designed with a specific duct volume in mind; closing vents increases static pressure, which can damage your blower motor and cause your coils to freeze.

Professional Airflow Diagnostics and Balancing

While DIY steps are crucial, some airflow problems are baked into the design of your home's ductwork. This is where professional balancing comes in.

When our technicians perform a diagnostic visit, we don't just guess. We use calibrated manometers to measure the Total External Static Pressure (TESP) of your system. This tells us exactly how hard your blower motor is working to move air. We also utilize flow hoods to measure the exact CFM coming out of each individual register.

If we find imbalances — such as a master bedroom that is always too hot while the kitchen is freezing — we can adjust the internal duct dampers to redistribute the airflow proportionally. We also specialize in sealing leaky ductwork using advanced mastic sealants, ensuring that every drop of cold air you pay for actually reaches your living space.

Frequently Asked Questions About AC Airflow

Why is my AC blowing weak air from the vents?

Weak airflow is usually caused by a severe restriction on either the return or supply side of your system. The most common culprit is a heavily clogged air filter, followed closely by a frozen evaporator coil that has turned into a solid block of ice. Other potential causes include leaky or disconnected ductwork in your attic, a failing blower motor capacitor, or a build-up of dirt on the blower wheel itself.

Can a high-efficiency MERV filter damage my air conditioner?

Yes, it can. High-efficiency filters (typically MERV 13 or higher) are designed with very dense pleats to capture microscopic allergens. If your system's blower motor (especially older permanent split capacitor, or PSC, motors) is not rated to handle the high static pressure these filters create, it will restrict your airflow significantly. This can lead to frozen coils, an overheated blower motor, and a drop in overall cooling capacity. We recommend consulting with us to find the optimal filter balance for your specific system.

How often should I have my air ducts cleaned?

For most South Florida homes, we recommend having your air ducts professionally inspected every 3 to 5 years. However, if you have multiple pets, suffer from severe allergies, or notice visible dust build-up on your register grilles shortly after cleaning them, you may benefit from more frequent duct cleanings. Regular duct cleanings remove the dust, mold spores, and debris that restrict airflow and degrade your indoor air quality.

Keep Your Cool with Air On Demand

At Air On Demand, we have spent years helping our neighbors in Coral Gables, Pinecrest, Palmetto Bay, and Kendall stay comfortable through the hottest summers. As local Daikin specialists, we understand that a high-efficiency cooling system is only as good as the airflow supporting it.

Whether you need a comprehensive duct cleaning, professional airflow balancing, or a precision repair to get your system breathing easy again, we are here to help. We offer convenient online booking, fast response times, real-time updates on your technician's arrival, and industry-leading warranties to give you ultimate peace of mind.

Don't let poor airflow drive up your utility bills and compromise your family's comfort. Schedule your professional AC service with Air On Demand today and feel the difference that balanced, optimized airflow can make!

How to Fix Ice on AC Unit Fast placeholder-image  | Air On Demand
Air Conditioning Repair
5 min read

How to Fix Ice on AC Unit Fast

Discover ice forming on your AC unit causes and what to do to safely defrost coils and restore cooling fast in Miami-Dade.

What to Do When You Find Ice on Your AC Unit

Ice forming on your ac unit causes and what to do is something every South Florida homeowner should know — because in Miami-Dade's relentless heat, a frozen system means zero cooling at exactly the wrong moment.

Here's a quick summary before we dive in:

Causes of ice on your AC unit:

• Dirty or clogged air filter blocking airflow

• Low refrigerant levels due to a leak

• Dirty evaporator coils

• Blocked or closed vents

• Faulty blower fan

What to do right now:

1. Turn your thermostat from COOL to OFF immediately

2. Switch the fan setting to ON to help thaw the coils

3. Check and replace your air filter

4. Let the unit thaw fully — typically 1 to 3 hours

5. Call a professional if ice returns after restarting

Ice on your AC is never a sign it's cooling extra well. It's a warning that something is wrong — and running the system while frozen can destroy your compressor, one of the most critical components to replace. The good news is that many cases start with something as simple as a clogged filter, and you can address it right now without any tools.

Read on to understand exactly why this happens, how to fix it safely, and how to make sure it never catches you off guard again.

Ice Forming on Your AC Unit Causes and What to Do

To understand why your air conditioner is suddenly mimicking an Arctic glacier in the middle of a sweltering South Florida afternoon, we have to look at the physics of how your system cools. Your air conditioner doesn't actually "create" cold air; instead, it extracts heat and moisture from your indoor air and transfers it outside.

This heat exchange happens at the indoor evaporator coil. Inside these copper coils, refrigerant circulates under precise pressure. As warm, humid air from your home in Coral Gables or Palmetto Bay is blown across this cold coil, the refrigerant absorbs the heat.

However, if something disrupts this delicate balance of temperature, airflow, and pressure, the temperature of the evaporator coil will plummet below 32°F. When the moisture in your home's humid air hits a super-cooled coil, it instantly freezes. Layer by layer, ice builds up until your evaporator coils and the connected refrigerant lines are completely encased in a thick block of ice.

This drop in temperature and pressure is rooted in a scientific principle known as the Joule-Thomson effect. When a gas or refrigerant expands rapidly under low pressure, its temperature drops significantly. If your system is low on refrigerant or if airflow is restricted, the pressure inside the evaporator coil drops too low, causing the coil's surface temperature to fall far below freezing.

The Danger of Liquid Slugging and Compressor Damage

Ignoring a frozen air conditioner is one of the fastest ways to permanently ruin your system. Your AC's compressor, located in the outdoor unit, is designed to compress refrigerant gas, not liquid.

When your evaporator coils are insulated by a thick layer of ice, the refrigerant inside cannot absorb heat from your home's air. Because it doesn't absorb heat, the refrigerant remains a cold liquid instead of boiling off into a vapor. This liquid refrigerant travels back down the suction line to the outdoor compressor.

This dangerous phenomenon is called liquid slugging. Because liquids cannot be compressed, the liquid refrigerant entering the compressor can bend valves, break pistons, and completely destroy the compressor motor. If you want to dive deeper into why this occurs, you can read more about the Reasons Your AC Coils May Freeze.

Restricted Airflow: The Primary Culprit Behind Ice Forming on Your AC Unit Causes and What to Do

By far, the most common reason for ice forming on your AC unit is restricted airflow. Your air conditioner needs a constant, steady stream of warm indoor air flowing over the evaporator coils to keep them warm enough to prevent freezing. If that airflow is choked off, the temperature of the coil drops below freezing, and ice begins to form.

Several issues can restrict airflow in your home:

• Clogged Air Filters: This is the absolute number-one cause of frozen AC systems. A filter caked in dust, pet dander, and Miami humidity acts like a solid wall, preventing air from reaching the coils.

• Blocked or Closed Vents: Many homeowners mistakenly believe that closing vents in unused rooms disrupts the system's static pressure, starves the system of air, and can cause the coils to freeze.

• Dirty Evaporator Coils: Dust that slips past a cheap or dirty filter can settle on the wet evaporator coils, forming a grimy barrier that insulates the coil and prevents heat exchange.

• Blower Fan Failures: If your blower motor is failing, running at the wrong speed, or dirty, it won't push enough air over the coils to keep them warm.

When airflow is severely restricted, your system has to work twice as hard to cool your home, which often leads to short-cycling. If you notice your system starting and stopping rapidly, check out our guide on Why Your AC Keeps Turning Off to see if restricted airflow is the underlying issue.

Low Refrigerant Levels: Why Leaks Lead to Ice Forming on Your AC Unit Causes and What to Do

Another major cause of ice formation is low refrigerant. A common misconception is that air conditioners "use up" refrigerant over time, similar to gas in a car. In reality, your AC is a sealed, closed-loop system. The refrigerant is constantly recycled. If your refrigerant levels are low, you have a leak.

When there is a leak in your copper coils or refrigerant lines, the overall pressure within the system drops. According to the laws of thermodynamics, a drop in pressure directly results in a drop in temperature. The remaining refrigerant expands too much, causing the evaporator coil to drop below 32°F.

If you suspect your system is losing its charge, you should look for signs of a leak. These include:

• A hissing or bubbling sound near the indoor air handler or outdoor unit.

• Warm air blowing from your supply registers.

• Unusually high energy usage.

• Visible ice on the copper lines leading to the outdoor unit.

If you suspect this is your issue, read our article Are You Leaking Refrigerant to learn how to identify a leak early, and check out the Signs of Low Refrigerant Levels in Your Air Conditioner for a detailed breakdown of symptoms.

If you walk past your closet or garage in Kendall or Pinecrest and notice water pooling on the floor or a block of ice encasing your copper lines, you must act immediately. Do not wait for the system to "cool itself out."

Step 1: Turn the Thermostat to OFF

Immediately switch your thermostat from COOL to OFF. This stops the cooling cycle and prevents the compressor from pumping more cold refrigerant through the frozen coils, halting further ice accumulation and protecting your compressor from liquid slugging.

Step 2: Switch the Fan Setting to ON

Change your fan setting from AUTO to ON. This keeps the indoor blower fan running continuously even though the cooling is off. The blower will pull warm air from your home and push it over the frozen coils, which significantly speeds up the natural defrosting process.

Step 3: Check and Replace Your Air Filter

While the system is thawing, pull out your air filter. If you cannot see light through it, replace it immediately. Putting a fresh, clean filter in place is the easiest way to restore proper airflow once the ice has melted.

Step 4: Manage the Water Drainage

As the ice melts, it will shed a substantial amount of water—sometimes several gallons. This water will drain into your primary condensate pan. If your condensate drain line is partially clogged, this sudden rush of water can overflow, leading to water damage on your ceilings, walls, or floors. Place towels around the indoor unit to catch any overflow, and check that water is draining safely to the outside. If your system is shut down and you need to troubleshoot further, refer to our guide on what to do when your AC Unit Not Cooling.

Step-by-Step Defrosting Process

Thawing your air conditioner must be done safely. Attempting to speed up the process using aggressive methods can permanently damage your sensitive HVAC components.

Below is a comparison of safe, natural thawing methods versus unsafe methods that you should avoid:

• Natural Thawing (Fan ON, System OFF) — Safe?: Yes — Estimated Thaw Time: 1 to 3 hours (up to 24 hours for severe ice blocks) — Risk / Benefit: Benefit: Safely melts ice using ambient indoor air without risking damage to coils or electrical parts.

• Hair Dryers or Heat Guns — Safe?: No — Estimated Thaw Time: 30 to 60 minutes — Risk / Benefit: Risk: High heat can cause extreme thermal shock, cracking the copper refrigerant lines or warping aluminum fins.

• Chipping Ice with Sharp Tools — Safe?: No — Estimated Thaw Time: N/A — Risk / Benefit: Risk: Screwdrivers or knives will easily puncture the delicate copper coils, causing a catastrophic refrigerant leak.

• Pouring Hot Water on Coils — Safe?: No — Estimated Thaw Time: 30 to 45 minutes — Risk / Benefit: Risk: Rapid temperature changes can crack the coils, and excess water can ruin electrical components below.

If you notice that your system takes an unusually long time to thaw, or if you hear strange noises as the ice melts, your system may be signaling a deeper mechanical issue. Review our checklist of Signs That Your AC Is in Trouble to determine if you need to schedule a professional diagnostic visit.

Long-Term Prevention: Keeping Your Miami-Dade AC Ice-Free

In the humid climate of South Florida, your air conditioner runs almost continuously for most of the year. To prevent ice from forming on your AC unit in the future, you need to practice consistent, proactive maintenance.

• Replace Your Filters Regularly: In homes with pets or high dust levels in areas like Country Walk or Lakes By the Bay, check your air filter every 30 days. Replace it at least every 90 days to maintain unrestricted airflow.

• Keep Vents and Registers Open: Ensure that furniture, curtains, or rugs are not blocking your return air grilles or supply vents. Keep at least 85% of your indoor vents fully open to maintain proper system pressure.

• Maintain Clearance Around the Outdoor Condenser: Ensure there is at least a 2-foot clearance around your outdoor unit. Clear away weeds, leaves, and debris that can block airflow through the condenser coils.

• Schedule Annual Professional Tune-Ups: Having a certified professional inspect your system once a year is the best way to catch slow refrigerant leaks, clean dirty coils, and check blower motor performance before they lead to a frozen system.

Investing in regular upkeep is the most effective way to protect your comfort. For a comprehensive look at how routine care protects your system, see our guide on How to Prevent HVAC Emergencies with Maintenance. You can also learn about what our technicians check by reading about What Really Happens During an AC Maintenance Visit.

Frequently Asked Questions About Frozen AC Units

Can I run my AC while there is ice on the coils?

Absolutely not. You should never run your air conditioner if you see ice on the coils or refrigerant lines. Operating a frozen AC blocks all airflow, meaning your home will not cool down anyway.

More importantly, running a frozen system forces liquid refrigerant back into the compressor. This can cause liquid slugging, which will destroy the compressor motor and lead to a major system replacement.

How long does it take for a frozen AC to thaw completely?

The defrosting process typically takes between 1 and 3 hours if you turn the cooling system OFF and set the fan to ON.

However, if your system has been running frozen for days and is encased in a solid block of ice, it can take up to 24 hours to thaw completely. Always wait until the ice has fully melted before attempting to restart the cooling mode.

Does a frozen AC always mean I need more refrigerant?

No, a frozen AC does not always mean you are low on refrigerant. In fact, a dirty air filter or blocked return vents are much more common causes of frozen coils.

You should always check and replace your air filter first. If your system freezes up again after you have replaced the filter and allowed it to thaw completely, then you likely have a refrigerant leak or a blower motor issue that requires professional diagnostic tools. For more help identifying issues, read our Signs AC Repair Guide.

Conclusion

Finding ice on your air conditioner on a hot Miami-Dade day can be incredibly stressful, but acting quickly can save your system from catastrophic failure. Start by shutting down the cooling, running the fan to thaw the ice, and checking your air filter.

If the ice returns after you've replaced the filter and restarted the system, it is time to bring in the professionals. At Air On Demand, we specialize in providing fast, seamless HVAC solutions throughout Coconut Grove, Coral Gables, Country Walk, Cutler Bay, Homestead, Kendale Lakes, Kendall, Lakes By the Bay, Palmetto Bay, and Pinecrest.

As a Daikin specialist, we offer our customers incredible peace of mind with the Daikin Comfort Promise and industry-leading 12-year parts warranties. With our convenient online booking and real-time service updates, you will never be left guessing when your technician will arrive.

Don't let a frozen AC ruin your comfort. Schedule our professional AC Maintenance Services today, and let us keep your home cool, efficient, and ice-free all year long!

Beginner's Guide to Summer Energy Saving Tips for South Miami Dade Homeowners placeholder-image  | Air On Demand
Energy Savings
5 min read

Beginner's Guide to Summer Energy Saving Tips for South Miami Dade Homeowners

Discover summer energy saving tips for south miami dade homeowners to cut cooling costs and boost AC efficiency all season long.

Why Your Summer Electric Bill Feels So Painful in South Miami-Dade

If you're looking for summer energy saving tips for South Miami-Dade homeowners, here's a quick snapshot of the most effective actions you can take right now:

• Set your thermostat to 78°F when you're home and 82-85°F when you're away

• Change your AC filter every 30 days during peak summer months

• Run ceiling fans counterclockwise to feel cooler without lowering the thermostat

• Close blinds on south- and west-facing windows before afternoon sun peaks

• Schedule a pre-summer AC tune-up to catch problems before they become breakdowns

• Seal air leaks around doors and windows to stop cool air from escaping

• Keep 2-3 feet of clearance around your outdoor condenser unit

South Miami-Dade summers are relentless. From Kendall to Homestead to Cutler Bay, homeowners deal with outdoor temperatures in the low-to-mid 90s, humidity levels that regularly top 75%, and AC systems that run nearly around the clock from June through September. That combination pushes air conditioning to account for 40 to 60 percent of your summer electricity usage — and for many families, summer electric bills can climb significantly.

What makes South Miami-Dade different from most of the country is that there is no real off-season for your AC. Salt air near the coast accelerates wear on outdoor equipment. Agricultural dust in areas like Homestead clogs filters faster. Attic temperatures can exceed 130°F, making your system work even harder. Generic energy-saving advice simply does not account for these local realities.

This guide breaks down exactly what works here — practical, specific steps you can take to lower your bills without sacrificing the comfort your family deserves.

Essential Summer Energy Saving Tips for South Miami Dade Homeowners

modern programmable thermostat set to 78 degrees

When the summer sun beats down on neighborhoods from Coral Gables to Kendale Lakes, your air conditioner becomes the most important appliance in your home. However, keeping your home cool shouldn't require draining your wallet. Managing your cooling bills starts with understanding how to operate your system efficiently.

The single most impactful habit you can change today is how you interact with your thermostat. Florida Power & Light (FPL) and the Department of Energy recommend setting your thermostat to 78°F when you are at home and awake.

We know what you might be thinking: "78 degrees? That sounds like a sauna!" But in reality, when indoor humidity is properly managed, 78°F paired with a gentle ceiling fan breeze is highly comfortable.

Every single degree you set your thermostat below 78°F increases your energy consumption by 3% to 5%. If you are cranking your system down to 72°F, you could be adding 18% to 30% to your monthly cooling energy consumption.

Additionally, avoid the temptation to treat your thermostat like an on/off switch. Cranking the temperature down to 65°F when you arrive home from a hot day at Lakes By the Bay will not cool your house any faster; your system cools at the same steady rate regardless of the target setting. It only forces the system to run longer, wasting energy and stressing your compressor. For more practical advice on managing these settings, explore our guide on How to Lower AC Bills During Summer.

Why Summer Energy Saving Tips for South Miami Dade Homeowners Matter

In South Florida, our air conditioners work harder and longer than almost anywhere else in the country. Because we don't have a true "winter" to give our systems a break, residential HVAC units accumulate wear and tear rapidly. During the peak summer months, your system is fighting an uphill battle against extreme outdoor temperatures and high thermal radiation.

Implementing smart energy-saving habits does more than just lower your monthly utility statements. It reduces the runtime of your equipment, which directly translates to fewer emergency repairs and a longer lifespan for your system. If you find yourself asking, "Are You Spending Too Much on Monthly Cooling," taking steps to optimize your home's thermal efficiency is the first line of defense.

Smart Thermostat Strategies for South Florida Heat

If you are still using an old manual slider thermostat, you are likely wasting energy without realizing it. Upgrading to a programmable or smart thermostat is one of the easiest ways to build 5 Efficiency Boosting Habits to Adopt into your daily routine.

A smart thermostat allows you to establish automated schedules that align with your lifestyle. For example:

• When Home: 78°F

• When Away (Work/School): 82°F to 85°F

• When Sleeping: 80°F (paired with a ceiling fan)

Many South Miami-Dade homeowners worry that letting the house warm up to 82°F while they are away makes the AC work harder to cool it down later. However, thermodynamics tells us that heat transfer slows down when the indoor temperature is closer to the outdoor temperature. Your home actually absorbs less heat when it is kept slightly warmer, meaning your system uses less total energy to bring the temperature back down to 78°F than it would maintaining a constant 75°F all day.

With smart home integration, you can use features like geofencing. This feature detects when your smartphone leaves a designated radius around your Pinecrest or Palmetto Bay home and automatically adjusts the temperature to an energy-saving setting, then begins cooling the home back down as you head back.

Managing Humidity and Ventilation in Humid Climates

In South Florida, heat is only half the battle. The true enemy of summer comfort is humidity. When the air is saturated with moisture, your body cannot evaporate sweat efficiently, making you feel much warmer than the actual thermometer reading.

Your air conditioner has two jobs: lowering the air temperature (sensible cooling) and removing moisture from the air (latent cooling). If your system is running inefficiently, or if you are constantly introducing humid outdoor air into your home, the AC will struggle to satisfy either requirement. You can learn more about bad habits that trap moisture and run up your bills in Save Money on Air Conditioning by Stopping This.

To maintain comfort and prevent mold growth, aim to keep your indoor relative humidity between 45% and 55%. If your home feels clammy or smells musty, your system may be short-cycling—turning on and off too quickly to complete a full dehumidification cycle. This is common when systems are oversized or when return ducts are restricted.

Maximizing Ceiling Fans and Natural Ventilation

Ceiling fans are an excellent, low-cost tool to supplement your air conditioning. A ceiling fan uses only a tiny fraction of the energy required to run your AC compressor.

By running your ceiling fans in a counterclockwise direction during the summer, you push air straight down. This creates a "wind chill" effect on your skin, making the room feel roughly 4 degrees cooler than it actually is. This physical sensation allows you to comfortably raise your thermostat setting from 74°F to 78°F without feeling any warmer.

However, keep this golden rule of fan usage in mind: fans cool people, not rooms. If you leave a room, turn the fan off. Running a fan in an empty room does nothing but waste electricity.

Additionally, be cautious with ventilation. While it might be tempting to open windows on a slightly breezy summer evening, doing so welcomes a massive wave of South Florida humidity into your home. Keep your windows closed and rely on exhaust fans in your kitchen and bathrooms to remove steam and moisture at the source. Just be sure to turn these exhaust fans off once they’ve done their job, as leaving them running indefinitely will pull hot, humid outdoor air inside through small gaps in your home's exterior.

Maintaining Your AC System for Peak Efficiency

A neglected air conditioning system can easily consume up to 30% more energy than a well-maintained unit. Over time, dust, pet dander, and environmental debris restrict airflow and insulate the vital components that transfer heat out of your home. If your utility statements are climbing unexpectedly, check out these 4 Reasons Your AC Energy Use Is Rising to help pinpoint the issue.

Implementing Summer Energy Saving Tips for South Miami Dade Homeowners Daily

The absolute simplest DIY maintenance task is replacing your air filter regularly. A dirty, clogged filter restricts airflow, forcing your blower motor to work harder and run longer to cool your home. This restriction can reduce your system's efficiency by 5% to 15% and can even cause your evaporator coils to freeze over.

• How often should you change it? While many filter manufacturers claim their products last 90 days, South Miami-Dade homeowners should check standard 1-inch pleated filters every 30 days during the peak summer months.

• Homestead Factors: If you live in Homestead near agricultural areas, or if you have multiple pets in your Kendall home, your filters will collect dust, pollen, and pet dander much faster. Check them every three weeks to ensure unrestricted airflow.

For a comprehensive approach to keeping your equipment running smoothly throughout the seasons, review our list of Year-Round HVAC Efficiency Tips.

Troubleshooting Dirty Coils and Low Refrigerant

Your AC relies on two sets of coils to transfer heat: the indoor evaporator coil and the outdoor condenser coil.

1. Evaporator Coil: Located inside your air handler, this coil absorbs heat and moisture from your indoor air. If it becomes coated in dust, it cannot absorb heat efficiently, leading to longer cooling cycles and higher energy bills.

2. Condenser Coil: Located in the outdoor unit, this coil releases the heat absorbed from your home into the outdoor air. Because it sits outside, it accumulates dirt, leaves, grass clippings, and pollen. Gently rinsing your outdoor condenser coil with a garden hose (with the power shut off) every few months keeps these fins clear.

Another common efficiency killer is an incorrect refrigerant charge. If your system has a "ghost leak," it will gradually lose refrigerant. A system that is even 10% low on refrigerant can consume up to 20% more electricity while failing to cool your home effectively. If you notice your system running continuously without reaching your setpoint, or if you see ice forming on the outdoor brass valves, it’s time to call in a professional.

If your current system is constantly breaking down or is more than a decade old, it may be time to evaluate how How a New AC System Can Save You Money Over Time through modern, high-efficiency technology.

Protecting Your System from Salt Air and Local Elements

South Miami-Dade presents unique environmental challenges that homeowners in other parts of the country never have to consider.

For residents living in coastal communities like Palmetto Bay, Cutler Bay, and Lakes By the Bay, salt air corrosion is a constant threat. Salt spray from Biscayne Bay settles on the delicate aluminum fins of outdoor condenser units, accelerating corrosion and causing the metal to deteriorate. This breakdown restricts heat transfer and significantly shortens the lifespan of your system—often reducing it to just 8 to 12 years compared to the 15 to 20 years enjoyed by inland systems.

To combat this, coastal homeowners should gently rinse their outdoor condenser units with fresh water once a month to wash away salt deposits.

As summer transitions into late summer and autumn, preparing your system for storm season is equally crucial. Ensure your outdoor condenser is securely anchored to its concrete pad with heavy-duty hurricane straps, and keep the surrounding area clear of loose tree branches, patio furniture, and garden tools that could become dangerous projectiles during high winds. For more end-of-season guidance, read our AC Efficiency Tips for the End of Summer.

Sealing Air Leaks, Ductwork, and Windows

No matter how efficiently your air conditioner runs, you will still pay too much if your home is constantly leaking cool air and sucking in hot, humid air from the outdoors or your attic. Treating your home as a complete system is the key to maximizing your savings.

• Solar Control Window Film — Approximate Benefit: Blocks up to 65% of solar heat gain — Installation Complexity: Low to Moderate (DIY-friendly) — Best Suited For: West- and south-facing windows

• Weatherstripping & Caulk — Approximate Benefit: Stops drafts and moisture intrusion — Installation Complexity: Low (DIY) — Best Suited For: Older doors, drafty window frames

• Professional Duct Sealing — Approximate Benefit: Recovers 20% to 30% of lost cooling capacity — Installation Complexity: High (Requires professional) — Best Suited For: Homes with unconditioned attic ducts

• Full Window Replacement — Approximate Benefit: Ultimate insulation and impact protection — Installation Complexity: High (Professional installation) — Best Suited For: Homes with single-pane glass

Taking a systematic approach to sealing your home's envelope is one of the most effective strategies outlined in our guide on How to Save Money on Air Conditioning.

Reducing Solar Heat Gain Through Windows and Doors

South Florida's intense afternoon sun can quickly turn single-pane glass windows into solar ovens. This radiant heat forces your air conditioner to work overtime to combat the rising indoor temperatures.

• Window Treatments: Keep your blinds, drapes, or shades closed on all south- and west-facing windows during the peak daylight hours of 10:00 AM to 4:00 PM. Using light-colored or reflective backings on your window coverings helps bounce solar energy back outside instead of absorbing it.

• Solar Control Film: If you want to preserve your view while blocking heat, high-quality solar control window films can block a significant portion of solar heat gain without making your rooms dark.

• Air Sealing: Inspect the weatherstripping around your exterior doors and the caulk around your window frames. If you can see light peaking through your doorway or feel a draft, you are losing conditioned air and inviting humid air inside.

Optimizing Attic Insulation and Ductwork

Your attic can easily reach temperatures upwards of 130°F to 140°F on a typical July afternoon. If your ductwork runs through this unconditioned space, any leaks or poor insulation will dramatically impact your cooling efficiency.

According to the Department of Energy, the average home loses 20% to 30% of its conditioned air through leaks, tears, and loose connections in the ductwork. When cold air escapes into your hot attic, it creates negative pressure inside your living space, which pulls hot, humid outdoor air in through wall penetrations, light fixtures, and exterior doors.

Ensure your attic has adequate insulation—the Florida Building Code recommends a minimum of R-30, though R-38 is highly recommended for optimal energy efficiency. Additionally, having your ducts professionally sealed and insulated ensures that the cold air your system produces actually reaches your living spaces instead of cooling your empty attic.

Frequently Asked Questions About Miami Energy Savings

What is the best thermostat setting for a Miami summer?

The ideal setting to balance comfort and energy savings is 78°F when you are home, and 82°F to 85°F when you are away. Pair your indoor settings with ceiling fans to create a cooling breeze that makes the room feel 4 degrees cooler.

How often should I change my AC filter in South Miami-Dade?

During the peak summer months, you should check and replace standard 1-inch filters every 30 days. Homeowners in high-dust agricultural areas like Homestead, or those with indoor pets, should check their filters every three weeks to prevent airflow restrictions.

Can professional maintenance prevent salt air damage?

Yes. Professional maintenance includes thoroughly cleaning the outdoor condenser coils with specialized, non-corrosive solutions that remove salt buildup and debris. Regular maintenance also allows technicians to apply protective coatings to the coils, helping to extend the lifespan of systems in coastal areas like Palmetto Bay and Cutler Bay.

Conclusion

Surviving a South Miami-Dade summer doesn't have to mean dreading your monthly electric bills. By implementing these practical summer energy saving tips for South Miami-Dade homeowners, you can keep your home comfortable, protect your HVAC system from premature wear, and keep your utility bills under control.

From managing your thermostat settings to staying on top of filter changes and sealing up attic air leaks, small changes can add up to major relief. If you want to make sure your system is fully prepared to take on the peak summer heat, we are here to help.

At Air On Demand, we specialize in providing seamless, reliable residential HVAC services tailored specifically to our unique South Florida climate. Backed by strong Daikin warranties—including a 12-year parts warranty and the Comfort Promise—our expert team serves families across Coconut Grove, Coral Gables, Country Walk, Cutler Bay, Homestead, Kendale Lakes, Kendall, Lakes By the Bay, Palmetto Bay, and Pinecrest.

Ready to maximize your system's efficiency and secure peace of mind this summer? Schedule professional AC maintenance with Air On Demand today! Use our convenient online booking system to schedule your visit, and we'll take care of the rest.

How Oversized AC Units Make Humidity Problems Worse placeholder-image  | Air On Demand
Air Conditioning
5 min read

How Oversized AC Units Make Humidity Problems Worse

Learn how oversized AC units make humidity problems worse in Miami homes and discover proper sizing solutions for drier indoor comfort.

Why Oversized AC Units Make Humidity Problems Worse Than You Think

How oversized AC units make humidity problems worse is one of the most misunderstood issues in South Florida homes — and it catches a lot of homeowners completely off guard.

Here's the quick answer:

• An oversized AC cools your home too fast, causing it to shut off before it can remove enough moisture from the air

• This on-and-off pattern is called short cycling

• Short cycles leave indoor humidity at 55–65% even when your thermostat reads 72°F

• The result is air that feels cold and clammy — sometimes called the "cold jungle" effect

• Over time, this excess moisture raises mold risk, increases energy consumption, and wears out your equipment faster

In Miami's climate, where outdoor humidity is relentless, your AC has to work as a dehumidifier just as much as a cooling system. A unit that's too large for your home never runs long enough to do that job properly. You end up with a space that feels sticky and uncomfortable no matter how low you set the thermostat — and most homeowners have no idea their AC size is the culprit.

The sections below break down exactly what's happening inside your system, how to spot the signs, and what you can do about it.

The Science of AC Dehumidification and the Short Cycling Trap

To understand why a bigger air conditioner isn't always better, we have to look at how your system actually manages moisture. Many people believe that air conditioners only cool the air temperature. In reality, modern residential air conditioning systems are designed to perform two distinct functions: lowering the air temperature (sensible cooling) and removing airborne moisture (latent cooling).

Dehumidification occurs as a natural byproduct of the refrigeration cycle. When your system is running, the indoor blower fan draws warm, humid air from your living spaces and pushes it across the freezing-cold evaporator coil. As this warm, moist air makes contact with the cold metal surface of the coil, it rapidly cools down to its dew point.

Just like water droplets forming on the outside of a cold glass of sweet tea on a sweltering July afternoon in Coral Gables, the water vapor in your home's air condenses onto the evaporator coil. This collected water then drips down into a condensate drain pan and flows safely out of your home.

This process is explained in detail in our guide on How Your Air Conditioner Helps to Control the Humidity. However, for this moisture-removal process to work effectively, the evaporator coil must remain cold, and the air must pass over it repeatedly. This requires sustained, steady runtime.

What is Short Cycling and Why Does an Oversized AC Cause It?

When your air conditioner has too much cooling capacity for the square footage of your home, it experiences a phenomenon known as short cycling.

Think of your AC like a car. If you are driving in heavy stop-and-go traffic, slamming on the gas pedal only to immediately hit the brakes, you waste fuel and put massive stress on the vehicle. An oversized AC behaves the same way. When the thermostat detects that the indoor temperature has risen slightly, it signals the system to turn on.

Because the compressor is massive and has an abundance of cooling power, it blasts an overwhelming volume of icy air into your home. The thermostat, usually located in a central hallway, registers a rapid temperature drop within just 5 to 8 minutes and immediately shuts the system down.

This rapid on-and-off behavior is the classic definition of short cycling. Instead of running healthy, steady cycles of 20 to 30 minutes, the oversized system turns on and off 4 to 6 times an hour. To dive deeper into why this pattern is so destructive, check out our article on the Miami AC Guide: Why Short Cycling on an AC Unit Can Be a Problem.

How Oversized AC Units Make Humidity Problems Worse Through Short Cycles

Now, let's connect the dots between short cycling and high indoor humidity.

An evaporator coil does not instantly drop to 40°F the second your AC turns on. It takes roughly 5 to 10 minutes of continuous operation for the coil to reach its optimal cooling temperature and start condensing water vapor.

When an oversized system short cycles and shuts down after only 5 to 8 minutes, the evaporator coil barely has enough time to get cold and begin the condensation process. The system satisfies the thermostat's temperature setting (the sensible load) almost instantly, but it fails to address the moisture in the air (the latent load).

To make matters worse, whatever moisture did manage to condense on the coil during that brief run cycle doesn't have time to drain away. When the system abruptly shuts off, the blower fan often continues to run briefly, or the stagnant air in the ductwork warms up. This causes the standing water on the wet coil to re-evaporate directly back into your home's air supply.

This dynamic is why how oversized ac units make humidity problems worse is such a frustrating issue for homeowners. You can read more about how this cycle impacts your overall indoor environment in our post on How Humidity Can Affect the Quality of Air Conditioning.

The Consequences of High Indoor Humidity in South Florida

mold growth on drywall inside a humid home

Living in South Florida communities like Pinecrest, Palmetto Bay, or Cutler Bay means dealing with high outdoor humidity year-round. When your air conditioner fails to keep indoor relative humidity (RH) levels in check, your home quickly becomes uncomfortable and potentially hazardous to your health.

Uneven Temperatures and Poor Airflow Across Rooms

Because an oversized air conditioner runs in short, explosive bursts, it never has the chance to establish proper, balanced airflow throughout your home.

The rooms closest to your indoor air handler will get blasted with freezing air, while rooms further away — such as back bedrooms or rooms with large, west-facing windows — remain warm and stuffy. This rapid cooling prevents the air from circulating thoroughly, creating distinct hot and cold spots.

Furthermore, oversized systems push air at incredibly high airflow rates. If your home's ductwork was originally sized for a 2.5-ton system and a contractor installs a 4-ton unit without modifying the ducts, the static pressure inside your ventilation system will skyrocket. This leads to noisy registers, whistling grilles, and stagnant air pockets where humidity pools undisturbed.

Increased Energy Consumption and Accelerated Equipment Wear

It is a common myth that a larger AC is more efficient because it cools your home faster. In reality, an oversized system consumes significantly more energy.

The outdoor compressor draws the most electrical power during its initial startup phase. Because a short-cycling system is constantly starting up and shutting down, it consumes significantly more electricity than a properly sized system running a single, continuous, low-draw cycle.

Additionally, this constant starting and stopping places immense mechanical strain on the compressor and the blower motor. Essential lubricants don't have time to circulate properly, leading to premature friction and heat damage.

This accelerated wear and tear can slash the expected lifespan of your system by 20% to 30%, turning a system that should last 15 years into one that fails in under 10. For a closer look at how these operational stresses lead to mechanical failure, read about the Air Conditioning Issues That Lead to Compressor Damage.

To understand how these factors affect your home overall, our Miami Air Conditioning Guide: What You Need to Know covers the essential elements of maintaining a healthy, efficient system in our unique coastal environment.

How Oversized AC Units Make Humidity Problems Worse

To visualize the direct differences between these two scenarios, consider this comparison:

• Average Cycle Length — Correctly Sized AC (e.g., 2.5 Tons): 20 to 30 minutes — Oversized AC (e.g., 4 Tons): 5 to 8 minutes

• Cycles Per Hour — Correctly Sized AC (e.g., 2.5 Tons): 2 to 3 steady cycles — Oversized AC (e.g., 4 Tons): 5 to 6 rapid cycles

• Indoor Relative Humidity — Correctly Sized AC (e.g., 2.5 Tons): Healthy 40% to 50% — Oversized AC (e.g., 4 Tons): Clammy 55% to 65%+

• Indoor Air Feel — Correctly Sized AC (e.g., 2.5 Tons): Crisp, light, and comfortable — Oversized AC (e.g., 4 Tons): Cold, sticky, and damp ("cold jungle")

• Energy Consumption — Correctly Sized AC (e.g., 2.5 Tons): Highly efficient steady-state operation — Oversized AC (e.g., 4 Tons): Frequent startup power spikes

• Equipment Lifespan — Correctly Sized AC (e.g., 2.5 Tons): Full expected lifespan (12–15 years) — Oversized AC (e.g., 4 Tons): Reduced by 20% to 30% due to wear

• Air Distribution — Correctly Sized AC (e.g., 2.5 Tons): Even temperatures across all rooms — Oversized AC (e.g., 4 Tons): Major hot/cold spots and stagnant air

When indoor relative humidity remains consistently above 55%, you experience the "cold jungle" effect. This is when your skin feels cold and clammy because the high humidity prevents your body’s natural sweat from evaporating. To compensate, many homeowners lower their thermostat settings even further, which only wastes more energy and worsens the short cycling cycle.

Diagnosing and Sizing Your AC System Correctly

If you suspect your air conditioner is too large for your home, the first step is understanding how proper sizing is determined.

In the past, many contractors relied on outdated "rules of thumb," such as allocating one ton of cooling capacity for every 500 square feet. In South Florida, this lazy practice is a recipe for disaster. It completely ignores critical variables like insulation quality, window types, ceiling heights, home orientation to the sun, and local climate realities.

To size a system correctly, a professional technician must perform a Manual J load calculation. This industry-standard calculation evaluates your home’s exact thermal characteristics to determine the precise amount of sensible and latent heat your system needs to remove.

When it comes to selecting a new system, details like SEER2 ratings and proper capacity matching are essential. You can learn more about how to navigate this process in our guide on How to Choose the Right Air Conditioning Installation.

Signs That Your Current AC Unit is Oversized

You don't necessarily need to be an HVAC engineer to spot an oversized system. If you notice any of the following warning signs in your home, there is a very high probability your system is too large:

1. The 10-Minute Cool Down: Your home goes from warm to icy cold in less than 10 minutes from the moment the system turns on.

2. High Indoor Humidity: Your thermostat reads a cool 71°F, but your skin feels damp, sticky, and clammy.

3. Frequent On/Off Cycles: You constantly hear your outdoor unit turning on, running for a few minutes, turning off, and then repeating the process 10 minutes later.

4. Musty Odors: Stagnant, humid air inside your ductwork and living spaces creates a persistent musty smell.

5. Divergent Room Temperatures: Your living room is freezing, but your bedrooms feel like a humid greenhouse.

It is worth noting that while an oversized system cycles on and off rapidly, there are other issues that can cause a system to do the opposite. If you've ever wondered about the other end of the spectrum, you can read about Why Your AC Runs Constantly in South Florida.

Why Proper Sizing Matters for Long-Term Comfort

A properly sized air conditioner will run long, gentle, and highly efficient cycles. This allows the evaporator coil to stay cold enough to pull gallons of water out of your air every single day.

Because the system operates primarily in its highly efficient steady-state phase, it uses significantly less power and keeps your monthly energy usage manageable. Additionally, proper sizing ensures that your system achieves its rated SEER2 (Seasonal Energy Efficiency Ratio) efficiency.

To understand how system efficiency and capacity work hand-in-hand to protect your comfort and maximize efficiency, check out our explanation on Miami Air Conditioning Guide: Why SEER Matters.

Practical Fixes and Workarounds for an Oversized AC

If you already have an oversized air conditioner installed in your home, replacing a relatively new system immediately may not be practical. Fortunately, there are several professional adjustments and workarounds that can help mitigate high humidity levels:

• Lower the Blower Fan Speed: Most indoor air handlers allow technicians to adjust the fan speed (measured in CFM, or cubic feet per minute). By reducing the airflow across the evaporator coil, the air stays in contact with the cold metal longer. This lowers the dew point and coaxes the system into removing more moisture.

• Install a Whole-Home Dehumidifier: This is the most effective workaround. A dedicated whole-home dehumidifier works alongside your existing AC system, pulling moisture out of the air independently of your cooling cycles.

• Upgrade to a Variable-Speed or Two-Stage Compressor: If you choose to upgrade, systems featuring variable-speed inverter technology (such as Daikin FIT systems) can modulate their capacity anywhere from 10% to 100%. This allows them to run almost continuously at ultra-low, highly efficient speeds, providing unmatched dehumidification.

• Adjust Thermostat Fan Settings: Always ensure your thermostat fan setting is set to "Auto" rather than "On." If the fan runs continuously ("On"), it will blow air over the wet evaporator coil during the off-cycle, pushing all the condensed moisture right back into your home.

How Oversized AC Units Make Humidity Problems Worse and How Dehumidifiers Help

When an oversized AC short cycles, it fails to handle the latent moisture load of your home. A whole-home dehumidifier acts as a dedicated partner to your AC.

While the oversized AC focuses on lowering the temperature quickly, the dehumidifier monitors the relative humidity. It pulls damp air out of your living spaces, removes the moisture, and returns dry air back into your ductwork. This allows you to maintain a healthy relative humidity target of 45% to 50%, eliminating the clammy "cold jungle" feel and protecting your home from mold growth.

Frequently Asked Questions About Oversized AC Units

What should the ideal indoor humidity level be in Miami?

For optimal comfort, health, and structural safety, indoor relative humidity in South Florida should be kept strictly between 45% and 50%. Keeping your humidity below 50% is crucial because dust mites, mold spores, and musty odors thrive once relative humidity climbs above 55%.

Can I fix an oversized AC by closing vents in unused rooms?

No, you should never close vents to try and balance an oversized system. Closing supply registers restricts airflow and increases static pressure inside your ductwork. This can cause the evaporator coil to freeze over completely, leading to liquid refrigerant floodback and catastrophic compressor damage.

Why does a smaller, properly sized AC feel cooler than a larger one?

A smaller, properly sized AC runs longer, continuous cycles that steadily pull moisture out of the air. Because dry air allows your skin’s natural moisture to evaporate easily, a room at 75°F with 45% humidity feels significantly cooler, crisper, and more comfortable than a room at 71°F with 65% humidity.

Conclusion

At Air On Demand, we have spent years helping homeowners across Coconut Grove, Coral Gables, Country Walk, Cutler Bay, Homestead, Kendale Lakes, Kendall, Lakes By the Bay, Palmetto Bay, and Pinecrest achieve perfect indoor comfort.

If you suspect your air conditioner is oversized, short cycling, or leaving your home feeling cold and clammy, don't keep turning down the thermostat. Let our experienced local team perform a comprehensive system diagnostic and help you find the right solution for your home.

Schedule professional AC services with Air On Demand today to restore comfort, optimize energy usage, and protect your indoor air quality.

Beginner's Guide to Preparing for Low GWP Refrigerants placeholder-image  | Air On Demand
Energy Savings
5 min read

Beginner's Guide to Preparing for Low GWP Refrigerants

Learn how to prepare for the shift to low gwp refrigerants before the 2025-2026 EPA deadlines hit South Florida homes.

Beginner's Guide to Preparing for Low GWP Refrigerants

Beginner's Guide to Preparing for Low GWP Refrigerants

What the Shift to Low-GWP Refrigerants Means for Florida Homeowners

How to prepare for the shift to low GWP refrigerants starts with understanding what's already changed — and what's coming next. Here's a quick snapshot:

1. Know your system's refrigerant — Most Florida homes built before 2025 use R-410A, which is now being phased down.

2. Check your AC's age — Systems over 10 years old are most at risk of needing repairs as R-410A becomes less available.

3. Understand the new rules — The EPA now requires all new residential AC systems to use refrigerants with a GWP below 700.

4. Don't retrofit — You cannot simply swap a low-GWP refrigerant into an older R-410A system.

5. Plan your next replacement — New systems use refrigerants like R-454B or R-32, which are more efficient and future-proof.

6. Work with a qualified local HVAC pro — Especially one familiar with South Florida building codes and the latest equipment.

If you've noticed your energy bills creeping up, heard about refrigerant shortages, or simply want to stay ahead of new EPA rules, you're not alone. Homeowners across Kendall, Pinecrest, and Cutler Bay are asking the same question right now: what does this refrigerant transition actually mean for my home?

The short answer is that R-410A — the refrigerant in most AC systems installed before 2025 — is being phased down under federal law. New systems can no longer be manufactured with it, and the supply of R-410A is shrinking fast. This supply reduction affects maintenance and repairs on older systems.

For homeowners in South Florida, where your AC runs hard for most of the year, this transition isn't a distant concern — it's happening right now. The good news is that with a little planning, the shift to low-GWP refrigerants can also mean a more efficient, more reliable system for your home.

Understanding the EPA Regulations and the HFC Phasedown

To understand how the air conditioning industry arrived at this point, we have to look at the legislative background driving these changes. The transition is governed primarily by the American Innovation and Manufacturing (AIM) Act, which was passed by Congress in late 2020. The AIM Act directs the Environmental Protection Agency (EPA) to phase down the production and consumption of hydrofluorocarbons (HFCs) by 85% by the year 2036.

HFCs are chemical compounds that became the industry standard after older, ozone-depleting refrigerants like R-22 (Freon) were phased out. While HFCs do not harm the ozone layer, they are incredibly potent greenhouse gases. In fact, their Global Warming Potential (GWP) can be hundreds to thousands of times higher than carbon dioxide ($CO_2$).

To address this, the EPA finalized its Technology Transitions Rule. Under this rule, a strict GWP limit of 700 has been established for all newly manufactured residential air conditioning and split systems. Because R-410A has a GWP of approximately 2,088, it falls well above this limit and is being systematically phased out of new equipment. For a deeper look into how these chemical compounds function within your cooling system, you can read A Brief Guide on Air Conditioner Refrigerant.

Why Homeowners Must Learn How to Prepare for the Shift to Low GWP Refrigerants Now

As we navigate through June 2026, the reality of the HFC phasedown is setting in. While you are not legally required to rip out your perfectly functioning R-410A system, keeping it running over the next few years is going to become increasingly challenging due to supply limitations.

The primary catalyst for this is the looming 2029 AIM Act step-down. In 2029, the federal allowance for HFC production drops sharply from 60% of the baseline down to just 30%. This is the steepest single drop in the phasedown schedule. Because the installed base of R-410A systems across Florida remains massive, the sudden halving of available virgin refrigerant will inevitably trigger severe supply constraints.

If your air conditioning system develops a leak, you cannot simply let it slowly drip away. Not only is venting refrigerant illegal, but your system will also suffer severe performance drops and eventually fail. As a homeowner, you must realize that Your AC System Should Not Run Out of Refrigerant. If it does, a leak is present, and repairing that leak in an older R-410A unit will require reclaimed gas, which is becoming harder to source. Proactive planning today prevents emergency system failures tomorrow.

Key Compliance Deadlines for Residential AC Systems

The EPA transition timeline has been rolled out in phases to give manufacturers, distributors, and homeowners time to adjust:

• January 1, 2025: The manufacturing and importing of new residential air conditioning and split systems utilizing refrigerants with a GWP above 700 (such as R-410A) was officially banned.

• The Sell-Through Period: To prevent distributors from being stuck with unusable inventory, the EPA established a sell-through window, allowing existing stock manufactured prior to 2025 to be installed for a limited time.

• The 2026 Reality: As of June 2026, the transition is in full swing. New installations are almost exclusively low-GWP systems.

For South Florida homeowners in hot, humid climates like Coral Gables and Palmetto Bay, this means any new air conditioning installation you schedule today will utilize next-generation, environmentally friendly refrigerants.

Comparing R-410A and New Low-GWP Alternatives (A2L vs. Naturals)

The transition away from R-410A has introduced two primary low-GWP alternatives to the residential market: R-32 and R-454B. Both of these alternatives offer significantly lower environmental impacts while maintaining or exceeding the cooling capacity of legacy systems.

• R-410A — Safety Classification: A1 (Non-flammable) — Global Warming Potential (GWP): 2,088 — Relative Charge Size Required: 100% — Key Benefit: Legacy standard; being phased down

• R-32 — Safety Classification: A2L (Mildly Flammable) — Global Warming Potential (GWP): 675 — Relative Charge Size Required: ~60% — Key Benefit: Single-component; highly efficient

• R-454B — Safety Classification: A2L (Mildly Flammable) — Global Warming Potential (GWP): 466 — Relative Charge Size Required: ~90% — Key Benefit: Lowest GWP of the primary options

energy efficient residential AC condenser

What Are A2L Refrigerants?

You might have heard the term "A2L" thrown around by HVAC technicians, and it’s important to understand what it means. Under the ASHRAE Standard 34 safety classification, refrigerants are rated by toxicity and flammability:

• Class A denotes low toxicity (safe for residential use).

• Class 1 means no flame propagation (like R-410A).

• Class 2L means "mildly flammable."

A2L refrigerants like R-32 and R-454B are classified as mildly flammable because they have a very slow burning velocity (less than 10 centimeters per second) and require a highly concentrated spark to ignite. In practical terms, they are incredibly difficult to ignite and do not pose a danger under normal residential operating conditions.

Furthermore, R-32 is a single-component refrigerant, meaning it doesn't fractionate (separate) and can be easily topped up or recycled. It also delivers up to 10% better energy efficiency and allows systems to run with up to 40% less refrigerant charge compared to legacy R-410A units. This is why leading manufacturers like Daikin have heavily embraced A2L technologies for their residential line-ups.

Natural Refrigerants vs. A2L Alternatives

Some environmental advocates point to "natural" refrigerants as the ultimate solution. These include carbon dioxide ($CO_2$ or R-744), propane (R-290), and ammonia (R-717). While these substances have incredibly low or zero GWP, they present major practical challenges for residential central air conditioning:

• Propane (R-290) is highly flammable (Class A3). Due to safety standards like UL 60335-2-40, strict charge limits are placed on propane in residential systems, making it unsuitable for large central AC units.

• Carbon Dioxide (R-744) operates at extremely high pressures (up to 100 bar), requiring heavily reinforced steel copper piping and complex multi-stage compressors that are not practical for home use.

• Ammonia (R-717) is highly toxic (Class B2L) and cannot be safely used in residential ducted systems.

Because of these limitations, A2L refrigerants represent the ideal middle ground for residential cooling: they are safe, highly efficient, and perfectly suited for the demands of South Florida homes.

Preparing for this transition doesn't require drastic, immediate action, but it does require strategic planning. By understanding the health of your current system and knowing what to look for in a replacement, you can reduce your carbon footprint and ensure your home remains a cool sanctuary during our brutal summer months.

Step-by-Step: How to Prepare for the Shift to Low GWP Refrigerants

If you want to stay ahead of the curve, follow this practical checklist:

• Step 1: Audit your existing system's age and refrigerant type. Look at the manufacturer's label on your outdoor condenser. It will state whether the system uses R-22, R-410A, or a newer low-GWP refrigerant.

• Step 2: Check your maintenance history. If your AC has a history of leaks, it is a prime candidate for an early upgrade. Repeatedly patching and recharging an R-410A system is not a sustainable long-term solution.

• Step 3: Consult local HVAC experts. Have a professional technician assess your ductwork, electrical connections, and overall system performance.

• Step 4: Align with local building codes. South Florida has strict building and electrical codes. Ensure any future installation is handled by a licensed contractor who understands local permitting and A2L safety standards.

• Step 5: Plan your next steps. While you don't need to replace a working system today, start planning for a new system if your current unit is over 10 to 12 years old.

Managing Existing R-410A Systems and Leak Prevention

If your current R-410A system is relatively new and running efficiently, your best strategy is strict preventive maintenance. Because virgin R-410A production is shrinking, keeping your system sealed is paramount.

Refrigerant leaks are the most common cause of premature system failure and high energy bills. If you suspect a leak, you should investigate immediately. Ask yourself, Are You Leaking Refrigerant?

Ignoring a small hiss or a slight drop in cooling performance can lead to major issues. Leaky Refrigerant is a Bigger Problem Than You Might Think. Beyond the environmental impact, running your system with low pressure puts immense strain on the compressor, leading to total system burnout. To protect your investment, learn How Leaky Refrigerant Affects Your Air Conditioner so you can spot the warning signs early.

Frequently Asked Questions About the Refrigerant Transition

Navigating federal regulations can be confusing. Here are answers to the most common questions we receive from homeowners in Coconut Grove, Homestead, and Country Walk.

Can I retrofit my existing R-410A system with a low-GWP refrigerant?

No, you cannot. This is one of the most common misconceptions about the transition. Converting a system designed for an A1 refrigerant (like R-410A) to run on an A2L refrigerant (like R-32 or R-454B) is strictly prohibited by the EPA and safety standards like UL 60335-2-40.

A2L systems require specific safety components, including integrated refrigerant detection sensors (RDS), specialized expansion valves, different compressor lubricants, and A2L-compatible electrical components to prevent ignition risks. Attempting to "drop in" a low-GWP gas will void your manufacturer warranty, ruin your compressor, and create safety hazards. If your system is failing, you must address The Problem with a Refrigerant Leak or plan for a full system replacement.

How do I know if my air conditioner is leaking refrigerant?

Your air conditioner is a closed-loop system; it should never "consume" or run out of refrigerant. If the levels are low, you have a leak. Common signs include:

• Warm air blowing from your supply vents.

• A noticeable hissing or bubbling sound near your indoor or outdoor coils.

• Ice forming on the evaporator coils or the brass refrigerant lines outside.

• A sudden, unexplained spike in your monthly electric bill.

For a complete breakdown of these symptoms, read about the Signs of Low Refrigerant Levels in Your Air Conditioner. If you notice any of these signs, you should contact a professional immediately to determine if You Need to Get Your Refrigerant Supply Refilled and have the leak permanently repaired.

Will R-410A still be available for AC repairs in 2026?

Yes, R-410A is still available for servicing existing systems in 2026, but the supply of newly manufactured "virgin" gas is highly restricted. Most servicing now relies on reclaimed and recycled R-410A. Because of the shrinking supply and the high demand across older systems, sourcing R-410A will continue to become more difficult as we head toward the 2029 quota cliff. While you can still get your system repaired, you should weigh the challenges of ongoing repairs against the long-term efficiency benefits of upgrading to a modern, low-GWP system.

Conclusion

The shift to low-GWP refrigerants is a major step forward for environmental sustainability and home energy efficiency. While change can feel overwhelming, preparing for this transition is simple when you have the right partner.

At Air On Demand, we specialize in providing seamless, future-proof residential air conditioning solutions throughout Coconut Grove, Coral Gables, Country Walk, Cutler Bay, Homestead, Kendale Lakes, Kendall, Lakes By the Bay, Palmetto Bay, and Pinecrest. As premier Daikin specialists, we are proud to offer advanced, highly efficient systems that utilize next-generation low-GWP refrigerants.

When you choose us, you benefit from our outstanding service guarantees, including convenient online booking, rapid response times, and real-time updates. Plus, we back our installations with incredible manufacturer warranties, such as the Daikin 12-year parts warranty and the Daikin Comfort Promise.

Don't wait for a disruptive refrigerant leak to affect your comfort. Contact us today to schedule a comprehensive system audit and explore our premium Air Conditioning Services to keep your home cool, efficient, and compliant for years to come.

How to Check Your Thermostat in 5 Easy Steps placeholder-image  | Air On Demand
5 min read

How to Check Your Thermostat in 5 Easy Steps

Learn how to check your thermostat before calling for repair with this 5-step troubleshooting guide.

Why You Should Learn How to Check Your Thermostat Before Calling for Repair

Knowing how to check your thermostat before calling for repair could save you from a service visit you never needed. In fact, roughly 25% of furnace and AC repair calls turn out to be simple thermostat issues that homeowners can often resolve in just a few minutes.

Before you pick up the phone, here is a quick checklist to run through:

1. Check the batteries - Replace them even if the screen looks active

2. Check the circuit breaker - Look for a tripped switch on your indoor air handler

3. Verify your settings - Confirm the mode (Heat/Cool), fan setting, and temperature setpoint

4. Clean the thermostat - Dust buildup can interfere with sensors

5. Test the accuracy - Compare the reading to a separate thermometer

If none of those steps fix the problem, it is time to dig a little deeper — or call a professional.

Here in South Florida, a thermostat that is not working correctly does not just mean mild discomfort. It means your AC may be running nonstop in 90-degree Miami heat, driving up your energy bills while your home never actually cools down. Thermostats typically last 10 to 15 years, and problems often develop gradually, making them easy to overlook until something feels noticeably wrong.

The good news? Many of the most common thermostat issues are straightforward to diagnose yourself before scheduling a professional service call.

When your air conditioning system begins acting up, it is easy to assume that the outdoor compressor or the complex air handler inside has failed. However, the thermostat acts as the brain of your entire HVAC system. If the brain cannot communicate with the body, nothing works correctly. Learning the basics of What to Check Before Calling for Air Conditioning Repair is an essential skill for any homeowner in communities like Coral Gables, Pinecrest, or Palmetto Bay. By understanding how this small wall-mounted device operates, you can rule out minor glitches before scheduling a professional service call. To dive deeper into the root causes of climate control failures, consult our comprehensive Miami Air Conditioning Repair Guide: What Causes AC Problems.

Signs of a Faulty Thermostat

How do you know if your thermostat is actually the culprit? Several classic signs indicate that your wall unit is malfunctioning rather than your main AC unit:

• A completely blank or flickering display: If the screen has gone dark or flashes erratically, the system cannot receive your commands.

• The AC system runs nonstop: If your air conditioner refuses to shut off even when the room feels like an icebox, the thermostat's internal relay may be stuck in the "on" position, or the temperature sensor might be misreading the room. For more details on this specific issue, see our guide on Why Your AC Runs Constantly Without Cooling.

• Frequent short-cycling: This occurs when the air conditioner turns on and off rapidly every few minutes. Short-cycling puts immense wear and tear on your compressor and blower motor.

• Unresponsive buttons or touchscreen: If you press the buttons and nothing happens, the physical switches or the internal circuit board may have failed.

• Erratic temperature swings: If one room feels like a sauna and another feels like a freezer, or if the digital display jumps up and down randomly, the thermostat's internal calibration has likely drifted.

How Thermostat Issues Impact Your Energy Bills

A malfunctioning thermostat is a major contributor to skyrocketing utility bills. When a thermostat suffers from a calibration error of just 2 to 3 degrees, it can cause your air conditioner to run significantly longer than necessary.

According to the U.S. Department of Energy, turning your thermostat back 7 to 10 degrees Fahrenheit for eight hours a day can reduce your annual heating and cooling energy use by up to 10%. However, if your thermostat's internal sensor drifts in the opposite direction—thinking your home is warmer than it actually is—it will force your AC to work overtime.

To help you distinguish between normal operation and a system that needs immediate attention, review the comparison table below:

• Maintains room temperature within 1°F of the setpoint — Faulty Thermostat Symptoms: Temperature fluctuates wildly or differs from actual room temp by 3°F or more

• Cycles the AC system on and off 2 to 3 times per hour — Faulty Thermostat Symptoms: Short-cycles (cycles on and off every few minutes) or runs continuously

• Responds instantly to manual temperature adjustments — Faulty Thermostat Symptoms: System ignores manual inputs or takes several minutes to click on

• Retains programmed schedules and WiFi connections — Faulty Thermostat Symptoms: Regularly loses programmed times, schedules, or smart home connections

• Clear, steady digital display — Faulty Thermostat Symptoms: Blank, flickering, or faded screen

The 5-Step Thermostat Troubleshooting Guide
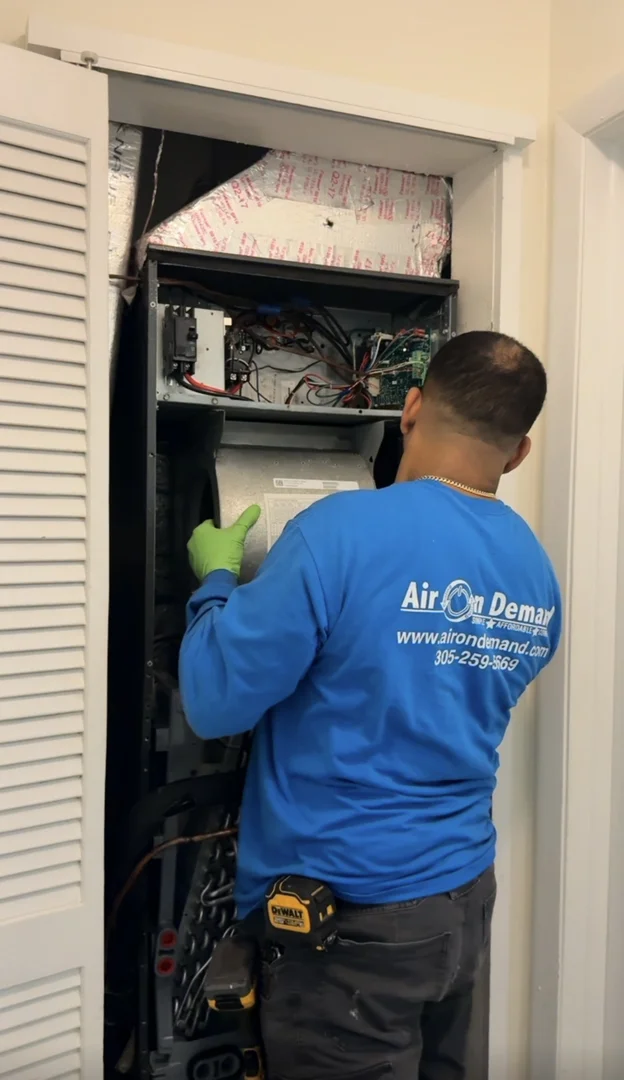
person checking the batteries in a digital thermostat

Before you assume you need a brand-new AC system, follow this systematic, step-by-step DIY troubleshooting guide. It takes less than fifteen minutes and requires no specialized technical training.

Step 1: Perform an Essential Power and Battery Audit

The single most common cause of a seemingly "dead" thermostat is a lack of electrical power.

First, look at the batteries. Many homeowners do not realize that even hardwired thermostats often use batteries as a backup power supply to preserve programmed settings during a power outage. Over time, these batteries degrade. We recommend replacing them once a year. When you replace them, always use high-quality, name-brand alkaline or lithium batteries. Avoid rechargeable batteries, as they often do not provide the consistent voltage required by sensitive digital relays.

If replacing the batteries does not bring the screen back to life, head over to your home's main electrical panel. Look for the circuit breaker labeled "AC," "Air Handler," or "Furnace." In South Florida homes, the indoor air handler contains the low-voltage transformer that sends 24V common power (often called the C-wire) to your thermostat. If this breaker has tripped, your thermostat will lose its primary power source. Flip the breaker fully to the "OFF" position, then firmly back to "ON."

Additionally, check the safety switch on your indoor air handler cabinet door. Most modern air handlers have an internal safety switch that cuts all 24V power if the blower compartment door is not fully closed and latched. If you recently checked or replaced your air filter, make sure that the access panel is completely flush and securely sealed.

Step 2: Verify Your Settings and the 5-Degree Rule

It may sound incredibly simple, but holiday guests, children, or accidental bumps can easily change your thermostat's configuration.

Start by verifying the mode. Ensure it is set firmly to "Cool" (or "Heat" during our brief cool winter nights). Next, check the fan setting. There is a massive difference between "Auto" and "On." When set to "Auto," the indoor blower fan only runs when the AC is actively cooling the air. When set to "On," the fan runs continuously, even when the compressor is off. This can make it feel like your system is failing to cool, and it can actually blow humidity back into your home. For a detailed breakdown of how this works, read The Fan Setting on Your Thermostat May Not Be What You Think.

Once you have verified the mode, apply the 5-degree rule. If your home's current room temperature is 78°F, lower the setpoint to 73°F. This significant temperature differential forces the thermostat to send a strong call for cooling to the outdoor condenser. Wait about five minutes. Most digital thermostats have a built-in compressor delay timer to prevent short-cycling, so do not panic if the system does not start instantly. If you hear a distinct "click" from the wall unit and your outdoor compressor roars to life, your thermostat's control relays are functioning properly.

Step 3: Clean the Internal Components and Sensors

Just like any other electronic device, thermostats are highly sensitive to dust, pet dander, and insect debris. This is especially true for older mechanical models, but even digital sensors can become insulated by a thick layer of dust, leading to inaccurate readings. Cleaning your thermostat is an excellent task to add to your seasonal home care checklist, particularly during the transition from winter to spring. Learn more about preparing your system with our guide on Common Air Conditioning Problems in the Spring.

To clean your thermostat safely:

1. Turn off the power to your HVAC system at the circuit breaker.

2. Gently pull the thermostat cover straight off its wall mounting plate. Some covers slide up, while others use small plastic tabs on the sides.

3. Use a can of compressed air to blow away loose dust bunnies and debris from the internal circuit board and sensors.

4. If you have an older mechanical thermostat, use a soft brush or a clean dollar bill to gently slide between the metal contact points to clear away oxidation.

5. Avoid using wet cloths, harsh chemical cleaners, or visual solvents, as these can permanently ruin the electronic circuitry.

Step 4: Test Accuracy and Calibrate Your Thermostat

If your home constantly feels warmer or cooler than the number displayed on your wall, your thermostat may be out of calibration.

To test its accuracy, tape a reliable, separate digital thermometer to the wall directly next to your thermostat. Place a small piece of paper towel behind the separate thermometer so it does not touch the drywall directly, as wall temperatures can skew the reading. Leave both devices undisturbed for at least 20 to 30 minutes.

After the time has passed, compare the two temperatures. A difference of 1 degree is perfectly normal. However, if the readings differ by 2 degrees or more, your thermostat needs to be recalibrated.

Many modern digital and smart thermostats allow you to adjust this via a "temperature offset" or "calibration" setting in the system configuration menu. If you have an older mechanical thermostat, it may need to be physically leveled, as even a slight tilt can cause the internal switches to misread the room temperature.

Also, consider the physical location of your unit. Is it mounted in direct sunlight? Is it directly under a supply vent, near a drafty hallway, or on an exterior wall? If your thermostat is exposed to localized heat or cold, it will never accurately reflect the average temperature of your living space.

Step 5: Inspect the Wiring and Connections Safely

If the basic checks have not resolved the issue, it is time to inspect the wiring connections behind the wall plate.

Safety First: Before touching or inspecting any internal wires, you must turn off the power to your air handler and outdoor condenser at your home's breaker panel.

Once the power is completely off, remove the thermostat cover to expose the wiring terminals. You will see several small, color-coded wires attached to screw terminals labeled with letters like R, G, Y, W, and C.

• R (Red): 24V Power supply from the transformer.

• G (Green): Blower fan control.

• Y (Yellow): Compressor/Cooling control.

• W (White): Heating control.

• C (Blue/Black): Common wire that provides continuous power to digital screens.

Gently tug on each wire to ensure it is firmly secured under its terminal screw. If you notice any loose wires, tighten the screws with a small precision screwdriver. Look closely for signs of corrosion, oxidation, or bare wires touching one another, which can cause a short circuit. If a wire looks corroded, you can carefully strip the wire back to expose clean copper and reattach it.

If you own a digital multimeter, you can verify if the thermostat is receiving power by measuring the voltage between the R and C terminals. With the circuit breaker turned back on, the multimeter should read between 20 and 30 volts AC. If your multimeter reads zero, the issue lies within your air handler's control board, a blown low-voltage fuse, or a broken wire inside your walls.

Advanced Diagnostics: Mechanical vs. Digital and Smart Thermostats

Not all thermostats are created equal. The specific troubleshooting steps you need to take depend heavily on the technology your device uses.

How to Check Your Thermostat Before Calling for Repair: Digital and Smart Models

Modern smart thermostats are incredibly convenient, offering features like remote smartphone access, learning algorithms, and energy reports. However, their advanced computer chips make them susceptible to unique digital glitches.

When troubleshooting a smart thermostat, first check its WiFi connectivity. If your home router recently updated its firmware or if you upgraded your internet service, your smart thermostat may have dropped offline. Most smart thermostats require a standard 2.4GHz WiFi network rather than a 5GHz network. If the connection drops, the thermostat may fail to follow its programmed schedule or ignore commands sent from your phone.

Additionally, check for pending firmware updates or run a built-in system diagnostic test if your model supports it. If the screen is completely blank but your home has power, it often means the device is not receiving enough voltage through the C-wire. Many older homes in Kendall or Homestead do not have a dedicated C-wire, requiring a professional to install a common wire adapter or run new thermostat wiring.

How to Check Your Thermostat Before Calling for Repair: Mechanical and Analog Models

Older mechanical thermostats rely on physical components rather than computer chips to sense temperature. Most use a bimetallic coil that expands and contracts as the room temperature changes.

The most common issue with mechanical thermostats is dust accumulation. "Mischievous dust bunnies" love to settle inside the casing, blocking the mechanical contact points and preventing the electrical switch from closing. Use a soft brush or compressed air to clean these components gently.

Another critical factor is leveling. Many older analog thermostats use a small glass bulb filled with mercury to complete the electrical circuit. If the thermostat housing is slightly tilted on the wall, the mercury will pool on one side, causing the AC to turn on too early or refuse to turn on at all. Use a pocket level to ensure the wall plate is perfectly straight.

When to Stop Troubleshooting and Call an Expert

While DIY troubleshooting can save you time and money, it is vital to know when to put the tools down and call a licensed professional. Electrical work carries inherent risks, and attempting to fix complex HVAC issues yourself can void your equipment warranties.

You should immediately stop troubleshooting and call us if you encounter any of the following electrical red flags:

• A burning smell or smoke coming from the thermostat or the air handler.

• Visible sparks or burn marks on the thermostat's circuit board or wall plate.

• A circuit breaker that trips repeatedly immediately after you reset it. Never force a tripped breaker back on, as this indicates a direct electrical short and poses a severe fire hazard.

• Persistent short-cycling that continues even after you have replaced the batteries, cleaned the unit, and installed a clean air filter.

• Unusual clicking, buzzing, or squealing noises coming from your indoor blower unit or outdoor compressor.

At Air On Demand, we specialize in high-quality Daikin products and offer prompt, reliable residential AC service across South Florida. If your thermostat diagnostic efforts point to a deeper system issue, our certified technicians are ready to help.

Frequently Asked Questions About Thermostat Troubleshooting

Why is my thermostat screen blank after changing the batteries?

If your thermostat screen remains blank after you install fresh, high-quality alkaline batteries, the unit is likely not receiving its primary 24V AC power from the indoor air handler. Double-check your home's main circuit breaker panel.

Next, inspect the safety switch on your air handler's blower door; if the door is slightly ajar, all low-voltage power is cut off. Finally, the low-voltage transformer inside your AC unit may have failed, or a small fuse on the main control board may have blown, requiring professional replacement.

Can a bad thermostat cause my AC to run constantly?

Yes, a faulty thermostat is a common cause of a constantly running air conditioner. If the internal temperature sensor drifts or loses its calibration, it will continuously report that the room is too warm, preventing the system from cycling off.

Additionally, the physical relays inside the thermostat can fuse together over time due to electrical wear, keeping the cooling circuit permanently closed. This not only spikes your energy bills but also risks freezing your AC coils and damaging your compressor.

How long do home thermostats typically last?

On average, a residential thermostat has a lifespan of 10 to 15 years. Over this decade of continuous operation, the internal sensors slowly lose their accuracy, and the mechanical relays wear out.

If your thermostat is over ten years old, upgrading to a modern digital or smart model is a highly effective home improvement. Modern smart thermostats often significantly improve energy efficiency and precise temperature setbacks.

Conclusion

Taking a few minutes to learn how to check your thermostat before calling for repair is one of the smartest things a South Florida homeowner can do. By ruling out dead batteries, incorrect settings, tripped breakers, and simple dust buildup, you can often restore your home's comfort without waiting for a technician.

However, if you have completed this guide and your air conditioning system still refuses to cooperate, do not sweat in the Miami heat. The team at Air On Demand is here to provide seamless, stress-free HVAC solutions.

We proudly serve homeowners throughout Coconut Grove, Coral Gables, Country Walk, Cutler Bay, Homestead, Kendale Lakes, Kendall, Lakes By the Bay, Palmetto Bay, and Pinecrest. As Daikin specialists, we offer industry-leading warranties, convenient online booking, and our signature Comfort Promise to ensure your home stays cool and comfortable all year long.

Don't let a minor thermostat glitch compromise your home's comfort or drive up your utility bills. Schedule professional AC maintenance today and let our expert team keep your cooling system running at peak performance!

The Complete Guide to Summer Efficiency Tips for Tropical Coastal Florida Homes placeholder-image  | Air On Demand
Energy Savings
5 min read

The Complete Guide to Summer Efficiency Tips for Tropical Coastal Florida Homes

Discover summer efficiency tips for tropical coastal Florida homes that cut cooling costs and boost comfort in Miami-Dade County.

Why Summer Efficiency Tips for Tropical Coastal Florida Homes Matter More Than Ever

If you're looking for the most effective summer efficiency tips for tropical coastal florida homes, here's a quick overview of what works:

• Set your thermostat to 78°F when home and 80°F when away

• Block solar heat gain with window films, cellular shades, or solar screens

• Seal duct leaks that can waste 20-30% of your cooled air

• Run ceiling fans counterclockwise to feel cooler without lowering the thermostat

• Keep attic insulation at R-38 and use a cool or reflective roof

• Schedule annual HVAC maintenance to prevent efficiency losses of up to 5% per year

• Use portable dehumidifiers and exhaust fans to manage humidity

Here in Miami-Dade County and the surrounding coastal communities, summer isn't just hot — it's relentless. From May through October, temperatures push into the low-to-mid 90s, humidity regularly tops 70%, and your air conditioner runs nearly non-stop just to keep up. The result? Cooling alone can account for 50% or more of your total summer energy consumption.

That's a real problem for homeowners in Kendall, Coral Gables, Cutler Bay, and Pinecrest who want comfort without watching their energy usage spiral out of control every June through September.

The good news is that a combination of smart habits, targeted home improvements, and a well-maintained AC system can make a significant difference — without sacrificing comfort. This guide walks you through every practical step, from window treatments to HVAC upgrades, so you can take control of your home's cooling this summer.

Implementing Summer Efficiency Tips for Tropical Coastal Florida Homes

energy-efficient window treatments blocking bright Florida sun

When it comes to keeping a coastal Florida home comfortable, your first line of defense is preventing heat from getting inside in the first place. This is known as managing your "solar heat gain." Approximately 30% of a home's unwanted heat enters directly through its windows and doors.

If your home is still fitted with older, single-pane windows, they act like magnifying glasses in the intense South Florida sun. Upgrading to high-performance, double-pane windows with low-E (low-emissivity) glass can block up to 70% of solar heat gain. These windows feature a microscopic metal oxide coating that reflects infrared heat while still letting natural light pass through.

For many homeowners in Palmetto Bay and Country Walk, replacing every window at once is a significant undertaking. Fortunately, there are many highly effective steps you can take today to block the sun and improve efficiency during summer without a full window overhaul.

Passive Design and Landscaping: Summer Efficiency Tips for Tropical Coastal Florida Homes

Passive design is all about working with nature rather than fighting it. In South Florida, the orientation of your home dictates how much direct sunlight hits your living spaces throughout the day:

• South-Facing Windows: These receive consistent, bright light. Adding architectural overhangs or awnings is highly effective here because the high summer sun can be blocked while still allowing pleasant indirect light inside.

• East and West Exposures: These are the most challenging. East-facing windows catch the intense morning sun, while west-facing windows bear the brunt of the blistering afternoon heat. Minimizing window sizes on these sides or heavily shading them is crucial.

One of the most natural, beautiful, and effective ways to manage this heat is through strategic landscaping. By planting native shade trees—such as wild tamarind, live oaks, or even strategically placed palms—on the eastern and western sides of your property, you can block the sun before it ever touches your glass.

Additionally, shading your outdoor air conditioning condenser unit with shrubbery can improve its efficiency, provided you maintain at least a two-foot clearance around the unit so it has room to breathe. Adopting these landscaping adjustments is one of many 5 Efficiency Boosting Habits to Adopt that pay dividends season after season.

High-Performance Window Treatments and Films

If you want to keep the sun out without changing your landscaping, high-performance window treatments are your best bet. According to the U.S. Department of Energy, properly fitted energy-efficient window treatments can lower summer cooling energy use by up to 30%.

Here are the top options for coastal Florida homes:

1. Cellular Shades (Honeycomb Shades): These shades feature individual air pockets that trap air, creating a powerful thermal barrier between the hot glass and your living room.

2. Blackout Thermal Curtains: Ideal for bedrooms, these heavy, tightly woven curtains block 99% of light and prevent heat transfer. Opt for light-colored backings to reflect the sun back outside.

3. Solar Roller Shades: These filter out harsh glare and harmful UV rays while preserving your beautiful coastal views—perfect for living areas in Coconut Grove or Lakes By the Bay.

4. UV-Blocking Window Films: These thin, retrofitted sheets are applied directly to the glass. They can block up to 99% of UV rays and a massive portion of infrared heat, protecting your skin and preventing your furniture from fading.

By layering solar shades with light linen curtains, you can easily control privacy, light, and heat throughout the day. To explore more ways to optimize your windows, check out our guide on optimize your air conditioning.

Optimizing Your Home Envelope: Insulation, Roofing, and Air Sealing

Your home’s "envelope" is the barrier between your air-conditioned indoor sanctuary and the brutal outdoor elements. If this envelope is weak, your air conditioner will constantly run to replace the cold air that is escaping.

In South Florida, the attic is often the hottest part of the entire house, frequently reaching temperatures north of 130°F. If you do not have adequate attic insulation, that heat radiates directly down through your ceiling.

Current building standards recommend insulating South Florida attics to an R-38 rating. If your home was built more than a decade ago, you likely only have R-19 insulation, which is simply not enough to stop the thermal downward draft. Upgrading your insulation can drastically reduce your AC's daily workload.

Your roof color also plays a massive role. Traditional dark shingles absorb up to 90% of solar energy. Upgrading to a "cool roof"—such as white concrete tile, light-colored metal, or reflective shingles—can reflect the majority of this heat away from your home entirely. For more ideas on securing your home envelope, read our Year-Round HVAC Efficiency Tips.

Sealing Duct Leaks and the Building Envelope

Did you know that the average Florida home loses 20% to 30% of its conditioned air to the attic through ductwork leaks?

Because most ductwork in places like Homestead and Kendale Lakes runs through the unconditioned, scorching attic space, even a tiny tear or loose joint can pull superheated attic air into your system or dump cold, conditioned air into the rafters. This causes severe pressure imbalances, forcing your AC to work twice as hard.

Professional duct sealing using mastic sealant or specialized aerosol systems is one of the most effective improvements you can make.

Beyond the ducts, you should perform a quick perimeter walk of your home on a hot day. Check for drafts around your doors and windows. Replacing worn weatherstripping and applying high-quality outdoor caulk to gaps around window frames, pipes, and electrical outlets will seal your home's envelope, ensuring you Make Your Air Conditioning More Efficient This Year.

Smart Climate Controls and Ventilation Strategies

To truly maximize your efficiency, you need to combine a tight home envelope with smart climate controls. Your thermostat is the brain of your cooling system, and how you program it directly impacts your monthly energy consumption.

Smart Thermostat Settings: Summer Efficiency Tips for Tropical Coastal Florida Homes

The Department of Energy recommends setting your thermostat to 78°F when you are at home during the summer. We understand that 78°F can sound warm to some, but here is the reality: each degree you set your thermostat below 78°F increases your energy usage by approximately 6% to 8%.

A smart thermostat (such as a Nest or Ecobee) helps you manage this effortlessly:

• Setback Schedules: Program the thermostat to automatically rise to 82°F–85°F when the house is empty for more than four hours.

• Geofencing: This feature tracks your smartphone’s location, cooling the house back down to 78°F just as you pull into your driveway in Pinecrest or Coral Gables.

• Humidity Sensing: High humidity makes 76°F feel like 82°F because your sweat cannot evaporate to cool you down. Many smart thermostats can run your AC on a slower cycle specifically designed to pull moisture out of the air.

To learn more about how humidity affects your indoor comfort levels, read our detailed article on Humidity and Air Conditioning in Miami FL.

Away-from-Home Maintenance and Mold Prevention

Many South Florida residents are "snowbirds" who head north for the summer, or families who travel for weeks at a time. Leaving your AC completely off while you are away is a recipe for disaster. Within days, indoor relative humidity will spike above 70%, leading to mold, mildew, warped wood, and ruined drywall.

If you are away for extended periods:

• Set your thermostat to 80°F (or 77°F if you live in a high-rise condo).

• Use a humidistat set to 58% relative humidity to prevent mold growth while minimizing energy use.

• Install a float switch on your AC condensate pan. If the drain line clogs while you are away, the float switch will instantly shut the system down, preventing catastrophic water damage.

• Leave interior doors open to maintain balanced airflow throughout the home.

To see how your cooling system works double-duty as a moisture manager, explore How Your Air Conditioner Helps to Control the Humidity.

High-Efficiency HVAC Upgrades and Benefits

If your air conditioner is more than 10 to 12 years old, it is likely running at the end of its lifespan and operating at a fraction of its original efficiency. Replacing an old, inefficient system with a modern, high-SEER2 system is one of the best long-term investments you can make for your home.

In January 2023, the Department of Energy transitioned to the stricter SEER2 (Seasonal Energy Efficiency Ratio 2) testing standard to better reflect real-world operating conditions in hot, humid climates. In Florida, the minimum allowable rating for a new split-system AC is now 14.3 SEER2 (equivalent to the old 15 SEER).

• Legacy SEER 10 (Pre-2015) — Estimated Annual Energy Use (3-Ton Load): High Energy Use — Efficiency Improvement vs. Legacy SEER 10: Baseline

• Standard SEER2 14.3 (Minimum) — Estimated Annual Energy Use (3-Ton Load): Moderate Energy Use — Efficiency Improvement vs. Legacy SEER 10: ~15% - 20% Reduction

• High-Efficiency SEER2 18 (Inverter) — Estimated Annual Energy Use (3-Ton Load): Low Energy Use — Efficiency Improvement vs. Legacy SEER 10: ~35% - 40% Reduction

• Ultra-Efficiency SEER2 22+ (Inverter) — Estimated Annual Energy Use (3-Ton Load): Extremely Low Energy Use — Efficiency Improvement vs. Legacy SEER 10: ~50%+ Reduction

Modern systems utilizing inverter technology and variable-speed compressors do not constantly turn fully on and fully off. Instead, they modulate their speed up and down in tiny increments to match the exact cooling load of your home. This eliminates the massive energy spikes associated with traditional compressors starting up, while providing unmatched humidity removal.

To help you decide if it is time to upgrade, read our AC Efficiency Tips for the End of Summer to evaluate your current system's health.

Daily Habits to Minimize Indoor Heat Gain

While upgrading your equipment is highly effective, your daily habits can also play a major role in keeping your home cool:

• Switch to LED Bulbs: Incandescent bulbs convert 90% of their energy into heat. Replacing them with LEDs keeps your rooms cooler and lowers your lighting energy use.

• Cook Smart: Your oven and stove can quickly turn your kitchen into an oven. On hot afternoons, grill outdoors, use a microwave, or utilize a slow cooker. If you must cook indoors, always run your range hood to vent heat and steam outside, and keep lids on boiling pots.

• Time Your Appliances: Run your dishwasher, washing machine, and clothes dryer after 7:00 PM when outdoor temperatures are cooler and grid demand is lower.

• Run Ceiling Fans Wisely: Ensure your ceiling fans are rotating counterclockwise to create a wind-chill effect. Remember: fans cool people, not rooms. Turn them off when you leave the room to reduce electricity use.

Frequently Asked Questions about Florida Summer Efficiency

What is the best thermostat setting for a humid Florida summer?

The Department of Energy recommends 78°F when you are at home. This setting provides an ideal balance between efficiency and comfort. For every single degree you lower the thermostat below 78°F, you will increase your cooling energy consumption by approximately 6% to 8%.

How much energy is lost through leaky ductwork in Florida homes?

The average Florida home loses 20% to 30% of its conditioned air through leaks, tears, and poor connections in the ductwork. Because these ducts run through a superheated attic, sealing them is one of the fastest ways to lower your energy consumption and improve your indoor air quality.

Does turning off the AC when away improve efficiency in Florida?

No. Turning your AC completely off in Florida is highly discouraged. Doing so allows indoor humidity to skyrocket, which can lead to mold growth in as little as 24 to 48 hours. Instead, raise your thermostat to 80°F–85°F while you are away to reduce energy use while keeping humidity under control.

Conclusion

Managing your summer energy usage in tropical coastal Florida doesn't have to be an uphill battle. By combining simple daily habits—like managing your window treatments and utilizing ceiling fans—with smart home improvements like attic insulation and duct sealing, you can enjoy a cool, comfortable home all summer long.

To keep your system running efficiently, regular maintenance is key. You can learn more about the Benefits of Regular HVAC Maintenance in Tropical Coastal Florida or explore standard AC Maintenance Services to keep your home comfortable all year long.

How South Florida Humidity Makes Your AC Work Harder placeholder-image  | Air On Demand
Air Conditioning
5 min read

How South Florida Humidity Makes Your AC Work Harder

Discover how South Florida humidity makes your AC work harder and learn practical fixes to improve comfort and efficiency.

Why South Florida's Humidity Is a Real Problem for Your AC

How South Florida humidity makes your AC work harder comes down to one simple fact: your system has to fight two battles at once — lowering the temperature and pulling moisture out of the air.

Here's a quick breakdown of what's happening:

• Dual workload: Your AC removes heat and water vapor from indoor air, which takes significantly more energy than cooling alone.

• Longer run times: High moisture levels force your system to run longer cycles, putting extra strain on the compressor and blower motor.

• Short-cycling risk: An oversized unit cools the air fast but shuts off before removing enough moisture, leaving your home feeling cold but sticky.

• Mold and wear: Excess indoor humidity above 60% creates ideal conditions for mold growth and accelerates component wear.

• Coastal factor: Salt air near the coast speeds up corrosion on outdoor units, cutting system lifespan from 15 years down to as few as 7-10.

If you live in Kendall, Palmetto Bay, Coral Gables, or anywhere else in South Florida, your AC is working in one of the most demanding climates in the country. Relative humidity routinely tops 70% from May through October, and that moisture load doesn't just affect your comfort — it quietly drives up your energy bills and wears out your equipment faster than most homeowners realize.

The good news? Understanding exactly what's happening inside your system is the first step to fixing it.

How South Florida Humidity Makes Your AC Work Harder: The Science of Latent Heat

Air conditioner evaporator coil sweating with heavy moisture condensation

To understand why your air conditioner struggles during the sticky summer months in South Florida, we have to look at the physics of cooling. Many homeowners assume that an air conditioner’s only job is to lower the indoor air temperature. In reality, controlling the moisture levels inside your home is just as critical to your comfort.

When your air conditioner runs, it pulls warm, humid air from your living spaces and passes it over a freezing-cold evaporator coil. As this warm air hits the cold metal surface, moisture in the air condenses into liquid water—much like droplets forming on the outside of an iced sweet tea on a hot afternoon in Cutler Bay. This water collects in a drain pan and flows outside, leaving the air drier and cooler.

However, when relative humidity levels are exceptionally high, the thermodynamic workload on your system skyrockets. This is because of "latent heat." Latent heat is the energy required to change water from a gas (vapor) to a liquid. Before your air conditioner can drop the temperature of the air even one degree, it must first condense and extract the heavy water vapor suspended within it. This constant phase change requires an immense amount of energy, which explains why managing Humidity and Air Conditioning in Miami FL is such a massive mechanical challenge for local systems.

Sensible vs. Latent Cooling in ASHRAE Climate Zone 1

In the HVAC industry, cooling is divided into two distinct categories:

• Sensible Cooling: This is the cooling you can easily measure with a standard thermometer. It represents the reduction of actual air temperature.

• Latent Cooling: This is the energy spent removing moisture (latent heat) from the air to lower the relative humidity.

South Florida sits squarely in ASHRAE Climate Zone 1, which is classified as the most demanding hot and humid zone in the United States. In dry climates, like Arizona, an air conditioner can devote nearly 100% of its capacity to sensible cooling because there is very little water vapor in the air.

In our tropical climate, however, your system must split its capacity. Often, up to 30% or more of your system's total energy output is consumed purely by latent cooling. This means your system has less available power to actually lower the temperature, forcing it to run longer to achieve the same indoor comfort. Knowing How Your Air Conditioner Helps to Control the Humidity highlights why a properly balanced system is absolutely vital in our unique climate.

Why This Climate and How South Florida Humidity Makes Your AC Work Harder

During the peak of the cooling season in May 2026, outdoor relative humidity levels in areas like Homestead and Pinecrest regularly exceed 70% to 90%. When high humidity combines with ambient temperatures in the mid-90s, the "feels-like" temperature or heat index can easily climb past 105°F.

This extreme weather places a relentless latent load on your home. Humid air constantly tries to seep indoors through microscopic gaps in doors, windows, and drywall. As the indoor relative humidity climbs above the ideal 45% to 55% range, your compressor has to work much harder to squeeze that water out of the air. This added strain is a primary driver behind Why Your AC Runs Constantly in South Florida, leading to higher utility bills and a system that rarely gets a break.

The Clammy Home Dilemma: Oversized ACs and Short-Cycling

A common mistake made by inexperienced contractors in South Florida is installing an oversized air conditioning unit. On paper, a larger system might seem like a great way to cool down a home in Lakes By the Bay or Country Walk quickly. However, when it comes to humidity control, an oversized AC is actually one of the worst things you can have.

When an air conditioner is too large for the space it serves, it quickly blasts the home with cold air and satisfies the thermostat in a matter of minutes. This rapid cooling cycle is known as short-cycling.

While the temperature on the wall drops quickly, the air conditioner doesn't run long enough to lower the temperature of the evaporator coil below the dew point for a sustained period. Because the system shuts off after only 5 to 8 minutes, it fails to pull moisture out of the air. The result is the infamous "meat locker" effect: your home feels cold, but the air is thick, damp, and clammy.

To understand how short-cycling impacts your comfort and system health, read our Miami AC Guide: Why Short Cycling on an AC Unit C to see why this issue shouldn't be ignored.

Why Bigger Isn't Better for Dehumidification

An air conditioner requires at least 10 to 15 minutes of continuous operation for the evaporator coil to reach its optimal operating temperature and start draining water effectively. A properly sized system will run longer, gentler cycles, allowing it to steadily extract gallons of water from your indoor air.

• Run Cycle Duration — Oversized AC System: Short bursts (5–8 minutes) — Properly Sized AC System: Long, steady cycles (15–25 minutes)

• Dehumidification — Oversized AC System: Poor (leaves home clammy and sticky) — Properly Sized AC System: Excellent (maintains 45–55% RH)

• Energy Consumption — Oversized AC System: High (frequent starting draws peak current) — Properly Sized AC System: Optimized (runs efficiently at steady state)

• Component Wear — Oversized AC System: Severe (frequent starting stresses compressor) — Properly Sized AC System: Normal (extended lifespans)

• Indoor Comfort — Oversized AC System: Cold but damp, uneven temperatures — Properly Sized AC System: Consistently cool, dry, and comfortable

To prevent these issues, professional HVAC technicians rely on Manual J load calculations. This rigorous industry standard calculates the precise cooling load of your home by analyzing factors such as insulation levels, window orientation, ceiling heights, and local climate data. This ensures your system is sized perfectly to handle both temperature and humidity.

The Triple Threat: Energy Waste, Component Wear, and Mold Growth

When indoor relative humidity consistently hovers above 60% to 70%, it triggers a cascade of severe problems for South Florida homeowners.

First, high humidity forces your system to run far more frequently. Because wet air holds more heat energy than dry air, your AC has to consume significantly more electricity to cool your home. If you have been wondering, "Are You Spending Too Much on Monthly Cooling?", South Florida's relentless humidity is often the primary suspect behind those soaring summer power bills.

Second, the added moisture creates a breeding ground for biological growth. Mold spores thrive in dark, damp environments with relative humidity levels above 60%. If your AC is failing to dehumidify, mold can quickly colonize your ductwork, drywall, and even the internal components of your air handler, severely compromising your indoor air quality and putting your family's health at risk.

How High Humidity Accelerates System Wear and Tear

The mechanical toll of high humidity on your HVAC system is profound. Because the system must run longer and more frequent cycles to combat the latent heat load, critical components experience accelerated wear.

The compressor—the vital heart of your air conditioner—and the blower motor are forced to run under high stress for extended periods. This constant operation leads to premature mechanical breakdowns, electrical failures, and fan motor burnout. Over time, this constant strain means How an Older Air Conditioner Tanks Your Energy Efficiency becomes painfully obvious as the system degrades and struggles to keep up with the humid South Florida climate.

Coastal Corrosion: How Salt Air and Moisture Shorten AC Lifespan

For homeowners living in coastal areas like Coral Gables, Palmetto Bay, and Coconut Grove, humidity isn't the only environmental threat. The combination of high outdoor moisture and salt-laden ocean breezes creates a highly corrosive atmosphere that is incredibly destructive to outdoor HVAC equipment.

When salt air settles on the aluminum fins and copper tubes of your outdoor condenser coil, it triggers a chemical process called galvanic corrosion. This occurs when two dissimilar metals come into contact in the presence of an electrolyte (in this case, salty moisture). The corrosion eats away at the delicate aluminum fins, causing them to flake off and disintegrate.

Without these fins, the condenser coil cannot shed heat efficiently. This forces the compressor to run hotter and work harder, consuming more energy and drastically shortening the lifespan of your system. In inland parts of the country, an AC system can easily last 15 years. Along the South Florida coast, however, salt air corrosion can reduce that lifespan to just 7 to 10 years.

To learn more about these coastal challenges, check out our guide on What Shortens Your AC Lifespan in Heat, Humidity and Salt Air.

Protecting Condensers in Coral Gables and Palmetto Bay

Fortunately, you can take steps to protect your investment. When installing a new system in coastal zones, it is wise to select units that feature specialized, factory-applied protective coil coatings designed to resist salt spray. Many high-quality systems are tested to meet rigorous ASTM B117 salt-spray standards to ensure they can withstand the harsh coastal environment.

Additionally, regular maintenance is crucial. Gently rinsing your outdoor condenser coil with fresh water from a garden hose once a month can wash away accumulated salt deposits and slow down the rate of corrosion. For comprehensive protection strategies, read about How to Extend the Life of Your AC in South Florida.

Operational Pitfalls: Settings and Maintenance Issues That Worsen Humidity

Sometimes, the reason your home feels sticky isn't just the outdoor weather—it can be caused by common maintenance oversights and incorrect system settings.

• Dirty Evaporator Coils: If your indoor coil is coated in dust and pet dander, the dirt acts as an insulating blanket. This prevents the refrigerant inside the coil from absorbing heat and moisture from the air, causing humidity levels to rise.

• Clogged Condensate Drains: As your AC pulls water from the air, it must drain away safely. Algae and sludge can easily clog the drain line. When this happens, water backs up into the drain pan, raising indoor humidity levels or triggering safety switches that shut down your system.

• Low Refrigerant Levels: A slow refrigerant leak will cause the evaporator coil's temperature to fluctuate. If the coil doesn't get cold enough, it won't reach the dew point required to condense water vapor, leading to a home that feels warm and humid.

When your system is suffering from these issues, you may notice it running constantly without actually cooling your home. If you suspect this is happening, read about what to do when your AC Runs Constantly Without Cooling.

Thermostat Fan Settings: ON vs. AUTO

One of the easiest ways homeowners accidentally spike their indoor humidity is by misconfiguring their thermostat fan settings.

Your thermostat fan has two main settings: ON and AUTO.

When you set the fan to ON, the blower motor runs continuously, even when the outdoor compressor is resting. During the cooling cycle, moisture condenses on your indoor evaporator coil. When the compressor shuts off, the coil remains soaking wet. If the fan continues to blow air across this wet coil, it evaporates all that collected water right back into your home's air supply.

This simple setting mistake can raise your indoor relative humidity by 10% to 15% in a matter of hours. Always keep your fan set to AUTO so the blower only runs when the system is actively cooling and dehumidifying. For more troubleshooting tips, see our guide on When Constant AC Running Signals a Problem.

Practical Steps to Reduce Your AC’s Workload

Managing indoor humidity requires a proactive strategy. By taking a few practical steps, you can significantly reduce the workload on your air conditioner, improve your indoor comfort, and lower your energy bills.

• Install a Whole-Home Dehumidifier: These systems integrate directly into your existing ductwork. They operate independently of your cooling system, pulling moisture from the air even when the AC isn't running. This allows your AC to focus purely on controlling the temperature.

• Upgrade to a Smart Thermostat: Modern smart thermostats can monitor both temperature and relative humidity. Some advanced models can automatically adjust your AC's fan speed or run cycles to prioritize dehumidification when indoor moisture levels creep too high.

• Seal Your Ductwork: Leaky supply or return ducts in your attic can pull hot, humid air into your system, forcing your AC to work twice as hard. Sealing these leaks keeps the humid air out and the cool air in.

• Perform Regular Maintenance: Keeping your system clean and well-maintained ensures it operates at peak efficiency, allowing it to remove moisture as effectively as possible.

Practical Solutions for How South Florida Humidity Makes Your AC Work Harder

If you are planning to replace an aging system, investing in modern technology can make a world of difference. Traditional single-stage air conditioners are either 100% on or 100% off, which often leads to temperature swings and poor humidity control.

In contrast, systems featuring variable-speed compressors and Daikin inverter technology can adjust their cooling capacity in real-time. Instead of shutting off when the temperature target is met, these systems run continuously at lower, highly efficient speeds. This allows for long, steady run cycles that provide unmatched dehumidification and superior energy savings.

Additionally, don't forget the basics: replace your air filters every 1 to 3 months and schedule professional coil cleanings to keep the heat-exchange process working flawlessly.

Frequently Asked Questions About South Florida Humidity and AC Performance

Why does my house feel cold but clammy?

If your home feels cold but sticky, your air conditioner is likely oversized or short-cycling. The system is cooling the air temperature down so fast that the thermostat is satisfied before the evaporator coil has enough time to condense and remove moisture from the air. This leaves you with cold, high-humidity indoor air.

Should I set my AC fan to ON or AUTO in Florida?

You should always keep your thermostat fan set to AUTO. Setting it to ON forces the blower fan to run continuously, which re-evaporates the moisture sitting on your wet evaporator coil back into your living spaces, causing indoor relative humidity to spike.

How long should an AC run to remove humidity?

An air conditioner typically needs to run continuously for at least 10 to 15 minutes for the evaporator coil to reach the steady, cold temperature required to pull significant water vapor out of the air. Shorter cycles will cool the air but fail to dehumidify it.

Defeat the Humidity with Air On Demand

Living in South Florida means dealing with some of the most intense humidity in the country, but your indoor comfort shouldn't have to suffer. At Air On Demand, we specialize in providing seamless residential HVAC solutions designed to conquer our unique climate.

As a trusted local expert serving Coral Gables, Pinecrest, Cutler Bay, Kendall, and surrounding areas, we specialize in high-efficiency Daikin products. We offer convenient online booking, fast service, real-time updates, and the industry’s best warranties—including Daikin’s 12-year parts warranty and Comfort Promise.

Whether you need a system tune-up, duct cleaning, or a brand-new variable-speed AC installation, our friendly team is ready to help. Contact us today to schedule your service and experience the difference of a cool, dry, and truly comfortable home!

Learn more about our professional Air Conditioning Services

In-Depth Guide to How the Refrigerant Transition Affects Your Next AC Purchase placeholder-image  | Air On Demand
Air Conditioning
5 min read

In-Depth Guide to How the Refrigerant Transition Affects Your Next AC Purchase

Learn how the refrigerant transition affects your next AC purchase with 2025–2026 EPA rules, A2L options, and efficiency upgrades for South Florida homeowners.

What the 2025–2026 Refrigerant Transition Means Before You Buy a New AC

How the refrigerant transition affects your next AC purchase comes down to a few straightforward changes every South Florida homeowner should understand before signing off on a new system in 2026.

Here's the quick version:

• New systems no longer use R-410A. As of January 1, 2025, manufacturers stopped producing residential AC equipment using R-410A. All new units now use lower-GWP refrigerants — primarily R-454B or R-32.

• You are not required to replace a working R-410A system. The rules apply to new equipment, not existing installations.

• Servicing your current R-410A system is still legal. R-410A refrigerant remains available, though prices have risen significantly and will continue to climb.

• New A2L systems are designed to be 10–15% more efficient than the R-410A units they replace, which matters a lot in Miami's year-round cooling climate.

• All new equipment includes built-in safety features — like leak detection sensors — specifically engineered for the new refrigerants.

If you are shopping for a new AC right now, every system on the market uses one of these newer refrigerants. If your current system is still running well, there is no emergency. The decision is about timing, cost-effectiveness, and what makes sense for your home.

The EPA's AIM Act set this transition in motion back in 2020, and by June 2026 the shift is fully underway. For homeowners in Kendall, Coral Gables, Cutler Bay, and across the Miami area, understanding what changed — and what did not — is the difference between making a smart, confident purchase and getting pressured into a rushed decision.

The sections below break it all down clearly.

How the Refrigerant Transition Affects Your Next AC Purchase: The 2025–2026 EPA Rules

To understand why this change is happening, we have to look at the Global Warming Potential (GWP) of the chemicals that keep our homes cool. For decades, R-410A was the industry standard. While it does not deplete the ozone layer like the older R-22 refrigerant did, it does have a very high GWP of 2,088.

Under the American Innovation and Manufacturing (AIM) Act of 2020, the Environmental Protection Agency (EPA) was directed to phase down the production and import of high-GWP hydrofluorocarbons (HFCs) by 85% by 2036. To meet these targets, the EPA mandated that all new residential air conditioning systems manufactured after January 1, 2025, must use refrigerants with a GWP of 700 or less.

This rule effectively retired R-410A for new equipment, paving the way for a new class of refrigerants known as A2Ls. If you are currently looking for a replacement, finding the right system means looking at these modern, compliant options. You can read more about selecting the right setup in our guide on how to Find an Efficient Air Conditioning Replacement.

What Changed for South Florida Homeowners in 2025 and 2026

The transition has rolled out in stages, and as of mid-2026, we are in the final phases of the physical inventory shift:

• January 1, 2025: Manufacturers officially ceased production of residential R-410A air conditioning systems.

• January 1, 2026: The grace period for installing pre-existing inventory of R-410A systems ended. Today, any new central air conditioning system installed in your home must be an A2L-compliant system.

• The Phase-Down Impact: In 2026, the production of virgin R-410A refrigerant has been cut by 40%. While there is still a supply allocated for servicing older systems, the shrinking supply has caused prices to climb.

This timeline means that if you live in Coral Gables, Pinecrest, or Palmetto Bay, you can no longer opt to install a brand-new R-410A system. The market has fully transitioned to R-454B and R-32. This shift directly influences efficiency standards and equipment design, which we explain in detail in our article on What is SEER2 and Why it Impacts Your Next AC Replacement.

How the Refrigerant Transition Affects Your Next AC Purchase Options

When you begin shopping for a new air conditioner in 2026, you will notice that the equipment on the market is fundamentally different from what was available a few years ago. Because A2L refrigerants operate under different physical properties, they cannot be mixed with R-410A, and they cannot be used to "retrofit" an older outdoor condenser.

This means your next purchase will be a completely redesigned, future-proof system. The indoor evaporator coil, the outdoor condenser, and the copper line sets connecting them are engineered to handle the exact pressures and thermal properties of either R-454B or R-32. Additionally, buying a modern system ensures that you will not face refrigerant scarcity issues down the road when your system requires routine maintenance or repairs. If you want to dive deeper into making a smart investment, check out our insights on how to Focus on Efficiency with Your AC Replacement.

Comparing R-410A to New A2L Refrigerants (R-454B and R-32)

technician inspecting safety sensors inside a modern AC unit

The move away from R-410A is a massive step forward for environmental sustainability. The new refrigerants, R-454B and R-32, carry the ASHRAE safety classification of A2L.

To put this in perspective, let’s look at how these three refrigerants stack up against each other:

• R-410A — Safety Classification: A1 (Non-Flammable) — Global Warming Potential (GWP): 2,088 — GWP Reduction vs. R-410A: Baseline — Composition: Blend (R-32 / R-125)

• R-32 — Safety Classification: A2L (Mildly Flammable) — Global Warming Potential (GWP): 675 — GWP Reduction vs. R-410A: ~68% Reduction — Composition: Pure Single-Component

• R-454B — Safety Classification: A2L (Mildly Flammable) — Global Warming Potential (GWP): 466 — GWP Reduction vs. R-410A: ~78% Reduction — Composition: Blend (R-32 / R-1234yf)

The "A" in A2L stands for non-toxic, meaning these gases are just as safe for humans as the older R-410A. The "2L" indicates that they are mildly flammable.

While the word "flammable" can sound alarming, A2L refrigerants are incredibly difficult to ignite. They require a high-energy direct ignition source (like an open flame) and a highly concentrated, stagnant mixture in the air to catch fire. They also burn exceptionally slowly—often described as a lazy, self-extinguishing flame that moves slower than a gentle walk. In fact, these same low-GWP refrigerants have been used safely for years in millions of automotive air conditioners and household refrigerators worldwide.

Safety Standards and Leak Detection Systems in A2L Units

To ensure absolute safety in residential applications, manufacturers have integrated advanced safety components into all A2L air conditioning units.

If you install a new A2L system in your Country Walk or Lakes By the Bay home, the indoor air handler will feature a built-in Refrigerant Detection System (RDS). This system includes:

• Highly Sensitive Leak Sensors: Constantly monitoring the air inside the cabinet for any trace of refrigerant.

• Mitigation Boards: A specialized control board that takes immediate action if a leak is detected.

• Blower Activation: If a leak is sensed, the system automatically shuts down the outdoor compressor to stop the flow of refrigerant and turns the indoor blower fan on to its maximum speed. This rapidly circulates the air, diluting the refrigerant safely throughout the home so it can never reach a concentration level capable of igniting.

These extra layers of protection make modern units incredibly safe. If you are planning a replacement, choosing a system designed with these modern safety features is always the best path forward. For more on this, read our tip on why you should Install a High Efficiency AC System This Time Around.

Efficiency Gains and How the Refrigerant Transition Affects Your Next AC Purchase Performance

Beyond safety and environmental benefits, the physical properties of R-32 and R-454B bring a major win for your wallet: increased energy efficiency.

Because these newer refrigerants have superior heat transfer capabilities (R-32, for example, has about 10% higher thermal capacity than R-410A), your air conditioner does not have to work as hard to cool your home. New A2L systems are engineered to run 10% to 15% more efficiently than their R-410A predecessors.

In South Florida, where our air conditioners run almost continuously to combat the intense heat and humidity, a 10% to 15% improvement in operating efficiency translates directly to lower monthly power bills. When comparing your options, it is highly beneficial to look at how these efficiency ratings translate to real-world performance. You can compare different options in our post on Which Air Conditioner is the Most Efficient.

Repair vs. Replace Decisions for Miami Homeowners

Living in Miami-Dade County means our cooling systems face some of the most demanding operating conditions in the country. High ambient temperatures, relentless coastal humidity, and salt-laden air all accelerate wear and tear on copper coils and compressors.

When your current R-410A system experiences a breakdown in 2026, the refrigerant transition will heavily influence whether you should opt for a repair or invest in a replacement. If your system is approaching 10 to 12 years of age, an expensive repair might not be the wisest choice. To understand how age impacts your system's performance, read our guide on How an Older Air Conditioner Tanks Your Energy Efficiency.

Can You Still Repair and Service an Existing R-410A System?

Yes, it is entirely legal to repair and service your existing R-410A system. The EPA rules only restrict the manufacture and installation of new non-compliant systems. However, the practical challenge comes down to the availability and cost of R-410A refrigerant.

Because R-410A production has been cut by 40% in 2026, the price of this refrigerant has doubled compared to a couple of years ago. If your older system has a significant leak, a simple recharge can now be a major financial setback. Furthermore, industry projections show that by 2028, R-410A prices are expected to triple or quadruple as supply lines continue to shrink.

If your system has a minor electrical issue, repairing it makes perfect sense. But if you are facing a major refrigerant leak or a failed compressor, the rising cost of R-410A makes replacement a much more logical long-term decision. Learn more about how minor issues can spiral by reading about The Impact of AC Problems on Energy Efficiency.

Long-Term Efficiency Benefits of Upgrading to A2L Systems

Upgrading to a new A2L system is an excellent way to future-proof your home comfort. Modern systems often utilize advanced two-stage or variable-speed compressors, which are particularly effective in South Florida's humid climate.

Unlike standard single-stage systems that turn on and off at full blast, variable-speed systems run continuously at lower, highly efficient speeds. This continuous operation allows the system to constantly extract moisture from your indoor air, keeping your home comfortable at a higher thermostat setting and saving you money on your utility bills. Discover the comfort advantages of these systems in our detailed breakdown of Two-Stage and Variable Speed AC Benefits.

What to Ask Your Contractor Before Buying a New AC in 2026

Buying a new air conditioner is a significant investment. Because A2L systems require updated installation protocols, you want to make sure you are working with a highly trained, licensed local contractor.

Before you sign any installation agreement in 2026, we highly recommend asking your contractor these key questions:

1. Are your technicians certified to handle A2L refrigerants? Working with R-32 and R-454B requires specialized safety training and A2L-specific tools (like spark-resistant vacuum pumps and recovery machines).

2. Will you perform a proper load calculation? Because A2L systems are highly efficient, proper sizing is critical to ensure proper dehumidification in humid areas like Kendall and Pinecrest.

3. What safety and leak detection features are built into this specific model? Ensure the unit includes integrated leak detection sensors that communicate properly with your thermostat and blower motor.

4. Are you pulling the required municipal permits? Proper permitting ensures your system is installed up to the latest Florida building codes.

Working with a professional who understands these details is essential for a safe, reliable installation. For more tips on evaluating your options, check out our guide on AC Installation Tip: Efficiency Ratings.

Frequently Asked Questions about the Refrigerant Transition

Navigating regulatory changes can be confusing. Here are direct answers to the most common questions we hear from South Florida homeowners during this transition.

Do I need to replace my working R-410A system immediately?

No. There is absolutely no mandate requiring you to replace a properly functioning R-410A air conditioner. You can continue to run, maintain, and repair your current system for the remainder of its natural operational lifespan. The transition only affects you when it is time to buy a completely new system.

Can my older AC be retrofitted to use R-454B or R-32?

No. Older R-410A systems cannot be converted or retrofitted to use the new A2L refrigerants. The compressors, expansion valves, and electrical components are not compatible with the pressure profiles and lubricant requirements of R-454B or R-32. Additionally, older systems lack the mandatory leak detection sensors and mitigation controls required by modern building codes for A2L equipment. Trying to mix these refrigerants will permanently damage your system and void your manufacturer warranty.

Are there rebates or incentives available for new A2L systems?

Yes! Because these new systems meet strict updated efficiency standards, many models qualify for federal tax credits under the Inflation Reduction Act (Section 25C), which can provide significant savings. Additionally, local utility rebates and manufacturer promotions are frequently available for high-efficiency installations. You can learn more about maximizing your savings in our post on how to Get $1450 Back When You Upgrade Your AC.

Conclusion

The 2025–2026 refrigerant transition represents a major positive step for both environmental sustainability and home energy efficiency. While navigating these changes might seem overwhelming at first, the transition is now fully implemented, and the new A2L systems on the market offer unmatched reliability, safety, and cooling performance for South Florida homes.

At Air On Demand, we specialize in high-quality Daikin cooling systems designed to thrive in our unique coastal climate. We serve homeowners across Coconut Grove, Coral Gables, Country Walk, Cutler Bay, Homestead, Kendale Lakes, Kendall, Lakes By the Bay, Palmetto Bay, and Pinecrest.

Whether you need a reliable repair on your existing system or are ready to upgrade to a highly efficient, future-proof A2L unit backed by Daikin's outstanding 12-year parts warranty and our Comfort Promise, we are here to help.

Ready to experience fast service, convenient booking, and real-time updates? Schedule an Air Conditioning Service with Air On Demand today, and let our local experts guide you to the perfect cooling solution for your home.

How to Troubleshoot AC Circuit Breaker Tripping placeholder-image  | Air On Demand
Air Conditioning Repair
5 min read

How to Troubleshoot AC Circuit Breaker Tripping

Learn what ac circuit breaker keeps tripping what it means and follow safe steps to troubleshoot your AC before calling a pro.

How to Troubleshoot AC Circuit Breaker Tripping

How to Troubleshoot AC Circuit Breaker Tripping

AC Circuit Breaker Keeps Tripping What It Means

AC circuit breaker keeps tripping what it means for your home is simple: your electrical system is detecting more current than it can safely handle and is shutting down to protect you. Here's a quick breakdown of the most common reasons this happens:

• Clogged air filter - restricts airflow, forcing the blower motor to draw excess power

• Dirty condenser coils - trap heat and make the compressor work harder

• Failing capacitor - causes the compressor to pull 3-5 times its normal startup current

• Loose or damaged wiring - creates shorts or arcing that trigger the breaker

• Grounded compressor - causes a direct short to ground and an immediate trip

• Worn circuit breaker - the breaker itself may be faulty and need replacement

It's a sweltering South Florida afternoon. You walk to your electrical panel, flip the AC breaker back on, and within minutes — click — it trips again. If this sounds familiar, you're not alone, and you're right to take it seriously.

A tripping breaker isn't just an annoyance. It's your home's built-in warning system telling you something is wrong with your AC. In the intense heat and humidity of Miami-Dade, your air conditioner runs hard — and when something goes wrong electrically or mechanically, the breaker is the first line of defense against overheated wiring and potential fires.

This guide walks you through exactly what's causing the problem and what to do about it safely. For immediate help, contact the Air On Demand team or read on to diagnose the issue step by step.

At its core, a circuit breaker is an automatic safety switch designed to protect your home from electrical damage. When your air conditioner draws more electrical current than the circuit is rated to handle, the breaker cuts the power. This safety mechanism, known as overcurrent protection, prevents the wires in your walls from overheating, melting their insulation, and potentially sparking a devastating house fire.

For central air conditioning systems in South Florida, standard household 120-volt single-pole breakers aren't enough. Because central AC units draw massive amounts of power, they require a dedicated, double-pole breaker connected to a 240-volt circuit. This double-pole breaker consists of two linked switches that monitor both "hot" wires of the circuit simultaneously. If either side detects an electrical anomaly, both switches trip together to cut all power to the outdoor condensing unit.

When your ac circuit breaker keeps tripping what it means is that your system is actively experiencing one of three major electrical faults. To help you understand what is happening behind the scenes, we've broken down these faults in the table below:

• Circuit Overload — What It Means: The AC is pulling slightly more amperage than the breaker’s rating over a prolonged period. — Common AC Causes: Clogged air filters, dirty condenser coils, low refrigerant. — Danger Level: Medium (Can damage the compressor and degrade wiring over time)

• Short Circuit — What It Means: A "hot" wire comes into direct contact with a neutral wire, causing an instantaneous, massive spike in current. — Common AC Causes: Loose electrical connections inside the unit, chewed wiring, failed motor windings. — Danger Level: High (Can cause immediate component damage and electrical fires)

• Ground Fault — What It Means: A "hot" wire touches a grounded component, such as the metal casing of the AC unit. — Common AC Causes: Grounded compressor, failed fan motor, water intrusion in electrical compartments. — Danger Level: Severe (High shock hazard and catastrophic system failure)

Understanding these distinctions is highly beneficial when referencing a Miami Air Conditioning Repair Guide: What Causes AC Problems. While a mild overload might take 15 to 30 minutes of operation to trip the breaker, a short circuit or ground fault will cause the breaker to trip instantly the very second the AC unit attempts to start up.

Common Airflow and Mechanical Causes of Breaker Trips

Many homeowners assume that a tripping breaker always points to a complex electrical failure. However, in our years of servicing homes from Coral Gables to Cutler Bay, we have found that many electrical trips actually start as simple mechanical issues.

When your AC experiences an airflow restriction, the internal pressure within the refrigeration cycle spikes. This high head pressure forces the compressor and the outdoor fan motor to work significantly harder to pump refrigerant through the system. As these mechanical components struggle against the resistance, their electrical draw increases. If the system continues to run under these high-pressure conditions, the amperage draw will eventually exceed the breaker's safe limit, causing it to trip.

If you are noticing that your home isn't cooling properly before the system cuts out, you may want to check for other Signs That Your AC Is In Trouble. Below, we dive into the two most common mechanical culprits behind these high-pressure overloads.

Clogged Air Filters and Blower Motor Strain

The single most common cause of an overloaded AC breaker is a dirty air filter. Your indoor blower motor is designed to pull warm air from your home, push it across the cold evaporator coils, and distribute the cooled air back through your ductwork.

When a filter becomes clogged with dust, pet dander, and South Florida humidity, it creates severe airflow restriction. The blower motor has to work twice as hard to draw air through the dense layer of dirt. This added resistance causes the motor to draw extra electrical current.

• The Stat: A dirty air filter can increase an AC system’s energy consumption by up to 15%, often causing the circuit breaker to trip.

Furthermore, this lack of warm airflow can cause your indoor evaporator coils to freeze over. When the coils freeze, the system runs continuously without cycling off, leading to a scenario where your AC Runs Constantly Without Cooling. The longer the system runs under this extreme stress, the hotter the blower motor gets, until it eventually pulls enough amperage to trip the breaker.

Dirty Condenser Coils and Heat Transfer Issues

While the indoor unit relies on a clean filter, your outdoor condenser unit relies on clean coils to release the heat extracted from your home. Over time, the outdoor coils accumulate a thick layer of dust, grass clippings, pollen, and — for our customers living near the coast in Palmetto Bay and Pinecrest — corrosive salt air deposits.

This accumulation of dirt acts as an insulating blanket. Instead of releasing heat into the outdoor air, the heat remains trapped inside the refrigerant. As a result, the compressor must operate at much higher temperatures and pressures to continue the cooling process.

• The Stat: Dirty condenser coils can reduce AC efficiency by 30% or more, leading to higher electrical loads and frequent breaker trips.

As the compressor works against this extreme pressure, its power consumption climbs higher and higher. On hot afternoons when temperatures climb, this added thermal load becomes the tipping point, forcing the breaker to shut down the system to prevent the compressor from overheating. If you notice your outdoor unit making a loud straining sound before the power cuts out, you should check out these 3 Signs You Need AC Repair ASAP.

Electrical Component Failures That Trigger the Breaker

When mechanical issues are ruled out, the problem is almost certainly a failing electrical component. Over years of constant operation in South Florida's humid climate, the electrical parts inside your air conditioner experience significant wear.

Corrosion from salt air, loose wiring connections caused by natural equipment vibrations, and high voltage fluctuations during summer storms can all degrade your system's electrical integrity. If you suspect an electrical failure is at play, your AC System Needs Professional Service immediately to prevent permanent damage to your equipment.

Failing Capacitors and Hard-Starting Compressors

Your outdoor unit utilizes capacitors — small, cylindrical devices that act like temporary batteries — to store and release electrical energy. The start capacitor, in particular, provides the high-voltage boost required to overcome the inertia of the stationary compressor and get it spinning during startup.

As capacitors age, they lose their ability to hold a charge, especially when subjected to the intense heat of a Florida summer. When a start capacitor weakens or fails, the compressor struggles to start up. Instead of starting smoothly, the compressor stall-starts, pulling an immense amount of power known as Locked Rotor Amps (LRA).

• The Stat: A failing or weak start capacitor can cause an AC compressor to draw 3–5 times its normal running amperage during startup, frequently tripping breakers.

When this massive spike in current occurs, the double-pole breaker trips almost instantly to protect the compressor from burning out. If you hear a loud clicking or buzzing sound from your outdoor unit followed by an immediate click at the breaker panel, a blown capacitor is the likely culprit. For a deeper dive into this common issue, check out our AC Repair Guide: The Blown Capacitor.

Grounded Compressors and Short Circuits

A grounded compressor is one of the most severe electrical failures an HVAC system can experience. This condition occurs when the electrical windings inside the compressor motor break down, lose their protective insulation, and make direct contact with the metal shell of the compressor.

When this happens, electricity bypasses the motor windings entirely and flows directly into the grounded metal frame of the unit, creating a massive ground fault. Because there is virtually zero resistance in this path, the current spikes to extreme levels in a fraction of a second.

A grounded compressor will trip your circuit breaker the exact millisecond the thermostat calls for cooling. Unfortunately, a grounded compressor cannot be repaired; the entire compressor must be replaced, or the homeowner must invest in a new outdoor condensing unit. Attempting to repeatedly reset the breaker on a grounded compressor is highly dangerous, as the extreme electrical currents can ignite the oil inside the compressor, leading to a catastrophic blowout or an electrical fire.

Safe Step-by-Step Troubleshooting Protocol for Homeowners

If your AC breaker has tripped, it is important to approach the situation with caution. While some issues require professional diagnostic tools, there are a few basic troubleshooting steps you can safely perform yourself before calling in the experts.

First, perform a quick visual inspection of your system:

1. Check the Air Filter: Locate your indoor return vents and pull out the filter. If it is gray, dusty, or completely clogged, replace it immediately.

2. Inspect the Outdoor Unit: Walk outside and check the condenser unit. Ensure there are at least two feet of clear space around the unit. Clear away any dead leaves, weeds, or debris that might be blocking the airflow.

3. Check Indoor Vents: Walk through your home and ensure that at least 80% of your supply vents are open and unblocked by furniture or drapes.

The One-Reset Rule: Safely Testing the System

If you have completed the visual inspection and replaced a dirty filter, you can safely test the system using the "One-Reset Rule." Never repeatedly flip a tripped breaker back on. Follow this exact protocol:

1. Turn Off the Thermostat: Go to your thermostat and switch the system from "Cool" to "Off." This prevents the AC from drawing power the instant you reset the breaker.

2. Reset the Breaker: Go to your electrical panel. Locate the double-pole breaker labeled "AC" or "HVAC." It will likely be in the middle position (neither fully "On" nor fully "Off"). Push the switch firmly to the "Off" position until you hear a click, then flip it back to "On."

3. Wait 30 Minutes: Do not turn the AC back on immediately. Let the system rest for 30 minutes. This allows the internal pressures within the refrigerant lines to equalize and gives any warm motors a chance to cool down.

4. Turn the Thermostat On: After 30 minutes, switch your thermostat back to "Cool" and set the temperature a few degrees below the current room temperature.

If the system starts up and runs smoothly without tripping again, the issue was likely a temporary overload caused by a dirty filter or a minor power fluctuation. However, if the breaker trips again immediately or within a few minutes, stop troubleshooting. Keep the breaker off and call for professional service.

When an AC Circuit Breaker Keeps Tripping What It Means to Call a Professional

There is a clear line between basic homeowner maintenance and dangerous electrical work. You should immediately turn off your system and call a licensed HVAC technician if you experience any of the following:

• The breaker trips instantly upon resetting, even when the thermostat is off.

• You detect a strong burning plastic or metallic odor near the indoor blower or outdoor condenser.

• You hear loud buzzing, grinding, or screeching noises when the system attempts to start.

• You notice visible smoke, sparks, or scorch marks on the electrical panel or the AC outdoor disconnect box.

• The circuit breaker switch itself feels hot to the touch.

When our technicians arrive at your South Florida home, we perform a highly detailed diagnostic process. To understand what goes on during these visits, you can read about What Really Happens During an AC Maintenance Visit. We use specialized multimeters to test capacitor capacitance, check electrical windings with megohmmeters, and measure the exact startup and running amperage of your compressor to pinpoint the root cause of the fault safely.

The Risks of Repeatedly Resetting a Tripped Breaker

It can be incredibly tempting to just keep resetting your AC breaker every time it trips, especially when the South Florida humidity starts creeping into your living room. However, treating the breaker like an on/off switch is incredibly dangerous.

Every time a circuit breaker trips, it is responding to an active hazard. Bypassing this warning by repeatedly forcing the switch back on degrades the internal spring mechanisms of the breaker itself. Over time, the breaker can weaken, meaning it will trip at lower, safe mileposts, or worse — it can fail to trip at all, allowing dangerous levels of electricity to flow unchecked. If you are experiencing persistent issues, neglecting them is one of the worst things What Happens If You Skip AC Maintenance.

Fire Hazards and Wiring Damage

The most severe risk of ignoring a tripping breaker is the high potential for an electrical fire. When high electrical currents force their way through your home's wiring, they generate extreme thermal energy.

• The Stat: Repeated breaker trips can increase the risk of electrical fire by up to 50% if the underlying cause is not addressed.

This intense heat can melt the protective plastic insulation surrounding the wires inside your walls or electrical panel. Once the insulation melts, bare copper wires can touch, creating a massive arc fault that can instantly ignite dry drywall, wood framing, or dust inside your walls.

Why an AC Circuit Breaker Keeps Tripping What It Means for System Longevity

Beyond the immediate safety hazards, repeatedly forcing an overloaded system to run will cause severe, irreversible mechanical damage to your air conditioner.

When your compressor is forced to start under high amperage or low voltage conditions, its internal motor windings experience extreme thermal stress. This slowly bakes the insulation off the motor windings, eventually leading to a short circuit or a grounded compressor. Replacing a compressor is a major, highly complex repair in the HVAC industry. By addressing the tripping breaker early, you can save your compressor and protect your investment. Learn more about the long-term benefits of protecting your equipment by reading these Reasons to Invest in AC Maintenance.

Frequently Asked Questions about Tripping AC Breakers

Why does my AC trip the breaker only when it is very hot outside?

When South Florida temperatures soar during the summer, the temperature difference between the indoor air and the outdoor air increases. This forces your AC to work much harder to release heat. The pressure inside your condenser coils rises, which naturally increases the workload on your compressor.

If your condenser coils are even slightly dirty, or if your compressor is starting to age, this extra thermal load during the hottest part of the day pushes the system's electrical draw past the breaker's limit.

Can a refrigerant leak cause my circuit breaker to trip?

Yes, indirectly. When your AC has a refrigerant leak, the low refrigerant levels make it incredibly difficult for the system to cool your home. As a result, the system will run continuously without shutting down.

This extended run time causes the compressor to overheat. As the compressor's temperature climbs, its electrical resistance changes, causing it to draw more and more current until the circuit overloads and trips the breaker.

Does a dirty air filter really cause a breaker to trip?

Absolutely. A clogged air filter restricts the volume of air flowing across your indoor evaporator coil. This forces your blower motor to work significantly harder to pull air through the system, which directly increases its electrical draw.

Furthermore, the lack of airflow can cause the evaporator coil to freeze, leading to liquid refrigerant flowing back into the compressor. This causes severe mechanical strain, forcing the compressor to draw excess power and trip the breaker.

Conclusion

If your ac circuit breaker keeps tripping what it means is that your system is crying out for professional attention. Whether it is a simple airflow restriction or a complex electrical fault, ignoring this warning sign can put your home at risk of electrical fires and lead to catastrophic compressor failure.

At Air On Demand, we have spent years keeping families comfortable and safe across South Florida, including Coconut Grove, Coral Gables, Country Walk, Cutler Bay, Homestead, Kendale Lakes, Kendall, Lakes By the Bay, Palmetto Bay, and Pinecrest. As Daikin Comfort Pro specialists, we provide fast, reliable residential AC diagnostics and repairs backed by industry-leading warranties, including Daikin’s 12-year parts warranty and Comfort Promise.

• The Stat: Annual professional HVAC maintenance can reduce the likelihood of AC breaker trips by up to 70% by catching issues like dirty coils, loose wiring, and failing components early.

Don't let a tripping breaker ruin your home's comfort or threaten your safety. Schedule your professional AC maintenance or repair service today with the local experts at Air On Demand!

Stop Burning Cash with High Efficiency Cooling placeholder-image  | Air On Demand
Energy Savings
5 min read

Stop Burning Cash with High Efficiency Cooling

Discover how high efficiency systems reduce summer costs in South Florida—save 30-44% on bills with SEER2 tech!

Stop Burning Cash with High Efficiency Cooling

Stop Burning Cash with High Efficiency Cooling

Why Summer Electricity Bills Feel So Painful — And What Actually Fixes Them

Understanding how high efficiency systems reduce summer costs starts with one simple idea: they do the same job as a standard AC — keeping your home cool — while using dramatically less electricity to get there.

Here's a quick snapshot of the core ways high-efficiency systems cut your summer bills:

• Lower energy consumption — High-efficiency units can save 30% or more on monthly cooling costs compared to older, standard systems

• Fewer daily cycles — Variable-speed compressors run 3–8 cycles per day instead of 10–12, reducing costly power spikes

• Lower startup wattage — High-efficiency units ramp up at 2,000–3,000 watts vs. 4,000–6,000 watts for standard units

• Better dehumidification — Superior moisture removal lets you feel comfortable at higher thermostat settings, which directly lowers runtime

• Less wasted air — Modern systems work better with sealed ducts, meaning the cool air you pay for actually reaches your rooms

In South Florida — from Coconut Grove and Coral Gables to Kendall and Palmetto Bay — air conditioning isn't a seasonal luxury. It runs almost every day of the year. And because AC typically accounts for 40% to 70% of a summer electricity bill, even modest efficiency improvements translate into real, recurring savings month after month.

If your system is more than 10–15 years old, there's a good chance it's quietly draining your wallet every time it kicks on. The rest of this guide breaks down exactly how high-efficiency technology works, what the numbers actually look like for a South Florida home, and what you can do right now to stop leaving money on the table.

What Defines a High-Efficiency AC System?

When we talk about high-efficiency systems, we aren't just talking about "newer" models. Efficiency is a specific engineering standard. In HVAC, this is primarily measured by the Seasonal Energy Efficiency Ratio (SEER), or the updated SEER2.

Energy Star label on a modern cooling system

To put it simply, SEER is like the "miles per gallon" for your air conditioner. It measures the cooling output divided by the energy consumed. As of 2026, a unit is generally considered high-efficiency if it has a SEER2 rating of 16 or higher. Some ultra-efficient models, like those using Daikin’s inverter technology, can reach ratings of 20 or even 22.

Key components that define these systems include:

1. Variable-Speed Motors: Unlike older units that are either "100% on" or "100% off," variable-speed motors adjust their output to meet the exact cooling needs of your home in real-time.

2. Advanced Inverter Technology: This allows the system to ramp up slowly rather than hitting the power grid with a massive surge every time it starts.

3. Energy Star Certification: We always look for the blue What the Energy Star Means for Air Conditioning label, which signifies the unit meets strict EPA guidelines for energy savings and performance.

Understanding these AC Installation Tip: Efficiency Ratings is the first step toward reclaiming your summer budget.

How High Efficiency Systems Reduce Summer Costs in South Florida

Living in places like Country Walk or Homestead, we know the "summer" bill isn't just a July problem; it’s a May-through-October problem. Because our cooling systems work harder and longer than almost anywhere else in the country, the ROI on efficiency is much faster here.

Research shows that high-efficiency AC systems can save a minimum of 30% on your monthly electricity bill. In many cases, especially when jumping from an old SEER 10 or 12 unit to a modern SEER 18+ system, those savings can skyrocket to 44%.

Let’s look at how this impacts a typical 2,000-square-foot home in Kendall or Coral Gables:

• Standard/Older Unit (SEER <14): Monthly summer cooling cost might average $180.

• High-Efficiency Unit (SEER 16+): Monthly summer cooling cost drops to approximately $100.

That is an $80 savings every single month. Over a five-year period, that’s $4,800 back in your pocket — essentially paying for a significant portion of the system itself. This is how high efficiency systems reduce summer costs so effectively; they turn a monthly expense into a long-term investment.

It is also important to recognize How an Older Air Conditioner Tanks Your Energy Efficiency. As parts wear down, motors struggle, and coils get dirty, an old unit can use 15% to 20% more energy than it did the day it was installed. If you’re seeing consistent spikes, there are 4 Things Your Energy Bills Can Tell You about the health of your system and why it might be time for an upgrade.

Understanding the Impact of SEER2 on How High Efficiency Systems Reduce Summer Costs

You might have heard the term "SEER2" recently. This updated testing standard was introduced by the Department of Energy to better reflect real-world conditions, such as the external pressure found in home ductwork.

As of 2025, SEER 16 is the minimum acceptable rating to be considered "energy certified." When we help homeowners in Pinecrest or Palmetto Bay choose a system, we often explain What is SEER2 and Why it Impacts Your Next AC Replacement. Choosing a higher rating isn't just about being "green"; it’s about "staying ahead of the game" as energy costs continue to rise.

If you are wondering Which Air Conditioner is the Most Efficient, the answer usually lies in units with "Inverter" compressors. These units don't just shut off; they slow down to a crawl, maintaining a steady temperature and preventing the expensive "on-off" cycles that eat up electricity.

Why Humidity Control is Vital for How High Efficiency Systems Reduce Summer Costs

In South Florida, "it's not the heat, it's the humidity" is a cliché for a reason. High humidity makes 78 degrees feel like 85. Standard AC units often cool the air so quickly that they shut off before they’ve had a chance to remove enough moisture. This leaves you feeling clammy and prompts you to "crank down" the thermostat even further.

High-efficiency systems are specifically Which Air Conditioner is Best for Warm Climates because their variable-speed fans run for longer, slower cycles. This provides superior dehumidification. When the air is dry, you can comfortably set your thermostat to 78°F instead of 72°F. Since each degree you raise the thermostat can save you 6% to 10% on your bill, the humidity control alone is a massive cost-saver.

Key Features That Drive Down Monthly Bills

The "secret sauce" of a high-efficiency unit is how it manages power during startup and operation. Standard units are like a car that can only go 0 or 100 mph. High-efficiency units are like a modern car with a smooth transmission.

One of the biggest energy drains is "startup wattage." It takes a massive surge of electricity to get a heavy compressor motor moving. High-efficiency systems use "soft-start" technology to ramp up slowly.

• Startup Wattage — Standard AC Unit: 4,000 – 6,000 Watts — High-Efficiency AC Unit: 2,000 – 3,000 Watts

• Daily Cycles — Standard AC Unit: 10 – 12 per day — High-Efficiency AC Unit: 3 – 8 per day

• Daily Energy Use — Standard AC Unit: ~72,000 Watts — High-Efficiency AC Unit: ~24,000 Watts

• Blower Motor — Standard AC Unit: Fixed Speed (On/Off) — High-Efficiency AC Unit: Variable Speed (Modulating)

By reducing the number of daily cycles from 12 down to as few as 3, these systems eliminate the most expensive part of AC operation: the startup surge. This is a primary reason why we recommend that homeowners Install a High Efficiency AC System This Time Around.

Furthermore, when you look at What are the Benefits of Trane Air Conditioning or Daikin systems, you see that they are built to last longer. Because they aren't constantly slamming on and off, there is less mechanical wear and tear on the compressor and fan motor, leading to lower repair costs over the life of the unit.

Maximizing Your Savings with Maintenance and Home Sealing

Even the most efficient system in the world will struggle if your home is "leaking" cold air. To truly understand how high efficiency systems reduce summer costs, you have to look at the whole home as an ecosystem.

The 20% Ductwork Rule

In many homes in Cutler Bay or Lakes By The Bay, ductwork runs through a scorching hot attic. If those ducts have small leaks or disconnected joints, you could be losing 20% or more of your cooled air before it ever reaches your living room. Sealing your ducts ensures that the high-efficiency air you’re paying for actually stays inside.

Precision Maintenance

A neglected system can use 15% to 20% more energy than a well-maintained one. We always emphasize Miami Air Conditioning Installation Tip: Why SEER matters, but maintenance is what keeps that SEER rating high.

• Clean Coils: Dirty coils force the system to run longer to achieve the same cooling.

• Filter Management: A clogged filter blocks airflow, making the motor work overtime. We recommend checking filters every 30 days during the peak South Florida summer.

• Professional Tune-ups: Our technicians check refrigerant levels and electrical connections to ensure peak performance.

Home Sealing and Insulation

Don't forget the "envelope" of your home. Using weatherstripping around doors in Coral Gables or adding attic insulation in Homestead can reduce the total "load" on your AC. When the house stays cool longer, the AC doesn't have to work as hard, further driving down those summer costs.

Frequently Asked Questions about High Efficiency Cooling

When should I consider upgrading to a high-efficiency system?

If your current AC is between 10 and 15 years old, it is likely a candidate for replacement. In South Florida, the salt air and constant runtime mean systems age faster than in other climates. If you notice your energy bills climbing even with regular maintenance, or if you’re facing a repair that costs more than 50% of a new unit, upgrading to a high-efficiency system is a smart financial move.

How much can I realistically save on my summer electricity bills?

Most South Florida homeowners see a minimum reduction of 30%. However, if you are upgrading from a legacy unit (SEER 10 or 12) to a modern SEER 18 or 20 unit, you can cut your cooling costs by up to 44%. For a home that typically spends $250 a month on cooling, that’s a savings of over $100 per month.

Do high-efficiency systems require more maintenance than standard units?

No, they require the same annual professional tune-up and regular filter changes as any other unit. However, because they use advanced components like variable-speed motors and sensors, it is even more important that the person servicing them is a trained professional who understands the technology. Keeping the system clean is vital to protecting your investment and maintaining those high-efficiency ratings.

Conclusion

At Air On Demand, we’ve spent years helping our neighbors in Coconut Grove, Palmetto Bay, and across South Florida navigate the heat without breaking the bank. As a Daikin specialist, we take pride in offering some of the most advanced, energy-efficient solutions on the market today.

Whether it’s the peace of mind provided by a 12-year parts warranty or the immediate relief of a lower utility bill, the move to high-efficiency cooling is one of the best upgrades you can make for your home. Don’t let another summer of record-breaking heat drain your savings.

Ready to see how much you could save? Schedule your professional AC maintenance today or contact us to discuss which high-efficiency system is the perfect fit for your South Florida home. From Pinecrest to Country Walk, we are here to keep you cool for less.

All About How AC Refrigerant Changes Affect Homeowners placeholder-image  | Air On Demand
Air Conditioning
5 min read

All About How AC Refrigerant Changes Affect Homeowners

Learn how ac refrigerant changes affect homeowners in South Florida with the 2026 R-410A phase-out and new A2L options.

How AC Refrigerant Changes Affect Homeowners Right Now

modern residential air conditioning unit refrigerant transition

How AC refrigerant changes affect homeowners comes down to a few key points worth knowing before your next service call or system replacement:

• Your existing R-410A system is not illegal. You can keep using and servicing it.

• New AC systems installed after January 1, 2026 must use low-GWP refrigerants like R-454B or R-32.

• You cannot swap new refrigerants into an old system. They are not compatible.

• R-410A will remain available for repairs, but prices are rising as production is reduced.

• New systems are 10-15% more energy efficient and include built-in safety features.

If you own a home in South Florida — whether in Kendall, Coral Gables, or Homestead — your air conditioner runs hard. It has to. The heat here is relentless, and your cooling system is one of the most important appliances in your home.

So when word spreads that the HVAC industry is going through a major refrigerant change, it is completely natural to wonder what it means for you. Do you need a new system? Will repairs cost more? Is your current unit still safe to run?

The short answer: most homeowners do not need to do anything drastic right now. But understanding what is changing — and why — will help you make smarter decisions when the time comes to repair or replace your system.

The 2026 Refrigerant Shift: Why R-410A is Being Phased Out

As we move through May 2026, the transition away from R-410A is no longer a "future" event—it is our current reality. The primary driver behind this shift is the Environmental Protection Agency (EPA) and the American Innovation and Manufacturing (AIM) Act. The goal is to phase down the production and consumption of hydrofluorocarbons (HFCs), which are potent greenhouse gases.

R-410A has been the industry standard for nearly two decades. However, it has a high Global Warming Potential (GWP) of 2,088. To put that in perspective, the new refrigerants we are seeing in 2026 have GWPs below 700. By making this switch, the EPA expects to avoid approximately 1.6 million skin cancer deaths in the United States among individuals born between 1890 and 2100 by protecting the stratospheric ozone layer and reducing climate impact.

For a deeper dive into the basics, check out our guide on 3 Things You Should Know About Refrigerant.

Will my current AC become illegal?

This is the number one question we hear from homeowners in Pinecrest and Palmetto Bay. The answer is a resounding no. Your current air conditioner does not become illegal to own or operate just because the manufacturing of new R-410A units has stopped.

Regulations typically target the manufacturing of new equipment, not the use of existing equipment. If your system is cooling your home perfectly fine today, you can continue to use it for the rest of its natural lifespan. We can still perform maintenance, fix leaks, and replace parts. The only thing that changes is the source of the refrigerant used for repairs; as virgin R-410A production drops, the industry relies more heavily on reclaimed refrigerant—refrigerant that has been recovered, cleaned, and tested to meet purity standards.

To learn more about the specifics of these regulations, visit our post Answering Refrigerant FAQs What You Need to Know.

Why the change matters for South Florida cooling

In South Florida, our air conditioners don't just provide comfort; they provide safety. From the humid afternoons in Homestead to the coastal breezes in Cutler Bay, a cooling failure in July is a major emergency.

Because our systems run almost year-round, they experience more wear and tear than units in the north. This makes the refrigerant transition particularly relevant for us. If your older R-410A system develops a major leak, the cost of the refrigerant itself is now significantly higher than it was just a few years ago. Supply is tightening, and while reclaimed gas is available, the market prices reflect that scarcity.

Furthermore, a leak isn't just a cooling issue; it's an efficiency issue. A system low on charge works twice as hard to do half the job, which can lead to premature compressor failure. You can read more about why Leaky Refrigerant Is a Bigger Problem Than You Might Think.

How AC Refrigerant Changes Affect Homeowners in South Florida

When we talk about how ac refrigerant changes affect homeowners, we have to look at both the technology and the logistics of keeping a home cool in places like Coconut Grove and Kendale Lakes.

The biggest change for 2026 is the introduction of A2L refrigerants. These are a new class of refrigerants that are much better for the environment but have different physical properties than the old R-410A. Because of these differences, the equipment itself has been redesigned.

Safety features for how ac refrigerant changes affect homeowners

You might hear the term "A2L" and see it described as "mildly flammable." While that sounds a bit intimidating, the reality is that these systems are incredibly safe for home use. In fact, many household items, like hairspray or certain cleaning supplies, are more flammable than A2L refrigerants.

To ensure total safety, the new systems installed in 2026 are built to the UL 60335-2-40 standard. This means they include:

• Leak Detection Sensors: These are often located near the indoor evaporator coil. If they detect a refrigerant leak, they automatically shut down the compressor and turn on the indoor blower fan to dissipate the gas.

• Mitigation Boards: These are specialized control boards that manage the safety sensors and ensure the system reacts instantly if a problem is detected.

• Enhanced Ventilation: The goal is to prevent the refrigerant from ever reaching a concentration where it could ignite, even if a total system leak occurred.

How ac refrigerant changes affect homeowners with older units?

If you are living in an older home in Palmetto Bay or Country Walk, you might even have a system that predates R-410A. These units use R-22 (often called Freon). R-22 has been fully phased out for years, and it is now extremely expensive to service.

The lesson from the R-22 phase-out is what we are seeing today with R-410A: as the supply of "virgin" gas disappears, we rely on the 140 million pounds of refrigerant reclaimed by professionals over the last two decades. If your system is over 12 years old and starts blowing warm air, you should ask yourself if a recharge is worth the investment.

If you find yourself constantly needing a "top-off," you should read Do You Need to Get Your Refrigerant Supply Refilled. Spoiler alert: a healthy AC system should never actually "run out" of refrigerant because it is a closed loop!

Understanding A2L Refrigerants: R-454B and R-32 Safety

The two primary replacements for R-410A in 2026 are R-454B and R-32. Both are A2L refrigerants, but they have slight differences.

• R-32: This is a single-component refrigerant. It has been used globally for years (especially by brands like Daikin) and is known for its excellent heat transfer properties. It has a GWP of 675.

• R-454B: This is a blend of refrigerants (R-32 and R-1234yf). It has an even lower GWP of 466, which is a 78% reduction compared to R-410A.

Both options are non-toxic and provide a much smaller carbon footprint for your home. For a more detailed breakdown, see A Brief Guide on Air Conditioner Refrigerant and what it means for your cooling capacity.

Are new A2L systems more efficient?

Yes! This is the "silver lining" of the 2026 changes. Because A2L refrigerants are more efficient at carrying heat, manufacturers have been able to re-engineer systems to be 10–15% more efficient than their R-410A predecessors.

In communities like Lakes By The Bay, where the AC might run 18 hours a day, a 15% jump in efficiency can lead to significant savings on your monthly FPL bill. Many of these new systems also meet the latest SEER2 (Seasonal Energy Efficiency Ratio) standards, ensuring you get the most cooling for every watt of electricity used.

Can I retrofit my R-410A system?

We get this question a lot: "Can you just drain my R-410A and put in the new R-454B?"

The answer is a firm no. You cannot retrofit an old system to use the new A2L refrigerants. The operating pressures are different, the lubricants (oils) used in the compressor are incompatible, and—most importantly—older systems lack the mandatory safety sensors and mitigation boards required for A2L gases.

Attempting to mix refrigerants or "drop in" a new gas into an old unit can lead to catastrophic system failure, voided warranties, and safety hazards. Your AC System Should Not Run Out of Refrigerant, so if it’s empty, it needs a repair or a replacement, not a different type of gas.

Repairing vs. Replacing Your Unit During the Transition

Choosing whether to fix an old R-410A unit or upgrade to a new A2L system is the biggest decision how ac refrigerant changes affect homeowners in 2026. Here is a simple way to look at it:

• Availability — R-410A Systems (Legacy): Phasing down; becoming scarcer — A2L Systems (R-454B / R-32): Current standard; widely available

• GWP (Climate Impact) — R-410A Systems (Legacy): 2,088 (High) — A2L Systems (R-454B / R-32): 466 - 675 (Low)

• Efficiency — R-410A Systems (Legacy): Standard SEER2 — A2L Systems (R-454B / R-32): 10-15% Higher Efficiency

• Safety Tech — R-410A Systems (Legacy): Standard pressure switches — A2L Systems (R-454B / R-32): Leak sensors & mitigation boards

• Repair Cost — R-410A Systems (Legacy): Rising (due to gas prices) — A2L Systems (R-454B / R-32): Standard for new equipment

If your system is less than 8 years old and has a minor issue, a repair is likely the way to go. However, if you are dealing with a "low refrigerant" diagnosis on a unit that is 10-12 years old, you are at a crossroads. For help with that specific issue, read about Resolving Low Refrigerant Issues.

Can I still get R-410A for repairs?

Yes, for now. As of May 2026, we still have access to R-410A for our customers in Kendale Lakes and the surrounding Miami area. However, the EPA has mandated an 85% reduction in HFC production by 2036. We are currently in the middle of that "step-down" process.

This means that while the gas is available, it is no longer the "budget" option. We always recommend that homeowners prioritize fixing leaks rather than just "topping off" a system. With the current price of R-410A, a "top-off" is often a waste of money that could have gone toward a permanent fix or a new, efficient system.

Are there incentives for upgrading?

The good news is that the government and utility companies want you to upgrade to these newer, greener systems. Because new A2L units are so efficient, many qualify for:

• Federal Tax Credits: Under the Inflation Reduction Act, homeowners can often claim significant tax credits for installing ENERGY STAR certified equipment.

• Utility Rebates: Local South Florida utility providers often offer instant rebates for high-efficiency cooling upgrades.

• Long-term Savings: Replacing old equipment with ENERGY STAR certified units can cut annual energy bills by more than $160—and in the Miami heat, that number is often much higher.

Frequently Asked Questions About Refrigerant Changes

Do I need to replace my AC immediately because of the 2026 changes?

No. There is no law requiring you to replace a working air conditioner. You only need to consider a replacement if your current unit is broken, inefficient, or if the cost of an R-410A repair has become too high for your budget.

Can I use the new A2L refrigerants in my old R-410A system?

No. As mentioned earlier, the systems are technically incompatible. The new refrigerants require different pressures, different oils, and specific safety electronics that your old unit simply doesn't have.

Will the new refrigerants make my home safer?

The refrigerants themselves are designed for environmental safety, but the systems are arguably safer because of the mandatory leak detection technology. If a leak occurs in an old system, it just keeps trying to run until it breaks. In a new A2L system, the unit will sense the leak, shut itself down, and alert you, preventing further damage.

Conclusion

Navigating how ac refrigerant changes affect homeowners doesn't have to be stressful. While the industry is moving toward a greener, more efficient future with R-454B and R-32, your comfort remains our top priority.

At Air On Demand, we specialize in Daikin products, which are at the forefront of this refrigerant transition. Whether you are in Coral Gables, Kendall, or Homestead, we offer seamless HVAC solutions designed for the Florida climate. When you choose a new system through us, you benefit from industry-leading protections like the 12-year parts warranty and the Comfort Promise.

If your AC is struggling to keep up with the May heat, or if you’re worried about the rising cost of R-410A repairs, don't wait for a total breakdown. Our team provides fast service, real-time updates, and convenient online booking to keep your home cool and your mind at ease.

Ready to see how a modern, efficient system can change your home comfort? Explore our Air Conditioning Services today or give us a call to schedule a professional system evaluation. We are proud to serve Coconut Grove, Country Walk, Cutler Bay, Lakes By The Bay, Pinecrest, and the entire Miami area!

How to Troubleshoot AC Issues Safely Before Calling a Pro placeholder-image  | Air On Demand
Air Conditioning Repair
5 min read

How to Troubleshoot AC Issues Safely Before Calling a Pro

Discover ac troubleshooting tips before calling a professional to safely fix common AC issues and restore cooling fast.

How to Troubleshoot AC Issues Safely Before Calling a Pro

How to Troubleshoot AC Issues Safely Before Calling a Pro

When to Troubleshoot Your AC Yourself — and When to Call a Pro

Here are the most important ac troubleshooting tips before calling a professional you can safely try at home:

1. Check the thermostat — confirm it's set to COOL and the temperature is set below the current room temperature

2. Replace the air filter — hold it up to light; if you can't see through it, swap it out

3. Reset the circuit breaker — switch it fully OFF, wait 30 seconds, then switch it back ON

4. Check the outdoor unit — make sure it's running and free of leaves, dirt, or debris

5. Inspect your vents — ensure all supply and return grilles are open and unblocked

6. Turn the system OFF — if you notice ice on the lines, a burning smell, water leaking, or loud banging noises, shut it down and call a professional

It's a frustrating moment every South Florida homeowner knows too well — the AC goes quiet on a sweltering afternoon, and the house starts warming up fast. In Miami's heat and humidity, that's not just uncomfortable. It can become a real problem within the hour.

Before you call for a technician, though, there's good news. Many common AC complaints trace back to simple issues — a clogged filter, a tripped breaker, a thermostat set to the wrong mode — that you can check and fix yourself in under 30 minutes. Knowing what to look for can save you time and a lot of unnecessary stress.

That said, there's a clear line between safe DIY checks and issues that require a licensed professional. Electrical faults, refrigerant leaks, and frozen coils are not problems to push through on your own. This guide will walk you through exactly where that line is.

homeowner inspecting a digital thermostat in a modern Florida home

In the peak of May 2026, the Miami heat doesn't take breaks. When your cooling system falters, your first instinct might be to reach for the phone. However, performing a few basic checks can often resolve the issue without a service call. We recommend spending about 30 minutes on these DIY steps before concluding that a professional repair is necessary.

The first place to look is your thermostat. It sounds simple, but you’d be surprised how often a system "failure" is actually just a setting that got bumped or a battery that died. Ensure the system is set to "COOL" rather than "HEAT" or "AUTO." If the display is blank or dim, it’s likely time for fresh batteries. For a deeper dive into these initial steps, check out our guide on DIY Thermostat Troubleshooting: Try This First.

Step 1: Verifying Power and Thermostat Calibration

Your air conditioner relies on two separate power sources: one for the indoor air handler and one for the outdoor condenser unit. If one trips while the other stays on, the system won't cool properly.

• Check the Breaker Panel: Look for switches labeled "AC" or "HVAC." If a breaker is in the middle position, it has tripped. Switch it fully to "OFF" and then back to "ON."

• The Outdoor Disconnect: Near your outdoor unit, there is a small metal box containing a disconnect switch or pull-out fuse. Ensure this hasn't been accidentally flipped during yard work.

• The 5-Minute Reset: Sometimes the electronics just need a "reboot." Turn the system off at the thermostat, wait five minutes to allow pressures to equalize, and then turn it back on.

If you find yourself constantly resetting the breaker, stop. A breaker that trips repeatedly is a safety warning of an electrical fault. You can learn more about these control issues in our Air Conditioning Repair FAQ: Is It the Thermostat?.

Step 2: Inspecting the Air Filter and Vents

A dirty air filter is the single most common cause of poor AC performance. When the filter is clogged with dust, pet dander, and Miami humidity, it restricts airflow. This forces the blower motor to work harder and can eventually cause the evaporator coil to freeze into a block of ice.

We suggest the "light test": hold your filter up to a bright light or the sun. If you can't see light passing through the fibers, the filter is too dirty to do its job. While you're at it, walk through your home and check your return grilles and supply vents. Ensure that furniture, curtains, or rugs aren't blocking the airflow. Even in a large home in Pinecrest or Palmetto Bay, blocking just a few vents can disrupt the pressure balance of the entire system. Don't Forget to Check Your Air Filter regularly to prevent these avoidable breakdowns.

Optimizing Airflow and Outdoor Unit Performance

Air conditioning isn't actually about "adding" cold air to your home; it’s about removing heat. This heat is released through the outdoor condenser unit. If that unit is buried under overgrown hedges or clogged with grass clippings, the heat has nowhere to go. According to the Department of Energy, poor airflow and duct leaks can cause a system to lose up to 30% of its efficiency.

If your system is running but the house feels humid and warm, the outdoor unit might be struggling to breathe. You can find more details on this specific issue in our article: AC Not Cooling Properly: What to Check.

Why Airflow is Central to AC Troubleshooting Tips Before Calling a Professional

When airflow is restricted indoors, the refrigerant in your evaporator coils gets too cold. This leads to ice formation on the copper lines. If you see frost, your system is literally suffocating. Airflow isn't just about the filter; it's about the health of the blower fan and the integrity of your ducts. In areas like Kendall, where homes may have older ductwork, leaks can prevent cooled air from ever reaching your living spaces. If the air coming out of your vents feels weak, it’s a sign that the "push" behind your cooling is failing. Explore the root causes here: Why Is My Air Conditioner Not Cooling Properly.

Clearing Debris Around the Condenser

South Florida's lush landscape is beautiful, but it's tough on AC units. We recommend maintaining at least a two-foot clearance around all sides of your outdoor unit and at least five feet of clear space above it.

• Cleaning the Coils: You can gently use a garden hose to rinse away dust and salt spray from the condenser fins. Never use a pressure washer, as the high pressure will bend the delicate aluminum fins and block airflow.

• Landscaping Hazards: Be careful with weed whackers near the unit. It is incredibly common for homeowners to accidentally clip the thin thermostat wires that lead to the outdoor unit, which will cause the system to stop immediately.

If the outdoor fan isn't spinning even though the thermostat is calling for cooling, you may have a failed capacitor or motor. Check out our guide on AC Fan Not Spinning for more insight.

Critical Warning Signs: When DIY Troubleshooting Must Stop

While we want to empower you to handle basic maintenance, safety is our priority. There are moments when you must step away from the unit and call in a licensed specialist. If you smell something burning (like ozone or burning plastic), see sparks, or hear loud metal-on-metal grinding, turn the power off at the breaker immediately. These are signs of mechanical or electrical failure that can lead to a fire or total system destruction. For a list of sounds that mean trouble, visit Noises That Signal a Need for Air Conditioning Repair.

Safety First: Electrical and Refrigerant Limits

Modern AC systems are complex. They contain high-voltage circuits and capacitors that can store a lethal electrical charge even after the power is turned off. Furthermore, handling refrigerant is strictly regulated by the EPA.

If you notice an oily residue on the copper lines or near the valves, this is a tell-tale sign of a refrigerant leak. Refrigerant doesn't "wear out" or "get used up"—if it's low, there is a hole in your system. Only a technician with EPA 608 certification can safely find, seal, and recharge these leaks. Attempting to fix this yourself is not only dangerous but illegal. Learn how to spot these professional-grade issues in our Signs AC Repair Guide.

Managing Water Leaks and Frozen Coils

In the humidity of Coral Gables or Coconut Grove, your AC pulls gallons of water out of the air every day. This water should flow down a drain line to the outside. If that line clogs with algae or debris, the water backs up into a drain pan. Most modern systems have a "float switch" that will automatically shut the AC off if it detects standing water to prevent your ceiling from collapsing.

If you see water pooling around your indoor unit, or if you see ice on the refrigerant lines:

1. Turn the AC OFF at the thermostat.

2. Turn the Fan to ON (not Auto). This helps circulate warm air over the coils to melt the ice safely.

3. Wait. It can take several hours for a system to thaw.

Do not try to chip the ice away with a screwdriver or knife; you will likely puncture the coils, turning a simple fix into a major replacement. For more help, see Troubleshooting AC Water Leaks.

Deciding Between AC Repair and Replacement in Florida

As we move through 2026, many homeowners in Kendall and Homestead are facing the reality of aging systems. While ac troubleshooting tips before calling a professional can extend the life of your unit, eventually, replacement becomes the more practical choice.

• Typical Tasks — DIY Maintenance: Filter changes, debris clearing, battery swaps — Professional Repair: Capacitor replacement, leak sealing, motor repair — System Replacement: New system installation with warranty

• System Age — DIY Maintenance: Any age — Professional Repair: 1-10 years — System Replacement: 12-15+ years

• Frequency — DIY Maintenance: Monthly/Quarterly — Professional Repair: Rare (once a year or less) — System Replacement: Once every 15 years

• Efficiency — DIY Maintenance: Maintains current SEER — Professional Repair: Restores factory performance — System Replacement: Significant improvement in energy efficiency

Most experts agree the lifespan of an AC in Florida's harsh climate is 10-15 years. If your system is over 12 years old and you're calling for service more than once a season, you’re likely continuing to repair a failing asset. Modern systems are significantly more efficient and come with industry-leading 12-year parts warranties. If you're unsure where your system stands, read What to Check Before Calling for Air Conditioning Repair.

Frequently Asked Questions about AC Troubleshooting

Why is my AC blowing warm air?

The most common reasons for warm air include a thermostat set to "HEAT" by mistake, a tripped breaker for the outdoor unit (meaning the indoor fan is blowing, but the compressor isn't cooling), or a heavily soiled outdoor condenser coil. If those check out, you likely have a refrigerant leak or a failed compressor.

Should I turn off my AC if I see ice on the lines?

Yes, immediately. Ice acts as an insulator, preventing the system from cooling your home and putting immense strain on the compressor. Turn the cooling off but keep the fan running to melt the ice. Check your filter once the ice is gone; a clogged filter is the #1 cause of freezing.

How often should I change my filter in Miami?

In high-traffic areas like Pinecrest or Coral Gables, we recommend checking your filter every 30 days. If you have pets or suffer from allergies, you may need to replace it monthly. At a minimum, never let a filter go longer than 90 days.

Conclusion

At Air On Demand, we pride ourselves on being specialists who understand the unique demands of the South Florida climate. Whether you're in Coconut Grove, Coral Gables, or Homestead, we are here to provide fast, reliable service when your DIY efforts reach their limit. By following these ac troubleshooting tips before calling a professional, you can often solve minor issues yourself. But when the job requires expert hands, our team is ready with real-time updates and our service promise.

Don't let a small issue turn into a total system failure. Schedule your professional AC maintenance today and keep your home a cool sanctuary all year long.

The Ultimate Guide to Mini Split vs Central AC Cost Comparison placeholder-image  | Air On Demand
Ductless Systems
5 min read

The Ultimate Guide to Mini Split vs Central AC Cost Comparison

Compare mini split vs central ac cost comparison for South Florida homes and discover which cooling system saves more long-term.

What the Mini Split vs Central AC Comparison Really Comes Down To

The mini split vs central AC comparison is one of the most common questions South Florida homeowners ask before upgrading or replacing their cooling system — and the honest answer depends on one thing above all else: whether your home already has ductwork in good condition.

Here's a quick breakdown to help you decide:

• Best for homes with existing ducts — Mini Split: No — Central AC: Yes

• Best for homes without ducts — Mini Split: Yes — Central AC: No

• Efficiency (SEER2 range) — Mini Split: 18-30+ — Central AC: 14-21

• Number of zones — Mini Split: Flexible (per room) — Central AC: Whole home

• Lifespan — Mini Split: 15-20 years — Central AC: 12-15 years

• Heating capability — Mini Split: Yes (most models) — Central AC: Cooling only (needs furnace)

In South Florida's relentless heat, choosing the wrong system doesn't just mean discomfort — it means using more energy every single month. Central AC tends to be the standard choice when solid ductwork is already in place. Mini splits tend to be preferred when there's no ductwork, when you need room-by-room control, or when you're cooling a home addition, garage, or problem room that your existing system can't quite reach.

The sections below walk through every major factor — installation, operating requirements, maintenance, lifespan, and available incentives — so you can make a confident, informed decision for your home.

Basic mini split vs central ac comparison glossary:

• adding cooling without ductwork options compared

• central ac vs ductless mini split comparison

Upfront Investment: Mini Split vs Central AC Comparison

central air conditioning condenser unit outside a Pinecrest home

When we talk about the upfront investment of a new cooling system, it is easy to focus entirely on the equipment itself. However, the installation process and your home's current structural design play a massive role in the overall project.

For a standard home in Pinecrest or Coral Gables that already features a well-designed, insulated network of ducts, installing a new central air conditioning system is often the most direct and straightforward path. The crew simply swaps out the old outdoor condenser and indoor air handler, reconnects them to the existing duct system, and turns on the cool air.

On the flip side, if you are looking at a home without ductwork—such as a historic property in Coconut Grove or a modern slab-on-grade house—the upfront dynamics shift entirely. Installing new ductwork from scratch is incredibly invasive. It requires cutting into plaster walls, lowering ceilings, and building bulkheads, which can quickly increase the labor and construction requirements of a central AC project.

This is where the zoning flexibility of ductless systems shines. A ductless mini-split avoids invasive construction entirely. The installation process requires nothing more than a small, three-inch hole through an exterior wall to run the refrigerant and electrical lines from the outdoor condenser to the indoor air handlers. To understand how these two setups stack up side-by-side in terms of layout and physical footprint, check out our guide on Central AC vs. Ductless Mini Split Comparison.

How Existing Ductwork Affects Your Mini Split vs Central AC Comparison

If you want to feel the true, hidden impact of a central air conditioner, all you have to do is stand in a South Florida attic in the middle of July. When temperatures up there climb past 130 degrees, your central AC has to push freezing cold air through thin metal or flexible ducts running right through that sweltering dead space.

Over time, even the best-installed ducts degrade. Seams split, tape peels, and small holes develop. According to the Department of Energy, typical duct systems lose 20% to 30% of their conditioned air to unconditioned spaces like attics and crawlspaces. In South Florida, that means you are cooling your attic before that air ever reaches your living room.

If your existing ductwork is leaky, old, or improperly sized, you face a tough choice:

1. Undertake extensive ductwork retrofitting, sealing, or complete replacement to make a new central AC run efficiently.

2. Skip the ducts entirely by choosing a ductless mini-split system.

By delivering conditioned air directly into the room from an indoor air handler, mini-splits completely bypass the energy losses associated with ductwork. If you are debating whether to repair old ducts or make the jump to ductless, read more about your options in Should I Consider Ductless Split Air Conditioning?.

Multi-Zone Configurations and the Mini Split vs Central AC Comparison

A single-zone mini-split—consisting of one outdoor compressor and one indoor wall unit—is an incredibly efficient way to cool a specific space, like a sunroom in Palmetto Bay or a garage workshop in Homestead. But what if you want to cool an entire multi-room home?

For whole-home cooling, you will need a multi-zone configuration. This setup connects a single, high-capacity outdoor compressor to multiple indoor air handlers (often up to eight units). Each indoor unit is installed in a different room or "zone," allowing you to set a different temperature for each space.

While multi-zone setups offer unmatched, customized comfort, the upfront equipment and labor requirements scale with the number of zones you add. Each indoor air handler requires its own line set, mounting hardware, and dedicated installation labor. If you already have functional ductwork, a central AC system will usually require less initial installation effort than a multi-zone mini-split system with four or five zones. However, if you value room-by-room control and want to avoid cooling empty guest bedrooms, the long-term energy savings of zoning can quickly offset that initial effort. Learn more about how these setups operate by reading What Really Makes a Ductless Mini Split Different?.

Long-Term Operating and Energy Efficiency

To understand why a mini-split can drastically reduce your monthly energy consumption compared to a central AC, we have to look at how these systems use electricity. The secret lies in two factors: the elimination of duct loss and the use of advanced inverter technology.

Standard central AC systems typically operate on an "all-or-nothing" cycle. When the thermostat detects the temperature has risen, the compressor kicks on at 100% capacity, blasts cold air until the target temperature is met, and then shuts off. This constant starting and stopping draws massive amounts of electricity and creates noticeable temperature swings.

Most modern mini-splits utilize variable-speed inverter compressors. Instead of shutting off completely, an inverter compressor slows down to a fraction of its maximum speed once the room reaches the desired temperature. It runs continuously and quietly at a low level to maintain a perfectly steady climate, using only a tiny amount of power.

• Average SEER2 Rating — Standard Central AC: 14 – 21 SEER2 — High-Efficiency Mini-Split: 18 – 30+ SEER2

• Duct Energy Loss — Standard Central AC: 20% – 30% loss — High-Efficiency Mini-Split: 0% (Ductless)

• Compressor Type — Standard Central AC: Single or Two-Stage — High-Efficiency Mini-Split: Variable-Speed Inverter

• Zoning Capability — Standard Central AC: Single zone (whole house) — High-Efficiency Mini-Split: True room-by-room zoning

By combining variable-speed performance with zero duct loss, mini-splits deliver almost exactly the cooling power they are rated for directly to your living spaces. This translates to a 25% to 40% reduction in cooling energy compared to standard ducted systems. For a closer look at these savings, explore The Perks of Installing a Ductless AC.

Total Ownership: Maintenance, Lifespan, and Value

When evaluating the total ownership over 10 to 15 years, you must look past the initial installation and monthly energy usage. Routine maintenance, system lifespan, and home resale value are crucial pieces of the puzzle.

Expected Lifespan

In our humid, salty coastal air here in South Florida, cooling systems work incredibly hard.

• Central AC systems in places like Cutler Bay or Lakes By the Bay typically last 12 to 15 years before the salt air and constant cycling take their toll.

• Ductless mini-splits often enjoy a longer lifespan of 15 to 20 years with consistent maintenance, largely because their inverter compressors experience less wear and tear from constant on/off cycling.

Maintenance Requirements

Both systems require regular professional attention to stay running efficiently, but their day-to-day upkeep differs:

• Central AC systems rely on a central filter that needs to be replaced every 1 to 3 months. Professional maintenance focuses on duct integrity, coil cleaning, and checking refrigerant levels.

• Mini-split systems feature individual reusable filters inside each indoor wall unit. Because these units pull air directly from the room, these filters should be rinsed out every 2 to 4 weeks during heavy summer use. Keeping these filters clean is vital; a clogged mini-split filter can quickly restrict airflow and cause the indoor coil to freeze.

Home Value and Incentives

Historically, central air was considered the gold standard for home resale value in the US. However, the market in 2026 has shifted dramatically. Today's home buyers in communities like Pinecrest and Coral Gables place a massive premium on energy efficiency and personalized comfort. A modern, multi-zone ductless system is highly attractive to eco-conscious buyers.

Additionally, while federal tax credits under the Inflation Reduction Act for certain cooling upgrades have evolved, local utility rebates (such as those offered for high-efficiency systems in South Florida) can still help support your initial installation. Always ask your installer about current local rebates that apply to your specific zip code.

Frequently Asked Questions About Air Conditioning

Which system is more energy-efficient for a whole house?

Ductless mini-splits are generally more energy-efficient than central AC systems for whole-house cooling. They achieve much higher SEER2 ratings (often exceeding 30 SEER2, compared to central AC which tops out in the low 20s) and completely eliminate the 20% to 30% energy loss caused by ductwork. Furthermore, their zoning capabilities allow you to turn off the cooling in empty rooms, whereas a central AC must cool the entire house to satisfy a single thermostat.

Can I supplement my central AC with a mini-split?

Absolutely! This is one of the smartest ways to solve comfort issues without replacing your entire system. Many homeowners in Kendall and Country Walk use a single-zone mini-split to cool "problem rooms" like a hot master bedroom, a finished attic, a sunroom, or a garage conversion. This allows you to keep your main central AC set to a higher temperature while keeping your frequently used spaces perfectly chilled.

How long do these cooling systems last in South Florida?

In the coastal climates of Miami-Dade County, including Coconut Grove and Palmetto Bay, the salty air and high humidity can accelerate corrosion. A well-maintained central AC typically lasts 12 to 15 years. A ductless mini-split system can last 15 to 20 years. To maximize the lifespan of either system, we highly recommend regular professional coil cleanings to protect against salt-air corrosion.

Conclusion: Making the Right Choice for Your Miami-Area Home

The choice between central AC and a mini-split comes down to your home's unique layout, your comfort priorities, and your existing infrastructure. If you have a traditional home with ductwork in great shape, central AC is a reliable, familiar, and practical choice. If your home has no ducts, has severe hot spots, or you want the absolute highest energy efficiency and room-by-room control, a ductless system is the clear winner.

At Air On Demand, we specialize in helping South Florida families find the perfect cooling solution. As specialists in high-performance Daikin products, we provide seamless installations backed by industry-leading protection, including Daikin’s exceptional 12-year parts warranty and our dedicated Comfort Promise.

Whether you are in Homestead, Coral Gables, or anywhere in between, our team is ready to provide fast service, convenient online booking, and real-time updates. Ready to see which system makes the most sense for your home? Explore our Daikin Mini Split Systems or schedule a professional home assessment with us today!

Ultimate Guide to How Your Indoor and Outdoor AC Units Work Together placeholder-image  | Air On Demand
Air Conditioning
5 min read

Ultimate Guide to How Your Indoor and Outdoor AC Units Work Together

Learn how your indoor and outdoor ac units work together in South Florida split systems to maximize cooling efficiency and comfort.

How Your Indoor and Outdoor AC Units Work Together — And Why It Matters

How your indoor and outdoor AC units work together is one of the most important things to understand about your home's cooling system. In short, the two units form a single closed-loop system that moves heat from inside your home to the outside air using refrigerant.

Here's a quick overview of how the coordination works:

• Indoor unit (air handler or evaporator coil): absorbs heat and humidity from your indoor air

• Outdoor unit (condenser): releases that heat outside and sends cooled refrigerant back indoors

• Refrigerant lines: carry refrigerant continuously between the two units

• Result: a repeating cycle that keeps your home cool and comfortable

Most South Florida homeowners have this type of system — called a split system — running around the clock through long, humid summers. When both units are properly matched and maintained, the system runs efficiently and reliably. When they're not, you'll feel it in your comfort and your system's overall efficiency.

This guide breaks down every part of that relationship, from how each component works to why matching your indoor and outdoor units correctly is non-negotiable for long-term performance.

Relevant articles related to how your indoor and outdoor ac units work together:

• how the refrigeration cycle cools your home

• how your air conditioner works

What is a Split System AC and Why is it Common in South Florida?

When we talk about central air conditioning in South Florida communities like Coral Gables, Pinecrest, or Palmetto Bay, we are almost always talking about a split system.

A split system gets its name because the components are divided (or "split") into two physical locations: one inside your home and one outside. It is the most common residential HVAC setup in the United States, and for good reason. By keeping the loud, heat-releasing components outdoors and the quiet, air-distributing components indoors, split systems provide incredibly quiet and efficient whole-home comfort.

outdoor condenser unit next to a residential home

In our hot, humid climate, a split system is uniquely suited to handle the heavy cooling loads we experience. Instead of trying to force all the mechanical parts into a single window unit or a packaged system on the roof, a split system allows for larger coils and more powerful compressors. This design maximizes the system's ability to pull heat and moisture out of your indoor air, leaving you with cool, crisp, and dehumidified spaces.

To learn more about the fundamentals of these setups, take a look at our article on Air Conditioning Basics: What You Should Know.

The Core Components of Your Indoor and Outdoor AC Units

To understand how your indoor and outdoor ac units work together, we first need to look at the individual players. Your air conditioner does not actually "create" cold air. Instead, it acts as a heat transfer vehicle. It takes the heat inside your home and dumps it outside.

This process relies on four primary components divided between your two units: the compressor, the condenser coil, the evaporator coil, and the blower motor.

For a deeper dive into how these coils function, you can read Our Quick Guide to the Coils in Your Air Conditioner.

The Outdoor Condenser Unit

Commonly referred to as the "condenser" or the "AC compressor box," the outdoor unit is the workhorse responsible for heat rejection. It is typically anchored to a concrete pad on the side of your home in Homestead or Cutler Bay.

Its key components include:

• The Compressor: Often called the "heart" of the AC system, the compressor pumps refrigerant through the system and pressurizes it, raising its temperature so it can release heat.

• The Condenser Coil: A large network of copper or aluminum tubing surrounded by thin metal fins. As the hot refrigerant passes through this coil, it releases its heat to the outdoor air.

• The Condenser Fan: Located at the top of the outdoor unit, this fan pulls outdoor air through the condenser coils, carrying the rejected heat away into the atmosphere.

• Electrical Contactors & Controls: These components receive signals from your indoor thermostat, telling the outdoor unit when to turn on and off.

The Indoor Air Handler or Furnace

The indoor unit is usually tucked away in a closet, garage, or attic. In South Florida, where natural gas is less common, this unit is typically an air handler equipped with an electric heating strip for our brief winter cold snaps.

Its key components include:

• The Evaporator Coil: The "cold side" of the system. Extremely cold refrigerant flows through this coil. As warm indoor air is blown across it, the refrigerant absorbs the heat and moisture from the air.

• The Blower Fan: A powerful motor that pulls warm air from your home through the return vents, pushes it across the cold evaporator coil, and distributes the newly cooled air back through your ductwork.

• The Air Filter: Located at the return air inlet, the filter catches dust, pet dander, and pollen before the air enters the system, protecting both your indoor air quality and the delicate evaporator coil.

To explore the inner workings of the indoor cabinet, read our detailed guide on the Components of an Air Handler.

How Your Indoor and Outdoor AC Units Work Together in the Cooling Cycle

Now that we know who the players are, let's look at how they collaborate. Your indoor and outdoor units must operate in perfect synchronization. If one unit stops working, is turned off, or loses power, the entire cooling cycle grinds to a halt.

• Primary Role — Indoor Unit (Air Handler): Absorbs indoor heat & dehumidifies air — Outdoor Unit (Condenser): Releases absorbed heat to the outdoors

• Key Component — Indoor Unit (Air Handler): Evaporator Coil & Blower Fan — Outdoor Unit (Condenser): Compressor & Condenser Coil

• Refrigerant State — Indoor Unit (Air Handler): Cold, low-pressure liquid/vapor — Outdoor Unit (Condenser): Hot, high-pressure liquid/vapor

• Air Movement — Indoor Unit (Air Handler): Circulates cooled air into the home — Outdoor Unit (Condenser): Blows hot exhaust air away from the home

This continuous exchange of heat is governed by the laws of thermodynamics. To understand the exact physics behind this process, you can read about How the Refrigeration Cycle Cools Your Home.

Step-by-Step: How Your Indoor and Outdoor AC Units Work Together to Cool Your Home

Here is exactly how the magic happens when your thermostat in Kendall or Pinecrest calls for cooling:

1. The Thermostat Signals the System: Your thermostat detects that the indoor temperature has risen above your set point. It sends a low-voltage electrical signal to both the indoor air handler and the outdoor condenser to start up.

2. Heat Absorption (Indoors): The indoor blower fan pulls warm, humid air from your living spaces through your return ducts. This air passes over the freezing-cold evaporator coil. The refrigerant inside the coil absorbs the heat from the air. As the air cools, it also loses moisture, which condenses on the coil and drains away.

3. The Journey Outdoors: The refrigerant, which has now warmed up and turned into a low-pressure vapor, travels out of your home through insulated copper pipes called the suction line.

4. Compression (Outdoors): The refrigerant enters the outdoor compressor. The compressor squeezes the refrigerant vapor, packing its molecules tightly together. This raises both the pressure and the temperature of the refrigerant, turning it into a super-heated, high-pressure gas.

5. Heat Release (Outdoors): The hot gas flows into the outdoor condenser coil. The outdoor fan blows ambient air across the coil. Because heat naturally moves from hot areas to cooler areas, the heat from the refrigerant escapes into the outdoor air. As it cools, the refrigerant condenses back into a high-pressure liquid.

6. The Return Journey: The cooled, high-pressure liquid refrigerant travels back toward your home through the narrower, uninsulated copper pipe called the liquid line.

7. Expansion and Decompression: Before entering the indoor evaporator coil, the refrigerant passes through an expansion valve. This valve acts like a nozzle, dropping the pressure of the refrigerant rapidly. This sudden drop in pressure causes the refrigerant's temperature to plummet, preparing it to absorb indoor heat all over again.

For more details on how central air systems coordinate this cycle, refer to our article: Let Us Teach You a Bit About Your Central AC.

Why You Must Pair Matched Indoor and Outdoor Units

One of the most common mistakes homeowners make when faced with an AC breakdown is attempting to replace only one half of the system. We cannot stress this enough: your indoor and outdoor units must be a certified, factory-matched system.

The Air-Conditioning, Heating, and Refrigeration Institute (AHRI) tests and certifies specific combinations of indoor and outdoor components. When a manufacturer designs an outdoor condenser, they calibrate it to work with a specific indoor evaporator coil that has a matching capacity, airflow rate, and refrigerant volume.

If you are debating whether to upgrade your entire system or fix a single component, check out our guide on AC Repair vs AC Replace.

What Happens When You Have Mismatched Systems?

Trying to pair a brand-new outdoor condenser with an aging indoor air handler is like putting a high-performance sports car engine into a golf cart. It leads to serious performance and operational consequences:

• Severe Efficiency Loss: Modern air conditioners are designed to meet strict SEER2 (Seasonal Energy Efficiency Ratio) standards. An older indoor unit will restrict a new, highly efficient outdoor unit, dropping your actual operating efficiency far below the rated level.

• Excessive Compressor Strain: If the indoor coil is too small or uses a different airflow rate, the refrigerant will not evaporate properly. This can cause liquid refrigerant to flood back into the outdoor compressor, leading to catastrophic mechanical failure.

• Refrigerant Incompatibility: As of May 2026, older systems using R-410A are being phased out in favor of newer, environmentally friendly refrigerants like R-454B. Older indoor coils are physically incompatible with these new refrigerants and their operating pressures.

• Voided Warranties: HVAC manufacturers will not honor their parts warranties if their outdoor units are paired with unapproved, mismatched indoor components.

Ducted Split Systems vs. Ductless Mini-Splits

While traditional ducted split systems are the standard in many Country Walk and Lakes By the Bay homes, ductless mini-split systems have exploded in popularity.

In a traditional ducted system, the indoor unit is connected to a network of metal or flexible ducts that distribute air throughout the entire house. However, traditional ductwork can leak between 20% and 40% of its conditioned air into unconditioned spaces like attics or crawlspaces, significantly reducing efficiency.

Ductless systems eliminate this energy loss entirely by delivering conditioned air directly into individual rooms. A ductless system still uses an outdoor unit paired with an indoor unit, but the physical delivery is different:

• Single-Split Ductless: One outdoor condenser is connected directly to one wall-mounted or ceiling-recessed indoor blower unit.

• Multi-Split Ductless: One outdoor condenser can connect to up to 8 independent indoor units. This allows you to set different temperatures in different rooms, providing localized comfort and allowing you to turn off cooling in unused spaces.

How Your Indoor and Outdoor AC Units Work Together in a Ductless System

In a ductless system, the connection between the indoor and outdoor units is incredibly streamlined. Instead of massive ductwork, the units are linked by a compact "conduit" that passes through a small, three-inch hole in your exterior wall.

Inside this protective conduit, three critical lines work together:

1. Refrigerant Line Sets: Small copper tubes that carry the refrigerant back and forth to facilitate the heat transfer cycle.

2. Communication Cable: A shielded electrical wire that allows the indoor unit's thermostat to send real-time temperature and fan speed data to the outdoor condenser's inverter compressor.

3. Condensate Drain Line: A small PVC tube that carries the moisture squeezed out of your indoor air safely to the outdoors.

Frequently Asked Questions About Indoor and Outdoor AC Coordination

Can I replace just the outdoor AC unit and keep my old indoor unit?

Technically, some contractors might agree to do this, but we strongly advise against it. Installing a mismatched system violates modern building codes, voids your manufacturer's warranty, and will likely cause your new outdoor compressor to fail prematurely.

To ensure your system operates safely, efficiently, and legally, read about The Importance of Proper AC Installation.

How do the indoor and outdoor units physically connect?

Your indoor and outdoor units are physically connected by three elements: copper refrigerant line sets (suction and liquid lines), a low-voltage electrical communication wire, and a condensate drain line. These lines are bundled together and run through your walls, crawlspaces, or attic.

What maintenance keeps both units working in harmony?

Because the two units operate as a single loop, neglect on one side will quickly destroy the other. To keep them working in harmony, you should:

• Replace your indoor air filter every 30 to 90 days to maintain strong airflow across the indoor coil.

• Keep the outdoor unit clear of grass clippings, leaves, shrubs, and debris to allow proper heat rejection.

• Schedule professional maintenance twice a year to have both the indoor and outdoor coils chemically cleaned, electrical connections tightened, and refrigerant levels verified.

To keep your system running at peak performance year-round, read our Air Conditioner Complete Guide.

Conclusion

Your indoor and outdoor AC units are two halves of a single, highly coordinated system. When they are perfectly matched, properly installed, and regularly maintained, they work together seamlessly to keep your South Florida home cool, dry, and comfortable even in the dead of summer.

At Air On Demand, we specialize in delivering matched, high-efficiency cooling solutions tailored specifically to the unique climate demands of Coconut Grove, Coral Gables, Homestead, and the surrounding areas. As a premier provider of Daikin products, we offer industry-leading warranties, including 12-year parts protection and the Daikin Comfort Promise, ensuring your peace of mind for years to come.

Don't let a mismatched or struggling system compromise your home's comfort. Schedule professional AC service with Air On Demand today to ensure your indoor and outdoor units are working in perfect harmony!

The Honest Truth About Advantages of Non Commissioned Technicians placeholder-image  | Air On Demand
5 min read

The Honest Truth About Advantages of Non Commissioned Technicians

Discover advantages of non commissioned technicians: honest AC service, no sales pressure, energy savings for Miami homeowners.

The Honest Truth About Advantages of Non Commissioned Technicians

The Honest Truth About Advantages of Non Commissioned Technicians

Why the Advantages of Non Commissioned Technicians Matter for Miami-Area Homeowners

The advantages of non commissioned technicians are straightforward: without sales quotas or commission incentives, these technicians focus entirely on what your system actually needs — nothing more, nothing less.

Quick answer:

• Honest diagnostics — no pressure to sell parts or services you don't need

• Unbiased recommendations — advice based on your system's condition, not a sales target

• Greater transparency — you hear what's wrong, not what's most profitable to fix

• Long-term trust — technicians who return to do right by you, not by a quota

• Better value — repairs that match your actual needs, not an upsell agenda

Here in South Florida, your AC isn't a luxury — it's essential. When something goes wrong in the Miami-Dade heat, the last thing you need is a technician whose paycheck depends on how much they can add to your bill. Yet that's exactly the reality with commissioned HVAC models, where technicians can earn 10–12% on every product or service they sell you.

A well-known CBC News investigation put this to the test. Reporters staged a simple broken wire in a home and called in six different commissioned repair technicians. Every single one recommended unnecessary repairs — costing the homeowner hundreds of dollars in work that was never needed.

That's not a rare outlier. That's a system working exactly as designed — just not in your favor.

Understanding the Difference: Commissioned vs. Non-Commissioned Models

When you call for AC repair in Coral Gables or Pinecrest, you probably assume the person at your door is there to fix your cooling problem. While that is their job, their motivation can vary wildly depending on how they are paid. In the HVAC industry, there are two primary ways a Hvac Service Technician is compensated: hourly/salary (non-commissioned) or sales-based (commissioned).

In a commissioned model, the technician often receives a low base wage. To earn a comfortable living, they rely on commissions—frequently between 10% and 12%—on every part, repair, or new system they sell you. This turns your service call into a sales pitch. If they don't sell, they don't make their target income.

Conversely, a non-commissioned technician is paid a fair, steady hourly wage or salary regardless of whether you buy a new capacitor or a whole new indoor unit. Their success is measured by how well they fix your system and how satisfied you are with the service, not by the total at the bottom of the invoice.

Comparison of Incentives

• Primary Goal — Commissioned Technician: Maximizing ticket size / Sales — Non-Commissioned Technician: Quality repair / System efficiency

• Pay Structure — Commissioned Technician: Base + 10-12% of sales — Non-Commissioned Technician: Steady hourly wage or salary

• Pressure Level — Commissioned Technician: High (needs sales to hit quotas) — Non-Commissioned Technician: Low (focused on technical problem)

• Diagnostic Style — Commissioned Technician: May look for "upsell" opportunities — Non-Commissioned Technician: Focuses on root cause of the issue

• Customer Relationship — Commissioned Technician: Transactional — Non-Commissioned Technician: Built on long-term trust

Why the Advantages of Non Commissioned Technicians Matter

For homeowners in Pinecrest and Palmetto Bay, the advantages of non commissioned technicians translate directly into peace of mind. When a technician isn't worried about hitting a sales quota to keep their job or pay their mortgage, they become your advocate.

They look at your budget and the actual health of your equipment. If a simple cleaning or a minor wire repair will get your Kendall home cool again, that’s exactly what they’ll recommend. At Air On Demand, we believe in this ethical approach. You can learn more About Us and why we prioritize your comfort over high-pressure sales.

Real-World Risks: Why the Commission Model Can Fail Miami Homeowners

technician inspecting an indoor AC unit - advantages of non commissioned technicians

The risk of the commission model isn't just theoretical; it’s a documented issue in the home services industry. The CBC News sting operation mentioned earlier is a sobering example. In that study, six different commissioned repairmen were called to fix a "broken" AC unit that actually only had a single disconnected wire. Instead of simply reconnecting the wire, every single one of them tried to swindle the customer out of hundreds of dollars by claiming the system needed phony repairs or expensive parts.

This "bait-and-switch" or "scare tactic" approach is common in high-pressure environments. A Hvac Apprentice working under a commission-heavy supervisor might be taught to look for "revenue opportunities" rather than technical solutions. In the sweltering heat of a Cutler Bay afternoon, a homeowner is vulnerable. If a technician tells you your compressor is "about to explode" or that "mold is taking over," you’re likely to say yes to whatever they suggest just to keep your family safe and cool.

Avoiding Exploitation During Routine Maintenance

Routine maintenance is where commissioned technicians often find their biggest "wins." You call for a simple tune-up, and suddenly you're being told you need $1,000 in preventative parts. While some parts do wear out, a non-commissioned technician will provide an honest report of component wear without the "hardball" sales tactics.

Our Dispatcher Customer Service Representative team works hard to ensure that when we send a tech to your Homestead home, they are there to provide a service, not a sales presentation. Honest reporting ensures your system lasts longer because you aren't replacing perfectly good parts prematurely.

The Top Advantages of Non Commissioned Technicians for Homeowners

One of the most significant advantages of non commissioned technicians is their focus on the "Total System" approach. HVAC systems are responsible for roughly 39% of all building energy consumption. In a climate like Coconut Grove or Lakes By The Bay, that percentage is often much higher.

When a technician isn't chasing a commission, they focus on:

1. Energy Efficiency: Calibrating your system to run at peak performance, which saves you money on monthly utility bills.

2. Unbiased Advice: Helping you decide between a repair or a replacement based on the age and efficiency of the unit, not on a sales bonus.

3. Specialized Knowledge: Whether it's traditional central air or modern ductless mini-splits, Our Team focuses on the technical nuances that ensure your indoor air quality is pristine.

Long-Term Savings: Advantages of Non Commissioned Technicians

While a commissioned tech might "save" you money today with a "cheap" tune-up (only to upsell you later), a non-commissioned professional focuses on long-term savings. By properly optimizing your system, they reduce the strain on major components, preventing the need for emergency repairs during a July heatwave in Palmetto Bay.

We are so committed to this model that we actively look for people who value integrity for our careers page. We know that a happy, well-paid technician who doesn't have to "hustle" customers is a technician who will provide the best possible care for your Cutler Bay AC.

Lessons from the Military: The Value of Non-Commissioned Structures

The concept of a "non-commissioned" structure providing superior technical results isn't exclusive to the HVAC world. Look at the United States military. Programs like the Air Reserve Technician (ART) or the National Guard rely heavily on non-commissioned federal technicians.

In the ART program, aircraft maintenance employs more than 60% of the workforce. These professionals operate in a non-commissioned federal technician model, where their primary focus is mission readiness and technical excellence. They aren't trying to "sell" more parts to the government; they are there to ensure the aircraft is safe and functional.

This model demonstrates that when you remove sales-based incentives and focus on professional integrity and quality standards, the result is a more reliable, efficient, and trustworthy workforce. It’s the same philosophy we apply to residential AC service in South Florida.

How to Verify Your HVAC Service Provider in South Florida

How can you be sure you’re getting an honest deal in Kendale Lakes or Country Walk? Here are a few steps to verify your provider:

1. Ask Directly: Call the company and ask, "Are your technicians paid a commission on the parts or units they sell?"

2. Look for Transparent Pricing: Companies that list their prices or provide clear, upfront quotes are less likely to engage in bait-and-switch tactics.

3. Check Certifications: Look for NATE or TAB (Testing, Adjusting, and Balancing) certifications. TAB-certified firms emphasize quality and efficiency through structured processes and exhaustive documentation.

4. Get a Second Opinion: If a technician tells you that you need a multi-thousand-dollar repair on a system that was working yesterday, call for a second opinion from a non-commissioned provider.

Questions to Ask Your Technician:

• "Can you show me the physical evidence of the failure?"

• "Is this repair mandatory for the system to run, or is it a recommendation?"

• "How will this specific part improve my energy efficiency?"

• "Do you have a quota for how many systems you need to sell this month?"

Frequently Asked Questions about Technician Compensation

What is a non-commissioned technician?

A non-commissioned technician is a professional paid through a flat-rate salary or hourly wage. They do not receive a percentage of the sales they generate at your home. This removes the incentive to "find" problems that don't exist, ensuring you get honest, straightforward service.

How do non-commissioned techs improve energy efficiency?

Because their goal is system optimization rather than sales, they spend more time on proper calibration and balancing. Since HVAC accounts for 39% of building energy use, a properly balanced system in a Miami-Dade home can lead to significant monthly savings.

Are commissioned technicians always more expensive?

Not always on the initial "service fee," which they often keep low to get their foot in the door. However, they are often much more expensive in the long run due to the "upsell" of unnecessary parts, phony repairs, and the pressure to replace a system that could have been easily repaired.

Conclusion

At Air On Demand, we’ve seen how the advantages of non commissioned technicians build lasting relationships with our neighbors in Coconut Grove, Coral Gables, and throughout Miami-Dade. By removing the pressure of sales quotas, we allow our experts to focus on what they do best: keeping your home cool and your AC running efficiently.

Whether you are in Kendall, Homestead, or Pinecrest, you deserve an HVAC partner who values your trust more than a quick commission. For reliable AC solutions and honest, residential service, we are here to help.

Schedule your honest residential AC service today

A Quick Start Guide to How a Tune Up Improves Efficiency and Lowers Bills placeholder-image  | Air On Demand
Energy Savings
5 min read

A Quick Start Guide to How a Tune Up Improves Efficiency and Lowers Bills

Discover how a tune up improves efficiency and lowers bills with expert HVAC maintenance in South Florida.

A Quick Start Guide to How a Tune Up Improves Efficiency and Lowers Bills

A Quick Start Guide to How a Tune Up Improves Efficiency and Lowers Bills

Why Understanding How a Tune Up Improves Efficiency and Lowers Bills Can Save You Real Money

How a tune up improves efficiency and lowers bills comes down to one simple idea: a clean, well-adjusted system uses less energy to do the same job.

Here's a quick summary:

• Cleans coils and filters so air flows freely and heat transfers easily

• Checks refrigerant levels so the compressor isn't working overtime

• Tightens electrical connections to cut wasted energy and prevent hazards

• Calibrates the thermostat to stop short cycling and unnecessary run time

• Lubricates moving parts to reduce friction and motor strain

The result? Systems that get regular tune-ups can run up to 15% more efficiently and cut monthly energy bills by as much as 20%.

In South Florida, your AC runs hard — often year-round. The heat, humidity, and near-constant cooling demand in areas like Kendall, Coral Gables, and Cutler Bay put serious stress on HVAC equipment. Most homeowners don't notice efficiency loss right away. Bills creep up slowly. The system keeps running — just working harder than it should, burning more energy, and wearing down faster.

The good news is that most of that lost efficiency is completely recoverable with one professional visit.

Easy how a tune up improves efficiency and lowers bills glossary:

• AC Tune Up Checklist: What Your Technician Should Check

• AC Tune Up Guide for South Florida Homeowners

• Best Time of Year to Schedule Your AC Tune Up

What is an HVAC Tune-Up?

When we talk about an HVAC tune-up, we aren't just talking about a quick glance at your unit. Think of it as a comprehensive health check and performance optimization for your home’s most expensive appliance. Just as you wouldn't expect a car to run for 100,000 miles without an oil change or tire rotation, you shouldn't expect your air conditioner to handle the relentless humidity of Homestead or Pinecrest without professional attention.

A professional tune-up involves a multi-point inspection where we dive deep into the mechanical and electrical heart of the system. This includes:

• Deep Cleaning: We remove the buildup of South Florida dust, pollen, and debris from the coils and blower components.

• Electrical Tightening: We check all wiring and connections. Heat causes metal to expand and contract, which can loosen connections over time, leading to energy "leaks" or component failure.

• Component Calibration: We test the capacitors, relays, and sensors to ensure they are operating within the manufacturer’s specified ranges.

• Performance Measurement: We measure the temperature differential (the "split") between the air going into the system and the air coming out to ensure the cooling cycle is actually effective.

For a deeper dive into what our specific process looks like, check out our Ac Maintenance Miami Fl Guide. By the time we finish, your system is restored as close to its factory-fresh condition as possible.

The relationship between maintenance and your wallet is direct and measurable. According to the Department of Energy and various industry studies, regular maintenance can improve operational efficiency by up to 15%. When your system is efficient, it doesn't have to run as long to reach your desired temperature. Shorter run times mean less electricity used, which translates to a reduction in monthly energy bills by as much as 20%.

In fact, research shows that the average energy efficiency increase after a proper tune-up can be as high as 30% for systems that have been neglected for a few years. When we perform these services in neighborhoods like Palmetto Bay or Lakes By the Bay, we often see systems that were essentially "choking" on dirt and poor calibration.

To understand the impact, look at these 4 Things You Should Know About Energy Efficiency. To make it even clearer, here is how a maintained system stacks up against one that is ignored:

• Operational Efficiency — Maintained System: 95% - 100% of rated SEER — Neglected System: 70% - 85% of rated SEER

• Monthly Energy Costs — Maintained System: Baseline — Neglected System: 15% - 30% Higher

• Lifespan Expectancy — Maintained System: 15 - 20 Years — Neglected System: 8 - 10 Years

• Airflow Quality — Maintained System: High / Balanced — Neglected System: Low / Obstructed

• Repair Frequency — Maintained System: Rare / Preventative — Neglected System: Frequent / Emergency

Understanding how a tune up improves efficiency and lowers bills through coil cleaning

In HVAC, "heat transfer" is the name of the game. Your AC doesn't actually "create" cold; it removes heat from your indoor air and dumps it outside. This happens at the evaporator coils (inside) and the condenser coils (outside).

When these coils get dirty—and in our humid climate, they get dirty fast—that layer of grime acts like an insulating blanket. It prevents the refrigerant from effectively absorbing and releasing heat. This forces the compressor to run longer and work much harder to achieve the same cooling effect.

By cleaning these coils, we restore the thermal exchange process. This allows the system to move heat out of your home much faster. If you’ve ever wondered How Dust And Dirt Affect Your Air Conditioner, the answer is simple: they make your system work harder for worse results. A clean coil is the secret to a low utility bill in the middle of a July heatwave in Coral Gables.

Maximizing savings: how a tune up improves efficiency and lowers bills over time

While the monthly savings on your power bill are great, the real "big wins" come from the long-term financial benefits. An HVAC system is a major investment. A well-maintained central air system can last 15 to 20 years. Conversely, a neglected system often fails around the 10-year mark. By investing in a regular Hvac Tune Up Service, you are essentially doubling the life of your equipment.

Furthermore, almost every major manufacturer—especially Daikin—requires documented annual maintenance to keep your warranty valid. If a major component like a compressor fails, the manufacturer may ask for service records. If you haven't had your annual tune-up, you could be stuck paying for a repair that would have otherwise been covered.

Addressing the Main Causes of System Inefficiency

Why do systems lose their "oomph" in the first place? It usually comes down to three main culprits that we address during a tune-up:

1. Airflow Restriction: This is the most common issue. When filters are clogged or blower wheels are covered in dust, the system has to "gasp" for air. This increases the static pressure in your ducts and makes the motor work significantly harder. You can see How Dirty Air Filters Impact Ac Performance in real-time when your vents feel weak.

2. Refrigerant Levels: Refrigerant doesn't get "used up" like gas in a car. If it's low, there is a leak. Even a small 10% loss in refrigerant can cause a 20% spike in energy usage as the system struggles to cool.

3. Thermostat Calibration and Short Cycling: If your thermostat isn't sensing the temperature correctly, it may turn the system on and off too frequently. This is called "short cycling." Much like stop-and-go traffic kills your car's gas mileage, short cycling kills your HVAC efficiency.

Comparison of a clogged, gray air filter next to a bright white clean filter

Best Practices for South Florida Homeowners

Living in places like Pinecrest or Country Walk means our AC units don't get much of a "winter break." However, the best time to schedule your maintenance is during the "shoulder seasons"—typically early spring (March to May) or late fall. Scheduling in the spring ensures your system is ready for the brutal summer peak, while a fall tune-up catches any wear and tear caused by the high-demand months.

In addition to professional service, we recommend these Tips To Optimize Your Ac Usage:

• Change filters monthly: Especially if you have pets or live in a high-dust area like Homestead.

• Maintain a 2-foot clearance: Ensure plants, shrubs, or debris aren't crowding your outdoor condenser unit.

• Use a programmable thermostat: The Department of Energy notes you can save up to 10% a year by adjusting your thermostat by 7-10 degrees for eight hours a day when you’re away.

For a localized perspective, our Ac Tune Up Guide For South Florida Homeowners offers more specific advice for our unique climate.

Frequently Asked Questions about HVAC Maintenance

What safety checks are performed during a tune-up?

Safety is just as important as efficiency. During a tune-up, we inspect all electrical connections to prevent fire hazards. We also check the "start capacitor," which is a common failure point that can lead to electrical shorts. Perhaps most importantly for South Florida homes, we clean the condensate drain line. A clogged drain can lead to water backing up into your home, causing thousands in property damage and promoting mold growth. We also test safety switches that are designed to shut the system down if a problem occurs, preventing a minor issue from becoming a catastrophic failure.

Can I perform a full HVAC tune-up myself?

While we love a good DIY spirit, a full tune-up requires specialized tools and certifications. For instance, checking refrigerant levels requires EPA certification to handle the chemicals safely and legally. Testing electrical components requires high-precision multimeters and the knowledge of how to use them without getting a dangerous shock.

However, there are 3 Ways To Help Your Ac Perform Better on your own:

1. Keep your filters clean.

2. Keep your outdoor unit clear of weeds and debris.

3. Ensure your indoor vents are not blocked by furniture or curtains.Leave the internal cleaning, electrical testing, and mechanical calibration to us to ensure your warranty remains valid.

What signs indicate my system needs a tune-up immediately?

If you notice any of the following, don't wait for your scheduled annual visit:

• Rising Utility Bills: If your usage hasn't changed but your bill is 20% higher than last May, your efficiency has tanked.

• Unusual Noises: Banging, screeching, or clicking sounds often indicate a failing motor or loose belt.

• Frequent Cycling: If the AC turns on and off every few minutes, it’s wasting massive amounts of energy.

• Uneven Temperatures: If the bedroom is a sauna while the living room is an icebox, you likely have airflow or calibration issues.

For more tips on catching these issues early, see our guide on Inexpensive Ways To Improve Your Ac System S Eff.

Conclusion

At Air On Demand, we know that a comfortable home in Coconut Grove or Kendale Lakes shouldn't have to come with a staggering price tag. How a tune up improves efficiency and lowers bills is a proven science, and our team of experts is here to make sure your system is performing at its absolute peak.

As Daikin specialists, we offer more than just a standard check-up. We provide the peace of mind that comes with industry-leading expertise and the Daikin Comfort Promise. Whether you need a simple tune-up or are looking to take advantage of a 12-year parts warranty on a new installation, we are your local partners in home comfort.

Don't wait for the next heatwave to find out your system is struggling. Schedule your professional AC maintenance today and start seeing the savings on your next bill!

How the Low Price Guarantee Protects Your Budget and Your Peace of Mind placeholder-image  | Air On Demand
Maintenance Plan/Comfort Club
5 min read

How the Low Price Guarantee Protects Your Budget and Your Peace of Mind

Discover how the low price guarantee protects your budget with price matching, savings tips, and HVAC expertise in Miami. Save smartly now!

Why Understanding How the Low Price Guarantee Protects Your Budget Can Save You Real Money

How the low price guarantee protects your budget comes down to one simple idea: you should never pay more than the lowest available price — before or after you buy.

Here's a quick summary:

• Locks in the lowest price at the time of purchase, so you don't overpay upfront

• Covers post-purchase drops — if the price falls after you buy, you can claim the difference within the retailer's window

• Matches competitor prices so you don't have to shop around to find a better deal

• Extends during high-spending seasons like the holidays, giving you a longer window to catch lower prices

• Reduces the risk of buyer's remorse by giving you a clear, policy-backed safety net

For homeowners in Miami — where summer heat makes a working AC non-negotiable — unexpected costs on HVAC equipment and services can hit hard. Retailers across industries, from big-box stores to service providers, are tightening return policies and adding fees, making it more important than ever to lock in the best price from the start. A low price guarantee is one of the most straightforward tools available to protect your household budget, whether you're buying a new air conditioning unit or scheduling a service visit.

At Air On Demand, we believe you deserve full transparency and real value — no surprises, no regrets.

Understanding the Low Price Guarantee and How It Works

At its core, a low price guarantee is a promise made by a company that they will not be undersold. If you find the same item elsewhere for less, they will match that price. It sounds simple, but the "how" matters quite a bit. Usually, this involves a verification process where the retailer confirms the competitor’s price is current and for the exact same model.

When we talk about how this works in practice, it’s often divided into two categories: price matching (at the time of purchase) and price adjustments (after the purchase). For example, if you are looking at a new AC unit and see it advertised for less at another authorized dealer, a price match ensures you get that lower rate immediately.

This policy is designed to give you confidence. You don't have to spend your entire Saturday driving from Kendall to Cutler Bay comparing tags. Instead, you can shop where you feel most comfortable, knowing the store will honor the market's best rate. To see how we keep things competitive for our neighbors, you can check out our current Promotions.

How the low price guarantee protects your budget during initial purchases

The most immediate way how the low price guarantee protects your budget is by eliminating the "fear of missing out" on a better deal. When you're standing in a store or browsing online in April 2026, you want to know that the number on the screen is the best one possible.

By utilizing these guarantees, you effectively force market competitiveness. Retailers want your business, and they know that if they don't match a competitor, you'll simply walk away. For authorized dealers, especially in the HVAC world, this is a sign of stability. It shows that the provider is confident in their pricing structure and values your loyalty over a few extra dollars of margin.

Essential proof needed for a successful request

To make a guarantee work for you, you have to come prepared. Retailers won't just take your word for it (as much as we’d love to trust everyone!). Generally, you will need:

• Digital Advertisements: A live link to the competitor’s website showing the lower price.

• Printed Flyers: A current, local ad from a nearby competitor.

• Original Receipts: If you are asking for a post-purchase adjustment, your proof of purchase is mandatory.

• Photo Evidence: Sometimes a clear photo of a shelf tag from a local store in Palmetto Bay or Pinecrest can serve as a starting point for verification.

Common Eligibility Requirements and Exclusions to Watch For

While these guarantees are fantastic, they aren't a "get out of jail free" card for every single purchase. There are rules to the game. Most retailers require the item to be an "identical product." This means the brand, model year, color, and even the model number must match exactly. In the HVAC world, a single letter difference in a model number could mean a completely different SEER2 efficiency rating.

Time limits are another big factor. Most standard retail policies offer a 14-day to 30-day window. However, some premium memberships can double this. For instance, some major electronics retailers offer a 60-day window for their account holders. Beyond timing, you also need to ensure your system is well-kept to avoid unexpected costs later. A solid Maintenance Plan can help ensure that once you get that great price, the unit actually lasts as long as it should.

One of the biggest traps consumers fall into is trying to match a price from a third-party marketplace seller. If you see a "too good to be true" price on a major auction site or a marketplace where individuals sell items, most companies will deny the match. They typically only match "authorized dealers."

Other common exclusions include:

• Clearance and Liquidation: If a store in Homestead is going out of business, their "70% off" prices usually won't be matched by others.

• Refurbished Goods: You can't match the price of a brand-new unit against a "certified pre-owned" or open-box item.

• Custom Orders: If a product is custom-made for your specific home in Coral Gables, there is no "identical" item to match it against.

How the low price guarantee protects your budget when sales drop further

Have you ever bought something, only to see it go on sale three days later? It’s a frustrating feeling. This is where the price adjustment aspect of the guarantee shines. By keeping your receipt and monitoring the price for a few weeks, you can often go back and claim a refund for the difference.

This is a proactive way to manage your household expenses. In an era where nearly three-quarters of stores are implementing return fees—often a flat amount deducted from your refund—getting a price adjustment is much better than returning and repurchasing. It keeps your original warranty intact and avoids unnecessary "restocking" or "return" fees that eat into your savings.

Maximizing Savings During High-Spending Periods

The holiday season and major sales events like Black Friday are the "Super Bowl" of price guarantees. This is when how the low price guarantee protects your budget becomes most apparent. During these times, spending is high, and the pressure to find a deal is even higher.

Many retailers actually broaden their policies during these months. Instead of a 14-day window, they might offer a window that lasts from early November all the way through the end of December. This allows you to shop early, beat the crowds, and still get the "doorbuster" price if it drops later. If a large purchase feels like a stretch even with a guarantee, options like Financing can help bridge the gap without blowing your monthly budget.

Extended guarantees for the holiday season

Take a cue from major retailers like Target, which has been known to extend its price match window significantly during the holidays (sometimes from 14 days to over 45 days). This protects your budget against the "flash sales" that pop up in mid-December.

For Miami residents, this period is also a great time to look at home improvements. Shopping early for AC components or air quality upgrades in November means you’re ready for the first heatwave of the following year, all while being protected by extended holiday price windows.

The frugal paradox: Investing in quality over upfront cost

There is an old saying: "I'm too poor to buy cheap things." This is the frugal paradox. Sometimes, the cheapest option on the shelf actually costs you more in the long run because it breaks sooner or requires more frequent repairs.

When you use a low price guarantee to buy a high-quality, reliable brand (like Daikin), you are practicing true frugality. You are getting a premium product at the best possible market price. This is much smarter than buying a "no-name" brand that lacks a solid warranty. If you’re debating whether to keep patching up an old unit or finally upgrading, our guide on AC Repair vs AC Replace can help you navigate that decision.

How the Low Price Guarantee Protects Your Budget in the Service Industry

Price guarantees aren't just for TVs and blenders; they exist in the service industry too. However, they look a little different. In services, you often see "Best Rate Guarantees." This is common in travel, car rentals, and even some home services.

For example, if you book a service or a rental and find a lower rate for the exact same service within 24 hours, the provider might match it and even offer an extra discount. In the HVAC world, this translates to transparency in service call fees. We believe in being upfront, which is why we offer a Free Service Call with your repair, ensuring you aren't paying extra just to have a technician show up at your door in Country Walk or Lakes By the Bay.

Comparing product price matches to service rate guarantees

While a product match is about the physical box, a service guarantee is about the "base rate." It’s important to note that service guarantees often exclude things like taxes, local fees, or specialized labor.

In the travel industry, currency fluctuations can swing a price by hundreds of dollars. A price guarantee protects the traveler from these "surprise" costs. Similarly, in HVAC, a guarantee on the equipment price protects you from market shifts during the time between your quote and your installation. If you are looking for HVAC Replacement in Miami FL, these protections ensure that the price you were promised is the price you pay.

Strategies to maximize savings without risking denial

To ensure your request is approved, follow these "pro tips":

1. Be Polite: Customer service representatives are much more likely to help a friendly neighbor from Coconut Grove than someone who is shouting.

2. Do the Research First: Ensure the competitor is an "authorized dealer." Matching a price from a random guy selling AC units out of his truck won't work.

3. Check the Total Price: Some retailers will match the item price but then charge double for shipping. Most guarantees (like those at Home Depot or Lowe's) include the "price plus shipping" to ensure a fair comparison.

4. Join Loyalty Programs: Sometimes, being a member of a free loyalty program unlocks longer windows or automatic price tracking.

Frequently Asked Questions about Price Guarantees

What is the standard window to request a price match?

Most retailers offer a 14 to 30-day window. However, during the holiday season (November through December), this can be extended significantly. Always check the specific policy for the store where you made your purchase.

Can I use coupons alongside a low price guarantee?

This depends on the store. Some retailers, like JCPenney, allow you to apply eligible coupons after the price match is performed. Others consider the price match to be the "final" discount and won't let you stack coupons on top of it.

Does price matching apply to online-only retailers?

Many major brick-and-mortar stores will match prices from major online retailers like Amazon, but they usually specify that the item must be "Sold and Shipped by Amazon," not a third-party seller.

Conclusion

HVAC technician serving Miami home - how the low price guarantee protects your budget

At the end of the day, how the low price guarantee protects your budget is by putting the power back into your hands. It turns you from a passive shopper into a savvy consumer who knows the value of a dollar. Whether you are navigating the rising costs of living in Miami or just trying to keep your home comfortable in the heat of a Pinecrest summer, these policies are your first line of defense against overpaying.

At Air On Demand, we combine this commitment to value with world-class expertise. We specialize in Daikin products, which come with some of the best protections in the industry, including a 12-year parts warranty and the Daikin Comfort Promise. We serve our neighbors across Coconut Grove, Coral Gables, Country Walk, Cutler Bay, Homestead, Kendale Lakes, Kendall, Lakes By the Bay, Palmetto Bay, and Pinecrest with fast, reliable service and real-time updates.

If you're ready to experience a more comfortable home without the budget stress, we're here to help. From AC Replacement Services Miami FL to routine maintenance, our team is dedicated to your peace of mind. Learn more about our local expertise and let us show you why your neighbors trust us to keep their cool.

How MeasureQuick Technology Ensures Diagnostic Precision Every Time placeholder-image  | Air On Demand
Commercial HVAC
5 min read

How MeasureQuick Technology Ensures Diagnostic Precision Every Time

Discover how measureQuick technology ensures diagnostic precision with Bluetooth tools, AI profiling, and real-time monitoring for flawless AC diagnostics.

How MeasureQuick Technology Ensures Diagnostic Precision Every Time

How MeasureQuick Technology Ensures Diagnostic Precision Every Time

Why How MeasureQuick Technology Ensures Diagnostic Precision Matters for Your AC System

How MeasureQuick technology ensures diagnostic precision comes down to a few core capabilities working together:

• Bluetooth-connected smart tools stream live refrigerant and airside data directly to the app, eliminating manual entry errors

• System profiling sets accurate performance targets based on your specific equipment

• AI-powered OCR reads equipment labels automatically to build a complete system profile in seconds

• Probability-based fault detection shows technicians exactly how many symptoms point to a specific problem

• System View renders the refrigerant cycle visually in real time, flagging when readings drift outside normal ranges

If your home's AC has ever been "fixed" only to break down again a few weeks later, you already know how frustrating a missed diagnosis can be. The hard truth is that guesswork-based repairs are still surprisingly common in the HVAC industry — and South Florida homeowners face repeat service calls, wasted energy, and shortened equipment life.

MeasureQuick changes that by replacing gut-feel diagnostics with a structured, data-driven process. It's a professional-grade HVAC diagnostic platform used by over 100,000 technicians across more than 475,000 installations. Instead of relying on experience alone, technicians using MeasureQuick follow guided workflows backed by real-time measurements, calculated performance scores, and AI-assisted fault identification — so nothing gets missed before they leave your home.

The Core Mechanics of How MeasureQuick Technology Ensures Diagnostic Precision

At its heart, MeasureQuick isn't just an app; it is a high-precision diagnostic engine. In the past, a technician might hook up manual manifold gauges, look at a needle, and make a "best guess" based on the weather and how the air felt coming out of the vents. In the high-humidity environments of Coral Gables and Palmetto Bay, those guesses can lead to significant performance issues.

How measureQuick technology ensures diagnostic precision starts with the transition from analog to digital. By using Bluetooth-enabled tools, we collect system vitals—like pressures, temperatures, and airflow—simultaneously. This is crucial because an AC system is dynamic; if you measure the pressure at the outdoor unit and then walk inside five minutes later to measure the temperature at the evaporator coil, the system state has already changed. MeasureQuick captures everything at once, ensuring the data is synchronized and "stabilized" before any diagnostic conclusions are drawn.

Comparison: Manual Gauges vs. MeasureQuick Digital Precision

• Data Collection — Manual Manifold Gauges: Manual reading and mental math — MeasureQuick Digital Precision: Real-time Bluetooth streaming

• Calculation Accuracy — Manual Manifold Gauges: High risk of human error — MeasureQuick Digital Precision: Instant, algorithmic precision

• System Profiling — Manual Manifold Gauges: Often ignored or estimated — MeasureQuick Digital Precision: Mandatory, detailed profiling

• Fault Detection — Manual Manifold Gauges: Based on technician memory — MeasureQuick Digital Precision: Probability-based symptom counting

• Verification — Manual Manifold Gauges: "Trust me" verbal confirmation — MeasureQuick Digital Precision: Verifiable, branded PDF reports

Advanced System Profiling and AI-Powered Accuracy

Every air conditioning system is unique. A 3-ton unit in a Kendall ranch-style home has different requirements than a similar unit in a multi-story Coconut Grove residence. How measureQuick technology ensures diagnostic precision is by creating a "System Profile" for every job.

A system profile includes:

• Equipment type and capacity

• Metering device (TXV vs. Piston)

• Refrigerant type (R-410A, etc.)

• Airflow targets (CFM per ton)

• Filter size and type

• Line set dimensions

Without this profile, a technician is just looking at numbers without context. MeasureQuick uses this data to establish "target zones." If the system isn't hitting those targets, the app flags it immediately.

How MeasureQuick Technology Ensures Diagnostic Precision via System Profiling

The profile acts as the foundation of the diagnosis. By inputting specific airflow specs and filtration data, we can tell if your system is struggling because of a dirty coil or simply because the ductwork was sized incorrectly for the home. In South Florida, where humidity is our constant enemy, knowing the exact fan type and electrical info allows us to tune the system for maximum moisture removal—something that is impossible to do accurately with basic tools.

Let's be honest: technicians are human, and manually typing in 20-character serial numbers from a faded sticker on a hot outdoor unit is a recipe for mistakes. MeasureQuick solves this with AI-powered OCR (Optical Character Recognition).

Our technicians simply take a photo of the equipment nameplate. The AI instantly extracts the model and serial numbers, identifies the manufacturer's specifications, and builds the system profile automatically. This saves 10–15 minutes of data entry per job and, more importantly, ensures we have the exact right specs for your specific model. This eliminates the "wrong part" syndrome and ensures the diagnostic targets are 100% accurate for your equipment.

Real-Time Monitoring and Fault Detection

Once the tools are connected and the profile is built, MeasureQuick provides a "System View." This is a real-time, visual rendering of the refrigerant cycle. If you've ever seen an X-ray of a bone, System View is the HVAC equivalent. It shows us how the refrigerant is moving, where it's changing state, and exactly where a "blockage" or "leak" might be occurring.

measureQuick System View interface showing a cooling cycle - how measurequick technology ensures diagnostic precision

AI Assist and Guided Workflows

Even the best technicians appreciate a second pair of eyes. MeasureQuick includes "mQ Assist," an AI-driven diagnostic guide. As the live data flows in, AI Assist looks at the system profile and the current readings to suggest the next diagnostic step.

It provides context-aware support, ensuring that every technician—regardless of their years in the field—delivers the same "master-level" diagnosis. This consistency is vital for homeowners in areas like Country Walk or Lakes By the Bay, ensuring that the quality of service you receive is high every single time we visit.

Identifying Issues Before They Cause Callbacks

The most impressive statistic regarding how measureQuick technology ensures diagnostic precision is the reduction in callbacks. Nationally, companies using this technology have seen callback rates drop from 3-4% to a staggering 0.5%.

This is achieved through "probability-based diagnostics." Instead of the app just saying "System Broken," it shows symptom counts. For example, it might show 5 symptoms of an overcharged system and 0 symptoms of a dirty coil. This allows the technician to interpret the data with high confidence. By identifying these issues during a routine maintenance visit, we can recover up to 30% of lost system performance and fix small problems before they become major system failures.

Benefits for South Florida Homeowners

In our climate, the AC isn't a luxury; it's a necessity. We serve diverse neighborhoods from the historic streets of Coral Gables to the growing communities in Cutler Bay, and the common thread is a need for reliability.

Using MeasureQuick doesn't just fix your AC; it protects your equipment. Proper commissioning—ensuring the system is set up exactly to ACCA standards—can extend the lifespan of your unit from a meager 7–10 years to a robust 15–20 years. In the salty, humid air of Palmetto Bay and Pinecrest, that extra decade of life represents a significant benefit for your home's comfort.

Verifying Performance with Benchmarking

One of our favorite features is "Benchmarking." When we install or service a system, we take a digital "snapshot" of its peak performance. This creates a benchmark against which all future tests are compared.

In future years, we can run a "Quick Test" to see if the system has drifted from its original efficiency. This provides you with verifiable proof of performance. You don't have to take our word for it; you get a branded report showing the performance scores and exactly how your system is measuring up to industry standards.

Enhancing Indoor Air Quality and Comfort

Precision diagnostics aren't limited to the outdoor compressor. MeasureQuick also supports comprehensive Indoor Air Quality (IAQ) measurements. By monitoring humidity levels, VOCs, and CO2, we can identify why a room feels "stuffy" or why allergies seem worse in certain parts of the house.

Airflow optimization is a huge part of this. Many systems in South Florida struggle because the ductwork isn't delivering the right amount of air. MeasureQuick calculates the exact airflow and ductwork integrity, allowing us to make adjustments that improve both comfort and health.

Frequently Asked Questions about MeasureQuick Technology

How does measureQuick reduce AC repair callbacks?

By using probability-based diagnostics and real-time data, the app ensures that the root cause of a problem is identified, not just the symptom. When a technician follows the guided workflow, the app won't give a "green light" until all system vitals are within the correct manufacturer's range. This "digital check-off" means the job is done right the first time, reducing the need for a return visit to nearly zero.

Can measureQuick identify hidden airflow issues?

Yes! Airflow is often the "invisible" problem in HVAC. MeasureQuick calculates total external static pressure and compares it to the system's fan table. This allows us to see if your ductwork is too small, if your filter is too restrictive, or if your indoor coil is bypassed—issues that are almost impossible to "see" with the naked eye but drastically impact your system's efficiency.

Is measureQuick compatible with all residential AC brands?

Absolutely. One of the greatest strengths of MeasureQuick is that it is a universal platform. Whether you have a high-end Daikin system or an older unit from another manufacturer, the physics of the refrigerant cycle remain the same. MeasureQuick's algorithms are brand-agnostic, meaning they provide the same level of diagnostic precision across all makes and models.

Conclusion

At Air On Demand, we believe that our customers deserve more than just a "working" air conditioner—they deserve a system that operates at peak efficiency, provides maximum comfort, and lasts as long as possible. By embracing how measureQuick technology ensures diagnostic precision, we have moved away from the era of guesswork and into the era of data-driven reliability.

Whether you are in Kendall, Homestead, or Pinecrest, our team uses these advanced tools to provide you with the most accurate diagnosis possible. We don't just tell you your system is fixed; we show you the data to prove it.

Ready to experience the difference that precision technology makes? More info about our expert HVAC team is just a click away. Let us help you keep your South Florida home cool, efficient, and comfortable for years to come.

How Variable Speed Technology Saves Energy placeholder-image  | Air On Demand
Energy Savings
5 min read

How Variable Speed Technology Saves Energy

Discover how variable speed technology saves energy in South Florida homes with quieter, longer-lasting comfort and lower bills.

Why Understanding How Variable Speed Technology Saves Energy Can Cut Your AC Bills in South Florida

How variable speed technology saves energy comes down to one core idea: instead of running at full blast or shutting off completely, a variable speed system adjusts its output to match exactly what your home needs at any given moment.

Here is a quick breakdown of how it works:

• Matches output to demand - the motor speeds up or slows down based on real-time conditions, rather than cycling on and off

• Eliminates energy waste from on/off cycling - each startup draws a surge of electricity; fewer startups means less wasted power

• Runs longer at lower speeds - this is far more efficient than short, high-intensity bursts

• Reduces mechanical losses - no throttling valves or dampers restricting airflow while the motor still runs at full power

• Typical savings of 15–40% on energy compared to fixed-speed systems, with some applications saving even more

In South Florida's brutal heat and humidity, your AC runs almost year-round. That makes the difference between a fixed-speed and a variable speed system far more significant than it would be in a milder climate. A system that wastes energy even a little, every single day, adds up fast on your electricity bill — and puts extra wear on equipment that already works hard just to keep up with Miami-Dade summers.

Understanding How Variable Speed Technology Saves Energy

To truly grasp how variable speed technology saves energy, we first have to look at how traditional "fixed-speed" motors operate. Imagine driving a car where the accelerator only has two settings: floor it or stop. To maintain 30 mph, you’d have to constantly stomp on the gas and then slam on the brakes. It sounds exhausting (and expensive), right? That is exactly how a traditional AC unit works. It kicks on at 100% capacity, cools the room, and then shuts off completely.

Variable speed technology, often referred to as inverter technology, changes the game. It uses a Variable Speed Drive (VSD) or frequency inverter to control the motor. Instead of a binary "on/off" state, the inverter adjusts the frequency and voltage supplied to the motor. This allows the compressor and fan to run at any speed—from 10% to 100%—depending on the cooling load.

When we look at Which Air Conditioner is the Most Efficient, we see that the ability to match the load is the primary driver of efficiency. During a mild morning in Coral Gables, your system might only need to run at 30% capacity to keep you comfortable. A fixed-speed unit would still blast at 100%, wasting 70% of its effort.

This precision is reflected in modern efficiency standards. As of May 2026, we pay close attention to SEER2 (Seasonal Energy Efficiency Ratio 2) ratings. These ratings are higher for variable speed systems because they account for the massive efficiency gains found during part-load operation. If you are wondering What is SEER2 and Why It Impacts Your Next AC Replacement, it is essentially a measure of how well your system performs across an entire season, and variable speed units consistently top the charts.

The Physics of Efficiency: Affinity Laws and the Cube Law

There is a bit of "magic" in the physics of fluids (like air and water) that explains why slowing down a motor saves so much more energy than you might expect. This is governed by the Affinity Laws, specifically the "Cube Law."

The Cube Law states that the power consumed by a centrifugal load (like your AC’s fan or compressor) is proportional to the cube of its speed. This leads to some staggering statistics:

• A 10% reduction in speed can lead to a 25% reduction in power consumption.

• A 20% reduction in speed can lead to a 50% reduction in energy use.

Think about that for a second. By slowing down your fan just a little bit, you aren't just saving a little bit of power—you are cutting it in half. This is why variable speed motors are so much more effective than traditional flow control methods. In older systems, if you wanted less airflow, you might use dampers or valves to restrict the path. That is like keeping your foot on the gas while pressing the brake. The motor is still working at full power; you’re just wasting that energy as heat and friction.

Understanding 4 Things You Should Know About Energy Efficiency helps us realize that reducing mechanical wear is a side benefit of this physics lesson. When a motor runs at a lower speed, there is less vibration and less heat, which means the components inside your unit in Palmetto Bay or Cutler Bay last significantly longer.

How Variable Speed Technology Saves Energy by Reducing Cycling

One of the most "violent" things an electrical motor does is start up. When a fixed-speed motor kicks on, it experiences something called "inrush current." This is a massive surge of electricity—sometimes 5 to 6 times the normal operating current—required to get the motor spinning from a dead stop.

Variable speed drives act as "soft starters." They gradually ramp the motor up to speed, eliminating those massive voltage spikes. This saves energy in two ways:

1. It avoids the wasted power of the startup surge.

2. It allows the system to stay in its "sweet spot" of efficiency for longer periods.

Beyond the bill, this soft-starting capability protects your home’s electrical system and the motor itself. Frequent on/off cycling creates thermal stress—the constant heating and cooling of motor windings—which is the leading cause of motor failure. When you Save Big When You Upgrade to a Daikin Fit, you are investing in a system that avoids this stress by staying on at a low, steady hum.

How Variable Speed Technology Saves Energy in Miami's Climate

In places like Pinecrest and Kendale Lakes, we don't just fight the heat; we fight the humidity. This is where variable speed technology truly shines for Florida homeowners.

A traditional AC unit cycles on, blasts the air with cold, and then shuts off. Because it cools the air so quickly, it doesn't run long enough to actually remove the moisture from the air. This leads to a "cold and clammy" feeling. To fix this, many people lower their thermostats even further, which wastes even more energy.

Variable speed systems run for longer cycles at lower speeds. This keeps the evaporator coil at a consistent temperature, allowing it to pull significantly more moisture out of the air. When the humidity is lower, you feel cooler at a higher temperature. If you can set your thermostat to 75°F instead of 72°F because the air is drier, you are discovering How to Lower AC Bills During Summer in the most effective way possible.

Beyond the Bill: Comfort and Longevity Benefits

While the primary question is how variable speed technology saves energy, the benefits to your lifestyle are just as important.

• Quiet Operation: Because the system rarely needs to run at 100% capacity, you won't hear that loud "clunk" and roar every time the AC kicks on. Most of the time, it operates at a whisper-quiet level that you’ll barely notice.

• Precise Temperature Control: Fixed-speed systems result in "temperature swings"—you’re too cold when the AC is on and too warm when it’s off. Variable speed units maintain a steady temperature within a fraction of a degree.

• Improved Indoor Air Quality: Because the fan runs more consistently at lower speeds, your air is being filtered more often. This is a huge plus for families in Homestead or Country Walk who suffer from seasonal allergies.

• Sustainability: On a global scale, electric motors use about half of the world's electricity. By switching to variable speed, we contribute to a massive reduction in greenhouse gas emissions. In fact, global electrical consumption could drop by 8% if VSDs were used in every suitable application.

Following Year-Round HVAC Efficiency Tips is easier when your equipment is designed to be smart. Many of these systems come with sensors that adapt to the weather outside and the occupancy inside, ensuring not a single watt of power is wasted.

Maximizing Your System’s Performance in South Florida

Installing a variable speed system is a giant leap forward, but to ensure you are getting the full energy-saving potential, the rest of your home needs to be in sync. In South Florida, your ductwork is often the "weak link." If you have leaks in your ducts in Coconut Grove or Kendall, that perfectly cooled, efficiently produced air is ending up in your attic.

We always recommend pairing a high-efficiency installation with a thorough duct inspection and cleaning. Additionally, regular maintenance is non-negotiable. A variable speed compressor is a sophisticated piece of machinery; keeping the coils clean ensures it doesn't have to work harder than necessary.

Adopting 5 Efficiency Boosting Habits to Adopt can complement your new technology. Simple things like keeping blinds closed during the hottest part of the day in Lakes By the Bay can reduce the load on your system, allowing it to stay in its ultra-efficient low-speed mode for longer.

When considering a new system, pay attention to the AC Installation Tip: Efficiency Ratings. While the initial investment for a variable speed unit might be higher, the combination of lower monthly bills, reduced maintenance, and extended equipment life often results in a payback period of just a few years.

Frequently Asked Questions about Variable Speed AC

How much energy can variable speed technology save?

Typically, homeowners see energy savings between 15% and 40%. However, in specific applications like centrifugal fans and pumps, reducing the speed by just 20% can cut energy use by 50%. In South Florida, where systems run frequently, these savings are often on the higher end of the spectrum.

Why is variable speed better for Florida humidity?

Variable speed systems run for longer durations at a lower capacity. This constant airflow over the cooling coils allows for much better dehumidification than the "short-burst" cycles of a traditional fixed-speed unit. Lower humidity makes your home feel cooler at higher temperatures, allowing you to save even more by adjusting your thermostat.

Does variable speed technology extend the life of my AC?

Yes. By eliminating the harsh "inrush current" and the mechanical stress of constant on/off cycling, the internal components experience less wear and tear. The "soft start" capability of variable speed drives is one of the best ways to protect the longevity of your compressor.

Conclusion

At Air On Demand, we have seen how the right technology can transform a home’s comfort and its owner’s bank account. Serving our neighbors from Coral Gables to Homestead, we specialize in residential AC solutions that stand up to the unique challenges of the Miami-Dade climate.

How variable speed technology saves energy is no longer a secret—it is the gold standard for modern home cooling. When you choose a high-efficiency system, you aren't just buying an air conditioner; you are investing in a smarter, quieter, and more sustainable way to live. With our local expertise, 12-year parts warranty, and our Comfort Promise, we ensure your transition to high-efficiency cooling is seamless.

Ready to stop wasting energy and start feeling the difference? Schedule your variable speed AC installation today and let us help you find the perfect fit for your home.

How to Reduce AC Runtime Without Sacrificing Comfort: 5 Simple Methods placeholder-image  | Air On Demand
Energy Savings
5 min read

How to Reduce AC Runtime Without Sacrificing Comfort: 5 Simple Methods

Learn how to reduce your AC runtime without sacrificing comfort with these 5 simple methods for South Florida homes.

Why South Florida Homeowners Need to Know How to Reduce AC Runtime Without Sacrificing Comfort

If you want to know how to reduce your AC runtime without sacrificing comfort, here are the five most effective methods:

1. Optimize your thermostat settings - Set to 78°F when home, and raise it when away

2. Use ceiling fans - Run them counterclockwise to feel up to 4°F cooler without lowering the thermostat

3. Seal air leaks and improve insulation - Stop cooled air from escaping through gaps and poorly insulated attics

4. Keep up with HVAC maintenance - Clean filters, clear coils, and schedule annual professional tune-ups

5. Ensure proper system sizing - A correctly sized system cools efficiently without short-cycling or running nonstop

In South Florida, your AC isn't a seasonal luxury — it runs nearly year-round. When it runs longer than it should, your system wears out faster. The frustrating part? Most of the reasons an AC over-runs have nothing to do with the heat outside. They come down to small, fixable issues inside your home — a clogged filter here, an air leak there, or a thermostat set one degree too low. Every degree lower on your thermostat increases the workload on your system, and a dirty filter alone can force your system to run up to 15% longer per cycle.

The good news is that simple, practical changes can make a real difference — and you don't have to sacrifice an ounce of comfort to get there.

Know your how to reduce your ac runtime without sacrificing comfort terms:

• how a properly sized system handles south florida summers

• when constant ac running signals a problem

• why your ac runs constantly in south florida

1. Optimize Your Thermostat Settings and Schedule

Many homeowners believe that lowering the thermostat to an extreme temperature like 70°F will cool the house faster. In reality, your air conditioner cools at the exact same rate regardless of the setting. Cranking it down only ensures that the compressor runs much longer than necessary, putting extra wear on the system.

To balance comfort and efficiency, the U.S. Department of Energy recommends setting your thermostat to 78°F (25.5°C) when you are at home and awake. While 78°F might sound warm initially, you can easily acclimate to this temperature by raising it gradually—by just one degree every two days—allowing your body to adjust without feeling the heat.

When you leave the house for work or errands, setting up a "thermostat setback" of 7 to 10 degrees (raising the target to 82°F–85°F) can reduce your cooling system's workload significantly. Implementing this setback for at least eight hours a day can cut your overall cooling system runtime significantly. For more practical advice on managing your system daily, check out our guide on Tips to Optimize Your AC Usage.

Smart Thermostat Strategies: How to Reduce Your AC Runtime Without Sacrificing Comfort

Upgrading to a smart thermostat is one of the easiest ways to automate your energy savings. These devices eliminate the need for manual adjustments and ensure your home is cooled only when necessary.

Key smart thermostat features that help reduce runtime include:

• Geofencing: This technology tracks your smartphone’s location. When the last person leaves the geofenced boundary around your house (e.g., in Pinecrest or Palmetto Bay), the thermostat automatically switches to "Away Mode" and raises the temperature. As you return, it triggers the cooling cycle so your home is perfectly comfortable the moment you walk through the door.

• Adaptive Recovery: Instead of starting to cool at a hard-scheduled time, adaptive recovery calculates the optimal start time based on outdoor temperatures and your home's historical thermal loss. This prevents the system from running prematurely.

• Smart Scheduling: You can set precise schedules that align with your daily routine, such as lowering the temperature to 74°F for sleeping and raising it automatically at sunrise.

By letting technology handle the scheduling, you can easily discover How to Save Money on Air Conditioning without constantly micromanaging your wall controls.

Is It Better to Turn the AC Off When Away?

It is a common myth that turning your air conditioner completely off when you leave for work saves the most energy. In the humid South Florida climate, this is actually a recipe for increased system strain and potential home damage.

When you turn the system off entirely, heat builds up in the "thermal mass" of your home—your walls, furniture, floors, and ceilings soak up the heat. When you return and turn the AC back on, the system has to work twice as hard and run for hours continuously to remove that deeply embedded heat.

Furthermore, turning the AC off allows relative humidity to skyrocket. High humidity levels can lead to mold growth, musty odors, and moisture damage to wood and drywall. Instead of shutting the system down, maintain a setback temperature of 82°F to 85°F. This keeps indoor humidity in check, protects your belongings, and prevents the system from facing an overwhelming cooling load when you return. Learn more about managing summer cooling loads by reading about How to Lower AC Bills During Summer.

2. Leverage Ceiling Fans and Smart Ventilation

ceiling fan spinning counterclockwise in a bright living room

Ceiling fans are incredibly effective tools for reducing your air conditioner's runtime, but they must be used correctly. The most important rule to remember is that fans cool people, not rooms. They do not lower the actual temperature of the air; instead, they create a "wind chill effect" on your skin by speeding up the evaporation of sweat.

During the summer, ensure your ceiling fans are rotating counterclockwise. This direction pushes a cool breeze straight down, making the room feel up to 4°F cooler than the actual thermostat reading. This allows you to set your thermostat to 78°F while enjoying the physical comfort of a 74°F room. However, because fans do not cool the physical space, leaving them running in empty rooms is a waste of electricity—always turn them off when you leave the room.

Additionally, pay attention to spot ventilation. Your bathroom and kitchen exhaust fans are designed to pull heat and moisture directly out of your home. Always run your bathroom fan during and after showers, and use your kitchen range hood while cooking to prevent humidity and heat from spreading to the rest of the house.

Managing Humidity for Better Perceived Comfort

In South Florida, humidity is often the true culprit behind indoor discomfort. High relative humidity makes the air feel sticky and warm because your body cannot efficiently evaporate sweat to cool itself. Your air conditioner naturally removes moisture as it cools, but when the air is exceptionally humid, the system must run much longer just to handle the latent heat (moisture load) before it can lower the sensible temperature.

To keep your home feeling comfortable at higher thermostat settings, aim to maintain indoor relative humidity between 45% and 55%.

Many modern air conditioning systems feature a "Dry Mode". When activated, this mode slows down the blower fan. By passing air over the indoor evaporator coil at a slower rate, the coil gets colder and condenses significantly more moisture out of the air without dramatically dropping the temperature. Running your system in Dry Mode can make a 78°F room feel incredibly crisp and comfortable, reducing the need for long, energy-intensive cooling cycles.

3. How to Reduce Your AC Runtime Without Sacrificing Comfort Through Home Sealing and Insulation

If your home is leaky and poorly insulated, your air conditioner is essentially trying to cool the entire neighborhood. Poor air sealing can waste 25% to 30% of your cooling energy, forcing your system to run continuously to replace the cooled air that escapes.

To keep your conditioned air inside where it belongs, focus on sealing and insulating your home:

• Air Sealing: Inspect the areas around your windows and exterior doors. If you can see daylight or feel a draft, apply caulk or install fresh weatherstripping. Sealing these gaps around windows and doors can reduce your overall cooling workload by up to 15%.

• Attic Insulation: Heat from the intense Florida sun radiates directly through your roof and into your attic, sometimes reaching temperatures over 140°F. If your attic lacks sufficient insulation, that heat migrates through your ceiling and into your living spaces. Upgrading your attic insulation to an R-50 to R-60 rating acts as a powerful barrier, reducing your AC's runtime by up to 20%.

• Ductwork Sealing: Leaky ducts running through unconditioned spaces (like your attic) can lose up to 30% of your system's cooling capacity before the air ever reaches your living rooms. Having your ducts inspected and sealed with professional mastic sealant ensures every bit of cooled air is delivered exactly where it is needed.

Taking these structural steps is crucial, as relying on shortcuts is one of the most Inefficient Ways to Improve Your AC System's Efficiency.

Blocking Solar Heat Gain with Window Treatments

Direct sunlight streaming through your windows can act like a greenhouse, making individual rooms feel 10 to 20 degrees warmer and forcing your AC to run nonstop. Managing solar heat gain is a simple, passive way to dramatically reduce your system's workload.

Install high-quality blackout curtains or cellular shades on south- and west-facing windows, which receive the most intense sunlight during the afternoon. High-quality blackout curtains can block up to 33% of incoming solar heat.

Alternatively, you can apply reflective window films to existing glass to bounce solar radiation away from your home without completely blocking your view. By keeping your window coverings closed during the sunniest hours of the day, you stop heat from building up in your home, keeping things naturally cooler and giving your AC a much-deserved break.

4. Keep Up with Essential HVAC Maintenance

An air conditioner is a finely tuned machine that relies on unrestricted airflow to transfer heat out of your home. When maintenance is neglected, the system must work significantly harder and run longer to achieve the same level of cooling.

The single most important maintenance task for any homeowner is regularly replacing the air filter. A clogged, dirty air filter restricts airflow, forcing the blower motor to consume more electricity and extending the cooling cycle. In fact, a dirty filter can force your system to run up to 15% longer per cycle. During peak cooling months in South Florida, check your filters monthly and replace them every 1 to 3 months, especially if you have pets or allergy sufferers in the home.

Additionally, keep your outdoor condenser unit clear of debris. Cut back tall grass, weeds, and shrubs to maintain at least two feet of clear space around the unit. If the condenser coils are caked with dirt, leaves, or dust, the system cannot release heat efficiently, which dramatically increases runtime and power consumption. You can gently rinse the outdoor coils with a garden hose to keep them clean. For more practical DIY tips, check out our guide on 3 Ways to Help Your AC Perform Better.

Professional Maintenance: How to Reduce Your AC Runtime Without Sacrificing Comfort

While monthly filter changes are easy to handle yourself, keeping your system running at peak efficiency requires professional expertise. Scheduling a professional tune-up before the heavy summer cooling season is the best way to catch minor issues before they turn into major, runtime-extending problems.

During a professional maintenance visit, a licensed technician will:

• Check Refrigerant Levels: If your system has a refrigerant leak, the evaporator coil cannot get cold enough to cool the air efficiently. This causes the AC to run continuously without ever reaching your thermostat's setpoint. Technicians will locate the leak, repair it, and charge the system correctly.

• Clean the Evaporator and Condenser Coils: Professional cleaning removes deep-seated grime and buildup that DIY rinsing cannot reach, maximizing heat transfer.

• Inspect and Calibrate Controls: Ensuring your thermostat is calibrated correctly prevents the system from running longer than necessary due to inaccurate temperature readings.

Investing in regular care pays off. Discover the long-term benefits by reading about the Benefits of a Spring AC Tune-Up.

5. Ensure Proper System Sizing and Configuration

Sometimes, an air conditioner runs constantly because of a fundamental issue with the equipment itself: improper sizing. When installing a new system, an HVAC professional must perform a detailed Manual J load calculation. This calculation takes into account your home's square footage, insulation levels, window placement, local climate, and layout to determine the exact cooling capacity your home requires.

• Oversized System — Common Symptoms: • Quick cooling bursts• Frequent on/off cycling (short-cycling)• High indoor humidity — Impact on Runtime & Comfort: • High energy spikes from constant startup power• Accelerated component wear• Air feels cold but sticky

• Undersized System — Common Symptoms: • Continuous running during hot hours• Inability to reach setpoint temperature• Uneven temperatures — Impact on Runtime & Comfort: • Nonstop runtime• High energy consumption• System struggles and wears out prematurely

• Properly Sized System — Common Symptoms: • Consistent, steady 15-20 minute cycles• Excellent humidity control• Even temperatures — Impact on Runtime & Comfort: • Optimized runtime• Maximum energy efficiency• Ideal indoor comfort

If your system is improperly sized, it will struggle to keep your home comfortable regardless of how well you maintain it. To avoid these common pitfalls, read more about The Importance of HVAC System Sizing: Avoiding Common Issues.

The Impact of Professional Installation on Runtime

Even the most efficient, high-SEER2 air conditioner will underperform if it is installed poorly. Proper installation is critical to ensuring your system operates within its designed parameters and doesn't run longer than necessary.

A professional installation ensures:

• Optimized Ductwork Design: Properly sized and balanced ducts prevent restricted airflow and static pressure issues. If static pressure is too high, your blower motor has to work incredibly hard, reducing system efficiency and extending runtimes.

• Balanced Airflow: Technicians balance the supply and return registers to ensure even cooling throughout the entire home, eliminating warm spots that can trick your thermostat into running the system longer.

• Correct Refrigerant Charge and Airflow Calibration: Ensuring these variables are set perfectly from day one prevents premature wear on the compressor and fan motors.

To ensure your system is set up for success, learn more about The Importance of Proper AC Installation and explore How a Properly Sized System Handles South Florida Summers.

Frequently Asked Questions About AC Runtime

What is the ideal thermostat temperature for balancing comfort and reducing AC runtime?

The ideal thermostat setting for balancing comfort and reducing AC runtime is 78°F (25.5°C) when you are at home. Every degree you raise your thermostat can reduce your cooling energy use by approximately 3% to 7%. When you are away from home for more than two hours, raise the thermostat to 82°F–85°F to prevent unnecessary running while keeping indoor humidity under control.

What are the most common mistakes that cause an AC to run longer than necessary?

The most common mistakes include:

• Neglecting Air Filters: A clogged filter restricts airflow, forcing the system to run up to 15% longer per cycle.

• Blocking Vents and Registers: Closing vents or blocking them with furniture disrupts system pressure and airflow, extending runtimes.

• Frequent Thermostat Adjustments: Constantly turning the thermostat up and down prevents the system from running in efficient, steady cycles.

• Ignoring Air Leaks: Leaving gaps around doors and windows unsealed allows warm, humid air to infiltrate your home continuously.

How do smart thermostats, zoning, and humidity control help optimize AC runtime?

Smart thermostats automate your schedule and use features like geofencing to raise the temperature when you are away. Zoning systems use motorized dampers inside your ductwork to direct cooled air only to the rooms currently in use, preventing you from wasting energy cooling empty spaces. Dedicated humidity controls, such as running your system's "Dry Mode," remove excess moisture from the air, making your home feel significantly cooler at higher, more efficient thermostat settings.

Conclusion

Reducing your air conditioner's runtime doesn't mean you have to suffer through the South Florida heat. By implementing smart thermostat schedules, leveraging ceiling fans, sealing up air leaks, and staying on top of regular maintenance, you can keep your home perfectly comfortable while giving your cooling system a much-needed break.

At Air On Demand, we are proud to provide seamless residential HVAC solutions across South Florida, including Pinecrest, Coral Gables, Palmetto Bay, Homestead, Cutler Bay, and Kendall. As local cooling experts, we specialize in high-efficiency Daikin products and back our work with the outstanding Daikin Comfort Promise and a 12-year parts warranty. Whether you need a seasonal system tune-up, professional duct cleaning, or a complete system replacement, our team is here to help you maximize your home's comfort and efficiency.

Ready to optimize your cooling system? Contact us today to schedule your professional AC Maintenance in Miami, FL!

Thank you! Your submission has been received!
Oops! Something went wrong while submitting the form.