How to Check Your Thermostat in 5 Easy Steps
July 3, 2026
Knowing how to check your thermostat before calling for repair could save you from a service visit you never needed. In fact, roughly 25% of furnace and AC repair calls turn out to be simple thermostat issues that homeowners can often resolve in just a few minutes.
Before you pick up the phone, here is a quick checklist to run through:
If none of those steps fix the problem, it is time to dig a little deeper — or call a professional.
Here in South Florida, a thermostat that is not working correctly does not just mean mild discomfort. It means your AC may be running nonstop in 90-degree Miami heat, driving up your energy bills while your home never actually cools down. Thermostats typically last 10 to 15 years, and problems often develop gradually, making them easy to overlook until something feels noticeably wrong.
The good news? Many of the most common thermostat issues are straightforward to diagnose yourself before scheduling a professional service call.
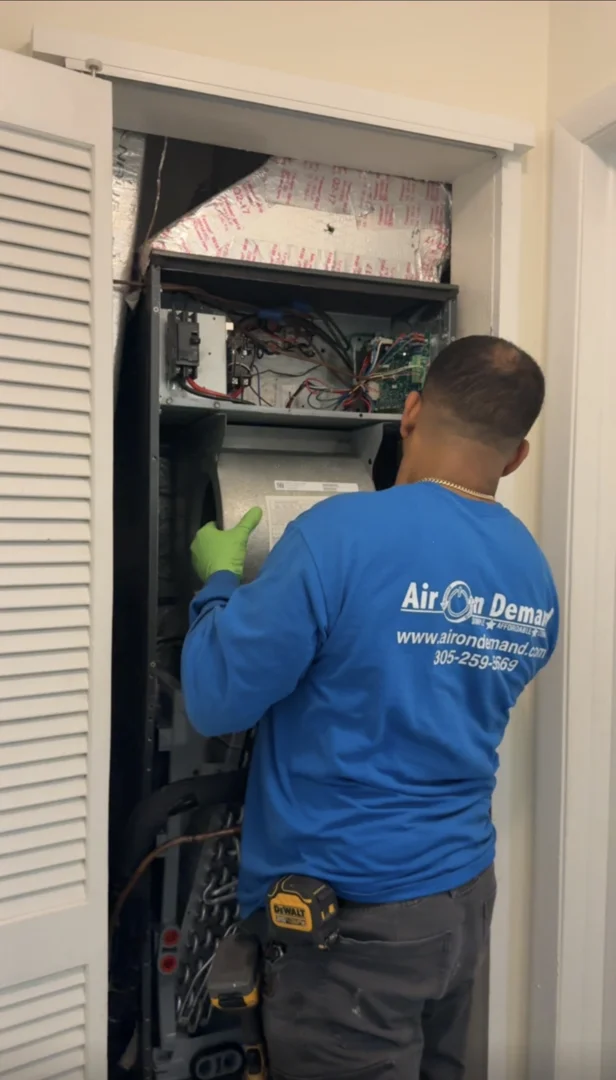
When your air conditioning system begins acting up, it is easy to assume that the outdoor compressor or the complex air handler inside has failed. However, the thermostat acts as the brain of your entire HVAC system. If the brain cannot communicate with the body, nothing works correctly. Learning the basics of What to Check Before Calling for Air Conditioning Repair is an essential skill for any homeowner in communities like Coral Gables, Pinecrest, or Palmetto Bay. By understanding how this small wall-mounted device operates, you can rule out minor glitches before scheduling a professional service call. To dive deeper into the root causes of climate control failures, consult our comprehensive Miami Air Conditioning Repair Guide: What Causes AC Problems.
How do you know if your thermostat is actually the culprit? Several classic signs indicate that your wall unit is malfunctioning rather than your main AC unit:
A malfunctioning thermostat is a major contributor to skyrocketing utility bills. When a thermostat suffers from a calibration error of just 2 to 3 degrees, it can cause your air conditioner to run significantly longer than necessary.
According to the U.S. Department of Energy, turning your thermostat back 7 to 10 degrees Fahrenheit for eight hours a day can reduce your annual heating and cooling energy use by up to 10%. However, if your thermostat's internal sensor drifts in the opposite direction—thinking your home is warmer than it actually is—it will force your AC to work overtime.
To help you distinguish between normal operation and a system that needs immediate attention, review the comparison table below:
| Normal Thermostat Operation | Faulty Thermostat Symptoms |
|---|---|
| Maintains room temperature within 1°F of the setpoint | Temperature fluctuates wildly or differs from actual room temp by 3°F or more |
| Cycles the AC system on and off 2 to 3 times per hour | Short-cycles (cycles on and off every few minutes) or runs continuously |
| Responds instantly to manual temperature adjustments | System ignores manual inputs or takes several minutes to click on |
| Retains programmed schedules and WiFi connections | Regularly loses programmed times, schedules, or smart home connections |
| Clear, steady digital display | Blank, flickering, or faded screen |

Before you assume you need a brand-new AC system, follow this systematic, step-by-step DIY troubleshooting guide. It takes less than fifteen minutes and requires no specialized technical training.
The single most common cause of a seemingly "dead" thermostat is a lack of electrical power.
First, look at the batteries. Many homeowners do not realize that even hardwired thermostats often use batteries as a backup power supply to preserve programmed settings during a power outage. Over time, these batteries degrade. We recommend replacing them once a year. When you replace them, always use high-quality, name-brand alkaline or lithium batteries. Avoid rechargeable batteries, as they often do not provide the consistent voltage required by sensitive digital relays.
If replacing the batteries does not bring the screen back to life, head over to your home's main electrical panel. Look for the circuit breaker labeled "AC," "Air Handler," or "Furnace." In South Florida homes, the indoor air handler contains the low-voltage transformer that sends 24V common power (often called the C-wire) to your thermostat. If this breaker has tripped, your thermostat will lose its primary power source. Flip the breaker fully to the "OFF" position, then firmly back to "ON."
Additionally, check the safety switch on your indoor air handler cabinet door. Most modern air handlers have an internal safety switch that cuts all 24V power if the blower compartment door is not fully closed and latched. If you recently checked or replaced your air filter, make sure that the access panel is completely flush and securely sealed.
It may sound incredibly simple, but holiday guests, children, or accidental bumps can easily change your thermostat's configuration.
Start by verifying the mode. Ensure it is set firmly to "Cool" (or "Heat" during our brief cool winter nights). Next, check the fan setting. There is a massive difference between "Auto" and "On." When set to "Auto," the indoor blower fan only runs when the AC is actively cooling the air. When set to "On," the fan runs continuously, even when the compressor is off. This can make it feel like your system is failing to cool, and it can actually blow humidity back into your home. For a detailed breakdown of how this works, read The Fan Setting on Your Thermostat May Not Be What You Think.
Once you have verified the mode, apply the 5-degree rule. If your home's current room temperature is 78°F, lower the setpoint to 73°F. This significant temperature differential forces the thermostat to send a strong call for cooling to the outdoor condenser. Wait about five minutes. Most digital thermostats have a built-in compressor delay timer to prevent short-cycling, so do not panic if the system does not start instantly. If you hear a distinct "click" from the wall unit and your outdoor compressor roars to life, your thermostat's control relays are functioning properly.
Just like any other electronic device, thermostats are highly sensitive to dust, pet dander, and insect debris. This is especially true for older mechanical models, but even digital sensors can become insulated by a thick layer of dust, leading to inaccurate readings. Cleaning your thermostat is an excellent task to add to your seasonal home care checklist, particularly during the transition from winter to spring. Learn more about preparing your system with our guide on Common Air Conditioning Problems in the Spring.
To clean your thermostat safely:
If your home constantly feels warmer or cooler than the number displayed on your wall, your thermostat may be out of calibration.
To test its accuracy, tape a reliable, separate digital thermometer to the wall directly next to your thermostat. Place a small piece of paper towel behind the separate thermometer so it does not touch the drywall directly, as wall temperatures can skew the reading. Leave both devices undisturbed for at least 20 to 30 minutes.
After the time has passed, compare the two temperatures. A difference of 1 degree is perfectly normal. However, if the readings differ by 2 degrees or more, your thermostat needs to be recalibrated.
Many modern digital and smart thermostats allow you to adjust this via a "temperature offset" or "calibration" setting in the system configuration menu. If you have an older mechanical thermostat, it may need to be physically leveled, as even a slight tilt can cause the internal switches to misread the room temperature.
Also, consider the physical location of your unit. Is it mounted in direct sunlight? Is it directly under a supply vent, near a drafty hallway, or on an exterior wall? If your thermostat is exposed to localized heat or cold, it will never accurately reflect the average temperature of your living space.
If the basic checks have not resolved the issue, it is time to inspect the wiring connections behind the wall plate.
Safety First: Before touching or inspecting any internal wires, you must turn off the power to your air handler and outdoor condenser at your home's breaker panel.
Once the power is completely off, remove the thermostat cover to expose the wiring terminals. You will see several small, color-coded wires attached to screw terminals labeled with letters like R, G, Y, W, and C.
Gently tug on each wire to ensure it is firmly secured under its terminal screw. If you notice any loose wires, tighten the screws with a small precision screwdriver. Look closely for signs of corrosion, oxidation, or bare wires touching one another, which can cause a short circuit. If a wire looks corroded, you can carefully strip the wire back to expose clean copper and reattach it.
If you own a digital multimeter, you can verify if the thermostat is receiving power by measuring the voltage between the R and C terminals. With the circuit breaker turned back on, the multimeter should read between 20 and 30 volts AC. If your multimeter reads zero, the issue lies within your air handler's control board, a blown low-voltage fuse, or a broken wire inside your walls.
Not all thermostats are created equal. The specific troubleshooting steps you need to take depend heavily on the technology your device uses.
Modern smart thermostats are incredibly convenient, offering features like remote smartphone access, learning algorithms, and energy reports. However, their advanced computer chips make them susceptible to unique digital glitches.
When troubleshooting a smart thermostat, first check its WiFi connectivity. If your home router recently updated its firmware or if you upgraded your internet service, your smart thermostat may have dropped offline. Most smart thermostats require a standard 2.4GHz WiFi network rather than a 5GHz network. If the connection drops, the thermostat may fail to follow its programmed schedule or ignore commands sent from your phone.
Additionally, check for pending firmware updates or run a built-in system diagnostic test if your model supports it. If the screen is completely blank but your home has power, it often means the device is not receiving enough voltage through the C-wire. Many older homes in Kendall or Homestead do not have a dedicated C-wire, requiring a professional to install a common wire adapter or run new thermostat wiring.
Older mechanical thermostats rely on physical components rather than computer chips to sense temperature. Most use a bimetallic coil that expands and contracts as the room temperature changes.
The most common issue with mechanical thermostats is dust accumulation. "Mischievous dust bunnies" love to settle inside the casing, blocking the mechanical contact points and preventing the electrical switch from closing. Use a soft brush or compressed air to clean these components gently.
Another critical factor is leveling. Many older analog thermostats use a small glass bulb filled with mercury to complete the electrical circuit. If the thermostat housing is slightly tilted on the wall, the mercury will pool on one side, causing the AC to turn on too early or refuse to turn on at all. Use a pocket level to ensure the wall plate is perfectly straight.
While DIY troubleshooting can save you time and money, it is vital to know when to put the tools down and call a licensed professional. Electrical work carries inherent risks, and attempting to fix complex HVAC issues yourself can void your equipment warranties.
You should immediately stop troubleshooting and call us if you encounter any of the following electrical red flags:
At Air On Demand, we specialize in high-quality Daikin products and offer prompt, reliable residential AC service across South Florida. If your thermostat diagnostic efforts point to a deeper system issue, our certified technicians are ready to help.
If your thermostat screen remains blank after you install fresh, high-quality alkaline batteries, the unit is likely not receiving its primary 24V AC power from the indoor air handler. Double-check your home's main circuit breaker panel.
Next, inspect the safety switch on your air handler's blower door; if the door is slightly ajar, all low-voltage power is cut off. Finally, the low-voltage transformer inside your AC unit may have failed, or a small fuse on the main control board may have blown, requiring professional replacement.
Yes, a faulty thermostat is a common cause of a constantly running air conditioner. If the internal temperature sensor drifts or loses its calibration, it will continuously report that the room is too warm, preventing the system from cycling off.
Additionally, the physical relays inside the thermostat can fuse together over time due to electrical wear, keeping the cooling circuit permanently closed. This not only spikes your energy bills but also risks freezing your AC coils and damaging your compressor.
On average, a residential thermostat has a lifespan of 10 to 15 years. Over this decade of continuous operation, the internal sensors slowly lose their accuracy, and the mechanical relays wear out.
If your thermostat is over ten years old, upgrading to a modern digital or smart model is a highly effective home improvement. Modern smart thermostats often significantly improve energy efficiency and precise temperature setbacks.
Taking a few minutes to learn how to check your thermostat before calling for repair is one of the smartest things a South Florida homeowner can do. By ruling out dead batteries, incorrect settings, tripped breakers, and simple dust buildup, you can often restore your home's comfort without waiting for a technician.
However, if you have completed this guide and your air conditioning system still refuses to cooperate, do not sweat in the Miami heat. The team at Air On Demand is here to provide seamless, stress-free HVAC solutions.
We proudly serve homeowners throughout Coconut Grove, Coral Gables, Country Walk, Cutler Bay, Homestead, Kendale Lakes, Kendall, Lakes By the Bay, Palmetto Bay, and Pinecrest. As Daikin specialists, we offer industry-leading warranties, convenient online booking, and our signature Comfort Promise to ensure your home stays cool and comfortable all year long.
Don't let a minor thermostat glitch compromise your home's comfort or drive up your utility bills. Schedule professional AC maintenance today and let our expert team keep your cooling system running at peak performance!